Alright, let's begin designing the by web page for listing all of our todos, along with an input box to create a new one. In this post, you will learn about Edge layouts and components.
Layouts
Layouts are standard edge templates that expose the sections in which the children templates can inject their markup. Let's see them in practice.
Run the following ace command to create a new template.
node ace make:view layouts/master

# CREATE: resources/views/layouts/master.edge
The master.edge file is created inside the layouts directory. Again, this is just a convention and not a technical limitation to keep the layouts inside this directory.
Open the newly created file and paste the following code snippet inside it.
<!DOCTYPE html>
<html lang="en">
  <head>
    <meta charset="UTF-8" />
    <meta name="viewport" content="width=device-width, initial-scale=1.0" />
    <meta http-equiv="X-UA-Compatible" content="ie=edge" />
    <link rel="stylesheet" href="/css/styles.css" />
    <script src="/js/app.js" defer></script>
  </head>

  <body class="h-screen font-sans">
    <div class="max-w-lg m-auto">
      <header class="py-16">
        <div class="mb-4">
          <svg width="99" height="33" fill="none" xmlns="http://www.w3.org/2000/svg"><path d="M57.19 13.304h-3.653v12.28h-3.063v-12.28H48v-2.77h2.474V8.55c0-1.322.422-2.401 1.266-3.238.864-.855 1.974-1.283 3.328-1.283.786 0 1.434.146 1.944.438.53.291.913.573 1.149.846l-1.03 2.304a2.92 2.92 0 00-.767-.525 1.922 1.922 0 00-.942-.263c-.707 0-1.198.165-1.473.496-.275.33-.412.739-.412 1.225v1.983h3.652v2.771zm3.18 12.28V4h3.034v21.583H60.37zM80.657 10.27v15.313h-3.063v-2.362c-.471.642-1.168 1.244-2.091 1.808-.923.564-1.993.846-3.21.846a6.552 6.552 0 01-3.564-1.02c-1.06-.681-1.905-1.624-2.533-2.83-.628-1.206-.943-2.586-.943-4.142 0-1.555.324-2.926.972-4.112.648-1.206 1.542-2.14 2.68-2.8 1.14-.68 2.435-1.021 3.888-1.021 1.08 0 2.022.233 2.828.7.824.467 1.482 1.011 1.973 1.633v-2.012h3.063zm-7.658 12.834c.943 0 1.767-.223 2.474-.67a4.768 4.768 0 001.65-1.867c.392-.798.589-1.692.589-2.684 0-.972-.197-1.847-.59-2.625a4.557 4.557 0 00-1.649-1.837c-.707-.467-1.531-.7-2.474-.7-.903 0-1.708.223-2.415.67a4.555 4.555 0 00-1.65 1.838c-.392.778-.588 1.663-.588 2.654 0 .992.196 1.886.589 2.684.393.777.942 1.4 1.65 1.866.706.448 1.511.671 2.414.671zM91.784 10.008c1.375 0 2.602.34 3.682 1.021 1.1.661 1.963 1.585 2.592 2.771.628 1.186.942 2.557.942 4.113 0 1.536-.314 2.906-.942 4.112-.629 1.186-1.483 2.12-2.563 2.8-1.08.68-2.287 1.02-3.622 1.02-1.1 0-2.101-.232-3.005-.7-.883-.466-1.58-1-2.09-1.603V32h-3.064V10.242h3.063v2.245c.452-.641 1.13-1.215 2.033-1.72a5.986 5.986 0 012.974-.759zm-.412 2.771c-.923 0-1.748.224-2.474.671a4.77 4.77 0 00-1.679 1.838c-.392.758-.589 1.633-.589 2.625 0 .972.197 1.847.59 2.625a5 5 0 001.678 1.866c.726.447 1.551.671 2.474.671.923 0 1.738-.224 2.444-.67a4.767 4.767 0 001.65-1.867c.412-.778.618-1.653.618-2.625 0-.992-.206-1.867-.618-2.626a4.554 4.554 0 00-1.65-1.837c-.706-.447-1.521-.67-2.444-.67z" fill="#000"/><path d="M7.832.904a3.949 3.949 0 00-3.591 3L.923 17.422v11.226a3.948 3.948 0 003.948 3.949h27.734a3.948 3.948 0 003.949-3.949V16.926L33.456 3.93a3.948 3.948 0 00-3.84-3.033h-.068v3.948h.068l2.99 12.545v11.258H4.87V17.9L7.832 5.835V.905z" fill="#5A4FD6"/><path d="M18.69 24.587a5.925 5.925 0 005.586-3.948H34.78V16.69H20.664v1.974a1.974 1.974 0 01-3.948 0V16.69H2.778v3.949h10.327a5.925 5.925 0 005.585 3.948zM28.561 8.793H8.82v3.949h19.742V8.793zM26.587 2.87H10.794v3.95h15.793V2.87z" fill="#5A4FD6"/></svg>
        </div>

        <p class="text-gray-600 text-xl font-normal">
          <a
            href="https://dev.to/amanvirk1/introducing-adonisjs-28af"
            class="text-gray-900 underline"
            >Follow along</a
          >
          as we build this todo app using AdonisJS, TailwindCSS and Alpine.js.
        </p>
      </header>

      @!section('body')
    </div>
  </body>
</html>
- The keywords starting with
@are called tags in Edge. For example The@layouttag, the@sectiontag, and so on. - The
master.edgefile defines the markup that will remain the same on all the pages. - Also it creates an empty section
@!section('body'), that children templates can inject their markup into and that will be placed right after the header.
To give it a try, let's open the todos/index.edge file we created in the last post and replace all of its content with the following code snippet.
@layout('layouts/master')

@section('body')
  <h1>Todos</h1>
@endsection
- Using the
@layouttag, we tell edge about the layout we want to use. - Next, we use the
@sectiontag to inject our markup. The section names needs to be the same inside this file and the layout file. - Anything outside the section tag will be ignored as Edge doesn't know where to place that markup.
Let's start the development server by running node ace serve --watch and node ace mix:watch commands and view the webpage in the browser.

Tweaking styles
Great. Let's take a step further and update the tailwindcss config to define our own set of colors and shadows. Open the tailwind.config.js file and replace its contents with the following code snippet.
module.exports = {
  purge: ['./resources/views/**/*.edge'],
  theme: {
    colors: {
      transparent: 'transparent',
      white: '#fff',
      gray: {
        900: '#24272e',
        700: '#64697e',
        600: '#7d849c',
        200: '#d2d5df',
        100: '#eff0f4',
      },
    },
    boxShadow: {
      default: '0px 1px 14px rgba(0,0,0,0.08)',
      sm: '0 1px 2px 0 rgba(0, 0, 0, 0.05)',
    },
    extend: {
      margin: {
        0.5: '0.125rem',
      },
      fontFamily: {
        sans: ['Nunito Sans', 'sans-serif'],
      },
    },
  },
  variants: {
    boxShadow: ['hover', 'focus', 'focus-within'],
    backgroundColor: ['hover', 'focus', 'focus-within'],
  },
}
- I have defined my own set of colors and box shadows. If you notice, they are outside of the
extendobject. It means, we are not extending the tailwind config, instead are completely overwriting it. - Next, I extend the margin utilities to have a
m-0.5class and useNunito Sansas the main font family. - I want tailwindcss to generate box-shadow and background color classes for
hover,focus, andfocus-withinstates. - Finally, we want the purgeCSS to scan our edge templates and remove the unused CSS. You can learn more about it in the tailwindcss docs.
Let's import the Nunito Sans font from Google fonts. Open the resources/css/styles.css file and add the following file of code to it.
@import url('https://fonts.googleapis.com/css2?family=Nunito+Sans:ital,wght@0,300;0,400;1,600&display=swap');
Also, I want to give the body a gradient background, so let's add that too in the same file.
body {
  background: #d7dceb;
  background: -webkit-linear-gradient(to right, #d7dceb, #e2e2e2);
  background: linear-gradient(to right, #d7dceb, #e2e2e2);
}
Components
To begin with, do not confuse Edge components with Web components or even with React or Vue components.
Components in Edge means a piece of a template that has its isolated state from the rest of the template. However, they do allow:
- Passing props to them
- Defining slots to inject markup to the component body
- And a component is capable of sharing data with the component caller
Do remember all this is happening on the server-side. Edge is not a frontend template engine.
We will be creating a total of three different components.
- A component to render the markup for a single todo.
- A component to display the input box for creating a new todo.
- Finally, one for the dropdown to filter todos by their list. This one will also use Alpine.js to show/hide the dropdown.
Dropdown component
Let's begin with the dropdown component first. Run the following command to create a new template.
node ace make:view components/dropdown

# CREATE: resources/views/components/dropdown.edge
Open the newly created file and paste the following code snippet inside it.
<div
  class="bg-gray-200 rounded py-2 px-4 focus-within:bg-white focus-within:shadow relative"
  x-data="{ opened: false }"
  @click.away="opened = false"
>
  <a href="#" class="flex items-center" @click.prevent="opened = !opened">
    <span class="mr-2">
      {{ items.find((item) => item.id === selected).text }}
    </span>
    <svg class="w-3 h-3" fill="none" stroke="currentColor" viewBox="0 0 24 24" xmlns="http://www.w3.org/2000/svg"><path stroke-linecap="round" stroke-linejoin="round" stroke-width="2" d="M19 9l-7 7-7-7"></path></svg>
  </a>

  <div
    class="bg-white shadow absolute whitespace-no-wrap left-0 rounded py-3 mt-1 w-40"
    x-show="opened"
  >
    @each(item in items)
      <a
        href="{{ item.url }}"
        class="text-gray-700 flex py-1 items-center px-4 hover:bg-gray-100"
      >
        <span
          class="w-3 h-3 rounded mr-2 border-2"
          style="border-color: {{ item.color }}"
        >
        </span>
        {{ item.text }}
      </a>
    @endeach
  </div>
</div>
- We have a standard markup with tailwind classes to style the elements.
- The component needs an array of
itemsfor the dropdown list. Every item inside the array is an object with the following properties.-
id: A unique identifier for the item -
text: The display text -
color: Just for beautifying the list -
url: The URL to visit on click.
-
- Finally, it needs a
selectedprop to know the selected item from the list. - Also we have added the alpine attributes to make the component functional. If you are new to alpine, then I recommend spending some time reading the README file.
Let's use this component inside the todos/index.edge file.
@section('body')
  <div class="flex justify-between">
    <div class="mr-3">
      @!component('components/dropdown', {
        selected: 'all',
        items: [
          {
            id: 'all',
            url: '?list=all',
            text: 'All',
            color: '#999',
          },
          {
            id: 'personal',
            url: '?list=personal',
            text: 'Personal',
            color: '#4fd1c5',
          },
          {
            id: 'work',
            url: '?list=work',
            text: 'Work',
            color: '#e53e3e',
          },
        ]
      })
    </div>
  </div>
@endsection
- The
@componenttag accepts the path to the component template, along with a props object. - For now, we are hardcoding the list items. Later we will get it from the database.
Demo time 😎

Input component
Let's repeat the same process and create another component for the input box to create a new todo.
node ace make:view components/input

# CREATE: resources/views/components/input.edge
<div class="bg-gray-200 rounded py-2 px-6 focus-within:bg-white focus-within:shadow flex-1">
  <input
    type="text"
    name="{{ name }}"
    id="{{ name }}"
    value="{{ flashMessages.get(name) || value || '' }}"
    placeholder="{{ placeholder }}"
    class="bg-transparent w-full outline-none placeholder-gray-600"
  />
  @if(flashMessages.has(`errors.${name}`))
    <p class="text-sm">{{ flashMessages.get(`errors.${name}`) }}</p>
  @endif
</div>
- The input component needs the input
name,placeholder, and an optionalvalue. - Ignore all the code related to
flashMessagesfor now. I have added them to make the component future-ready and we will learn about flash messages later.
Let's also use this component inside the todos/index.edge file.
<div class="mr-3">@!component('components/dropdown', {... })</div>

<div class="flex-1">
  <form action="/todos" method="POST">
    @!component('components/input', {
      name: 'text',
      placeholder: 'Start typing to create a new todo',
    })
  </form>
</div>
Todo component
Let's wrap up by creating a component to show a single todo item.
node ace make:view components/todo

# CREATE: resources/views/components/todo.edge
<div class="flex text-gray-700">
  <div class="mt-0.5">
    <input
      type="checkbox"
      name="is_completed"
      class="block form-checkbox"
      {{ isCompleted ? 'checked' : '' }}
    >
  </div>

  <div class="px-3 leading-tight flex-1">
    <p>{{ text }}</p>
  </div>

  <a href="http://" class="mt-0.5 text-gray-600">
    <svg class="w-4 h-4" fill="none" stroke="currentColor" viewBox="0 0 24 24" xmlns="http://www.w3.org/2000/svg"><path stroke-linecap="round" stroke-linejoin="round" stroke-width="2" d="M19 7l-.867 12.142A2 2 0 0116.138 21H7.862a2 2 0 01-1.995-1.858L5 7m5 4v6m4-6v6m1-10V4a1 1 0 00-1-1h-4a1 1 0 00-1 1v3M4 7h16"></path></svg>
  </a>
</div>
- This time we just need the todo text and whether it's completed or not.
- Later we will introduce some forms inside this component to mark the todo as done or to delete it.
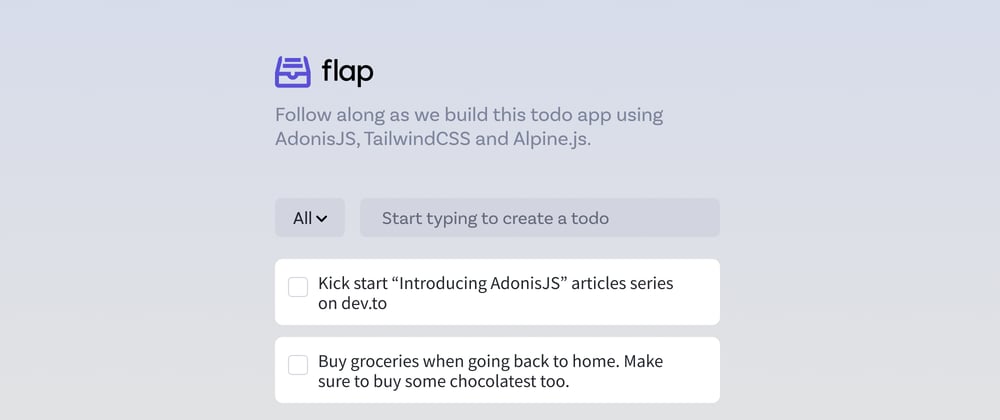
Let's update the todos/index.edge file and use this component.
<div class="mt-6">
  <div class="bg-white rounded-lg shadow py-3 px-4 mt-3">
    @!component('components/todo', {
      text: 'Kick start "Introducing AdonisJS" articles series on dev.to',
      isCompleted: true,
    })
  </div>

  <div class="bg-white rounded-lg shadow py-3 px-4 mt-3">
    @!component('components/todo', {
      text: 'Buy groceries when going back to home. Make sure to buy some chocolates too',
      isCompleted: false,
    })
  </div>

  <div class="bg-white rounded-lg shadow py-3 px-4 mt-3">
    @!component('components/todo', {
      text: 'Record podcast. Ping Romain for same',
      isCompleted: true,
    })
  </div>
</div>


Top comments (3)
Nice ...
Even more beautiful with the latest additions to Edge! See preview.adonisjs.com/blog/december...
sensational