
Welcome to the third post in our Almost Netflix series! We'll be building upon the project setup from yesterday and build a frontend for our Netflix Clone! In this post, we will take a closer look at building the clone using Flutter. In the subsequent posts of this series, we'll be building frontends for other platforms like iOS and Android!

This one's all about Flutter, so let's get started!
It would be impossible to write every piece of code in this article 😬 You will read about all essential concepts, components, and communication with Appwrite. Still, if you want to check out every corner of our Almost Netflix in Flutter, you can check out the GitHub Source Code that holds the whole application.
🤔 What is Appwrite?
Appwrite is an open source backend-as-a-service that abstracts all the complexity involved in building a modern application by providing you with a set of REST APIs for your core backend needs. Appwrite handles user authentication and authorization, databases, file storage, cloud functions, webhooks, and much more! If anything is missing, you can extend Appwrite using your favorite backend language.
To run the project, checkout the source code and then $ flutter run and be sure to check out the screenshots:
📃 Requirements
Before we begin, we should have the Appwrite instance up and running, with the Almost Netflix project set up. Please follow our article about Almost Netflix project setup if you don't have a project prepared yet.
To build Almost Netflix we will be using Flutter along with a couple of libraries to help out.
To make things a bit easier to use and more reusable, we are going to use provider library instead of InheritedWidget, including simplified resource management, reduced boilerplate, lazy loading and a nice listening mechanism to go with ChangeNotifier
To manage the user's preferences, location and credentials storage (across platform) we are going to lean on the shared_preferences library that will give us simplified persistent storage for simple data (NSUserDefaults on iOS/macOS, SharedPreferences on Android, etc.). To handle pop-ups and modals we are going to use adaptive_dialog for presenting our detail views as modals. For the pretty UI we are going to use as much "batteries included" UI (default is Material) as we can.
That's it, and if you are unfamiliar with these libraries or Flutter in general, please take some time to go read up! Never stop learning!
🛠️ Create Flutter Project
If you do not have Flutter installed yet, please head over to Flutter install.
With Flutter installed, let's create our application. On the command line, simply run: $ flutter create --platform=ios,android --org=io.appwrite /path/to/almost_netflix. This command will create the app using the flag --platform to tell Flutter who you are targeting and --org for your company/personal identifier (usually it's a reverse url style deal). With our project created, let's open up that folder in our favorite editor.
In our project open up the file pubspec.yaml and lets add a few things, starting with our dependencies (mentioned above) first. Look for dependencies: and under it, let's add our libraries. Once you have added them, the dependencies section should look like:
dependencies:
  Flutter:
    sdk: Flutter


  # The following adds the Cupertino Icons font to your application.
  # Use with the CupertinoIcons class for iOS style icons.
  cupertino_icons: ^1.0.2
  provider: ^6.0.1
  fluro: ^2.0.3
  appwrite: ^3.0.1
  shared_preferences: ^2.0.11

  # Any of your other dependencies too
The last item to take care of is our assets. We are going to create a new directory in our project called assets and then download (save) all our assets from the static folder on GitHub into our newly created assets folder. Now let's jump back into our pubspec.yaml file, and scroll till you see the section assets: and let's add our assets folder path so it looks like:
# ...

Flutter:

  # The following line ensures that the Material Icons font is
  # included with your application, so that you can use the icons in
  # the Material Icons class.
  uses-material-design: true

  assets:
    - images/

#... contd.
Great, the project is ready! Now let's get Appwrite in here.
🤖 Appwrite Client
We are going to create lib/api/client.dart and write a simple singleton and some shortcuts for talking with our Appwrite backend.
// libs/api/client.dart

import 'package:appwrite/appwrite.dart';

class ApiClient {
  Client get _client {
    Client client = Client();

    client
    .setEndpoint('https://your.appwrite.url/v1')
    .setProject('yourNetflixClone')
    .setSelfSigned();

    return client;
  }

  static Account get account => Account(_instance._client);
  static Database get database => Database(_instance._client);
  static Storage get storage => Storage(_instance._client);

  static final ApiClient _instance = ApiClient._internal();
  ApiClient._internal();
  factory ApiClient() => _instance;
}
With our client in place we can now create AccountProvider that will manage the state and method calls for our user's account, such as sign-up and sign-in. All providers will be classes that extend ChangeNotifier
import 'dart:convert';
import 'package:Flutter/material.dart';
import 'package:appwrite/models.dart';
import 'package:shared_preferences/shared_preferences.dart';
import 'package:almostNetflix2/api/client.dart';

class AccountProvider extends ChangeNotifier {
  User? _current;
  User? get current => _current;

  Session? _session;
  Session? get session => _session;

  Future<Session?> get _cachedSession async {
    final prefs = await SharedPreferences.getInstance();
    final cached = cached.get("cached.session");

    if(cached == null) {
      return null;
    }

    return Session.fromMap(json.decode(cached));
  }

  Future<bool> isValid() async {
    if (session == null) {
      final cached = await _cachedSession;

      if (cached == null) {
        return false;
      }

      _session = cached;
    }

    return _session != null;
  }

  Future<void> register(String email, String password, String? name) async {
    try {
      final result = await ApiClient.account.create(
        userId: 'unique()',
        email: email,
        password: password,
        name: name
      );

      _current = result;

      notifyListeners();
    } catch(_e) {
      throw Exception("Failed to register");
    }
  }

  Future<void> login(String email, String password) async {
    try {
      final result = await ApiClient.account.createSession(email: email, password: password);
      _session = result;

      final prefs = await SharedPreferences.getInstance();
      prefs.set("cached.session", json.encode(result.toMap()));

      notifyListeners();
    } catch(e) {
      _session = null;
    }
  }
}
Now that we have our provider, and our little nice provider methods for our account, we need to tell the app we want to use providers, so let's head over to main.dart and make it "Provider Aware" updating it to the following:
// main.dart

import 'package:appflix/providers/account.dart';
import 'package:Flutter/material.dart';
import 'package:provider/provider.dart';

Future<void> main() async {
  WidgetsFlutterBinding.ensureInitialized();

  runApp(
    MultiProvider(
      providers: [
        ChangeNotifierProvider(create: (context) => AccountProvider()),
      ],
      child: Main(),
    )
  );
}

class Main extends StatelessWidget {
  @override
  Widget build(BuildContext context) {
    return MaterialApp(
      title: 'Appflix',
      theme: ThemeData(
        scaffoldBackgroundColor: Colors.black,
        primarySwatch: Colors.blue,
        visualDensity: VisualDensity.adaptivePlatformDensity,
      ),
      home: FutureBuilder(
        future: context.read<AccountProvider>().isValid(),
        builder: (context, snapshot) => Container(
          child: Text("Main")
        ),
      )
    );
  }
}
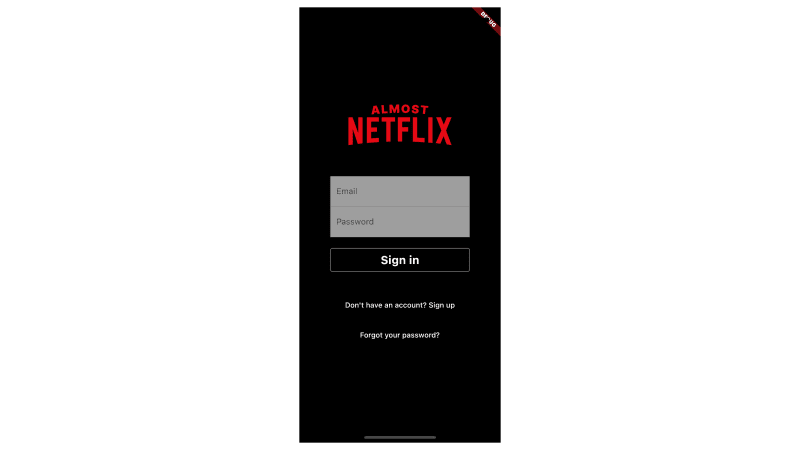
🔐 Authentication
For authentication we are going to create 2 forms for our onboarding screen. You can see the completed widget here: onboarding.dart. Be sure to grab it and add it into your project. On both forms you will see that the submit buttons have onPressed events. With our provider we can use this event to sign-in or sign-up a user:

  onPressed: () async {
    final api = context.read<AccountProvider>();
    final name = _nameController.text;
    final email = _emailController.text;
    final password = _passwordController.text;

    if (email.isEmpty || password.isEmpty) {
      showDialog(context: context, builder: (_) => AlertDialog(
        title: const Text('Error'),
        content: const Text('Please enter your email and password'),
        actions: [
          TextButton(
            child: const Text('OK'),
            onPressed: () => Navigator.of(context).pop(),
          )
        ],
      ));

      return;
    }

    await api.register(email, password, name);

  },
onPressed: () async {
  final api = context.read<AccountProvider>();
  final email = _emailController.text;
  final password = _passwordController.text;

  if (email.isEmpty || password.isEmpty) {
    showDialog(context: context, builder: (_) => AlertDialog(
      title: const Text('Error'),
      content: const Text('Please enter your email and password'),
      actions: [
        TextButton(
          child: const Text('OK'),
          onPressed: () => Navigator.of(context).pop(),
        )
      ],
    ));

    return;
  }

  await api.login(email, password);

},
The sign-in/sign-up events take the entered email and password and then call their associated functions on AccountProvider that we added earlier, once complete our provider will notify everyone who is watching for a valid user to show up. So let's head back over to main.dart and make a quick adjustment to react when a user is present.
Update main.dart to:
class Main extends StatelessWidget {
  @override
  Widget build(BuildContext context) {
    return MaterialApp(
      title: 'Appflix',
      theme: ThemeData(
        scaffoldBackgroundColor: Colors.black,
        primarySwatch: Colors.blue,
        visualDensity: VisualDensity.adaptivePlatformDensity,
      ),
      home: FutureBuilder(
        future: context.read<AccountProvider>().isValid(),
        builder: (context, snapshot) => context.watch<AccountProvider>().session == null ? const OnboardingScreen() : const Container(child: Text("HOME")),
      )
    );
  }
}
🎬 Movies page

Once our user is authenticated we will need to load up the movies page that will show a featured movie followed by a couple of lists of movies. For this we will create our EntryProvider that will give us access to our Appwrite database of movies. So we are going to create 2 files: lib/data/entry.dart and lib/providers/entry.dart
First lib/data/entry.dart will be our Data model for our Movie data stored in Appwrite's database.
class Entry {
  final String id;
  final String name;
  final String? description;
  final String ageRestriction;
  final Duration durationMinutes;
  final String thumbnailImageId;
  final String genres;
  final String tags;
  final DateTime? netflixReleaseDate;
  final DateTime? releaseDate;
  final double trendingIndex;
  final bool isOriginal;
  final String cast;

//... cont'd
}
Second our lib/providers/entry.dart
class EntryProvider extends ChangeNotifier {

  static String _collectionId = "movies";

  Entry _featured = Entry.empty();
  Entry get featured => _featured;

  List<Entry> _entries = [];
  List<Entry> get entries => _entries;

  List<Entry> get originals => _entries.where((entry) => entry.isOriginal).toList();

  List<Entry> get trending {
    var trending = _entries;

    trending.sort((a, b) => b.trendingIndex.compareTo(a.trendingIndex));

    return trending;
  }

  Future<void> list() async {
    var result = await ApiClient.database.listDocuments(collectionId: _collectionId);

    _entries = result.documents.map((document) => Entry.fromJson(document.data)).toList();
    _featured = _entries.isEmpty ? Entry.empty() : _entries[0];

    notifyListeners();
  }

  Future<Uint8List> imageFor(Entry entry) async {
    return await ApiClient.storage.getFileView(fileId: entry.thumbnailImageId);
  }
}
Then we create our homepage, which you can view at lib/screens/home.dart and attach our provider. Here we tell our widget to watch the featured property of our provider, if it changes the view will redraw for the updated property.
slivers: [
  SliverToBoxAdapter(
    child: ContentHeader(featured: context.watch<EntryProvider>().featured),
  ),
Next we tell our home widget to also watch the list in the provider to provide data to display in our lists.
SliverToBoxAdapter(
  child: ContentList(
    title: 'Mylist',
    contentList: context.watch<EntryProvider>().entries,
    isOriginal: false,
  ),
),
With that our app will now show a list view with several sub-lists which are segmented into categories.
🕵️ Detail page

With our lists in place, we want a user to be able to tap a movie and get a modal to give more detail about the movie selected. On user select we are going to tell our provider that we have a selected entry, so let's add the following to our lib/providers/entry.dart
Entry? _selected;
Entry? get selected => selected;

Future<void> select(Entry? entry) async {
  _selected = entry;

  notifyListeners();
}
And now we need to create a new view called lib/screens/details.dart to display our selected entry as well as update lib/widgets/content/list.dart to present a modal of our movie's detail view.
Let's update list.dart to use adaptive_dialog and present our details view for the selected movie.
onTap: () {
  await showDialog(
    context: context,
    builder: (context) => const DetailsScreen(entry: current),
  );
},
Now we need to update lib/screens/details.dart to allow the selected entry (movie) to be passed in.
class DetailsScreen extends StatefulWidget {
  final Entry _entry;

  DetailsScreen({Key? key, required Entry entry}) : _entry = entry, super(key: key);
So now when a user taps a movie in the list, they will be presented with a detail view for their selection.
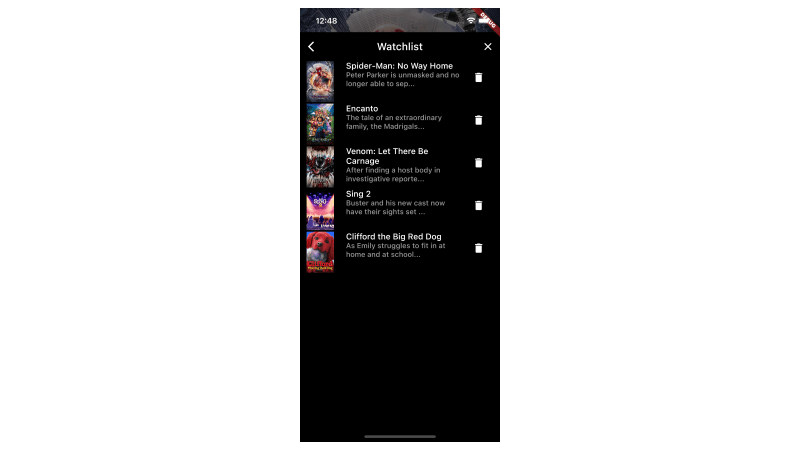
🔖 Watchlist page
We want our user to be able to list, add and remove movies from their own watchlist, so to do this we will create another provider lib/providers/watchlist.dart that will handle our api calls and also communicating to the UI the data and actions. So we need to tell the app that we want to use our WatchlistProvider by adding it to our lib/main.dart like we did with the others:
Future<void> main() async {
  WidgetsFlutterBinding.ensureInitialized();

  runApp(
    MultiProvider(
      providers: [
        ChangeNotifierProvider(create: (context) => AccountProvider()),
        ChangeNotifierProvider(create: (context) => EntryProvider()),
        ChangeNotifierProvider(create: (context) => WatchListProvider()),
      ],
      child: Main(),
    )
  );
}
When our user selects "My List" we will present a list of movies saved to the watchlist, with an option to delete it.
In libs/widgets/content/bar.dart we are going to add an action to the _AppBarButton
_AppBarButton('My List', () async {
  await showDialog(
    context: context,
    builder: (context) => const WatchlistScreen()
  );
}),
Now when the user adds a movie to their watchlist, they can come here to see or delete it.
For our users to add a movie to their list, we call the add method on the WatchlistProvider and once added we dismiss the detail view.
 tap: () {
  context.read<WatchListProvider>().add(widget._entry);
  Navigator.pop(context);
}
And to delete a movie from our list, we add a call to our remove method on our WatchlistProvider.
tap: () {
  context.read<WatchListProvider>().remove(entry);
}
👨🎓 Conclusion
And with that, we have cloned (Almost) Netflix with nothing more than some frontend magic, and Appwrite as our backend! To become part of the Appwrite community, you can join our Discord server. I look forward to seeing what you build and who you are (when you join our discord!)
Now for the post credits scene: We have more to do, we have more to show, so as Appwrite releases, our Netflix clone will grow so get ready for anything, from streaming to dreaming! 😉
🔗 Learn more
You can use the following resources to learn more and get help regarding Appwrite and its services


Top comments (1)
Beautiful. Thanks for this. We need more of such tuts with more state management packages and different code architectures.