
The HTMLRewriter (currently in BETA) class built into the Cloudflare Workers runtime allows for parsing and rewriting of HTML at the edge, giving developers the ability to efficiently and transparently customize their Workers applications.
 Cloudflare Developers@cloudflaredev
 🆕HTMLRewriter API Beta for Workers
We were thinking — what if the static site you deployed with Workers Sites didn’t have to be so…static? Turn sites into dynamic apps living on the edge with HTMLRewriter.
📝Blog post: blog.cloudflare.com/html-rewriter-…
📖Docs: developers.cloudflare.com/workers/refere… twitter.com/CloudflareDev/…17:01 PM - 30 Sep 2019Cloudflare Developers @CloudflareDev🎂 Announcing Workers Sites! Deploy your static site directly to our network! Make your static site blazing fast with only a few commands using the Wrangler CLI! 🤩Start in minutes: https://t.co/gGWtKElSvx 📣Announcement blog: https://t.co/eTkF9lnpuX https://t.co/1ikrR9GGH3


In this tutorial, we'll build an example internationalization and localization engine (commonly referred to as "i18n" and "l10n") for your application, serve the content of your site, and automatically translate the content, based your visitors' location in the world.

Prerequisites
To publish your project to Cloudflare Workers, you'll need a few things:
- A Wrangler installation running locally on your machine, and access to the command-line. If you haven't used Wrangler, we recommend checking out the "Installing the CLI" part of our Quick Start guide.
- A Cloudflare account, and access to the API keys for that account. Make sure to run
wrangler config.
This tutorial is designed to use an existing website. To simplify this process, we'll use a free HTML5 template from HTML5 UP. With this website as the base, we'll use the HTMLRewriter functionality in the Workers platform to overlay an i18n layer, automatically translating the site based on the user's language.
If you'd like to deploy your own version of the site, you can find the source on GitHub. Instructions on how to deploy this application can be found in the project's README.
Generate a project
To generate a new project, we'll use wrangler generate --site to create a new application, calling it i18n-example:
$ wrangler generate i18n-example --site
$ cd i18n-example
The --site flag indicates to Wrangler that we want to build a Workers Sites project - this means that there will be both a "site" component, the static HTML that we want to serve to the user, and a Workers script. Inside the Workers script we can customize the HTML response using HTMLRewriter.
The newly generated i18n-example project will contain two folders: public, which is our static HTML, and workers-site:
  ├── public # static html
  |  └── index.html
  |  └── ..
  ├── workers-site
  |  ├── index.js # Workers script that manages HTML rewriting
  |  ├── ...
  └── wrangler.toml
Inside of public, we should replace the default generated HTML code with the HTML5 UP template seen in the demo screenshot: you can download a release (ZIP link) of the code for this project and copy the public folder to your own project to get started.
With the static HTML for this project updated, we can focus on the Workers script inside of the workers-site folder, at index.js.
How it works
The HTMLRewriter class provided in the Workers runtime allows developers to parse HTML and write simple JavaScript to query and transform every element of the page.
Our example website is a basic single-page HTML project that lives in ./public, with some text elements: an h1 element with the text "Example Site", and a number of p elements with different text:
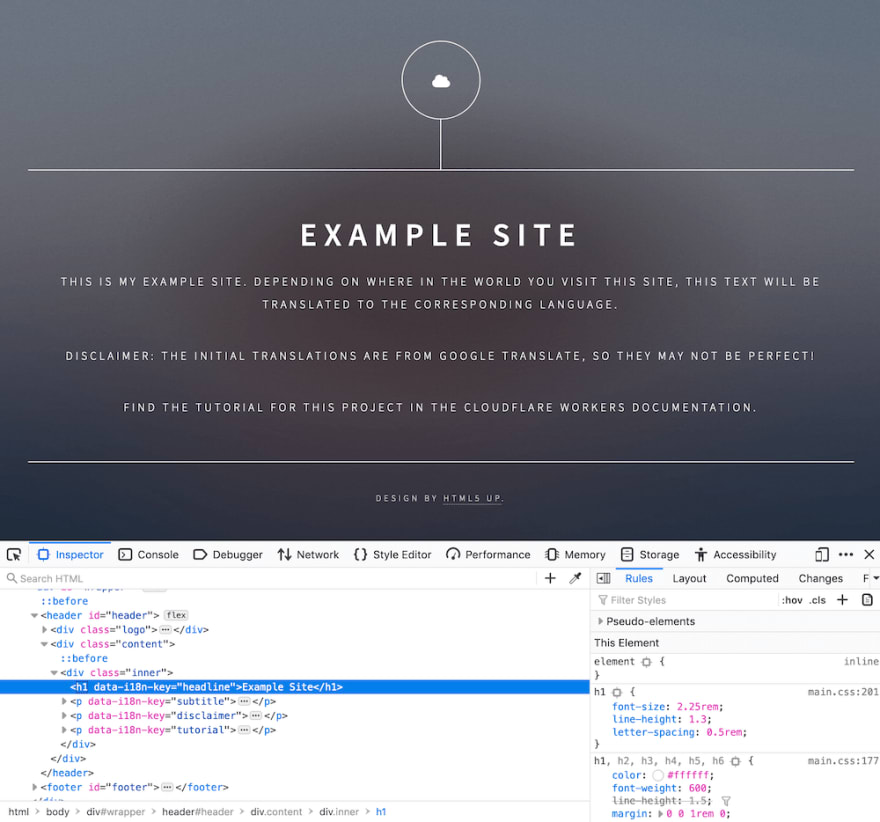
What is unique about this page is the addition of data attributes in the HTML – custom attributes defined on a number of elements on this page. The data-i18n-key on the h1 tag on this page, as well as many of the p tags, indicates that there is a corresponding internationalization key, which should be used to look up a translation for this text:
<!-- source clipped from i18n-example site -->

<div class="inner">
  <h1 data-i18n-key="headline">Example Site</h1>
  <p data-i18n-key="subtitle">
    This is my example site. Depending o...
  </p>
  <p data-i18n-key="disclaimer">
    Disclaimer: the initial translations...
  </p>
</div>
Using HTMLRewriter, we'll take this page (e.g ./public/index.html) and parse the HTML. When we find a data-i18n-key, we'll look up an internal strings object, using data-i18n-key to find a matching key, and retrieve the string translation. With HTMLRewriter, it's super easy to query elements, for instance, to find a data attribute, but as the name suggests, we can also rewrite elements: taking a translated string and directly inserting it into the HTML.
Finally, it's shockingly easy to introduce one more cool feature into this project: based on the Accept-Language header, which exists on incoming requests, we can set the translation language per-request, allowing users from around the world to see a locally-relevant and translated page. Neat!
Using the HTML Rewriter
To start, let's look at workers-site/index.js: our Workers application in this tutorial will live entirely in this file, so it's important to be familiar with it.
Inside of this file, the default code for running a Workers Site has been provided. The crucial part of the generated code lives in the handleEvent function. ThegetAssetFromKV function retrieves a website asset uploaded from your local ./public foldler, runs some magic to make it live on Workers KV, and returns it to the user. For now, we can ignore much of getAssetFromKV (though if you'd like to learn more, check out the docs .
To implement translations on the site, we'll take the HTML response retrieved from KV and pass it into a new instance of HTMLRewriter. When instantiating HTMLRewriter, we can also attach handlers using the on function: in our case, we'll use the * selector (see the documentation for more advanced usage) to parse all elements with a single class, ElementHandler. With the created instance of HTMLRewriter, the transform function takes a response and can be returned to the client:
// index.js
async function handleEvent(event) {
  // ...
  const response = await getAssetFromKV(event)
  return new HTMLRewriter().on('*', new ElementHandler()).transform(response)
}
Transforming HTML
Our ElementHandler will receive every element parsed by the HTMLRewriter instance, and thanks to the expressive API, it's really easy to query each incoming element for information.
In How it works, we talked about data-i18n-key, a custom data attribute that could be used to find a corresponding translated string for the website's user interface. In ElementHandler, we can define an element function, which will be called as each element is parsed. Inside of it, we can query for the custom data attribute using getAttribute:
class ElementHandler {
  element(element) {
    const i18nKey = element.getAttribute('data-i18n-key')
  }
}
With i18nKey defined, we can use it to lookup a corresponding translated string. Let's set up strings, an object with key-value pairs corresponding to the data-i18n-key value – for now, we'll define a single example string, headline, with a (possibly badly translated) German string, "Beispielseite" ("Example Site"), and retrieve it in the element function:
const strings = {
  headline: 'Beispielseite',
}

class ElementHandler {
  element(element) {
    const i18nKey = element.getAttribute('data-i18n-key')
    const string = strings[i18nKey]
  }
}
With our translated string, we can take it and insert it into the original element, using the setInnerContent function:
const strings = {
  headline: 'Beispielseite',
}

class ElementHandler {
  element(element) {
    const i18nKey = element.getAttribute('data-i18n-key')
    const string = strings[i18nKey]
    if (string) {
      element.setInnerContent(string)
    }
  }
}
To check that everything looks like you'd expect, it could be a good time to use the preview functionality built into Wrangler. Call wrangler preview --watch to open up a live preview of your project, refreshed after every code change that you make.
We can expand on this simple translation functionality to provide country-specific translations, based on the incoming request's Accept-Language header. By taking this header, parsing it, and passing the parsed language into our ElementHandler, we can retrieve a translated string in our user's home language, provided that it's defined in strings.
To implement this, we'll update the strings object, adding a second layer of key-value pairs, and allowing strings to be looked up in the format strings[country][key]. In addition, we'll pass a countryStrings object into our ElementHandler, so that it can be used during the parsing process. Finally, we'll grab the Accept-Language header from an incoming request, parse it, and pass the parsed language to ElementHandler.
To parse the Accept-Language header, we'll install the accept-language-parser NPM package:
$ npm i accept-language-parser
Once imported into our code, we can use it to parse the most relevant language for a client based on Accept-Language header, and pass it to ElementHandler. Our final code for the project, with an included sample translation for Germany (using Google Translate) looks like this:
import { getAssetFromKV, defaultKeyModifier } from '@cloudflare/kv-asset-handler'
import parser from 'accept-language-parser'

const DEBUG = false

addEventListener('fetch', event => {
  event.respondWith(handleEvent(event))
})

const strings = {
  de: {
    title: 'Beispielseite',
    headline: 'Beispielseite',
    subtitle:
      'Dies ist meine Beispielseite. Abhängig davon, wo auf der Welt Sie diese Site besuchen, wird dieser Text in die entsprechende Sprache übersetzt.',
    disclaimer:
      'Haftungsausschluss: Die anfänglichen Übersetzungen stammen von Google Translate, daher sind sie möglicherweise nicht perfekt!',
    tutorial: 'Das Tutorial für dieses Projekt finden Sie in der Cloudflare Workers-Dokumentation.',
    copyright: 'Design von HTML5 UP.',
  },
}

class ElementHandler {
  constructor(countryStrings) {
    this.countryStrings = countryStrings
  }

  element(element) {
    const i18nKey = element.getAttribute('data-i18n-key')
    if (i18nKey) {
      const translation = this.countryStrings[i18nKey]
      if (translation) {
        element.setInnerContent(translation)
      }
    }
  }
}

async function handleEvent(event) {
  const url = new URL(event.request.url)
  try {
    let options = {}
    if (DEBUG) {
      options = {
        cacheControl: {
          bypassCache: true,
        },
      }
    }
    const languageHeader = event.request.headers.get('Accept-Language')
    const language = parser.pick(['de'], languageHeader)
    const countryStrings = strings[language] || {}

    const response = await getAssetFromKV(event, options)

    return new HTMLRewriter().on('*', new ElementHandler(countryStrings)).transform(response)
  } catch (e) {
    if (DEBUG) {
      return new Response(e.message || e.toString(), {
        status: 404,
      })
    } else {
      return new Response(`"${defaultKeyModifier(url.pathname)}" not found`, {
        status: 404,
      })
    }
  }
}
Publish
Our simple i18n tool built on Cloudflare Workers is complete, and it's time to deploy it to your domain!
It's super easy (and quick) to deploy sites to your Workers.dev subdomain, but the wrangler.toml configuration file in your project needs a little bit of setup before you can deploy your project. First, you'll need to add your Cloudflare account ID. Set this ID at the top part of your project's wrangler.toml:
# wrangler.toml

# ...
name = "i18n-example"
account_id = "6de123.."
workers_dot_dev = true
# ...
The [site] section at the bottom of wrangler.toml tells Wrangler how to deploy your Workers Site. The bucket key tells Wrangler where to find your static assets: by default set to the public folder, where we placed our HTML code at the beginning of this tutorial. The entry-point key indicates where your Workers script is located, and like bucket, the default of workers-site should already be correctly configured for your application.
The final version of your project's wrangler.toml should look like:
name = "i18n-example"
type = "webpack"
account_id = "6de123.."
workers_dot_dev = true

[site]
bucket = "./public"
entry-point = "workers-site"
With that, it's time to publish your application! Using wrangler, we can publish to Cloudflare's entire network almost instantly, using the publish command:
$ wrangler publish
Resources
In this tutorial, you built and published an i18n tool using HTMLRewriter. If you'd like to see the full source code for this application, visit the repo on GitHub.
If you want to get started building your own projects, check out the quick-start templates we've provided in our Template Gallery.


Top comments (0)