Vue JS is a progressive javascript framework that is used to develop user-friendly and interactive user interfaces. It is a flexible framework that can be integrated with different platforms without any hassle. It is also very compatible and easy to use for the development process.
Auth0 is a flexible, drop-in solution to add authentication and authorization services to your applications. You can avoid the cost, time, and risk that come with building your solution to authenticate and authorize users.
Cloudinary is a Software-as-a-Service (SaaS) solution for managing all your web or mobile application’s media assets in the cloud. It enables you to programmatically add image and video upload, transformation, optimization, and delivery capabilities to your applications via easy-to-use REST APIs. Cloudinary offers different services such as:
- Upload widget, API, and search
- Remote fetch, auto-backup, and revision tracking
- Image and video transformations
- Video transcoding and adaptive streaming
- High-performance
In this tutorial, we will learn how to build a movies application that uses Auth0 to integrate authentication and Cloudinary to enable media optimization and transformation.
Prerequisites
This tutorial assumes the reader has the following:
- Node installed on their local development machine. You can verify if you do by running the command below in your terminal.
node -v
If otherwise, download from here
2.A basic knowledge of HTML, CSS, JavaScript, and Vue
Tutorial Demo
Yay! In this section, we will build a movies app in Vue and integrate auth0 and Cloudinary into the application.
Check out the demo on Codesandbox
For an easier understanding of this section, we will go through each part step by step.
Create a Vue Project
First, let’s start up a Vue application by using installing the vue CLI:
Install the Vue command-line interface (CLI):
npm install -g @vue/cli
Then, create the Vue app using this command:
vue create movies-app
With these steps, our vue application has been successfully created, switch to the path using cd movies-app, and run the command below to start the application.
npm run serve
Getting Started with Auth0.
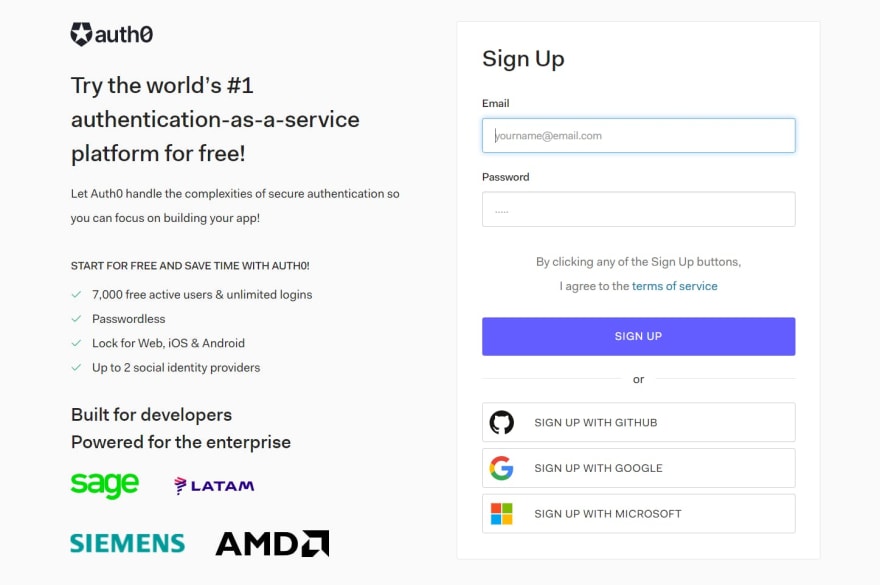
To get started with Auth0, Firstly sign up to create a free account -
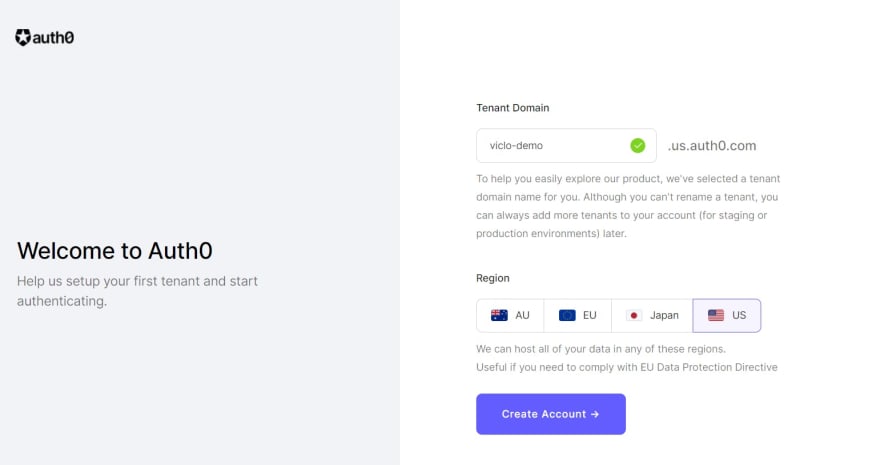
- Follow the sign-up steps and create a tenant domain name and region or you can continue with the default.
The tenant domain name will be the URL used to access resources such as the Auth0 API.
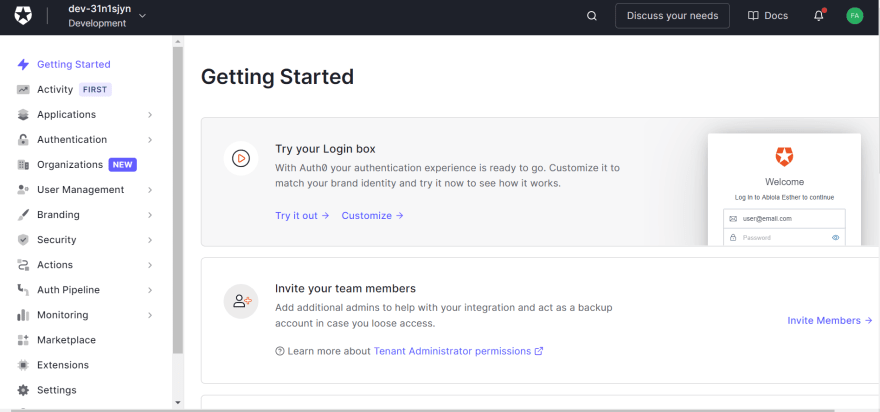
- From your Auth0 Dashboard, create a new application as shown below.
Auth0 offers various types of applications, It can be a native app, SPA (Single Page App), web app or even CLIs. For this tutorial, we are building a Vue application which is a SPA (Single Page App).

- Next, we would configure our application settings to meet our needs.
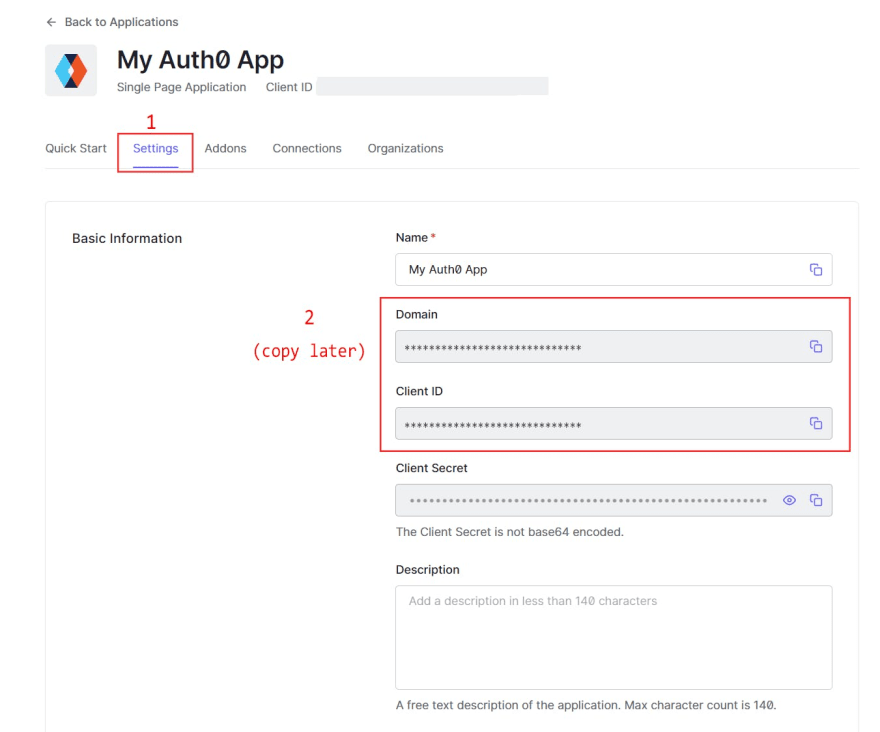
In the Application URIs,
Allowed Callback URLs - is the URL that Auth0 can use to redirect your users after they successfully log in.
Allowed Logout URLs - is the URL that Auth0 can use to redirect your users after they log out.
Allowed Web Origins - to enable silent log-in between user sessions. This way, the user doesn't have to log in to the website every time the page is refreshed.
For our example, all URLs will be:
http://localhost:8080
Scroll down and click 'Save Changes'. Now we have our Auth0 all set up.
Getting Started with Cloudinary
To get started, If you don't have a Cloudinary account yet, you can sign up for a free account now.
The sign-up form includes an option to select the cloud name for your account. That cloud name will appear in the URL of every asset you deliver from Cloudinary account, so you should pick a cloud name that's a good representation of your organization, application, or website. If you don't choose one, a randomly generated cloud name will be assigned.
Integrating Auth0 SDK in a Vue App.
Auth0 SDK libraries make it easy to integrate and interact with Auth0 for single-page applications. To set up the SDK for our Vue app, we firstly create a simple Vue.js plugin that acts as a reusable and reactive wrapper around the Auth0 SPA SDK, making it much easier to work with the asynchronous methods of the SDK.
Firstly, install the Auth0 SPA SDK
npm install @auth0/auth0-spa-js
Then we create an auth folder in the src folder, and then create a new file called index.js to implement the plugin.
In the Index.js
- Import the auth0 SDK into the plugin
     import Vue from "vue";
    import createAuth0Client from "@auth0/auth0-spa-js";
- Define a default action to perform after authentication
    const DEFAULT_REDIRECT_CALLBACK = () =>
      window.history.replaceState({}, document.title, window.location.pathname);
- Initialize the instance and creates an instance of the Auth0 SDK.
    let instance;

    /** Returns the current instance of the SDK */
    export const getInstance = () => instance;


    export const useAuth0 = ({
      onRedirectCallback = DEFAULT_REDIRECT_CALLBACK,
      redirectUri = window.location.origin,
      ...options
    }) => {
      if (instance) return instance;

      // The 'instance' is simply a Vue object
      instance = new Vue({
        data() {
          return {
            loading: true,
            isAuthenticated: false,
            user: {},
            auth0Client: null,
            popupOpen: false,
            error: null
          };
        },
    }
- Create the different methods to handle authentication
    methods: {
          /** Authenticates the user using a popup window */
          async loginWithPopup(options, config) {
            this.popupOpen = true;

            try {
              await this.auth0Client.loginWithPopup(options, config);
              this.user = await this.auth0Client.getUser();
              this.isAuthenticated = await this.auth0Client.isAuthenticated();
              this.error = null;
            } catch (e) {
              this.error = e;
              // eslint-disable-next-line
              console.error(e);
            } finally {
              this.popupOpen = false;
            }

            this.user = await this.auth0Client.getUser();
            this.isAuthenticated = true;
          },
          /** Handles the callback when logging in using a redirect */
          async handleRedirectCallback() {
            this.loading = true;
            try {
              await this.auth0Client.handleRedirectCallback();
              this.user = await this.auth0Client.getUser();
              this.isAuthenticated = true;
              this.error = null;
            } catch (e) {
              this.error = e;
            } finally {
              this.loading = false;
            }
          },
          /** Authenticates the user using the redirect method */
          loginWithRedirect(o) {
            return this.auth0Client.loginWithRedirect(o);
          },
          /** Returns all the claims present in the ID token */
          getIdTokenClaims(o) {
            return this.auth0Client.getIdTokenClaims(o);
          },
          /** Returns the access token. If the token is invalid or missing, a new one is retrieved */
          getTokenSilently(o) {
            return this.auth0Client.getTokenSilently(o);
          },
          /** Gets the access token using a popup window */

          getTokenWithPopup(o) {
            return this.auth0Client.getTokenWithPopup(o);
          },
          /** Logs the user out and removes their session on the authorization server */
          logout(o) {
            return this.auth0Client.logout(o);
          }
        },
        /** Use this lifecycle method to instantiate the SDK client */
        async created() {
          // Create a new instance of the SDK client using members of the given options object
          this.auth0Client = await createAuth0Client({
            ...options,
            client_id: options.clientId,
            redirect_uri: redirectUri
          });

          try {
            // If the user is returning to the app after authentication..
            if (
              window.location.search.includes("code=") &&
              window.location.search.includes("state=")
            ) {
              // handle the redirect and retrieve tokens
              const { appState } = await this.auth0Client.handleRedirectCallback();

              this.error = null;

              // Notify subscribers that the redirect callback has happened, passing the appState
              // (useful for retrieving any pre-authentication state)
              onRedirectCallback(appState);
            }
          } catch (e) {
            this.error = e;
          } finally {
            // Initialize our internal authentication state
            this.isAuthenticated = await this.auth0Client.isAuthenticated();
            this.user = await this.auth0Client.getUser();
            this.loading = false;
          }
        }
      });

      return instance;
    };
- Export the plugin to use as a wrapper to access the Auth0 SDK
    export const Auth0Plugin = {
      install(Vue, options) {
        Vue.prototype.$auth = useAuth0(options);
      }
    };
Adding the plugin to the Vue application
In the main.js file,use the Vue.use() method to install the plugin to the application.
     // Import the plugin here
     import { Auth0Plugin } from "./auth";

     // Install the authentication plugin here
     Vue.use(Auth0Plugin, {
       domain: process.env.VUE_APP_AUTH0_DOMAIN,
       clientId : process.env.VUE_APP_CLIENT_ID,
       onRedirectCallback: appState => {
         router.push(
           appState && appState.targetUrl
             ? appState.targetUrl
             : window.location.pathname
         );
       }
     });
Adding user authentication to the app.
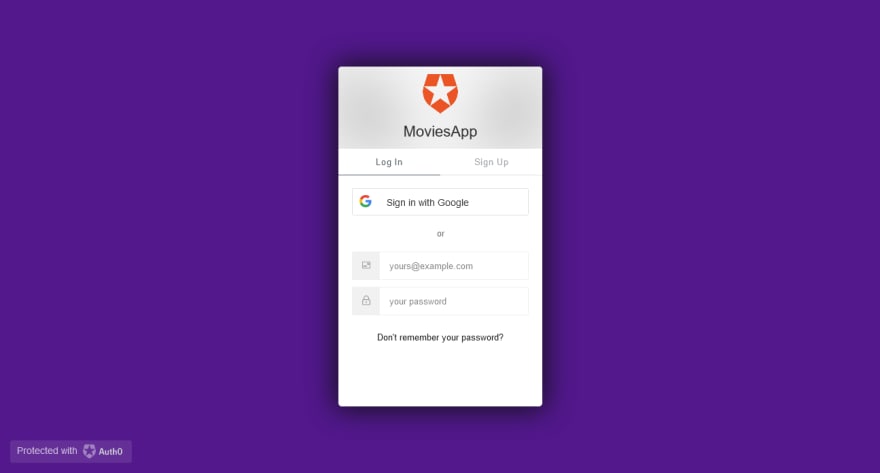
To implement the authentication, we will use the loginWithRedirect method, which means that when users click the login button the URL will redirect to Auth0 hosted login page(Universal Login). After they have successfully authenticated they will be redirected back to our application.
Create Navbar Component file, add two buttons that enable the user to sign in and log out.
    <template>
      <nav>
       <li >   <router-link to="/"> MUVIES </router-link> </li>
       <div class='nav-sub'>
            <li v-if="$auth.isAuthenticated">  <router-link to="/movies"> Movies </router-link> </li>
             <!-- Check that the SDK client is not currently loading before accessing is methods -->
        <div v-if="!$auth.loading">
          <!-- show login when not authenticated -->
          <li> <button v-if="!$auth.isAuthenticated" @click="login">Sign In</button> </li>
          <!-- show logout when authenticated -->
          <li> <button v-if="$auth.isAuthenticated" @click="logout">Log out</button> </li>
        </div>

       </div>
      </nav>
    </template>
Using the v-if directives, we set up conditionals to display either the sign-in or log-out button depending on whether the user is authenticated.
    <script>
    export default {
      name: "Navbar",
      methods: {
        // Log the user in
        login() {
          this.$auth.loginWithRedirect();
        },
        // Log the user out
        logout() {
          this.$auth.logout({
            returnTo: window.location.origin
          });
        }
      }
    };
    </script>
Then we implement the methods for the buttons using the this.$auth property.
With these, we have successfully set up user authentication for our application. You can also go further to add an extra feature to display the user profile details.
Moving forward, we will setup a protected route to allow only authenticated users to view the movies page.
Adding a Navigation Guard
Navigation guards provided by vue-router are primarily used to guard navigations either by redirecting it or canceling it. To implement this in our application, we create a new file in the auth folder called authGuard.js, and use the getInstance method of the authentication service to implement a function that will prevent a route from being accessed by an unauthenticated user:
    import { getInstance } from "./index";

    export const authGuard = (to, from, next) => {
      const authService = getInstance();
      const fn = () => {
        // If the user is authenticated, continue with the route
        if (authService.isAuthenticated) {
          return next();
        }
        // Otherwise, log in
        authService.loginWithRedirect({ appState: { targetUrl: to.fullPath } });
      };
      // If loading has already finished, check our auth state using `fn()`
      if (!authService.loading) {
        return fn();
      }
      // Watch for the loading property to change before we check isAuthenticated
      authService.$watch("loading", loading => {
        if (loading === false) {
          return fn();
        }
      });
    };
Then we set up the guard in our routes
router/index.js
    // Importing the guard
    import { authGuard } from "../auth/authGuard";
    Vue.use(VueRouter);
    const routes = [
      {
        path: "/movies",
        name: "MoviesList",
        component: MoviesList,
        beforeEnter: authGuard
      },
    ];
    const router = new VueRouter({
      mode: "history",
      base: process.env.BASE_URL,
      routes,
    });
    export default router;
With these, the application can authenticate users and give access only authenticated users access to the movies page.
Using Cloudinary in a Vue App.
Cloudinary provides the ability to perform all of its awesome transformation functionality on remote images with its remote fetch URL. With these, there would not be a need to install any extra package to the application. Fetch enables the transformation of remote images and also an optimized delivery with the use of CDN. With the remote fetch URL, Images are fetched from any remote source and cached on your Cloudinary account. The only limit of this feature is that it supports only image assets.
The image can be transformed and optimized before being cached and delivered through fast, localized CDNs and not via local web servers. To create a fetch URL, simply prepend the following prefix to the URL of the image:
https://res.cloudinary.com/<your Cloudinary account's cloud name>/image/fetch/
By adding the different transformation parameters to the fetch URL, you can apply a huge variety of automatic adjustments and effects to your delivered Image.
For the movies page of our application , we would make our api request using the fetch method and use cloudinary to transform and deliver our image.
    <script>
    export default {
      name: "MoviesList",
      data() {
        return {
           movies: [],
           api_key:process.env.VUE_APP_API_KEY,
          //  Using the cloudinary fetch URL
           movie_url:'https://res.cloudinary.com/cloud-name/image/fetch/w_300,h_300,c_fill,b_rgb:222,e_improve,r_50:50:0:0,bo_2px_solid_rgb:8a2be2/https://images.tmdb.org/t/p/original'
        };
      },
       methods: {
        async getMovies() {
          try {
            let response = await fetch(`https://api.themoviedb.org/3/trending/all/week?api_key=${this.api_key}`);
            let data = await response.json();
            this.movies=data.results
          } catch (error) {
            console.log(error);
          }
        },

      },
      created() {
        this.getMovies();
      },


    };
    </script>
In the above code, we were able to transform the images from the TMDB Api to fit perfectly.
Using the following transformation parameters:
c_fill,b_rgb:222,e_improve,r_50:50:0:0,bo_2px_solid_rgb:8a2be2
- w_300 - This sets the width of a transformed asset to 300px.
- h_300 - This sets the width of a transformed asset to 300px.
- c*_fill* - Creates an asset with the exact specified width and height without distorting the asset.
- b_rgb:222 - Sets the background to the specified color.
- e_improve - Adjusts an image's colors, contrast, and brightness to improve its appearance.
- r_50:50:0:0 - This uses the border-radius property to set the assets to required value. Starting with the top-left.
- bo_2px_solid_rgb:8a2be2 - This sets the border of the assets using the border property.
We were able to render the highly optimized and transformed images using the remote fetch URL for our images.
You can find more of the transformation parameters that Cloudinary offers Here
Another alternative is using a Transformation Editor that generates the URL for the transformation you define so that you can copy it and use it.
Conclusion
Congratulation ! we have successfully been able to build our Vue application from scratch and also integrate Auth0 SDK for the authentication and use the Cloudinary fetch URL for the Transformation. I hope you were able to learn about how to integrate different services in a Vue application by using this tutorial as an example.
If you have any questions, you can leave them in the comments section below or send a message on Twitter.
Resources and further reading
Content created for the Hackmamba Jamstack Content Hackathon with Auth0 and Cloudinary.


Top comments (0)