
Find me on medium.
Building a file upload component is a very important skill to learn as it allows users to select and send files outside of their local environment.
With that said, this post is putting a heavy focus on the native file api in JavaScript. If you want to know a little more about how the file api works, click here.
At first, building a file upload component can be an awkward concept to grasp especially if you want to customize the look and feel of it. (We can go over custom designing file input components in a future tutorial). But once you get a good understanding of the concepts, it actually isn't that bad!
I mean, you can just create a file input element, pass in an onChange and call it a day from there. But are you going to take care of your users by presenting them the current state of the process each way? Or are you just going to let them sit there and hope that they see the end of it without any visual updates in between?
What if the user's internet disconnects? What if the server doesn't respond with anything? What if file 8 of 14 is big for them? What if the user was waiting for the upload process to finish for 10 minutes and wanted to see how far it has gotten from there? Or which files have already been uploaded?
You have to keep the user consistently updated with what's going on in the background if you want the UX to stay consistent. A professional, consistent user interface helps to establish trust with your app in a technological point of view. If you plan on having an app where users sign up and pay for some service of yours, they have to trust the technology that you are offering them and that your technology is better than everyone else. You're developing in React, you have all the power to go up and beyond!
But where do I start?
No worries! This post will teach you how to create a user interface containing a file upload component that will help users select and send their files somewhere, while allowing the interface to tap into every update from the moment of instantiation to the end. Creating the component is one thing, but having the UI in sync with state updates throughout the whole process is a different story.
Let's begin!
In this tutorial we are going to quickly generate a react project with create-react-app.
Go ahead and create a project using the command below. For this tutorial i'll call it file-upload-with-ux
npx create-react-app file-upload-with-ux
Now go into the directory when it finishes:
cd file-upload-with-ux
The first thing we are going to do is open up App.js and replace the default code with our own implementation:
src/App.js
import React from 'react'
import './App.css'

const Input = (props) => (
  <input type='file' name='file-input' multiple {...props} />
)

const App = () => {
  const onSubmit = (e) => {
    e.preventDefault()
  }

  const onChange = (e) => {
    console.log(e.target.files)
  }

  return (
    <div className='container'>
      <form className='form' onSubmit={onSubmit}>
        <div>
          <Input onChange={onChange} />
          <button type='submit'>Submit</button>
        </div>
      </form>
    </div>
  )
}

export default App
Here we defined a form element and passed in an onSubmit handler so that we can access all of the files the user selected once they hit submit.
Inside the form, we defined the file input component which will allow the user to select any of their files. The input takes in an onChange handler so we pass that in as well. The onChange handler will be able to receive the files by accessing e.target.files inside the first argument.
I applied some basic styles inside App.css. You can choose to use them or skip this step:
App.css
.container {
  padding: 8px;
  width: 100%;
  box-sizing: border-box;
  overflow-x: hidden;
}

.form {
  position: relative;
  width: 100%;
  height: 100%;
}

.form input,
button {
  margin-bottom: 15px;
}

.form button {
  padding: 8px 17px;
  border: 0;
  color: #fff;
  background: #265265;
  cursor: pointer;
}

.form button:hover {
  background: #1e3d4b;
}
So we have a basic component set up with the handlers set in place. We're now going to create a custom react hook so that we can place all of the dirty state logic inside--away from the UI components.
I'm going to call this useFileHandlers.js:
src/useFileHandlers.js
import React from 'react'

const initialState = {
  files: [],
  pending: [],
  next: null,
  uploading: false,
  uploaded: {},
  status: 'idle',
}

const useFileHandlers = () => {
  return {}
}

export default useFileHandlers
The most important part of this entire post is probably the initialState shown above. This is what will allow the UI to tap into every moment of the file uploading process.
files is where the user initially loads an array of files by selecting them from the file input.
pending will be used to let the UI know what file is currently being processed and how many files are left over.
next will be assigned the next item in the pending array when the code detects that it's ready to do so.
uploading will be used for the code to know that files are still being uploaded.
uploaded will be the object we insert files into as soon as they are done uploading.
And finally, status is provided as extra convenience mainly for the user interface to utilize to its advantage.
We are going to use the useReducer hook api from react because its perfect for our use.
But first, lets define some constants above the useFileHandlers hook so we make sure we don't mistype anything later when applying state updates:
src/useFileHandlers.js
const LOADED = 'LOADED'
const INIT = 'INIT'
const PENDING = 'PENDING'
const FILES_UPLOADED = 'FILES_UPLOADED'
const UPLOAD_ERROR = 'UPLOAD_ERROR'
These will go into the reducer that gets passed in as the first argument to useReducer.
Now to define the reducer:
src/useFileHandlers.js
const reducer = (state, action) => {
  switch (action.type) {
    default:
      return state
  }
}
We probably shouldn't be forgetting about importing useReducer from react now, eh?
src/useFileHandlers.js
import { useReducer } from 'react'
Now to define the state/dispatch api into the hook:
src/useFileHandlers.js
const useFileHandlers = () => {
  const [state, dispatch] = useReducer(reducer, initialState)

  return {}
}

export default useFileHandlers
Now we're going to go back to the onChange implementation we set earlier and enhance it further.
Let's add a new switch case into the reducer for it before we do that:
src/useFileHandlers.js
const reducer = (state, action) => {
  switch (action.type) {
    case 'load':
      return { ...state, files: action.files, status: LOADED }
    default:
      return state
  }
}
This will allow the onChange handler to pass files into the state as soon as it invokes:
src/useFileHandlers.js
const onChange = (e) => {
  if (e.target.files.length) {
    const arrFiles = Array.from(e.target.files)
    const files = arrFiles.map((file, index) => {
      const src = window.URL.createObjectURL(file)
      return { file, id: index, src }
    })
    dispatch({ type: 'load', files })
  }
}
Something to note here is that e.target.files isn't an array when we retrieve it from the event object--its a FileList.
The reason why we are converting it to an array is so that the UI components can map over them and show useful information like file sizes and file types. Otherwise, the components will make the app crash trying to map over *FileList*s.
So far, here's the entire implementation of our custom hook:
src/useFileHandlers.js
import { useReducer } from 'react'

// Constants
const LOADED = 'LOADED'
const INIT = 'INIT'
const PENDING = 'PENDING'
const FILES_UPLOADED = 'FILES_UPLOADED'
const UPLOAD_ERROR = 'UPLOAD_ERROR'

const initialState = {
  files: [],
  pending: [],
  next: null,
  uploading: false,
  uploaded: {},
  status: 'idle',
}

const reducer = (state, action) => {
  switch (action.type) {
    case 'load':
      return { ...state, files: action.files, status: LOADED }
    default:
      return state
  }
}

const useFileHandlers = () => {
  const [state, dispatch] = useReducer(reducer, initialState)

  const onChange = (e) => {
    if (e.target.files.length) {
      const arrFiles = Array.from(e.target.files)
      const files = arrFiles.map((file, index) => {
        const src = window.URL.createObjectURL(file)
        return { file, id: index, src }
      })
      dispatch({ type: 'load', files })
    }
  }

  return {}
}

export default useFileHandlers
Now we're going to focus on the other handler--onSubmit. This invokes when the user submits the form (obviously). Inside the onSubmit handler we wrap it with a useCallback so that it will always obtain the latest state values.
src/useFileHandlers.js
import { useCallback, useReducer } from 'react'
src/useFileHandlers.js
const onSubmit = useCallback(
  (e) => {
    e.preventDefault()
    if (state.files.length) {
      dispatch({ type: 'submit' })
    } else {
      window.alert("You don't have any files loaded.")
    }
  },
  [state.files.length],
)
This onSubmit handler invokes after onChange, so it can just pull in the files from state.files that was just set by onChange, to instantiate the upload process.
And to instantiate the upload process, we need another switch case for that:
src/useFileHandlers.js
const reducer = (state, action) => {
  switch (action.type) {
    case 'load':
      return { ...state, files: action.files, status: LOADED }
    case 'submit':
      return { ...state, uploading: true, pending: state.files, status: INIT }
    default:
      return state
  }
}
Okay, now here's what happens:
It changes state.uploading to true. When you change state.uploading to true, you can start wreaking havoc with the UI components and display anything you want to the user as long as they understand that you are trying to convey some message to them that the files are being uploading.
It initiates state.pending with all of the files that the user selected. You can go ahead and wreak havoc with the UI components with this too. There are so many ways to use this part of the state. For now however, i'll just skip that part because I want to get through the whole tutorial with you first :)
It sets the convenience part of the state, status to "INIT". You can also use this somewhere in the hook or in the UI to trigger some "onStart" logic, or whatever you want--since it won't ever come back to this value until a new upload process starts.
Now we'll return the states as well as the onSubmit and onChange handler back out so that the UI can happily access them:
src/useFileHandlers.js
return {
  ...state,
  onSubmit,
  onChange,
}
src/useFileHandlers.js
The next thing we're going to tackle is the useEffect part. We need the useEffect to facilitate a "run-to-completion" functionality.
These useEffects are a pretty important implementation in this tutorial because they are what creates a perfect, consistent synchronized flow between the UI and the custom hook--everywhere as you will see in a bit.
src/useFileHandlers.js
import { useCallback, useEffect, useReducer } from 'react'
We're going to define our first useEffect which will be responsible for facilitating the next file to be uploaded as soon as it detects that it is ready to do so (as long as there are still items in state.pending):
src/useFileHandlers.js
// Sets the next file when it detects that state.next can be set again
useEffect(() => {
  if (state.pending.length && state.next == null) {
    const next = state.pending[0]
    dispatch({ type: 'next', next })
  }
}, [state.next, state.pending])
It grabs the next available file in the state.pending array and creates a signal using dispatch, sending the file as the next state.next object:
src/useFileHandlers.js
const reducer = (state, action) => {
  switch (action.type) {
    case 'load':
      return { ...state, files: action.files, status: LOADED }
    case 'submit':
      return { ...state, uploading: true, pending: state.files, status: INIT }
    case 'next':
      return {
        ...state,
        next: action.next,
        status: PENDING,
      }
    default:
      return state
  }
}
We added a status: PENDING here as a convenience again. However you choose to handle this part of the upload process is entirely up to you!
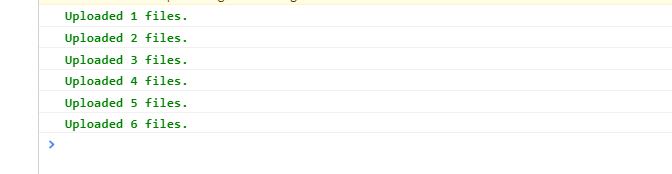
This next snippet is going to show a utility function that I provided just to help log to the console for you to see, just for this tutorial.
src/useFileHandlers.js
const logUploadedFile = (num, color = 'green') => {
  const msg = `%cUploaded ${num} files.`
  const style = `color:${color};font-weight:bold;`
  console.log(msg, style)
}
The second useEffect we will apply next will be responsible for uploading the next file that was just set in the state:
src/useFileHandlers.js
const countRef = useRef(0)

// Processes the next pending thumbnail when ready
useEffect(() => {
  if (state.pending.length && state.next) {
    const { next } = state
    api
      .uploadFile(next)
      .then(() => {
        const prev = next
        logUploadedFile(++countRef.current)
        const pending = state.pending.slice(1)
        dispatch({ type: 'file-uploaded', prev, pending })
      })
      .catch((error) => {
        console.error(error)
        dispatch({ type: 'set-upload-error', error })
      })
  }
}, [state])
Inside the .then() handler I created a new variable prev and assigned it the next object that finished uploaded. This is just for readability purposes because we don't want to be confused in the switch cases, as we will see in a bit.
You might have noticed that there was a useRef snuck in there. Yes, I confess. I did it. But the reason why I did it is because we're going to use and mutate it for the logUploadedFile utility function that I provided.
src/useFileHandlers.js
import { useCallback, useEffect, useReducer, useRef } from 'react'
Oh, and if you need some mock function to simulate an "upload" promise handler as seen in the snippet, you can use this:
const api = {
  uploadFile({ timeout = 550 ) {
    return new Promise((resolve) => {
      setTimeout(() => {
        resolve()
      }, timeout)
    })
  },
}
Now go ahead and update your reducer by applying the 'file-uploaded' and 'set-upload-error' switch cases:
src/useFileHandlers.js
const reducer = (state, action) => {
  switch (action.type) {
    case 'load':
      return { ...state, files: action.files, status: LOADED }
    case 'submit':
      return { ...state, uploading: true, pending: state.files, status: INIT }
    case 'next':
      return {
        ...state,
        next: action.next,
        status: PENDING,
      }
    case 'file-uploaded':
      return {
        ...state,
        next: null,
        pending: action.pending,
        uploaded: {
          ...state.uploaded,
          [action.prev.id]: action.prev.file,
        },
      }
    case 'set-upload-error':
      return { ...state, uploadError: action.error, status: UPLOAD_ERROR }
    default:
      return state
  }
}
For the file-uploaded case, we reset next back to null so that the first useEffect can respond to it again. When it does, it will pull in the next file in the state.pending queue and assign that to the next state.next value. You can already start to see how this becomes a self-running process--a run to completion implementation!
Anywho, we apply the file that was just uploaded to the state.uploaded object so that the UI can use this to their advantage as well. This is also a really useful feature in this tutorial because if you were rendering a bunch of thumbnails you can shade each row out after they're uploaded on the fly! :) Screenshots at the end of this post.
The third useEffect will be responsible for shutting down the upload process by sending a files-uploaded signal to the reducer:
src/useFileHandlers.js
// Ends the upload process
useEffect(() => {
  if (!state.pending.length && state.uploading) {
    dispatch({ type: 'files-uploaded' })
  }
}, [state.pending.length, state.uploading])
Adding that to the reducer looks something like this:
src/useFileHandlers.js
const reducer = (state, action) => {
  switch (action.type) {
    case 'load':
      return { ...state, files: action.files, status: LOADED }
    case 'submit':
      return { ...state, uploading: true, pending: state.files, status: INIT }
    case 'next':
      return {
        ...state,
        next: action.next,
        status: PENDING,
      }
    case 'file-uploaded':
      return {
        ...state,
        next: null,
        pending: action.pending,
        uploaded: {
          ...state.uploaded,
          [action.prev.id]: action.prev.file,
        },
      }
    case 'files-uploaded':
      return { ...state, uploading: false, status: FILES_UPLOADED }
    case 'set-upload-error':
      return { ...state, uploadError: action.error, status: UPLOAD_ERROR }
    default:
      return state
  }
}
And we are done with the custom hook! Hurray!
Here is the final code for the custom hook:
src/useFileHandlers.js
import { useCallback, useEffect, useReducer, useRef } from 'react'

const api = {
  uploadFile({ timeout = 550 }) {
    return new Promise((resolve) => {
      setTimeout(() => {
        resolve()
      }, timeout)
    })
  },
}

const logUploadedFile = (num, color = 'green') => {
  const msg = `%cUploaded ${num} files.`
  const style = `color:${color};font-weight:bold;`
  console.log(msg, style)
}

// Constants
const LOADED = 'LOADED'
const INIT = 'INIT'
const PENDING = 'PENDING'
const FILES_UPLOADED = 'FILES_UPLOADED'
const UPLOAD_ERROR = 'UPLOAD_ERROR'

const initialState = {
  files: [],
  pending: [],
  next: null,
  uploading: false,
  uploaded: {},
  status: 'idle',
}

const reducer = (state, action) => {
  switch (action.type) {
    case 'load':
      return { ...state, files: action.files, status: LOADED }
    case 'submit':
      return { ...state, uploading: true, pending: state.files, status: INIT }
    case 'next':
      return {
        ...state,
        next: action.next,
        status: PENDING,
      }
    case 'file-uploaded':
      return {
        ...state,
        next: null,
        pending: action.pending,
        uploaded: {
          ...state.uploaded,
          [action.prev.id]: action.prev.file,
        },
      }
    case 'files-uploaded':
      return { ...state, uploading: false, status: FILES_UPLOADED }
    case 'set-upload-error':
      return { ...state, uploadError: action.error, status: UPLOAD_ERROR }
    default:
      return state
  }
}

const useFileHandlers = () => {
  const [state, dispatch] = useReducer(reducer, initialState)

  const onSubmit = useCallback(
    (e) => {
      e.preventDefault()
      if (state.files.length) {
        dispatch({ type: 'submit' })
      } else {
        window.alert("You don't have any files loaded.")
      }
    },
    [state.files.length],
  )

  const onChange = (e) => {
    if (e.target.files.length) {
      const arrFiles = Array.from(e.target.files)
      const files = arrFiles.map((file, index) => {
        const src = window.URL.createObjectURL(file)
        return { file, id: index, src }
      })
      dispatch({ type: 'load', files })
    }
  }

  // Sets the next file when it detects that its ready to go
  useEffect(() => {
    if (state.pending.length && state.next == null) {
      const next = state.pending[0]
      dispatch({ type: 'next', next })
    }
  }, [state.next, state.pending])

  const countRef = useRef(0)

  // Processes the next pending thumbnail when ready
  useEffect(() => {
    if (state.pending.length && state.next) {
      const { next } = state
      api
        .uploadFile(next)
        .then(() => {
          const prev = next
          logUploadedFile(++countRef.current)
          const pending = state.pending.slice(1)
          dispatch({ type: 'file-uploaded', prev, pending })
        })
        .catch((error) => {
          console.error(error)
          dispatch({ type: 'set-upload-error', error })
        })
    }
  }, [state])

  // Ends the upload process
  useEffect(() => {
    if (!state.pending.length && state.uploading) {
      dispatch({ type: 'files-uploaded' })
    }
  }, [state.pending.length, state.uploading])

  return {
    ...state,
    onSubmit,
    onChange,
  }
}

export default useFileHandlers
But wait, it's not over yet. We still need to apply this logic to the user interface. Aww shucks!
We'll import the useFileHandlers hook and use it in the component. We'll also make the UI map over each file and render them as thumbnails:
src/App.js
import React from 'react'
import useFileHandlers from './useFileHandlers'
import './App.css'

const Input = (props) => (
  <input
    type='file'
    accept='image/*'
    name='img-loader-input'
    multiple
    {...props}
  />
)

const App = () => {
  const {
    files,
    pending,
    next,
    uploading,
    uploaded,
    status,
    onSubmit,
    onChange,
  } = useFileHandlers()

  return (
    <div className='container'>
      <form className='form' onSubmit={onSubmit}>
        <div>
          <Input onChange={onChange} />
          <button type='submit'>Submit</button>
        </div>
        <div>
          {files.map(({ file, src, id }, index) => (
            <div key={`thumb${index}`} className='thumbnail-wrapper'>
              <img className='thumbnail' src={src} alt='' />
              <div className='thumbnail-caption'>{file.name}</div>
            </div>
          ))}
        </div>
      </form>
    </div>
  )
}

export default App
This basic component just renders a bunch of thumbnails when they're loaded. I didn't go too crazy with the styles since i'll leave that all up to you to have fun with :)
But if you want to use the basic styles here they are:
src/App.css
.thumbnail-wrapper {
  display: flex;
  align-items: center;
  padding: 6px 4px;
}

.thumbnail {
  flex-basis: 100px;
  height: 100%;
  max-width: 50px;
  max-height: 50px;
  object-fit: cover;
}

.thumbnail-caption {
  flex-grow: 1;
  font-size: 14px;
  color: #2b8fba;
  margin-bottom: 5px;
  padding: 0 12px;
}
What happens when all of the files are done uploading? Well, nothing yet really. But we can at least display something to the user to have them know that its done:
src/App.js
{
  status === 'FILES_UPLOADED' && (
    <div className='success-container'>
      <div>
        <h2>Congratulations!</h2>
        <small>You uploaded your files. Get some rest.</small>
      </div>
    </div>
  )
}
src/App.css
.success-container {
  position: absolute;
  display: flex;
  justify-content: center;
  align-items: center;
  width: 100%;
  height: 100%;
}

.success-container h2,
small {
  color: green;
  text-align: center;
}
This time, status is being used here. See, it's pretty useful, isn't it? You can make some pretty amazing complex looking UI with the other status values as well when combined with state.pending and others. Send me an email with a couple of screenshots if you did something amazin with this tutorial!
Final output:
src/App.js
import React from 'react'
import useFileHandlers from './useFileHandlers'
import './App.css'

const Input = (props) => (
  <input
    type='file'
    accept='image/*'
    name='img-loader-input'
    multiple
    {...props}
  />
)

const App = () => {
  const {
    files,
    pending,
    next,
    uploading,
    uploaded,
    status,
    onSubmit,
    onChange,
  } = useFileHandlers()

  return (
    <div className='container'>
      <form className='form' onSubmit={onSubmit}>
        {status === 'FILES_UPLOADED' && (
          <div className='success-container'>
            <div>
              <h2>Congratulations!</h2>
              <small>You uploaded your files. Get some rest.</small>
            </div>
          </div>
        )}
        <div>
          <Input onChange={onChange} />
          <button type='submit'>Submit</button>
        </div>
        <div>
          {files.map(({ file, src, id }, index) => (
            <div
              style={{
                opacity: uploaded[id] ? 0.2 : 1,
              }}
              key={`thumb${index}`}
              className='thumbnail-wrapper'
            >
              <img className='thumbnail' src={src} alt='' />
              <div className='thumbnail-caption'>{file.name}</div>
            </div>
          ))}
        </div>
      </form>
    </div>
  )
}

export default App
src/App.css
(Media queries for mobile devices included)
.container {
  padding: 8px;
  width: 100%;
  box-sizing: border-box;
  overflow-x: hidden;
}

.form {
  position: relative;
  width: 100%;
  height: 100%;
}

.form input,
button {
  margin-bottom: 15px;
}

.form button {
  padding: 8px 17px;
  border: 0;
  color: #fff;
  background: #265265;
  cursor: pointer;
}

.form button:hover {
  background: #1e3d4b;
}

.thumbnail-wrapper {
  display: flex;
  align-items: center;
  padding: 6px 4px;
}

.thumbnail {
  flex-basis: 100px;
  height: 100%;
  max-width: 50px;
  max-height: 50px;
  object-fit: cover;
}

.thumbnail-caption {
  flex-grow: 1;
  font-size: 14px;
  color: #2b8fba;
  margin-bottom: 5px;
  padding: 0 12px;
}

.success-container {
  position: absolute;
  display: flex;
  justify-content: center;
  align-items: center;
  width: 100%;
  height: 100%;
}

.success-container h2,
small {
  color: green;
  text-align: center;
}

@media screen and (max-width: 472px) {
  .container {
    padding: 6px;
  }

  .thumbnail-wrapper {
    padding: 6px 2px;
  }

  .thumbnail {
    flex-basis: 40px;
    width: 100%;
    height: 100%;
    max-height: 40px;
    max-width: 40px;
  }

  .thumbnail-caption {
    font-size: 12px;
  }
}
Screenshots
I provided some screenshots of a basic UX implementation using the code in this tutorial:
onChange

logUploadedFile()
state.pending

Conclusion
That concludes the end of this post. I hope you liked it and stay tuned for more quality posts! :)


Top comments (0)