Introduction
WebAssembly is the new craze when it comes to frontend & backend capabilities. The part that has me excited about it is the concept that you can use the same library for both frontend & backend. (provided the backend is in Rust or NodeJs.)
Getting Started
Expected Prerequisites:
First, we need to establish the goal of this little tutorial. This tutorial is to give a little demonstration of how to simply get Webpack to compile our Rust code into WebAssembly and import it on the frontend. To get started, lets create a new folder and enter it:
mkdir -p ./wasm-demo
cd ./wasm-demo
Now with this empty folder, lets start by adding the necessary files to get up and running.
Setting up Yarn
For the yarn init, you can simply select all the defaults.
yarn init
We are converting this project to a Yarn 2+ for speed.
yarn set version berry
Getting our rust crate created
cargo new \
  --edition 2021 \
  --lib \
  --name hello-world \
  ./hello-world
Adding the root Cargo.toml
Now, create a new file called Cargo.toml in the root of your project. The contents of the Cargo.toml should be a simple workspace:
[workspace]
members = [
  "hello-world"
]
We create a Cargo.toml at the root of the project to allow us to have multiple crates in a given repository and manage them all together.
Finally, adding JavaScript dependencies
Development dependencies
yarn add -D \
  webpack \
  webpack-cli \
  webpack-dev-server \
  @wasm-tool/wasm-pack-plugin \
  html-webpack-plugin
Configuring Webpack
Getting the Webpack configurations to be just right can be tedious for any project. However, with Rust & WebAssembly it can be relatively easy! Lets start by creating the files we will need to get running:
Setting up the basic files
Our application directory:
mkdir -p ./src
Webpack config file:
touch ./webpack.config.js
Basic application file:
touch ./src/index.js
Editing the webpack config
// Path lets us map out where files should be:
const path = require("path");

// HtmlWebpackPlugin will let us inject html into our app
const HtmlWebpackPlugin = require('html-webpack-plugin');

// WasmPackPlugin does the magic of building our application
const WasmPackPlugin = require('@wasm-tool/wasm-pack-plugin');

module.exports = {
    experiments: {
        // This allows WebAssembly to be bundled
        asyncWebAssembly: true
    },
    // Its good practice to specify the mode
    // But this can also be done via `--mode`
    mode: process.env.NODE_ENV || "development",
    // This entry should be pathing to the index.js
    entry: path.join(__dirname, "src/index.js"),
    output: {
        // Always clean your output folder!
        // Otherwise, you can end up with dangling code when developing.
        clean: true,
        path: path.resolve(__dirname, './dist'),
        filename: 'bundle.js',
    },
    plugins: [
        // We point our WasmPackPlugin to the location of the
        // the crates `Cargo.toml` file. Never the root file.
        new WasmPackPlugin({
            crateDirectory: path.join(__dirname, "hello-world")
        }),
        // Some basic boiler plate,
        // Device width meta lets us make it mobile friendly.
        new HtmlWebpackPlugin({
            meta: {viewport: 'width=device-width, initial-scale=1, shrink-to-fit=no'},
            // This will be used later
            templateContent: "<div id='app'></div>",
            inject: "body"
        })
    ],
    resolve: {
        // A little overkill for our tutorial but useful.
        extensions: [".ts", ".tsx", ".js", ".jsx", '.mts', '.mjs', '...'],
    }
}
Getting our Rust code ready
Adding Dependencies
In order to compile to WebAssembly, we need to make a few adjustments. First, we will need to install the build tools:
cargo install wasm-pack
Next, we will need to modify the hello-world/Cargo.toml file:
[package]
name = "hello-world"
version = "0.1.0"
edition = "2021"

# We add cdylib and rlib to tell rust
# it needs to build for WebAssembly and Rust
[lib]
crate-type = ["cdylib", "rlib"]

[dependencies]
# wasm-bindgen builds the JavaScript bindings
# Take a look at the following link for more info:
# https://rustwasm.github.io/docs/wasm-bindgen/
wasm-bindgen = "0"
Adding a main function
Now, we edit the file at hello-world/src/lib.rs:
use wasm_bindgen::prelude::*;

// The main function which will be referenced in JavaScript
#[wasm_bindgen]
pub fn main() -> String {
    // Returning a string to use in JavaScript land.
    String::from("Hello, world!")
}
Building to ensure it works
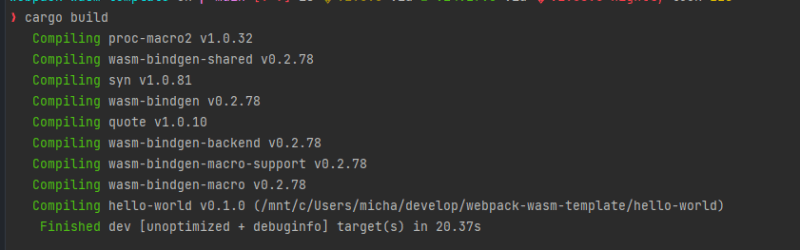
At the root of the project, run the following command to make sure the rust code is good:
cargo build
You should get a success build:
Getting our JavaScript code ready
Now that we have our Rust code ready to rock and roll, lets get our JavaScript ready by editing the src/index.js file:
/**
 * When importing a Rust WebAssembly crate,
 * you must always add a /pkg to the import like below.
 * This is because, when webpack builds the crate it will output the contents into a pkg folder.
 * If you wish to manually build, you can use the command `wasm-pack build --target web` inside the `hello-world` folder
 */
import * as helloWorld from '../hello-world/pkg'


document.getElementById("app").innerText =
    /**
     * Now we can simply call the function `main` from our Rust package :)
     */
    helloWorld.main();
Running the code
Now we have all of our code set up and ready to go! If we simply run:
yarn webpack serve
It should build the project successfully and give you a web address you can use to access your application! look for loopback and click that url or open it up in your browser:

Once the application is open in your browser, it should look a little something like this:


Top comments (0)