
How to create a pipeline which checks your app's code quality -frequently, automatically, in the cloud - using GitHub Actions. Such as to lint, test and build your app hosted on GitHub.
Who is this post for?
This post is for you if you want to get started in CI/CD or deploy pipelines, automating your tests or just using GitHub Actions.
Or if you're just interested in exploring Actions and just want to know what GH Actions is about.
We'll start with a simple Hello World flow which runs a greeting in the shell, then move onto one appropriate for a Node.js app. All you need is a GitHub account and a repo that you can add a workflow too.
Overview
What you'll learn in this post.
- How to make a basic deploy pipeline for your code can setup quick, easily and for free.
- It can run in the cloud whenever someone pushes to your repo. It will warn you when something fails. So in case you forgot to run tests locally or you edited in GitHub UI, you're covered.
- GitHub supports a pipeline service called GitHub Actions, covered in this post.
- We'll create sample workflow in this post to run a Hello World flow to print a message with a shell command.
- Then we create a flow for a Node.js app - use this template to get you started.
UPDATE: Thanks for all the support! This is by far my most popular post up to now.
What is GitHub Actions?
GH Actions lets us run shell commands against our repo code using GH's cloud infrastructure and is triggered on an event, like a commit, a PR or on a schedule.
You can find an "Action" available in the Actions "marketplace" - it is like a plugin so you can do more complex tasks in your workflow without writing the code yourself. But that is not the focus of this post.
See the Actions page on GitHub.
What is a deploy pipeline? 💡
This post deals with creating a "CI/CD" or "Continuous Integration / Continuous Deployment" pipeline.
The GH Actions docs explain the terms well here otherwise see my explanations below.
The "Integration" part of the name is about testing your code. Typically you'd take commands you run locally and run them in a remote service. You are testing how your commits integrate with the existing codebase, perhaps running checks against a Pull Request and blocking a merge until the tests pass.
The "Deployment" part is about deploying code frequently - this is not covered in this post, however you could use one pipeline file to handle both the CI and CD portions.
The "Continuous" part is automation to run the pipeline on every push and Pull Request. You don't have to remember to run the checks locally, as that can be tedious or forgotten. You just push local commits, or change a file on GitHub and the flow will run. For deploys, you don't need to connect to the remote server using SSH or FTP - you just commit and push and you site will deploy! The pipeline reduces effort and ensures you test the quality and deploy your code frequently.
You could use a tool like Travis or CircleCI, but most of my experience is with GitHub Actions, so I am going to cover that here. If you use GitLab, see this post.
Create a new pipeline
How to create a Hello World workflow on GH Actions

1. Choose a repo
Create a new GitHub repo.
Or choose an existing one. It doesn't matter what code is in the repo - the first section here won't actually use the code. But if you have a Node.js repo, pick that, as it will be useful later.
2. Create a workflow 🔃
Click the "Actions" tab on your repo. Note that you can view the tab on any repo but you can only edit workflows if you have edit access to the repo.

If you have no workflows (config files used for pipelines) yet, you'll be prompted to create one.
Rather than picking a template, choose the skip option (Skip this and set up a workflow yourself). You can always come back later to add another workflow using a Node.js or Python template for example.
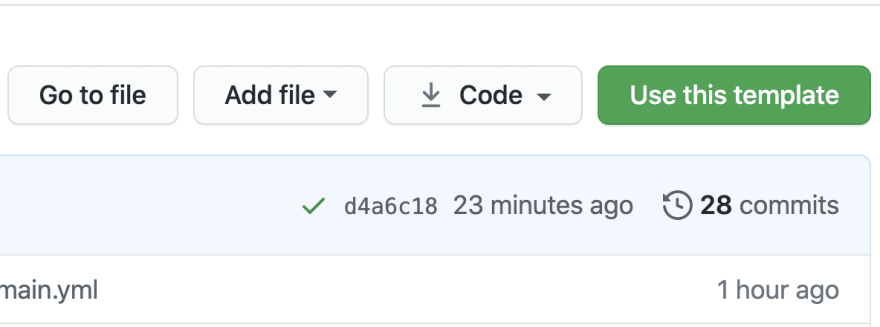
You'll be taken to an editor view for editing a new file called .github/workflows/main.yml. You can leave the path as is.
The comments in the sample there will be very verbose and you don't need to know everything yet, so you can delete the file contents.
Paste in the simpe content below:
name: CI

on: push

jobs:
  build:
    runs-on: ubuntu-latest

    steps:
      - uses: actions/checkout@v2

      - name: Run a one-line script
        run: echo "Hello, world!"
The key parts to note are the triggers (on a push event) and the steps (commands to run within a labeled "job"). You can name the job anything (no spaces). You only need one job in most cases.
You can have as many steps as you want. In the last step, the optional name field is just for logging purposed but run is the command that that gets run in the shell. We're using Ubuntu here as that is the typical choice for Actions.
Now save your file - click "Start commit" in the top right of GH or commit and push locally.
If you want, you can see the GH Actions docs on Configuring a Workflow or just continue on.
Note that workflow config file uses YAML syntax, which is like JSON but more readable. Read more in this YAML tutorial.
⚠️ Note that indentation is important! If the workflow editor or the build result finds an error in your syntax, make sure your code indentation matches the samples. Indentation for YAML is only 2 spaces, by the way.
3. View logs
You've added a new commit with that file, so your workflow's "push" condition will be triggered and it will run against the current code immediately.
View the Actions tab and find the logs for a run for this workflow - in this case only one run.
The workflow should log that it is successfully checked out your repo and then ran one step to print a greeting. Then it will finish with a green checkmark.
4. Make it fail
Edit your workflow file. Add 2 more steps.
To simulate a failed installation, lint error or failed unit test, the next step will exit with a non-zero code which means an error status. Instead of exit 1 you could also try using bad syntax or operating on a file that doesn't exit, for example mv foo bar.
    steps:
      - uses: actions/checkout@v2

      - name: Greeting
        run: echo "Hello, world!"

      - name: Simulate an error
        run: echo "About to fail" ; exit 1

      - name: Another greeting
        run: echo "Hello, world!"
The last step won't be reached because the build will be aborted.
Save the file. Now when you view the latest build, you'll see an error message.
You should also get an email saying that your build failed. You'll also get a notification under the notifications section of your GH profile.
Run a Node.js app pipeline ☕
Okay you're bored with Hello world? Let's move on to a Node.js workflow.
If you want to get a complete but simple Node.js repo which has a script, build commands configured and GH Actions setup already, then you can get a copy of this template project in your own repos. The pipeline will run for you from the first commit.
https://github.com/MichaelCurrin/node-project-template
Otherwise continue below.
1. Setup the files
If you have a Node.js project already you can use that. Or use the instructions below to add files to an empty repo.
For the purposes of this tutorial, if you do not have an Node.js app at hand, then you can just use a repo with no JS code and just a single package.json file which looks like this:
{
  "name": "First CI app",
  "dependencies": {
    "lodash": "*"
  },
  "scripts": {
    "lint": "echo 'Linting!'",
    "build": "echo 'Running a build!'",
    "test": "echo 'Running unit tests!'",
  }
}
2. Pick your commands
Let's say we have these commands that we run locally in our Node.js project, in order.
npm install
npm run lint
npm run build
npm test
We will put each in a step in our workflow.
3. Setup workflow
You can edit the existing simple workflow file or add a new one under a different filename.
Copy the following content and paste into a workflow file. e.g. .github/workflows/main.yml.
name: Node CI

on: push

jobs:
  build:
    runs-on: ubuntu-latest

    steps:
      - name: Checkout 🛎️
        uses: actions/checkout@v2
        with:
          persist-credentials: false

      - name: Install 🔧
        run: npm install

      - name: Lint 🧐
        run: npm run lint

      - name: Build 🏗️
        run: npm run build

      - name: Test 🚨
        run: npm test
The GH Actions environment comes with Node.js itself installed already. So don't have to hassle with that - unless you want a specific version or want to run against multiple versions in one workflow run.
4. View the logs
Go to your Actions tab and click to drill down to your build logs.
Or go the repo's main tab. Next to the commit, you'll see an orange in-progress dot, or a red X or green tick. Click on that so you can see the results of your build.
Actions status for a commit hash:
View sample results here or see the screenshot below.

You can click on the arrow next to each step to see more detailed console output.
5. Add a badge
To make it clear what the status if of your build, add a badge to your docs.
- Click through into a specific workflow run.
- In the menu on the top right, click "Create status badge" and copy the result.
- Add this to your
README.mdfile and save it.
Here's an example of the badge for my template project:
![]()
[Node CI](https://github.com/MichaelCurrin/node-project-template/workflows/Node%20CI/badge.svg)
I like to also wrap the image in a link that points to the Actions tab to make it easy to view the latest run.
What next? 🚀
You can go back to your Actions tab and create a new workflow. Explore other sample workflows which use Python, Rust, Ruby, etc.
See also the GitHub Actions docs.
Still confused? See DevOps CI/CD in 100 seconds on YouTube.
I wrote a tutorial on doing a GH Pages deploy with GH Actions if you are interested in that.
I added a bunch of resources below to help on your pipeline learning. Pick one of these to try out in your workflow.
If you are new to writing tests in general or want to explore Jest and Mocha as test frameworks for JS, I can recommend this dev.to post.
Give me samples!
If you a Node.js developer, I have some more advanced samples that I've collected in my Code Cookbook that will come in useful. See Node.js workflows.
If you're interested in another tool or language, see the Workflows section of my Code Cookbook. The GH Pages section covers how to build a static site (e.g. Jekyll or Hugo) or Node.js app (e.g. React) and then serve it as a GH Pages site.
Show me real workflows
If you are into React, try out my React Create App Quickstart repo. It's based on the standard React template, but I added a GitHub Actions workflow to run checks and deploy to GitHub Pages. Click Use This Template to add a copy of the project to your own repos.
I also cover Python in my Code Cookbook, as that is my preferred language.
If you want to see a Python action in use, see my Unicron project:
- Actions tab for workflow runs
- Workflow config file
Conclusion
I hope the steps, snippets and resources I supplied help you on your journey around deploy pipelines, whether new or experienced.
Any suggestions to improve the post or links for me to add to the end? What can I help you with such as GH workflows for other languages?
Thanks for reading.
Credits
- Cover image of pipes: @sixteenmilesout


Top comments (4)
Hi Mike thanks a lot for the article.
Quick question. In the first example you use
actions/checkout@v2and in the secondactions/checkout@master, was that intentional or? I'm guessing by referencing master you are effectively sayinguse the latest version of this action, so I am just wondering if there's a reason to decide which I should generally use or maybe it doesn't matter.Hey Sam.
It comes down to preference. In general in software you should lock your versions especially for software maintained by other people. I am going to edit to use v2 above consistently. You can use
@v2.3.4if you need more control.If you use
@masteryou will get any commits on master, regardless of what is tagged and this introduces risk because that commit might be failing build (tests fail or bad syntax).And if the author makes a significant changes from
v2.0.0tov3.0.0that is not backwards compatible, your next workflow run could break. Like if you pass an argument asfoo-barbut in the new version it isfoo_barthen you'll silently pass a useless parameter.So lock the version. And bump the version if you want a feature or fix or maybe a vulnerability fix.
When new version comes out, wait for it to be around a while (bugs get fixed and the version gets widely used) then you can adopt it as well.
BTW I just added a post to this series dev.to/michaelcurrin/deploy-a-vuer...
I just came across this 100 seconds of DevOps CI/CD video on YouTube that also uses a Node app, if you want a video explaining the concepts here.
youtu.be/scEDHsr3APg