I decided to make my first experimental Chrome Extension. My colleague came up with a really simple idea to implement, so I decided to give it a try.
The Functional Requirement
Create a Chrome Extension that will output a small colored square in the top left corner of a page, alerting you of which type of domain (i.e. .dev, .stage) you're on. These domains and colors will be managed on an Options Page.
Options Page
The environments and their corresponding color should be managed on a Options Page, allowing you to add / remove any number of entries.
Active Tab
The small square should only appear on domains that match entries the user has added on the Options Page.
The square's background color will reflect the current entry.
Getting Started
I originally followed this tutorial to get started.
Every extension needs to have a manifest.json. For a full list of options, visit their official documentation.
Below is a bare bones example of a manifest.json.
{
  "name": "Environment Flag Example",
  "version": "1.0",
  "description": "Environment Flag Example Extension",
  "manifest_version": 2,
  "background": {},
  "permissions": [],
  "options_page": "",
  "content_scripts": []
}
Notable Settings
Background Scripts
Extensions are event based programs used to modify or enhance the Chrome browsing experience. Events are browser triggers, such as navigating to a new page, removing a bookmark, or closing a tab. Extensions monitor these events in their background script, then react with specified instructions.
We'll be using background scripts to add an event listener to the onInstalled event.
This will allow us to run code when the extension is installed. We'll use this event to add some default entries for the Options Page.
{
  "background": {
    "scripts": ["background.js"],
    "persistent": false
  }
}
Why is persistent marked as false? As the documentation states:
The only occasion to keep a background script persistently active is if the extension uses chrome.webRequest API to block or modify network requests. The webRequest API is incompatible with non-persistent background pages.
Permissions
To use most chrome.* APIs, your extension or app must declare its intent in the "permissions" field of the manifest.
For example, if you would like to use Chrome's Storage API, you'll have to request permission for storage.
{
  "permissions": ["storage"]
}
Options Page
This entry will tell Chrome which html file you would like to use for the Options Page for your Extension.
{
  "options_page": "options/options.html"
}
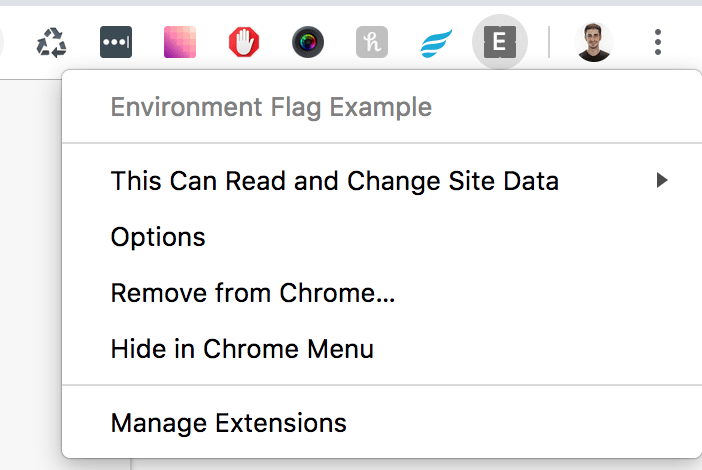
You would access this page by clicking on Options in the menu dropdown for your Extension.
Content Scripts
Content scripts are files that run in the context of web pages. By using the standard Document Object Model (DOM), they are able to read details of the web pages the browser visits, make changes to them and pass information to their parent extension.
Essentially, any script you would like to actually run on a given page, needs to leverage this api. In our example, we'll be injecting a colored square in the top left corner of the active tab.
"content_scripts": [
    {
      "matches": ["<all_urls>"],
      "js": ["content/content.js"]
    }
  ]
I also recommend watching the video on Content Scripts and Isolated Worlds for a better understanding of what's going on behind the scenes.
We'll also need to update our permissions to use the activeTab:
{
  "permissions": ["storage", "activeTab"]
}
Complete manifest.json
{
  "name": "Environment Flag Example",
  "version": "1.0",
  "description": "Environment Flag Example Extension",
  "manifest_version": 2,
  "permissions": ["storage", "activeTab"],
  "background": {
    "scripts": ["background.js"],
    "persistent": false
  },
  "options_page": "options/options.html",
  "content_scripts": [
    {
      "matches": ["<all_urls>"],
      "js": ["content/content.js"]
    }
  ]
}
Let's Get Coding
The entire codebase is available in my github repo.
Bonus - for the purists out there, I made a branch with no dependencies.
Installation
Installing a development extension is pretty well documented already, so I won't be going over it here.
Go ahead and follow their official documentation.
Background Script
The first thing we should do is set some default data using chrome's storage api.
The two methods you need to know about for this tutorial are:
chrome.storage.sync.set({ key: value }, function() {
  console.log('Value is set to ' + value);
});

chrome.storage.sync.get(['key'], function(result) {
  console.log('Value currently is ' + result.key);
});
The second parameter for each method is a callback function once the storage operation is complete. We'll be leveraging this in Vue to update internal state.
Let's open up background.js and add an event for when an extension is installed:
// background.js

chrome.runtime.onInstalled.addListener(function() {
  /**
   * lets add a default domain
   * for our options page
  */
  chrome.storage.sync.set(
    {
        config: [
            {
                domain: 'docker',
                color: '#2496ed',
            },
        ],
    },
    null
  );
}
In the code above, we are doing the following:
- add a new key to the
storage objectcalledconfig - add one
entryintoconfigfor a domain ending withdocker
Options Page
For my tech stack, I decided to go with Bootstrap 4, Vue JS, Webpack, & native ES6 Javascript. I chose these because I'm comfortable with them, but feel free to choose your own.
For the purposes of this tutorial, I won't be explaining much about Vue, since it's an implementation detail, and not necessary to build an extension.
For a dependency free implementation, checkout this branch.
The options.html page is very simple:
<!DOCTYPE html>
<html lang="en">
  <head>
    <meta charset="UTF-8" />
    <meta content="width=device-width, initial-scale=1.0" name="viewport" />
    <meta content="ie=edge" http-equiv="X-UA-Compatible" />
    <title>Environment Flag Options</title>
    <link
      crossorigin="anonymous"
      href="https://stackpath.bootstrapcdn.com/bootstrap/4.1.3/css/bootstrap.min.css"
      integrity="sha384-MCw98/SFnGE8fJT3GXwEOngsV7Zt27NXFoaoApmYm81iuXoPkFOJwJ8ERdknLPMO"
      rel="stylesheet"
    />
  </head>
  <body>
    <main>
      <div class="container  py-5">
        <div class="col-sm-8  offset-sm-2">
          <div id="app"></div>
        </div>
      </div>
    </main>
    <script src="../dist/options.bundle.js"></script>
  </body>
</html>
Go ahead and review the options folder before we continue. It's a pretty standard Vue application.
Let's review some of the notable Vue code. Options.vue is where most of the magic happens with leveraging the chrome api.
// options/Options.vue

{
    data() {
        return {
            /**
             * empty array to be used to store
             * the chrome storage result
             */
            config: [],
        };
    },
    mounted() {
        /**
         * once the component mounts
         * lets call the storage api
         * and request our `config` key
         *
         * on our callback, lets call a method
         * to set our internal state
         */
        chrome.storage.sync.get(['config'], this.setConfig);
    },
    methods: {
        setConfig(storage) {
            /**
             * set our internal state
             * with the result from the
             * chrome api call
             */
            this.config = storage.config;
        },
    },
}
In the code above, we are doing the following:
- setting internal state for a key called
config, and assigning it to an emptyarray - on the
mounted()method, we are requesting the keyconfigfrom thestorage api - on the
callback function, we call a method calledthis.setConfig -
setConfig()assigns our internal state to what is returned from thechrome api
We then have two methods for altering the chrome storage state:
{
    deleteEntry(index) {
        /**
         * remove the entry at a specific index
         * from our internal state
         */
        this.config.splice(index, 1);

        /**
         * update the chrome storage api
         * with the new state
         */
        chrome.storage.sync.set(
            {
                config: this.config,
            },
            null
        );
    },
    addEntry(entry) {
        /**
         * add an entry to our internal state
         */
        this.config.push(entry);

        /**
         * update the chrome storage api
         * with the new state
         */
        chrome.storage.sync.set(
            {
                config: this.config,
            },
            null
        );
    },
}
After implementing these methods, the final Options Page looks like this:
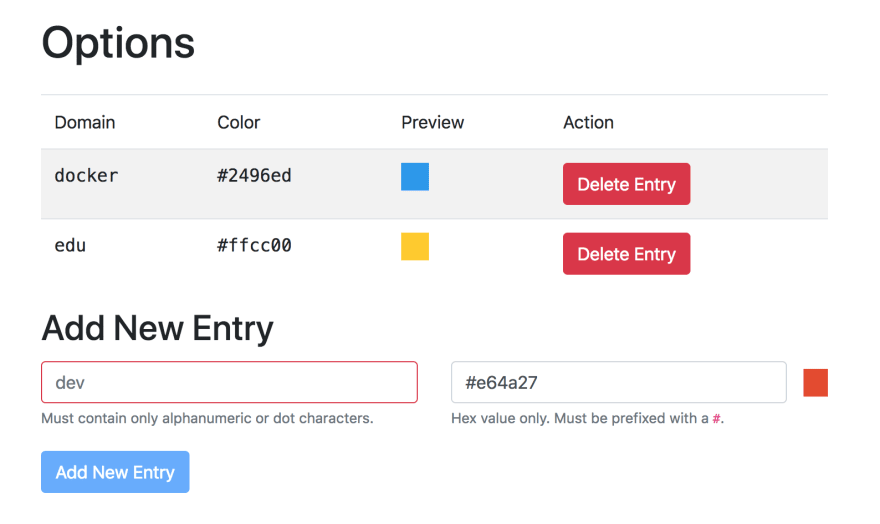
I know, it's nothing fancy… but that's not the point. Get out there and have some fun! You'll notice I added a edu domain, go ahead and add that now if you would like.
Content Script
Now that we have an Options Page with a way to add / delete entries, let's now implement the small square that will appear in the top left corner of valid domains.
To do this, we need to use the content script we discussed before. Let's go ahead and open up the content/content.js file.
// content/content.js

/**
 * lets first request the `config` key from
 * the chrome api storage
 */
chrome.storage.sync.get(['config'], ({ config }) => {
  /**
   * lets see if the `window.location.origin`
   * matches any entry from our
   * options page
   */
  let match = config.find((entry) => {
    let regex = RegExp(`${entry.domain}\/?$`);

    return regex.test(window.location.origin);
  });

  /**
   * if no match, don't do anything
   */
  if (!match) return;

  /**
   * lets create the style attribute
   * by building up an object
   * then using join to combine it
   */
  let node = document.createElement('div');
  let nodeStyleProperties = {
    'background-color': match.color,
    height: '25px',
    left: '5px',
    opacity: 0.5,
    'pointer-events': 'none',
    position: 'fixed',
    top: '5px',
    width: '25px',
    'z-index': '999999',
  };
  let nodeStyle = Object.entries(nodeStyleProperties)
    .map(([key, value]) => {
      return `${key}: ${value}`;
    })
    .join('; ');

  /**
   * apply the style to the node
   * and a class flag (doesn't do anything)
   */
  node.setAttribute('style', nodeStyle);
  node.setAttribute('class', 'chrome-extension-environment-flag');

  /**
   * append the node to the document
   */
  document.body.appendChild(node);
});
Conclusion
Now, when I go to an edu domain, I see the following in the top left corner:

I hope this tutorial at least got you interested in Chrome Extensions. We only scratched the surface. Feel free to use any of the code in my repo for any purpose.


Top comments (6)
Just putting it out here that if you're planning to build a chrome extension in 2023.
You may need to change the way you reference your background script in the manifest file. Since manifest version 2 is deprecated.
The right way to use a background script would be to use the
"service_worker"key like so:And when you try to use this approach for the first time, you may encounter an issue relating to the service worker being inactive. Restarting Chrome should fix that.
Hi! Nice work you have done.
Can you help me?
I'm trying to make a Chrome extension just to remove non-numerical stuff from a prompt command input (from user).
My js file is
function ajustaCpf() {
var cpf = prompt("Cole aqui o CPF: ");
cpf.trim();
var cpfNormal = new RegExp(/\D/g);
var txt = cpf.replace(cpfNormal,'');
if(txt.length == 11) {
alert("CPF: " + txt);
} else {
alert("CPF inválido!");
}
}
And the manifest.json is:
{
"name": "PJe - CPF - CNPJ - N. Processo",
"version": "1.0",
"description": "Extensao do PJe",
}
I'm getting the error msg: "Refused to execute inline event handler because it violates the following Content Security Policy directive: "script-src 'self' blob: filesystem: chrome-extension-resource:". Either the 'unsafe-inline' keyword, a hash ('sha256-...'), or a nonce ('nonce-...') is required to enable inline execution."
I really don't get it.
=(
How are you calling the function
ajustaCpf()?If you are calling it
inlinefrompopup.html, then it's not allowed in a chrome plugin.You would need to move the handler to your
magica.jsfile.Issue I am referring to: stackoverflow.com/questions/363243...
If that doesn't help try and post your code on github so I can take another look.
Thanks a lot!!
Yes, I was doing it inline:
I'll try what you referred. Sooner or later we'll talk again.
;)
It worked!
Thanks a lot for your help!!
Keep the good work!
;)
Interesting, and practical example. Thanks.