Hey guys! been a long time since I wrote an Article on Dev!
for the last few months I have been trying to develop using Typescript and host my own apps.Since
Glitch.medecided to ban pinging services like Uptime Robot which was commonly used to host Discord bots along with Glitch. So It was the perfect opportunity to practice my Typescript on this Bot and host on Heroku.So here's a short and detailed article on how you can setup your own discord Bots written in typescript.


➡️ STEP 1: Add Discord Bot to your Server
| Screens | Steps |
|---|---|
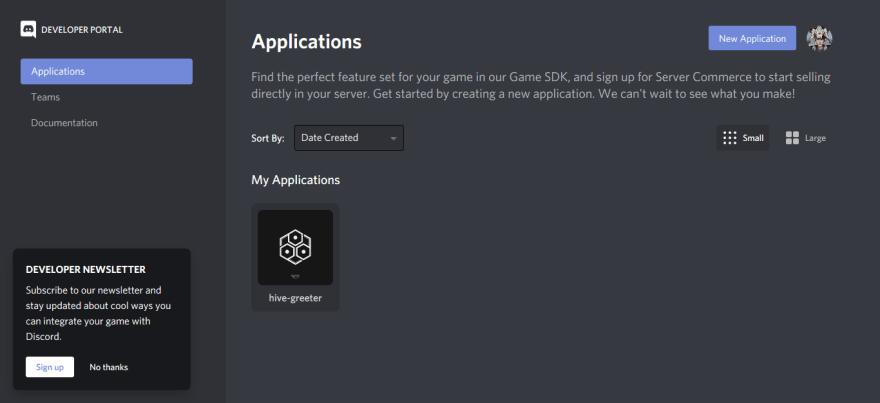 |
1. Open Discord developers portal Click New Application
|
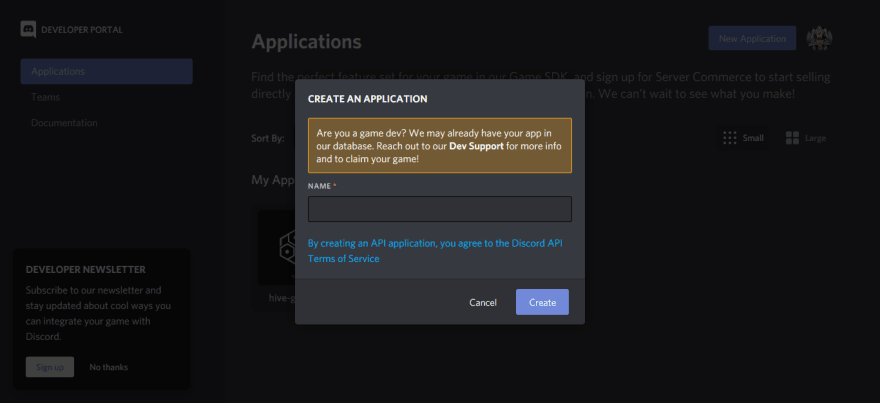 |
2. Give your BOT a new name and click Create
|
 |
3. Customize your bot by giving an Image and description. |
 |
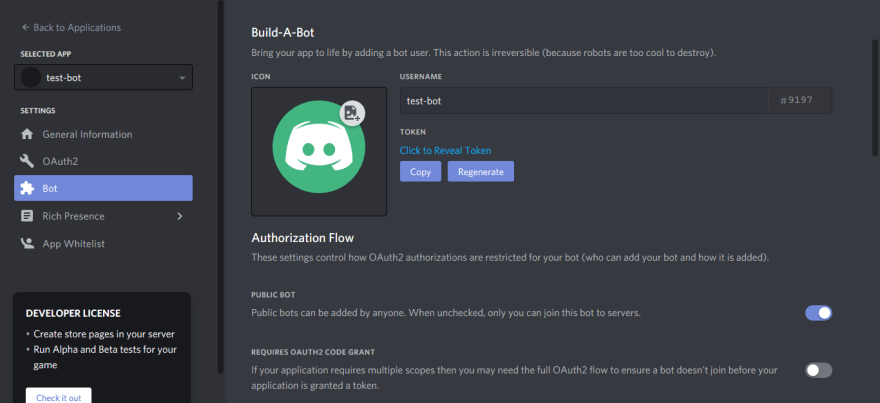
4. Under the Bot tab, click Add Bot
|
 |
5. Set Icon and Username
|
 |
6. Go to OAuth2 tab. Tick the bot checkbox under scopes.You can customize your BOT by setting the Bot Permissions. Note changing the permissions updates the link that'll be used to invite your bot to your server. |
 |
Inviting Your Bot when you open the link from the step above, in a new tab you'll see the following page and now you can add the bot to any of your server |
find detailed steps here
STEP 2: Code your Discord Bot
Get your Bot's token, for this you must go back to the developer portal, select your bot and go to the
Bottab, there you can find your Bot'stoken.
The simplest way to code your bot would be to fork this repo and then work on
bot-templatebranch.
alternatively you can clone the repository specifically thebot-templatebranch.
$ git clone -b bot-template --single-branch https://github.com/MidasXIV/hive-greeter.git
- Next create an
.envfile in the root of the repository and add yourtokenlike so:
token=TOKEN_WHICH_YOU_GOT_FROM_DISCORD
the .env file takes in key and value pair so here the key is token, if you wish to give a different token name then make sure you update the same in src/sonfig/secrets.ts file, as it looks for the "token" key.
export const DISCORD_TOKEN = process.env["token"];
- Now it's time to install and build the project
   $ npm install
   $ npm run start
you can view the NPM SCRIPTS in the package.json file, running the start command should build project and run the bot on http://localhost:5000/; you can modify the port in src/index.ts file.
- On Successfully building and running the project you'll see
   Server started on port 5000
   Hive Greeter has started
You should now be able to see your Bot online in your discord Server.
To get you started the template consists of two commands
greetandtimeto test your bot, go to any text channel of your server and type in> greet, you'll see your bot reply as such

To Add more commands you must add a new class in
src/commandsfolder taking into referencegreetCommand.tsfile, then you should export the class using thesrc/commands/index.tsfile so you can easily import it from yoursrc/CommandHandler.ts.You can update the "prefix" (
>) of the bot from thesrc/config/botConfig.tsfile.
➡️ STEP 3: Deploying Bot on Heroku
- Install Heroku Cli
- login with your Heroku account credentials when you run
$ heroku login
- Now create an app with name your-app-name by running:
$ heroku create your-app-name
- add a Git remote named heroku pointing to Heroku:
$ git remote add heroku https://git.heroku.com/your-app-name.git
Integrating Heroku with GitHub, This step is required if you plan on automatically deploying your bot every time you push changes to a GitHub repository. (detailed steps here)
- Select your app from the Heroku Dashboard.
- Go to
Deploytab of app,- Enabling GitHub integration: To configure GitHub integration, you have to authenticate with GitHub. You only have to do this once per Heroku account.
- App Connected to Github: you have to select the repository with your Bot.
-
Automatic deploys: When you enable automatic deploys for a GitHub branch, Heroku builds and deploys all pushes to that branch.

Testing your setup, This step is not required, but it's highly recommended. You should build your application locally to test if you've set up it correctly.
$ heroku local
The Heroku CLI will now run your app at http://localhost:5000/; if no errors are encountered, you're on the right track!
Go to
Settingstab of app to set your discord bot token inconfig varssection.

-
Deploying your bot Upon reaching this step you should have:
- developed a functioning Discord bot
- setup your repository for Heroku deployment
If all goes well, you can now deploy your app to Heroku by running:
$ git push heroku master
Note: If you have setup Automatic Deploys, you'll able to deploy your app with every commit to your master branch.
On completion of the above steps Heroku Cli will give you a link to your hosted app something like this:
https://you-app.herokuapp.com. Most often than not you'll run into issues with your first deployment as might have some dependencies in dev-dependencies or some config issues.
if you run into any issues run
heroku logs --tail
find detailed steps here
If you come across any issues, please do let me know in the comments down below :)
you can find the repository here:
 MidasXIV
/
hive-greeter
MidasXIV
/
hive-greeter
Discord bot created using Typescrit and Discord js hosted on Heroku


STEP 1: Add Discord Bot to your Server
Reveal Steps
| Screens | Steps |
|---|---|
 |
1. Open Discord developers portal Click New Application
|
 |
2. Give your BOT a new name and click Create
|
 |
3. Customize your bot by giving an Image and description. |
 |
4. Under the Bot tab, click Add Bot
|
 |
5. Set Icon and Username
|
 |
6. Go to OAuth2 tab. Tick the bot checkbox under scopes.You can customize your BOT by setting the Bot Permissions. Note changing the permissions updates the link that'll be used to invite your bot to your server. |
 |
Inviting Your Bot when you open the link from the step above, in a new tab you'll see the following page and now you can add the bot to any of your server |
find detailed steps here


Oldest comments (0)