You will need Go and SQLite installed on your machine, as well as basic knowledge of Go and JavaScript.
Many social media based applications allow users to upload photos and these photos are usually displayed in a timeline for their followers and others to see. In the past, you would have had to refresh your feed manually to see new photos uploaded to the timeline. However, with modern web technologies, you can see the updates in realtime without having to refresh the page manually.
In this article, we will consider how you can build a realtime photo feed using Pusher Channels, GO and a little Vue.js. Pusher Channels helps you “easily build scalable in-app notifications, chat, realtime graphs, geotracking and more in your web & mobile apps with our hosted pub/sub messaging API.”
This is a preview of what we will be building:

Prerequisites
Before we start building our application, make sure you have:
- Basic knowledge of the Go programming language.
- Basic JavaScript (Vue.js) knowledge.
- Go (version >= 0.10.x) installed on your machine. Check out the installation guide.
- SQLite (version >= 3.x) installed on your machine. Check out an installation guide.
Let’s get started.
Getting a Pusher Channels application
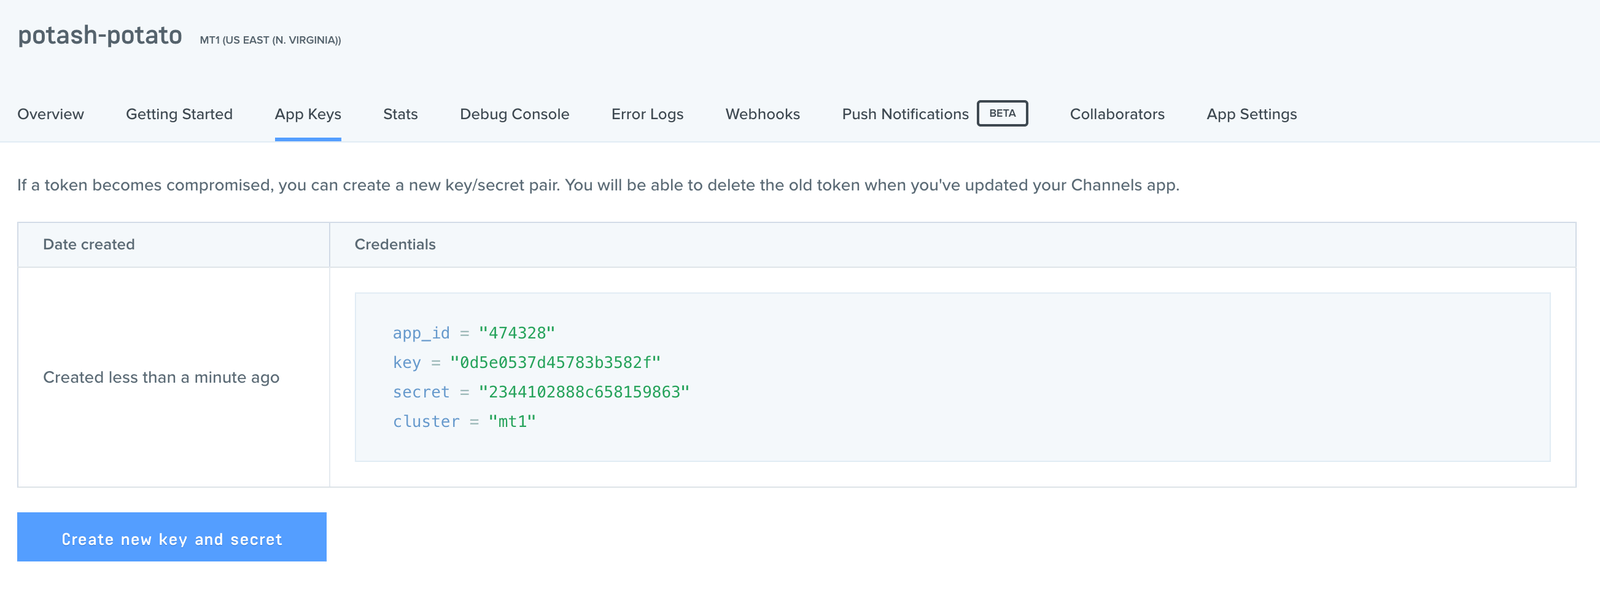
The first step will be to get a Pusher Channels application. We will need the application credentials for our realtime features to work.
Go to the Pusher website and create an account. After creating an account, you should create a new application. Follow the application creation wizard and then you should be given your application credentials, we will use this later in the article.
Now that we have our application, let’s move on to the next step
Creating our Go application
The next thing we want to do is create the Go application. In your terminal, cd to your $GOPATH and create a new directory there.
    $ cd $GOPATH/src
    $ mkdir gofoto
    $ cd gofoto
💡 It is recommended that you place the source code for your project in the
srcsubdirectory (e.g.,$GOPATH/src/your_projector$GOPATH/src/github.com/your_github_username/your_project.
Next, we will create some directories to organize our application a little:
    $ mkdir database
    $ mkdir public
    $ mkdir public/uploads
This will create a database and public directory, and also an uploads directory inside the public directory. We will store our database file inside the database directory, we will keep our public files: HTML and images, inside the public and uploads directory. Create a new index.html file in the public directory that was created.
Now let’s create our first (and only) Go file for this article. We will try to keep everything simple by placing all our source code in a single file. Create a main.go file in the project root.
In the file paste the following:
    <span class="hljs-keyword">package</span> main

    <span class="hljs-keyword">import</span> (
        <span class="hljs-string">"database/sql"</span>
        <span class="hljs-string">"io"</span>
        <span class="hljs-string">"net/http"</span>
        <span class="hljs-string">"os"</span>

        <span class="hljs-string">"github.com/labstack/echo"</span>
        <span class="hljs-string">"github.com/labstack/echo/middleware"</span>
        _ <span class="hljs-string">"github.com/mattn/go-sqlite3"</span>
        pusher <span class="hljs-string">"github.com/pusher/pusher-http-go"</span>
    )
Above we have imported some packages we will be needing to work on our photo feed. We need the database/sql to run SQL queries, the io and os package for our file uploading process, and the net/http for our HTTP status codes.
We have some other external packages we imported. The labstack/echo package is the Echo framework that we will be using. We also have the mattn/go-sqlite3 package which is for SQLite. Finally, we imported the pusher/pusher-http-go package which we will use to trigger events to Pusher Channels.
Importing external Go packages
Before we continue, let’s pull in these packages using our terminal. Run the following commands below to pull the packages in:
    $ go get github.com/labstack/echo
    $ go get github.com/labstack/echo/middleware
    $ go get github.com/mattn/go-sqlite3
    $ go get github.com/pusher/pusher-http-go
Note that the commands above will not return any confirmation output when it finishes installing the packages. If you want to confirm the packages were indeed installed you can just check the
$GOPATH/src/github.comdirectory.
Now that we have pulled in our packages, let’s create the main function. This is the function that will be the entry point of our application. In this function, we will set up our applications database, middleware, and routes.
Open the main,go file and paste the following code:
    <span class="hljs-function"><span class="hljs-keyword">func</span> <span class="hljs-title">main</span><span class="hljs-params">()</span></span> {
        db := initialiseDatabase(<span class="hljs-string">"database/database.sqlite"</span>)
        migrateDatabase(db)

        e := echo.New()

        e.Use(middleware.Logger())
        e.Use(middleware.Recover())

        e.File(<span class="hljs-string">"/"</span>, <span class="hljs-string">"public/index.html"</span>)
        e.GET(<span class="hljs-string">"/photos"</span>, getPhotos(db))
        e.POST(<span class="hljs-string">"/photos"</span>, uploadPhoto(db))
        e.Static(<span class="hljs-string">"/uploads"</span>, <span class="hljs-string">"public/uploads"</span>)

        e.Logger.Fatal(e.Start(<span class="hljs-string">":9000"</span>))
    }
In the code above, we instantiated our database using the file path to the database file. This will create the SQLite file if it did not already exist. We then run the migrateDatabase function which migrates the database.
Next, we instantiate Echo and then register some middlewares. The logger middleware is helpful for logging information about the HTTP request while the recover middleware “recovers from panics anywhere in the chain, prints stack trace and handles the control to the centralized HTTPErrorHandler.”
We then set up some routes to handle our requests. The first handler is the File handler. We use this to serve the index.html file. This will be the entry point to the application from the frontend. We also have the /photos route which accepts a POST and GET request. We need these routes to act like API endpoints that are used for uploading and displaying the photos. The final handler is Static. We use this to return static files that are stored in the /uploads directory.
We finally use e.Start to start our Go web server running on port 9000. The port is not set in stone and you can choose any available and unused port you feel like.
At this point, we have not created most of the functions we referenced in the main function so let’s do so now.
Creating our database management functions
In the main function we referenced an initialiseDatabase and migrateDatabase function. Let’s create them now. In the main.go file, paste the following functions above the main function:
    <span class="hljs-function"><span class="hljs-keyword">func</span> <span class="hljs-title">initialiseDatabase</span><span class="hljs-params">(filepath <span class="hljs-keyword">string</span>)</span> *<span class="hljs-title">sql</span>.<span class="hljs-title">DB</span></span> {
        db, err := sql.Open(<span class="hljs-string">"sqlite3"</span>, filepath)
        <span class="hljs-keyword">if</span> err != <span class="hljs-literal">nil</span> || db == <span class="hljs-literal">nil</span> {
            <span class="hljs-built_in">panic</span>(<span class="hljs-string">"Error connecting to database"</span>)
        }

        <span class="hljs-keyword">return</span> db
    }

    <span class="hljs-function"><span class="hljs-keyword">func</span> <span class="hljs-title">migrateDatabase</span><span class="hljs-params">(db *sql.DB)</span></span> {
        sql := <span class="hljs-string">`
            CREATE TABLE IF NOT EXISTS photos(
                    id INTEGER NOT NULL PRIMARY KEY AUTOINCREMENT,
                    src VARCHAR NOT NULL
            );
       `</span>

        _, err := db.Exec(sql)
        <span class="hljs-keyword">if</span> err != <span class="hljs-literal">nil</span> {
            <span class="hljs-built_in">panic</span>(err)
        }
    }
In the initialiseDatabase function, we create an instance of the SQLite database using the database file and return that instance. In the migrateDatabase function, we use the instance of the database returned in the previous function to execute the migration SQL.
Let’s create the data structure for our photo and photo collection.
Creating our data structures
The next thing we will do is create the data structure for our object types. We will create a Photo structure and a PhotoCollection structure. The Photo struct will define how a typical photo will be represented while the PhotoCollection will define how a collection of photos will be represented.
Open the main.go file and paste the following code above the initialiseDatabase function:
    <span class="hljs-keyword">type</span> Photo <span class="hljs-keyword">struct</span> {
        ID  <span class="hljs-keyword">int64</span>  <span class="hljs-string">`json:"id"`</span>
        Src <span class="hljs-keyword">string</span> <span class="hljs-string">`json:"src"`</span>
    }

    <span class="hljs-keyword">type</span> PhotoCollection <span class="hljs-keyword">struct</span> {
        Photos []Photo <span class="hljs-string">`json:"items"`</span>
    }
Creating our route handler functions
Next let’s create the functions for our routes. Open the main.go file and paste the following file inside it:
    <span class="hljs-function"><span class="hljs-keyword">func</span> <span class="hljs-title">getPhotos</span><span class="hljs-params">(db *sql.DB)</span> <span class="hljs-title">echo</span>.<span class="hljs-title">HandlerFunc</span></span> {
        <span class="hljs-keyword">return</span> <span class="hljs-function"><span class="hljs-keyword">func</span><span class="hljs-params">(c echo.Context)</span> <span class="hljs-title">error</span></span> {
            rows, err := db.Query(<span class="hljs-string">"SELECT * FROM photos"</span>)
            <span class="hljs-keyword">if</span> err != <span class="hljs-literal">nil</span> {
                <span class="hljs-built_in">panic</span>(err)
            }

            <span class="hljs-keyword">defer</span> rows.Close()

            result := PhotoCollection{}

            <span class="hljs-keyword">for</span> rows.Next() {
                photo := Photo{}

                err2 := rows.Scan(&photo.ID, &photo.Src)
                <span class="hljs-keyword">if</span> err2 != <span class="hljs-literal">nil</span> {
                    <span class="hljs-built_in">panic</span>(err2)
                }

                result.Photos = <span class="hljs-built_in">append</span>(result.Photos, photo)
            }

            <span class="hljs-keyword">return</span> c.JSON(http.StatusOK, result)
        }
    }

    <span class="hljs-function"><span class="hljs-keyword">func</span> <span class="hljs-title">uploadPhoto</span><span class="hljs-params">(db *sql.DB)</span> <span class="hljs-title">echo</span>.<span class="hljs-title">HandlerFunc</span></span> {
        <span class="hljs-keyword">return</span> <span class="hljs-function"><span class="hljs-keyword">func</span><span class="hljs-params">(c echo.Context)</span> <span class="hljs-title">error</span></span> {
            file, err := c.FormFile(<span class="hljs-string">"file"</span>)
            <span class="hljs-keyword">if</span> err != <span class="hljs-literal">nil</span> {
                <span class="hljs-keyword">return</span> err
            }

            src, err := file.Open()
            <span class="hljs-keyword">if</span> err != <span class="hljs-literal">nil</span> {
                <span class="hljs-keyword">return</span> err
            }

            <span class="hljs-keyword">defer</span> src.Close()

            filePath := <span class="hljs-string">"./public/uploads/"</span> + file.Filename
            fileSrc := <span class="hljs-string">"http://127.0.0.1:9000/uploads/"</span> + file.Filename

            dst, err := os.Create(filePath)
            <span class="hljs-keyword">if</span> err != <span class="hljs-literal">nil</span> {
                <span class="hljs-built_in">panic</span>(err)
            }

            <span class="hljs-keyword">defer</span> dst.Close()

            <span class="hljs-keyword">if</span> _, err = io.Copy(dst, src); err != <span class="hljs-literal">nil</span> {
                <span class="hljs-built_in">panic</span>(err)
            }

            stmt, err := db.Prepare(<span class="hljs-string">"INSERT INTO photos (src) VALUES(?)"</span>)
            <span class="hljs-keyword">if</span> err != <span class="hljs-literal">nil</span> {
                <span class="hljs-built_in">panic</span>(err)
            }

            <span class="hljs-keyword">defer</span> stmt.Close()

            result, err := stmt.Exec(fileSrc)
            <span class="hljs-keyword">if</span> err != <span class="hljs-literal">nil</span> {
                <span class="hljs-built_in">panic</span>(err)
            }

            insertedId, err := result.LastInsertId()
            <span class="hljs-keyword">if</span> err != <span class="hljs-literal">nil</span> {
                <span class="hljs-built_in">panic</span>(err)
            }

            photo := Photo{
                Src: fileSrc,
                ID:  insertedId,
            }

            <span class="hljs-keyword">return</span> c.JSON(http.StatusOK, photo)
        }
    }
In the getPhotos method, we are simply running the query to fetch all the photos from the database and returning them as a JSON response to the client. In the uploadPhoto method we first get the file to be uploaded then upload them to the server and then we run the query to insert a new record in the photos table with the newly uploaded photo. We also return a JSON response from that function.
Adding realtime support to our Go application
The next thing we want to do is trigger an event when a new photo is uploaded to the server. For this, we will be using the Pusher Go HTTP library.
In the main.go file paste the following above the type definitions for the Photo and PhotoCollection:
    <span class="hljs-keyword">var</span> client = pusher.Client{
        AppId:   <span class="hljs-string">"PUSHER_APP_ID"</span>,
        Key:     <span class="hljs-string">"PUSHER_APP_KEY"</span>,
        Secret:  <span class="hljs-string">"PUSHER_APP_SECRET"</span>,
        Cluster: <span class="hljs-string">"PUSHER_APP_CLUSTER"</span>,
        Secure:  <span class="hljs-literal">true</span>,
    }
This will create a new Pusher client instance. We can then use this instance to trigger notifications to different channels we want. Remember to replace the PUSHER_APP_* keys with the keys provided when you created your Pusher application earlier.
Next, go to the uploadPhoto function in the main.go file and right before the return statement at the bottom of the function, paste the following code:
client.Trigger(<span class="hljs-string">"photo-stream"</span>, <span class="hljs-string">"new-photo"</span>, photo)This is the code that triggers a new event when a new photo is uploaded to our application.
That will be all for our Go application. At this point, you can build your application and compile it into a binary using the go build command. However, for this tutorial we will just run the binary temporarily:
$ go run main.go

Building our frontend
The next thing we want to do is build out our frontend. We will be using the Vue.js framework and the Axios library to send requests.
Open the index.html file and in there paste the following code:
    <span class="hljs-meta"><!doctype html></span>
    <span class="hljs-tag"><<span class="hljs-name">html</span> <span class="hljs-attr">lang</span>=<span class="hljs-string">"en"</span>></span>
    <span class="hljs-tag"><<span class="hljs-name">head</span>></span>
        <span class="hljs-tag"><<span class="hljs-name">meta</span> <span class="hljs-attr">charset</span>=<span class="hljs-string">"utf-8"</span>></span>
        <span class="hljs-tag"><<span class="hljs-name">meta</span> <span class="hljs-attr">name</span>=<span class="hljs-string">"viewport"</span> <span class="hljs-attr">content</span>=<span class="hljs-string">"width=device-width, initial-scale=1, shrink-to-fit=no"</span>></span>
        <span class="hljs-tag"><<span class="hljs-name">link</span> <span class="hljs-attr">rel</span>=<span class="hljs-string">"stylesheet"</span> <span class="hljs-attr">href</span>=<span class="hljs-string">"https://stackpath.bootstrapcdn.com/bootstrap/4.1.1/css/bootstrap.min.css"</span>></span>
        <span class="hljs-tag"><<span class="hljs-name">title</span>></span>Photo Feed<span class="hljs-tag"></<span class="hljs-name">title</span>></span>
        <span class="hljs-tag"><<span class="hljs-name">style</span> <span class="hljs-attr">type</span>=<span class="hljs-string">"text/css"</span>></span><span class="css">
            <span class="hljs-selector-id">#photoFile</span> { <span class="hljs-attribute">display</span>: none; }
            <span class="hljs-selector-id">#app</span> <span class="hljs-selector-tag">img</span> { <span class="hljs-attribute">max-width</span>: <span class="hljs-number">100%</span>; }
            <span class="hljs-selector-class">.image-row</span> { <span class="hljs-attribute">margin</span>: <span class="hljs-number">20px</span> <span class="hljs-number">0</span>; }
            <span class="hljs-selector-class">.image-row</span> <span class="hljs-selector-class">.thumbnail</span> { <span class="hljs-attribute">padding</span>: <span class="hljs-number">2px</span>; <span class="hljs-attribute">border</span>: <span class="hljs-number">1px</span> solid <span class="hljs-number">#d9d9d9</span>; }
        </span><span class="hljs-tag"></<span class="hljs-name">style</span>></span>
    <span class="hljs-tag"></<span class="hljs-name">head</span>></span>
    <span class="hljs-tag"><<span class="hljs-name">body</span>></span>
        <span class="hljs-tag"><<span class="hljs-name">div</span> <span class="hljs-attr">id</span>=<span class="hljs-string">"app"</span>></span>

            <span class="hljs-tag"><<span class="hljs-name">nav</span> <span class="hljs-attr">class</span>=<span class="hljs-string">"navbar navbar-expand-lg navbar-light bg-light"</span>></span>
                <span class="hljs-tag"><<span class="hljs-name">a</span> <span class="hljs-attr">class</span>=<span class="hljs-string">"navbar-brand"</span> <span class="hljs-attr">href</span>=<span class="hljs-string">"#"</span>></span>GoFoto<span class="hljs-tag"></<span class="hljs-name">a</span>></span>
                <span class="hljs-tag"><<span class="hljs-name">div</span>></span>
                    <span class="hljs-tag"><<span class="hljs-name">ul</span> <span class="hljs-attr">class</span>=<span class="hljs-string">"navbar-nav mr-auto"</span>></span>
                        <span class="hljs-tag"><<span class="hljs-name">li</span> <span class="hljs-attr">class</span>=<span class="hljs-string">"nav-item active"</span>></span>
                            <span class="hljs-tag"><<span class="hljs-name">a</span> <span class="hljs-attr">class</span>=<span class="hljs-string">"nav-link"</span> <span class="hljs-attr">v-on:click</span>=<span class="hljs-string">"filePicker"</span> <span class="hljs-attr">href</span>=<span class="hljs-string">"#"</span>></span>Upload<span class="hljs-tag"></<span class="hljs-name">a</span>></span>
                            <span class="hljs-tag"><<span class="hljs-name">input</span> <span class="hljs-attr">type</span>=<span class="hljs-string">"file"</span> <span class="hljs-attr">id</span>=<span class="hljs-string">"photoFile"</span> <span class="hljs-attr">ref</span>=<span class="hljs-string">"myFiles"</span> @<span class="hljs-attr">change</span>=<span class="hljs-string">"upload"</span> <span class="hljs-attr">name</span>=<span class="hljs-string">"file"</span> /></span>
                        <span class="hljs-tag"></<span class="hljs-name">li</span>></span>
                    <span class="hljs-tag"></<span class="hljs-name">ul</span>></span>
                <span class="hljs-tag"></<span class="hljs-name">div</span>></span>
            <span class="hljs-tag"></<span class="hljs-name">nav</span>></span>

            <span class="hljs-tag"><<span class="hljs-name">div</span> <span class="hljs-attr">class</span>=<span class="hljs-string">"container"</span>></span>
                <span class="hljs-tag"><<span class="hljs-name">div</span> <span class="hljs-attr">class</span>=<span class="hljs-string">"row justify-content-md-center"</span> <span class="hljs-attr">id</span>=<span class="hljs-string">"loading"</span> <span class="hljs-attr">v-if</span>=<span class="hljs-string">"loading"</span>></span>
                    <span class="hljs-tag"><<span class="hljs-name">div</span> <span class="hljs-attr">class</span>=<span class="hljs-string">"col-xs-12"</span>></span>
                        Loading photos...
                    <span class="hljs-tag"></<span class="hljs-name">div</span>></span>
                <span class="hljs-tag"></<span class="hljs-name">div</span>></span>
                <span class="hljs-tag"><<span class="hljs-name">div</span> <span class="hljs-attr">class</span>=<span class="hljs-string">"row justify-content-md-center image-row"</span> <span class="hljs-attr">v-for</span>=<span class="hljs-string">"photo in photos"</span>></span>
                    <span class="hljs-tag"><<span class="hljs-name">div</span> <span class="hljs-attr">class</span>=<span class="hljs-string">"col col-lg-4 col-md-6 col-xs-12"</span>></span>
                        <span class="hljs-tag"><<span class="hljs-name">img</span> <span class="hljs-attr">class</span>=<span class="hljs-string">"thumbnail"</span> <span class="hljs-attr">:src</span>=<span class="hljs-string">"photo.src"</span> <span class="hljs-attr">alt</span>=<span class="hljs-string">""</span> /></span>
                    <span class="hljs-tag"></<span class="hljs-name">div</span>></span>
                <span class="hljs-tag"></<span class="hljs-name">div</span>></span>
            <span class="hljs-tag"></<span class="hljs-name">div</span>></span>

        <span class="hljs-tag"></<span class="hljs-name">div</span>></span>
        <span class="hljs-tag"><<span class="hljs-name">script</span> <span class="hljs-attr">src</span>=<span class="hljs-string">"//js.pusher.com/4.0/pusher.min.js"</span>></span><span class="undefined"></span><span class="hljs-tag"></<span class="hljs-name">script</span>></span>
        <span class="hljs-tag"><<span class="hljs-name">script</span> <span class="hljs-attr">src</span>=<span class="hljs-string">"https://unpkg.com/axios/dist/axios.min.js"</span>></span><span class="undefined"></span><span class="hljs-tag"></<span class="hljs-name">script</span>></span>
        <span class="hljs-tag"><<span class="hljs-name">script</span> <span class="hljs-attr">src</span>=<span class="hljs-string">"https://cdn.jsdelivr.net/npm/vue@2.5.16/dist/vue.js"</span>></span><span class="undefined"></span><span class="hljs-tag"></<span class="hljs-name">script</span>></span>
    <span class="hljs-tag"></<span class="hljs-name">body</span>></span>
    <span class="hljs-tag"></<span class="hljs-name">html</span>></span>
In the HTML file above we have defined the design for our photostream. We are using Bootstrap 4 and we included the CSS in the HTML above. We are also using the Axios library, Pusher library, and Vue framework. We included the links to the scripts at the bottom of the HTML document.
Next let’s add the Vue.js code. In the HTML file, add the following code right before the closing body tag:
    <script type=<span class="hljs-string">"text/javascript"</span>>
        <span class="hljs-keyword">new</span> Vue({
            <span class="hljs-attr">el</span>: <span class="hljs-string">'#app'</span>,
            <span class="hljs-attr">data</span>: {
                <span class="hljs-attr">photos</span>: [],
                <span class="hljs-attr">loading</span>: <span class="hljs-literal">true</span>,
            },
            mounted() {
                <span class="hljs-keyword">const</span> pusher = <span class="hljs-keyword">new</span> Pusher(<span class="hljs-string">'PUSHER_APP_KEY'</span>, {
                    <span class="hljs-attr">cluster</span>: <span class="hljs-string">'PUSHER_APP_CLUSTER'</span>,
                    <span class="hljs-attr">encrypted</span>: <span class="hljs-literal">true</span>
                });

                <span class="hljs-keyword">let</span> channel = pusher.subscribe(<span class="hljs-string">'photo-stream'</span>)

                channel.bind(<span class="hljs-string">'new-photo'</span>, data => <span class="hljs-keyword">this</span>.photos.unshift(data));

                axios.get(<span class="hljs-string">'/photos'</span>).then(<span class="hljs-function"><span class="hljs-params">res</span> =></span> {
                    <span class="hljs-keyword">this</span>.loading = <span class="hljs-literal">false</span>
                    <span class="hljs-keyword">this</span>.photos = res.data.items ? res.data.items : []
                })
            },
            <span class="hljs-attr">methods</span>: {
                <span class="hljs-attr">filePicker</span>: <span class="hljs-function"><span class="hljs-keyword">function</span> (<span class="hljs-params"></span>) </span>{
                    <span class="hljs-keyword">let</span> elem = <span class="hljs-built_in">document</span>.getElementById(<span class="hljs-string">'photoFile'</span>);

                    <span class="hljs-keyword">if</span> (elem && <span class="hljs-built_in">document</span>.createEvent) {
                        <span class="hljs-keyword">let</span> evt = <span class="hljs-built_in">document</span>.createEvent(<span class="hljs-string">"MouseEvents"</span>);
                        evt.initEvent(<span class="hljs-string">"click"</span>, <span class="hljs-literal">true</span>, <span class="hljs-literal">false</span>);
                        elem.dispatchEvent(evt);
                    }
                },
                <span class="hljs-attr">upload</span>: <span class="hljs-function"><span class="hljs-keyword">function</span> (<span class="hljs-params"></span>) </span>{
                    <span class="hljs-keyword">let</span> data = <span class="hljs-keyword">new</span> FormData();
                    data.append(<span class="hljs-string">'file'</span>, <span class="hljs-keyword">this</span>.$refs.myFiles.files[<span class="hljs-number">0</span>]);

                    axios.post(<span class="hljs-string">'/photos'</span>, data).then(<span class="hljs-function"><span class="hljs-params">res</span> =></span> <span class="hljs-built_in">console</span>.log(res))
                }
            }
        });
    <span class="xml"><span class="hljs-tag"></<span class="hljs-name">script</span>></span></span>
Above we created a Vue instance and stored the properties photos and loading. The photos property stores the photo list and the loading just holds a boolean that indicates if the photos are loading or not.
In the mounted method we create an instance of our Pusher library. We then listen on the photo-stream channel for the new-photo event. When the event is triggered we append the new photo from the event to the photos list. We also send a GET request to /photos to fetch all the photos from the API. Replace the PUSHER_APP_* keys with the one from your Pusher dashboard.
In the methods property, we added a few methods. The filePicker is triggered when the ‘Upload’ button is pressed on the UI. It triggers a file picker that allows the user to upload photos. The upload method takes the uploaded file and sends a POST request with the file to the API for processing.
That’s all for the frontend, you can save the file and head over to your web browser. Visit http://127.0.0.1:9000 to see your application in action.
Here’s how it will look again:
Conclusion
In this article, we have been able to demonstrate how you can use Pusher Channels in your Go application to provide realtime features for your application. As seen from the code samples above, it is very easy to get started with Pusher Channels. Check the documentation to see other ways you can use Pusher Channels to provide realtime features to your users.
The source code for this application is available on GitHub.
This post first appeared on the Pusher blog.


Top comments (0)