
I’m a Developer Evangelist at Stream, and API for Feeds and Chat, and I have the luxury of playing around with our various tools, amazing UI Kits, and new products! For many years, Stream has been the leading provider of feeds as a service, powering the feeds for over 500+ million end users. Over the last few months, the team has been hard at work on a new product offering — Chat.
In this tutorial, I’ll walk you through how to build a simple messenger style app with React Native, Gifted Chat (React Native Chat Components by Stream are currently in beta), Serverless, and of course, Chat by Stream. To add to the mix, I’ll introduce a backend Lambda function that will auto-respond with Chuck Norris jokes and facts provided by a third-party API.
For the heavy lifting, we’ll be using Stream Chat JS, a JavaScript SDK that communicates directly with the Stream API. If you're interested in checking out an awesome tutorial on Stream Chat, have a look here.
I should also point out that I’ll be using macOS and iOS so the tutorial may be slightly off if you are using Windows or Linux.
To follow along with this post, make sure that you’ve installed and/or set up the following:
Looking for the codebase? You can find the open-source code here. How about a quick demo? I’ve got that too! Have a look at the demo on Appetize.
Let’s have some fun! 🏂
1. Configure Chat by Stream
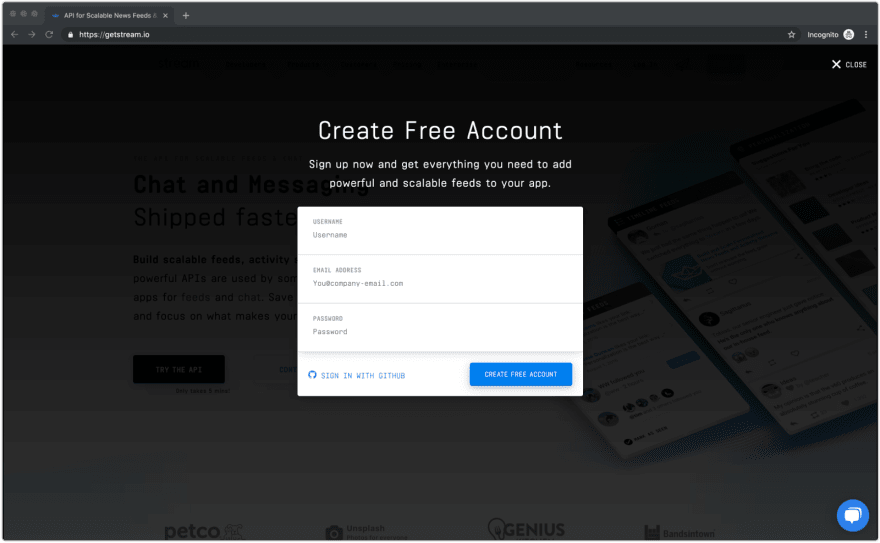
Head over to https://getstream.io and click on the “Sign Up” button — top right of the website. Follow the prompts from there.
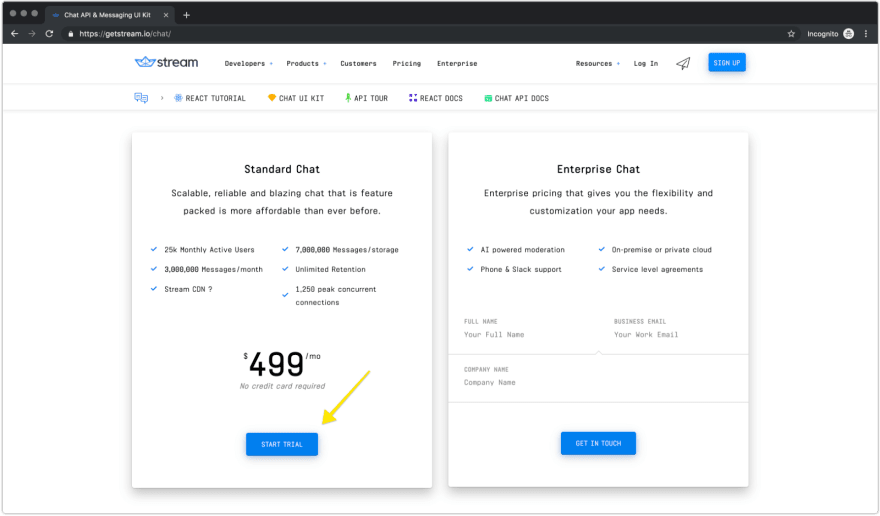
Once you are redirected, head to https://getstream.io/chat/#pricing and click on the “Start Trial” button — this will enable chat for your account on a trial basis (14 days). Once the trial is set, you’re almost there!
Head back to the dashboard and click on your application. The dashboard defaults to “Feeds”, so please click on the “Chat” button at the top.
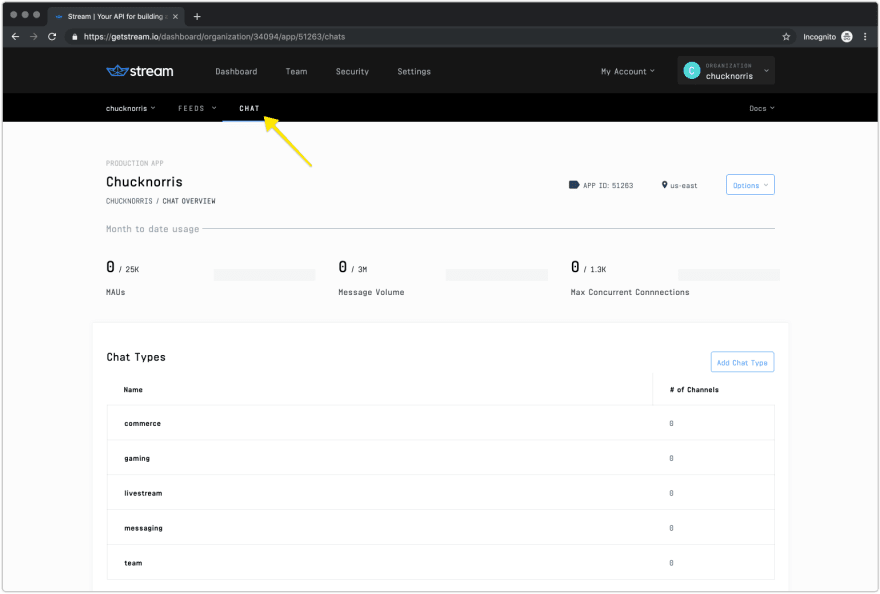
From here, if you scroll down, you will see the various settings for your newly chat enabled app. Make sure to keep this open in a new tab — you will need the Key, Secret (bottom), and App ID (top) from this page.
If you are interested in a pricing and product comparison for Stream Chat, have a look at this.
2. Setup Serverless
When you only have a couple of required endpoints, similar to this build, Serverless often makes the most sense. Spinning up servers can take quite a bit of time and can be pretty pricey. I’m not saying that a Serverless environment is for everyone and everything, however, I am saying that if you’re building a tiny little API, a Serverless environment is definitely the way to go.
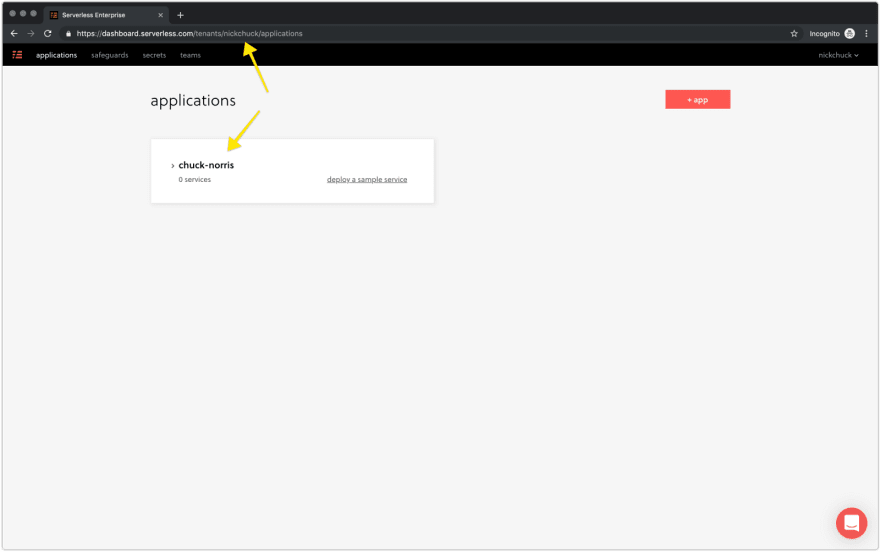
Head over to https://dashboard.serverless.com and create a new account. Follow the onboarding sequence (email verification, username selection, app creation, etc.). Once your application is created, save the tenant name (e.g. nick-chuck username = nickchuck tenant), and also save the app name — we’ll need both of these in the next couple of steps.
3. Create a React Native App with Expo
Expo simplifies the process of building a React Native app through the use of the Expo APIs. Technically, we don’t need it at all; however, if you are looking to quickly throw something together and potentially get a build out the door for iOS or Android, Expo will be the fastest way to do so. After all, you can always eject from your Expo project.
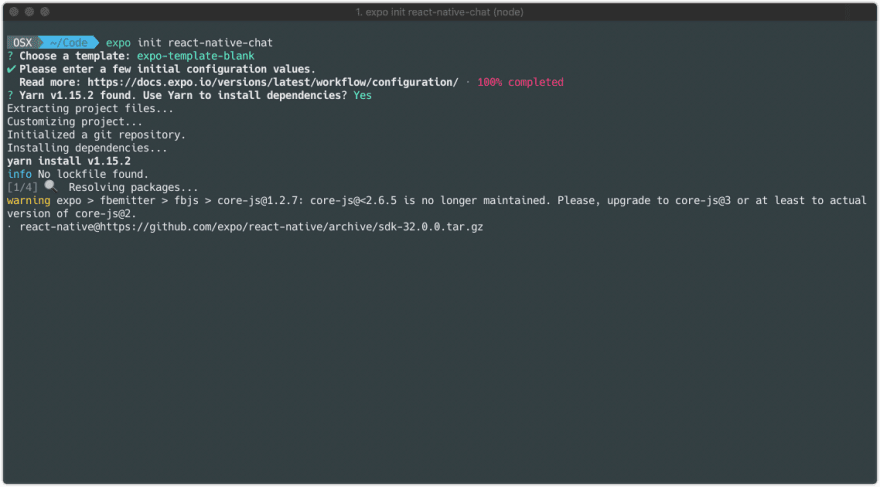
To create your app, open your terminal and head over to a directory of your choice (I’ll be in ~/Code). Once you’re all set, run the following command to scaffold the project.
$ expo init react-native-chat-chucky
Follow the prompts from the Expo CLI and choose “blank” for the tabs vs. blank question. Once you’re finished with the questions, Expo will generate the directory and install the necessary dependencies using yarn or npm. Your terminal should look something like this:
All set! 👏
4. Add Chat SDK to React Native Chat
Next, let’s go ahead and install all of the required dependencies using the command below. I’ll be using yarn for this, but if you chose npm during your initial setup, please use that to avoid mixed lock files.
$ yarn add axios md5 react-native-gifted-chat react-native-iphone-x-helper react-native-parsed-text react-router-native stream-chat
5. Add Default Message
To display the chat interface, we’re using react-native-gifted-chat, an awesome UI library specifically designed to handle chat applications. With Gifted Chat, we can set the UI aside and get up and running quickly!
To kick off an initial message, we’ll need to create a new directory and a messages file. The UI is already hooked up to require this file, so it’s a matter of creating it and dropping in a custom message.
$ mkdir data && touch messages.js
Once you’ve completed that step, past the following snippet into the file and save.
module.exports = [
  {
    _id: Math.round(Math.random() * 1000000),
    text: "Say something... I'll tell you some fun facts! 🤣",
    createdAt: Date.now(),
    user: {
      _id: "chuck",
      name: "Chuck Norris"
    }
  },
  {
    _id: Math.round(Math.random() * 1000000),
    text: "Chat with Chuck!",
    createdAt: Date.now(),
    system: true
  }
];
Good to go! 🚀
6. Add Routing & Screens to React Native
We have all of the necessary dependencies in place, so let’s move on and tie everything together!
Modify your App.js file to contain the following code snippet.
import React, { Component } from "react";
import { KeyboardAvoidingView, StyleSheet } from "react-native";
import { NativeRouter as Router, Route, Switch } from "react-router-native";

import Chat from "./screens/Chat";
import Login from "./screens/Login";

export default class App extends Component {
  render() {
    return (
      <KeyboardAvoidingView behavior="padding" enabled style={styles.root}>
        <Router>
          <Switch>
            <Route exact path="/chat" component={Chat} />
            <Route path="/" component={Login} />
          </Switch>
        </Router>
      </KeyboardAvoidingView>
    );
  }
}

const styles = StyleSheet.create({
  root: {
    flex: 1,
    backgroundColor: "white"
  }
});
Create a directory called screens and create two files within — Chat.js and Login.js.
$ mkdir screens && cd screens && touch Chat.js && touch Login.js
Once those two files are in place, we’ll need to populate them! Drop the code shown below into the appropriate files.
Chat.js
import React, { Component } from "react";
import { Constants, LinearGradient } from "expo";
import {
  ActivityIndicator,
  Platform,
  SafeAreaView,
  StyleSheet,
  Text,
  View
} from "react-native";
import {
  GiftedChat,
  Bubble,
  InputToolbar,
  SystemMessage
} from "react-native-gifted-chat";
import { StreamChat } from "stream-chat";
import { isIphoneX, getBottomSpace } from "react-native-iphone-x-helper";
import axios from "axios";
import md5 from "md5";

const client = new StreamChat("<YOUR_STREAM_APP_ID>");

export default class Chat extends Component {
  constructor(props) {
    super(props);

    this.state = {
      messages: [],
      typingText: null,
      user: null,
      token: null,
      channel: null
    };

    this._isMounted = false;
    this._isAlright = null;
  }

  componentWillMount() {
    this._isMounted = true;

    this.setState({
      messages: require("../data/messages.js")
    });
  }

  async componentDidMount() {
    const { location } = this.props;
    const user = location.state.user;

    try {
      const init = await axios.post("<YOUR_SERVERLESS_INVOCATION_URL>", {
        name: user.name,
        email: user.email
      });

      await client.setUser(init.data.user, init.data.token);

      const channel = client.channel("messaging", md5(user.email), {
        name: "Chat with Chuck Norris",
        members: ["chuck", init.data.user.id]
      });

      await channel.create();
      await channel.watch();

      channel.on(event => this.incoming(event));

      this.setState({
        user: init.data.user,
        token: init.data.token,
        channel
      });
    } catch (error) {
      console.log(error);
    }
  }

  componentWillUnmount() {
    this._isMounted = false;
  }

  incoming(evt) {
    if (evt.type === "message.new" && evt.user.id !== this.state.user.id) {
      this.onReceive(evt);
    }
  }

  onSend = async (messages = []) => {
    try {
      await this.state.channel.sendMessage({
        text: messages[0].text
      });

      this.setState(previousState => {
        return {
          messages: GiftedChat.append(previousState.messages, messages),
          typingText: "Chuck Norris is typing..." // mock typing indicator
        };
      });
    } catch (error) {
      console.log(error);
    }
  };

  onReceive = data => {
    this.setState(previousState => {
      return {
        messages: GiftedChat.append(previousState.messages, {
          _id: data.message.id,
          text: data.message.text,
          createdAt: data.message.created_at,
          user: {
            _id: data.message.user.id,
            name: data.message.user.name
          }
        }),
        typingText: null
      };
    });
  };

  renderBubble = props => {
    return (
      <Bubble
        {...props}
        wrapperStyle={{
          left: {
            backgroundColor: "#f0f0f0"
          }
        }}
      />
    );
  };

  renderInputToolbar = props => {
    if (isIphoneX()) {
      return (
        <SafeAreaView>
          <InputToolbar {...props} />
        </SafeAreaView>
      );
    }
    return <InputToolbar {...props} />;
  };

  renderSystemMessage = props => {
    return (
      <SystemMessage
        {...props}
        containerStyle={{
          marginBottom: 15
        }}
        textStyle={{
          fontSize: 14
        }}
      />
    );
  };

  renderFooter = props => {
    if (this.state.typingText) {
      return (
        <View style={styles.footerContainer}>
          <Text style={styles.footerText}>{this.state.typingText}</Text>
        </View>
      );
    }

    return null;
  };

  render() {
    if (!this.state.user) {
      return (
        <View style={styles.loader}>
          <ActivityIndicator />
        </View>
      );
    }

    const { user } = this.state;

    return (
      <>
        <GiftedChat
          messages={this.state.messages}
          onSend={this.onSend}
          user={{
            _id: user.id // sent messages should have same user._id
          }}
          renderBubble={this.renderBubble}
          renderSystemMessage={this.renderSystemMessage}
          renderInputToolbar={this.renderInputToolbar}
          renderFooter={this.renderFooter}
          listViewProps={this._listViewProps}
        />
        <LinearGradient
          pointerEvents="none"
          colors={this._gradient}
          style={styles.header}
        />
      </>
    );
  }

  get _gradient() {
    return [
      "rgba(255, 255, 255, 1)",
      "rgba(255, 255, 255, 1)",
      "rgba(255, 255, 255, 0)"
    ];
  }

  get _listViewProps() {
    return {
      style: styles.listViewStyle,
      contentContainerStyle: styles.contentContainerStyle
    };
  }
}

const styles = StyleSheet.create({
  footerContainer: {
    marginTop: 5,
    marginLeft: 10,
    marginRight: 10,
    marginBottom: 10
  },
  footerText: {
    fontSize: 14,
    color: "#aaa"
  },
  header: {
    height: Constants.statusBarHeight + 64,
    position: "absolute",
    top: 0,
    left: 0,
    right: 0
  },
  listViewStyle: {
    flex: 1,
    marginBottom: isIphoneX() ? getBottomSpace() : 0
  },
  loader: {
    flex: 1,
    justifyContent: "center",
    alignItems: "center"
  },
  contentContainerStyle: {
    paddingTop: 24
  }
});
Login.js
import React, { Component } from "react";
import {
  Image,
  SafeAreaView,
  StyleSheet,
  Text,
  TextInput,
  TouchableOpacity,
  View
} from "react-native";
import { Link } from "react-router-native";

const hitSlop = { top: 24, right: 24, bottom: 24, left: 24 };

class Login extends Component {
  constructor(props) {
    super(props);

    this.state = {
      email: "",
      name: ""
    };
  }

  _handleChange = name => value => {
    this.setState({
      [name]: value
    });
  };

  _renderLink = props => (
    <TouchableOpacity disabled={!this._canLogin} hitSlop={hitSlop} {...props} />
  );

  render() {
    const { email, name } = this.state;
    return (
      <SafeAreaView style={styles.root}>
        <View style={styles.brand}>
          <Image style={styles.logo} source={require("../images/chuck.png")} />
          <Text style={styles.name}>Chuck Bot</Text>
        </View>
        <TextInput
          style={styles.input}
          placeholder="Name"
          onChangeText={this._handleChange("name")}
          value={name}
        />
        <TextInput
          autoCapitalize="none"
          style={styles.input}
          placeholder="Email"
          onChangeText={this._handleChange("email")}
          value={email}
        />
        <View style={styles.btnWrapper}>
          <Link to={this._to} component={this._renderLink}>
            <Text style={this._labelStyle}>Chat with Chuck</Text>
          </Link>
        </View>
      </SafeAreaView>
    );
  }

  get _to() {
    return {
      pathname: "/chat",
      state: {
        user: this.state
      }
    };
  }

  get _canLogin() {
    const { email, name } = this.state;
    return Boolean(name) && Boolean(email);
  }

  get _labelStyle() {
    return {
      ...styles.btnLabel,
      color: this._canLogin ? "rgb(0, 122, 255)" : "#eeeeee"
    };
  }
}

export default Login;

const styles = StyleSheet.create({
  btnLabel: {
    fontSize: 16,
    color: "rgb(0, 122, 255)"
  },
  btnWrapper: {
    alignItems: "center",
    justifyContent: "center",
    paddingVertical: 32
  },
  brand: {
    alignItems: "center",
    justifyContent: "center",
    marginBottom: 32
  },
  input: {
    flexDirection: "row",
    fontSize: 20,
    fontWeight: "600",
    marginVertical: 8,
    borderRadius: 8,
    borderColor: "#f9f9f9",
    borderWidth: 2,
    padding: 16,
    width: 343
  },
  logo: {
    width: 80,
    height: 112
  },
  name: {
    fontSize: 20,
    fontWeight: "800",
    marginTop: 16
  },
  root: {
    flex: 1,
    paddingHorizontal: 16,
    justifyContent: "center",
    alignItems: "center"
  }
});
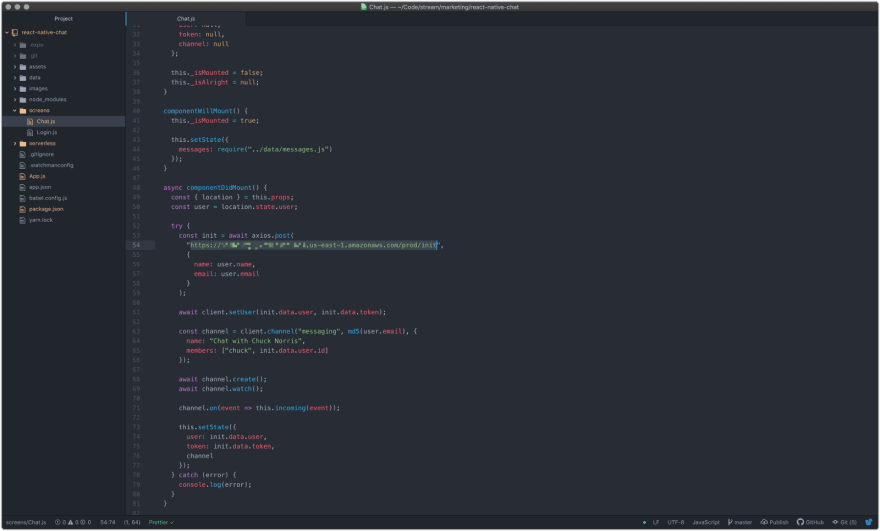
On line 22, drop in the Stream App ID from your Stream Dashboard. On line 53 you will need to add your Lambda’s endpoint provided by AWS API Gateway — don’t worry, you do not have this just yet, we’ll cover it in an upcoming section.
Woo! Almost there! 👨🚀
7. Add Serverless Directory & Files
Now that you have successfully scaffolded a React Native application using Expo, move into the directory (e.g. react-native-chat-chucky).
$ cd react-native-chat-chucky
First things first, let’s go ahead and create a new directory called serverless and then move into that directory so we can install a few dependencies.
$ mkdir serverless && cd serverless
Create a new package.json file.
$ touch package.json
Then, copy the contents of the example snippet below into your package.json file.
{
  "name": "stream-react-chat",
  "version": "1.0.0",
  "description": "Facilitates communication between RN and Stream",
  "main": "handler.js",
  "license": "BSD-3-Clause",
  "private": false,
  "scripts": {
    "start": "sls offline",
    "deploy": "sls deploy"
  },
  "dependencies": {
    "@babel/runtime": "^7.3.1",
    "axios": "^0.18.0",
    "babel-runtime": "^6.26.0",
    "stream-chat": "^0.9.0",
    "uuid": "^3.3.2"
  },
  "devDependencies": {
    "babel-loader": "^8.0.5",
    "eslint": "^5.16.0",
    "eslint-plugin-import": "^2.17.2",
    "eslint-plugin-node": "^8.0.1",
    "eslint-plugin-promise": "^4.1.1",
    "prettier": "^1.17.0",
    "serverless-offline": "^4.9.4",
    "serverless-webpack": "^5.2.0",
    "webpack": "^4.30.0",
    "webpack-node-externals": "^1.7.2"
  }
}
After adding the package.json file, make sure to run yarn within the serverless directory to properly install the modules.
Once you have completed the steps above, you’ll want to copy/paste the following file contents into your serverless directory.
.eslintrc.json
{
  "plugins": ["babel"],
  "extends": ["eslint:recommended"],
  "rules": {
    "no-console": 0,
    "no-mixed-spaces-and-tabs": 1,
    "comma-dangle": 0,
    "no-unused-vars": 1,
    "eqeqeq": [2, "smart"],
    "no-useless-concat": 2,
    "default-case": 2,
    "no-self-compare": 2,
    "prefer-const": 2,
    "no-underscore-dangle": [2, { "allowAfterThis": true }],
    "object-shorthand": 1,
    "babel/no-invalid-this": 2,
    "array-callback-return": 2,
    "valid-typeof": 2,
    "arrow-body-style": 2,
    "require-await": 2,
    "react/prop-types": 0,
    "no-var": 2,
    "linebreak-style": [2, "unix"],
    "semi": [1, "always"]
  },
  "env": {
    "es6": true
  },
  "parser": "babel-eslint",
  "parserOptions": {
    "sourceType": "module",
    "ecmaVersion": 2018,
    "ecmaFeatures": {
      "modules": true
    }
  }
}
.prettierrc
{
  "trailingComma": "es5",
  "tabWidth": 4,
  "semi": true,
  "singleQuote": true
}
webpack.config.js
const path = require("path");
const slsw = require("serverless-webpack");
const nodeExternals = require("webpack-node-externals");

module.exports = {
  entry: slsw.lib.entries,
  target: "node",
  devtool: "source-map",
  mode: "production",
  externals: [nodeExternals()],
  optimization: {
    minimize: false
  },
  performance: {
    hints: false
  },
  module: {
    rules: [
      {
        test: /\.js$/,
        exclude: /node_modules/,
        use: [
          {
            loader: "babel-loader"
          }
        ]
      }
    ]
  }
};
serverless.yml
service: <YOUR_APP_NAME> # e.g. chuck-norris
app: <YOUR_APP_NAME> # e.g. chuck-norris
tenant: <YOUR_TENANT_NAME> # e.g. tenant

frameworkVersion: ">=1.32.0 <2.0.0"

provider:
  name: aws
  runtime: nodejs8.10
  stage: prod
  region: us-east-1
  memorySize: 3008
  timeout: 30
  environment:
    STREAM_KEY: "<YOUR_STREAM_KEY>"
    STREAM_SECRET: "<YOUR_STREAM_SECRET>"
    STREAM_APP_ID: "<YOUR_STREAM_APP_ID>"
functions:
  init:
    handler: handler.init
    events:
      - http:
          path: /init
          method: post
  reply:
    handler: handler.reply
    events:
      - http:
          path: /reply
          method: post

plugins:
  - serverless-webpack
  - serverless-offline

custom:
  webpack:
    packager: "yarn"
    webpackConfig: "webpack.config.js"
    includeModules:
      forceInclude:
        - "@babel/runtime"
  serverless-offline:
    port: 8000
At the top of your
serverless.ymlfile is where you will define your tenant name and app name saved from the Serverless Dashboard. In my case, I’m using nickchuck as my tenant name and chuck-norris as my app name.
Nice work! 👊
8. Setup AWS
There is a great deal of information on the web supporting how to do this. I’m going to provide the necessary steps, but it’s definitely something I recommend you read up on!
One crucial thing to note is that Serverless requires several different AWS IAM privileges. S3, CloudFormation, API Gateway, and Lambda to name a few. There are ways to scope the IAM privileges only to meet the necessary requirements which can be found here. I’ve found that while this is the most secure approach to take, it’s certainly not the fastest. I’ll make the recommendation that if this is a personal AWS account, save yourself some time and give your account “AdministratorAccess” privileges from IAM.
After setting up your AWS account and IAM privileges, use the aws-cli to specify your credentials in the command line (credentials can be found under IAM).
$ aws configure
The aws-cli will ask for your Access Key ID and Secret Access Key. It will also ask you a couple more (optional) questions so the AWS CLI can provision your profile correctly.
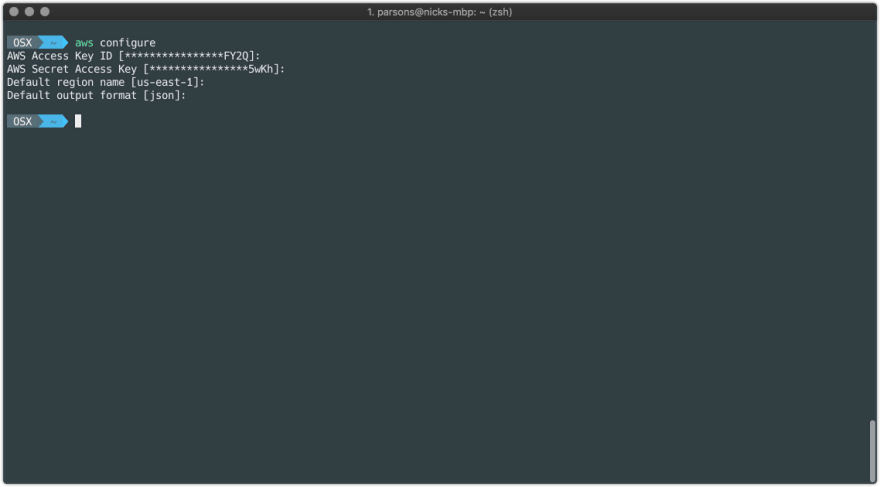
Need to install the aws-cli for the first time? It’s super easy on macOS. Just run brew install aws-cli and Homebrew will take care of the rest for you!
Good job! 🕺
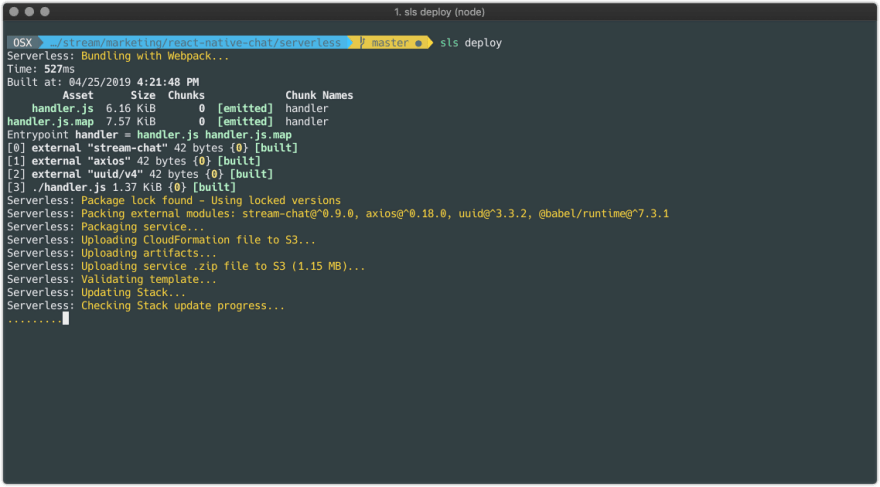
9. Deploy Your Serverless Build
With AWS configured and your AWS credentials securely stored on your machine, it’s time to deploy the Serverless build to Lambda! Navigate to your serverless directory within the React Native codebase and then run the following command!
If you have not installed the Serverless CLI, you can do so with npm install -g serverless.
$ sls deploy
The build will kick off, and you should start to see logging in real-time!
Run into an issue? Please drop detailed information in the comments at the end of this post and I’ll help you out!
Boom! 💥
10. Enable API Gateway to Start Serving Requests
Serverless has completed some heavy lifting for you, automating much of the build. Before Serverless was around and we only had Lambda to work with, things were definitely a bit temperamental and cumbersome at times. With a Lambda only workflow, we used to be required to zip up our codebase (node modules and all) and then upload the zip file manually to AWS. Yuck! 😫
To verify that your Lambda was provisioned along with API Gateway, login to AWS and search for API Gateway.
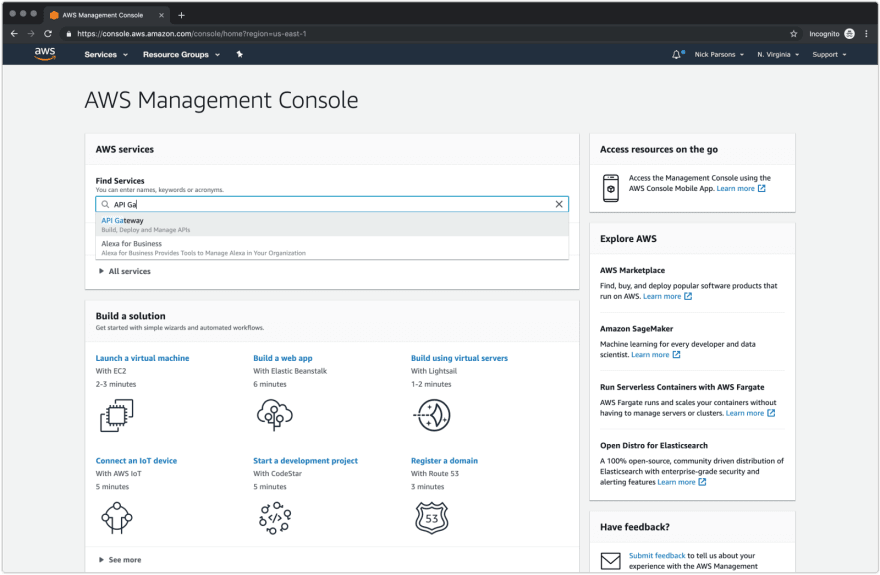
Click “API Gateway”, and you’ll be redirected to the dashboard with a list of your APIs. I have a few under my account, so it’s likely it will show something different. You’re ideally looking for something called prod-<YOUR_APP_NAME>. In my case, it is prod-react-native-app. Click on the correct API to view your resources.
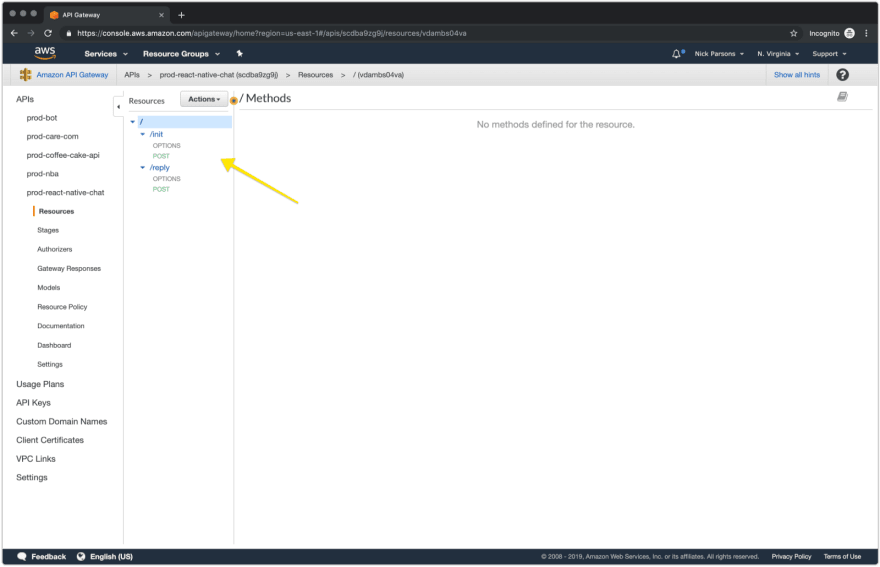
With the top root resource selected, click on the “Actions” dropdown and select “Deploy API”.
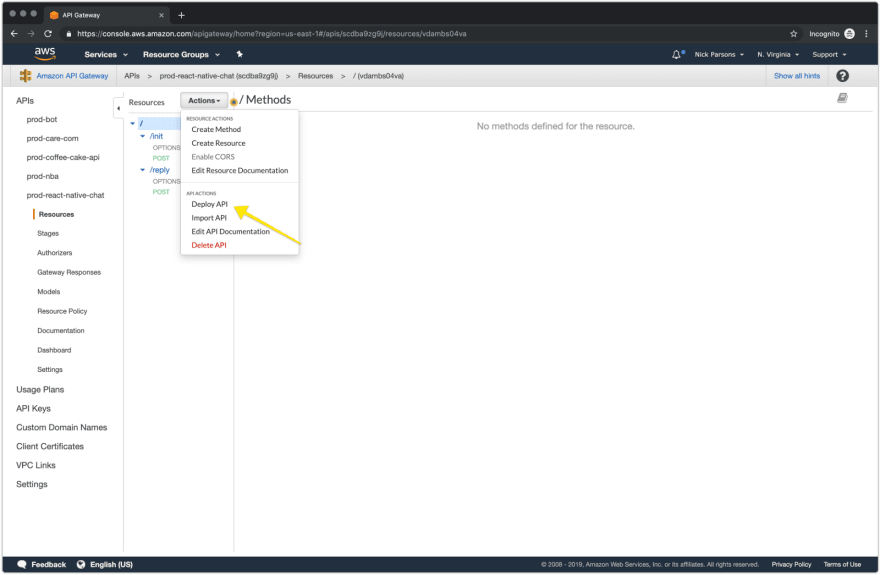
A modal will be displayed for you to specify your “stage”. If you don’t already have a “stage” in the dropdown, create a new one and call it whatever you would like. I opt-in for the name “prod” because when I push to Lambda, it’s generally been tested using serverless-offline and is production ready.
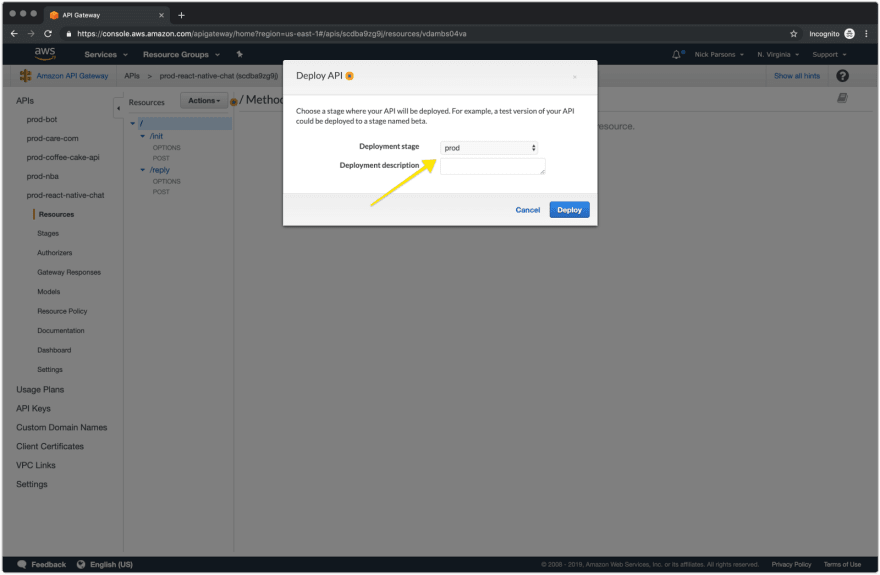
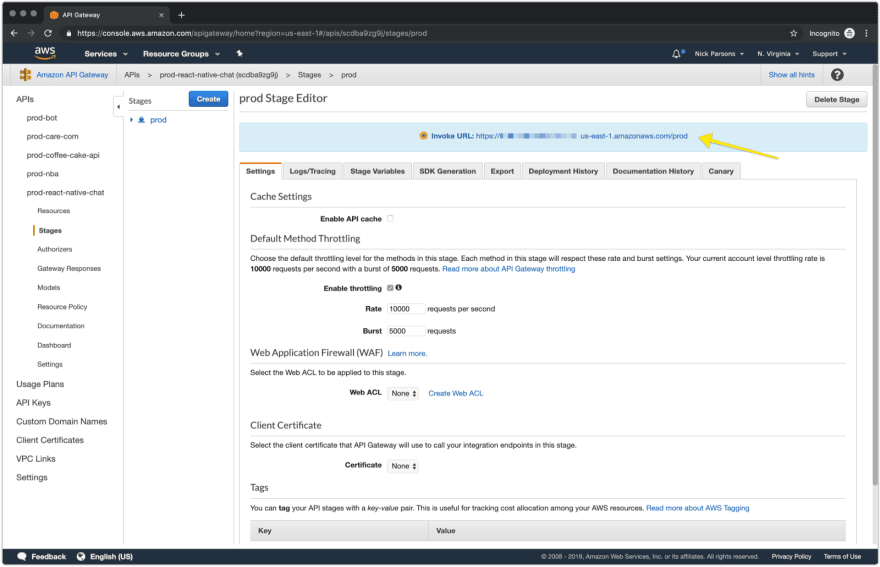
Click “Deploy” and your API will be deployed to API Gateway! Now, just capture the Invoke URL and save it for the next step!
Almost there! 🏎
11. Specify Init Endpoint in Chat.js
With your invocation URL saved, the init handler will be called by appending /init to the end of it. Go to Chat.js, line 53 and drop in your invocation URL from AWS API Gateway. This will handle fetching and generation of a server-side token which is required by Stream Chat.
With the proper URL in place, the code will make a POST to /init with the user information after the user has logged in (aka you!). The POST will return a serialized object with the user information as well as the user token that was generated.
Your endpoint is not currently secured by an API key. If you would like to enable an API key, it can be done on a route by route basis within API Gateway.
Bingo! 🎲
12. Set the Webhook Reply URL
Similar to the step above, the URL will be your invocation URL with /reply appended to the end. In the Stream Chat Dashboard, scroll down to the “Chat Events” section and enable the webhook by sliding the toggle until it is green. Then drop your URL in the input and click “Save”.
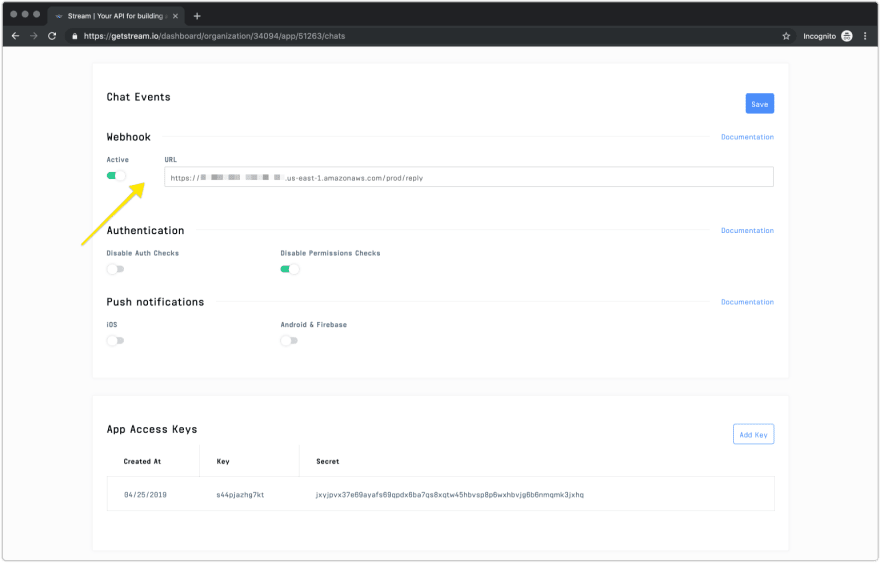
With the URL in place and the webhook activated, any chat events that are sent through the UI and off to Stream will be forwarded to your Lambda via POST. The body contains a lot of useful information, including the chat Identifier (CID), the user making the request, message body, and more.
If you look at the reply handler in serverless/handler.js, you’ll notice that we only send back a chat message if the event is coming from a user other than “chuck” — the preset user for Chuck Norris. It’s rather simple logic and shouldn’t be too confusing.
The Stream CLI also provides functionality for setting your Webhook URL — you can download the Stream CLI here. Please reference the documentation here.
One more step! 🚶
13. Fire Chat up Locally!
You’ve made it a long way. So far, we’ve built a custom React Native Chat UI with Expo and Gifted Chat, tied to Stream, set up an AWS Lambda with Serverless, and configured a webhook on the Stream Chat Dashboard. Whoa, that is a lot.
Now it’s time to have some fun with Chuck Norris and hear all of the exciting stories about his life.
Use the command line to start the iOS simulator (from your project directory).
$ expo start — ios
OR
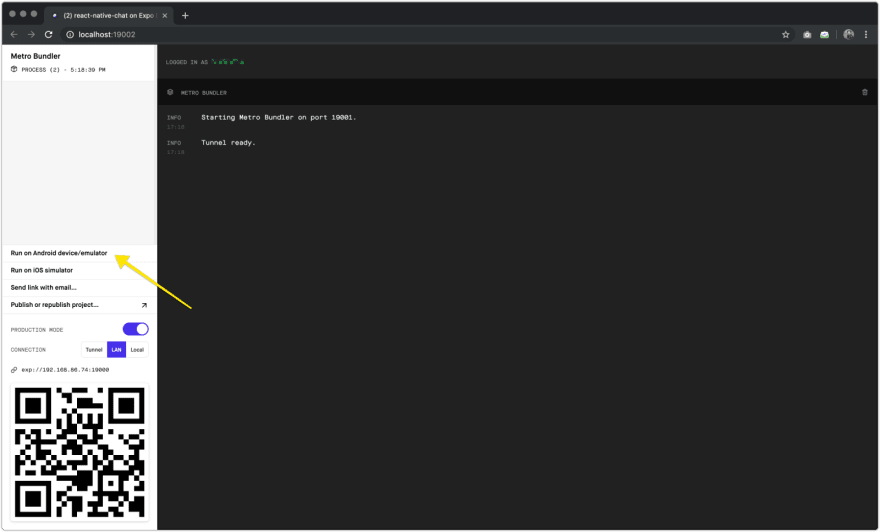
Drop into your root directory for React Native and run the command yarn start. Expo will open a new debugger window for you. Next, follow the steps below.
- Open Xcode
- Navigate to the Xcode menu bar until it drops down
- Locate “Open Developer Tools”, then click on “Simulator”
The iOS Simulator will boot and hang out in the top right-hand corner of your window. Next, focus on the debugger window that Expo opened. In the bottom left, click “Run on iOS Simulator”.
The application should load in the iOS Simulator, and you should see the login screen!
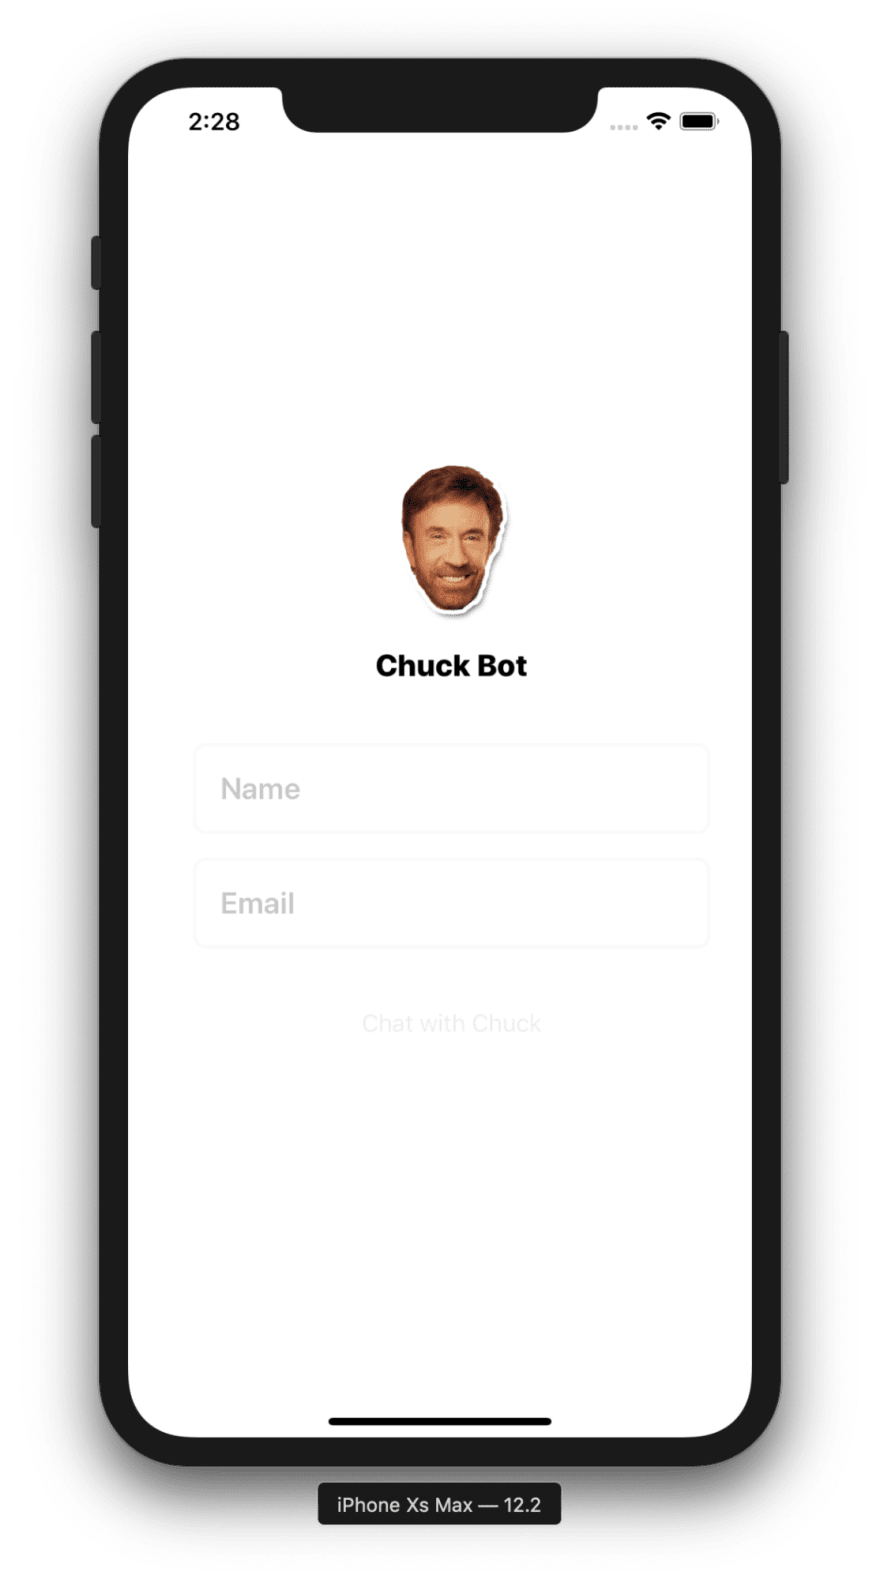
Type your name and email, and click the “Chat with Chuck” button at the bottom. The app will fire off its request to the server and retrieve a valid user token provided by your app on Stream. From here, it’s all about having fun!

Stuck at the build step? Drop some details in the comments below and I’d be happy to help you out!
If you’re looking to customize the app further or turn it into an APK (Android) or IPA (iOS), I recommend checking out the following links:
That’s a wrap! Chat by Stream provides the necessary backend infrastructure to build a chat product from scratch, leaving only the frontend up to you! Have a look at these React powered tutorials built on top of Stream Chat. If you're interested in building with another language/framework, Stream offers several SDKs as well as an iOS (Swift) SDK for those of you who enjoy native development on iOS.


Top comments (2)
Thanks for the tutorial, super helpful! In practice, a chat app needs way more basic features, such as photo & video messages, audio recordings, clickable URLs, typing indicators, etc. So the task gets way more complex - check out this React Native Chat to get an idea of how to achieve all these quickly.
Haha, this chuck norris post is epic: Chuck Norris counted to infinity... Twice!