
What is this article about?
If you have thought about building any dashboard, you probably realize you need to implement authentication.
You are probably already familiar with terms like Login and Registration. You have probably used them to register to dev.to 😅
In today's world, more companies are pushing to secure your account and offer you to add a Two-Factor authentication.
Two-factor authentication is an extra layer of protection; it requires you to enter a code you can find in an external service, SMS, Email, or an Authentication App.
In this article, you'll learn how to build an application that uses two-factor authentication with React, Novu, and Node.js.

What is Two Factor Authentication (2FA)?
Two Factor Authentication - sometimes referred to as dual-factor authentication, is an additional security measure that allows users to confirm their identity before gaining access to an account.
It can be implemented through a hardware token, SMS Text Messages, Push notifications, and biometrics, required by the application before users can be authorised to perform various actions.
In this article, we'll use the SMS text messaging 2FA by creating an application that accepts the users' credentials and verifies their identity before granting them access to the application.
Novu - the first open-source notification infrastructure
Just a quick background about us. Novu is the first open-source notification infrastructure. We basically help to manage all the product notifications. It can be In-App (the bell icon like you have in the Dev Community - Websockets), Emails, SMSs and so on.
I would be super grateful if you can help us out by starring the library 🤩
https://github.com/novuhq/novu

Setting up a Node.js server
Create the project folder containing two sub-folders named client and server.
mkdir auth-system
cd auth-system
mkdir client server
Navigate into the server folder and create a package.json file.
cd server & npm init -y
Install Express.js, CORS, and Nodemon.
npm install express cors nodemon
Express.js is a fast, minimalist framework that provides several features for building web applications in Node.js. CORS is a Node.js package that allows communication between different domains. Nodemon is a Node.js tool that automatically restarts the server after detecting file changes.
Create an index.js file - the entry point to the web server.
touch index.js
Set up a simple Node.js server as below:
const express = require("express");
const cors = require("cors");
const app = express();
const PORT = 4000;

app.use(express.urlencoded({ extended: true }));
app.use(express.json());
app.use(cors());

app.get("/api", (req, res) => {
    res.json({ message: "Hello world" });
});

app.listen(PORT, () => {
    console.log(`Server listening on ${PORT}`);
});
Building the app user interface
In this section, we'll build the user interface for the application allowing users to register and sign in to an application. Users can create an account, log in, and perform 2FA via SMS before they are authorised to view the dashboard.
Create a new React.js project within the client folder.
cd client
npx create-react-app ./
Delete the redundant files such as the logo and the test files from the React app, and update the App.js file to display Hello World as below.
function App() {
    return (
        <div>
            <p>Hello World!</p>
        </div>
    );
}
export default App;
Navigate into the src/index.css file and copy the code below. It contains all the CSS required for styling this project.
@import url("https://fonts.googleapis.com/css2?family=Space+Grotesk:wght@300;400;500;600;700&display=swap");
* {
    box-sizing: border-box;
    margin: 0;
    padding: 0;
    font-family: "Space Grotesk", sans-serif;
}
input {
    height: 45px;
    padding: 10px 15px;
    margin-bottom: 15px;
}
button {
    width: 200px;
    outline: none;
    border: none;
    padding: 15px;
    cursor: pointer;
    font-size: 16px;
}
.login__container,
.signup__container,
.verify,
.dashboard {
    width: 100%;
    min-height: 100vh;
    padding: 50px 70px;
    display: flex;
    flex-direction: column;
    align-items: center;
    justify-content: center;
}
.login__form,
.verify__form,
.signup__form {
    width: 100%;
    display: flex;
    flex-direction: column;
}
.loginBtn,
.signupBtn,
.codeBtn {
    background-color: green;
    color: #fff;
    margin-bottom: 15px;
}
.signOutBtn {
    background-color: #c21010;
    color: #fff;
}
.link {
    cursor: pointer;
    color: rgb(39, 147, 39);
}
.code {
    width: 50%;
    text-align: center;
}
.verify__form {
    align-items: center;
}

@media screen and (max-width: 800px) {
    .login__container,
    .signup__container,
    .verify {
        padding: 30px;
    }
}
Install React Router - a JavaScript library that enables us to navigate between pages in a React application.
npm install react-router-dom
Create a components folder within the React app containing the Signup.js, Login.js, PhoneVerify.js and Dashboard.js files.
mkdir components
cd components
touch Signup.js Login.js PhoneVerify.js Dashboard.js
Update the App.js file to render the newly created components on different routes via React Router.
import { BrowserRouter, Route, Routes } from "react-router-dom";
import Login from "./components/Login";
import Signup from "./components/Signup";
import Dashboard from "./components/Dashboard";
import PhoneVerify from "./components/PhoneVerify";

function App() {
    return (
        <BrowserRouter>
            <Routes>
                <Route path='/' element={<Login />} />
                <Route path='/register' element={<Signup />} />
                <Route path='/dashboard' element={<Dashboard />} />
                <Route path='phone/verify' element={<PhoneVerify />} />
            </Routes>
        </BrowserRouter>
    );
}

export default App;
The Login page
Copy the code below into the Login.js file. It accepts the email and password from the user.
import React, { useState } from "react";
import { useNavigate } from "react-router-dom";

const Login = () => {
    const [email, setEmail] = useState("");
    const [password, setPassword] = useState("");
    const navigate = useNavigate();

    const handleSubmit = (e) => {
        e.preventDefault();
        console.log({ email, password });
        setPassword("");
        setEmail("");
    };

    const gotoSignUpPage = () => navigate("/register");

    return (
        <div className='login__container'>
            <h2>Login </h2>
            <form className='login__form' onSubmit={handleSubmit}>
                <label htmlFor='email'>Email</label>
                <input
                    type='text'
                    id='email'
                    name='email'
                    value={email}
                    required
                    onChange={(e) => setEmail(e.target.value)}
                />
                <label htmlFor='password'>Password</label>
                <input
                    type='password'
                    name='password'
                    id='password'
                    minLength={8}
                    required
                    value={password}
                    onChange={(e) => setPassword(e.target.value)}
                />
                <button className='loginBtn'>SIGN IN</button>
                <p>
                    Don't have an account?{" "}
                    <span className='link' onClick={gotoSignUpPage}>
                        Sign up
                    </span>
                </p>
            </form>
        </div>
    );
};

export default Login;

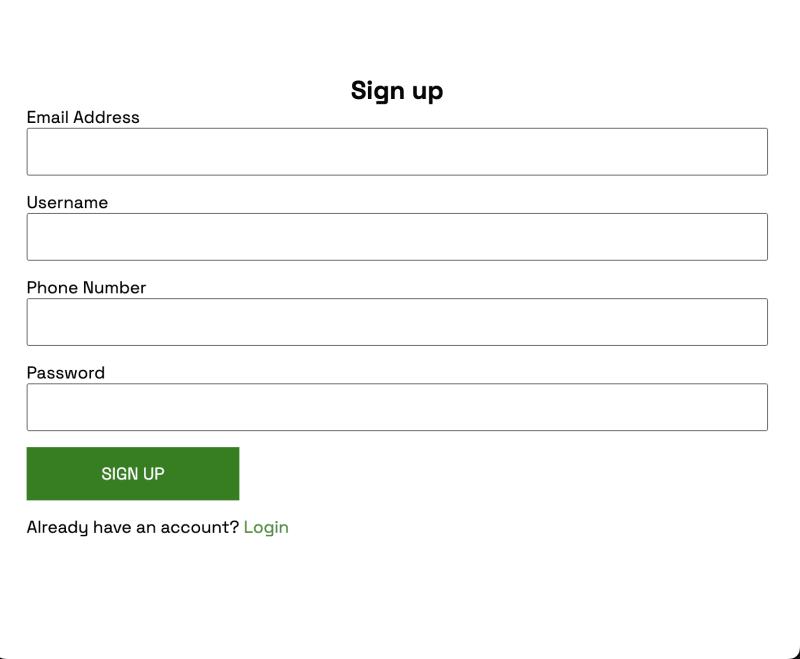
The Sign up page
Copy the code below into the Signup.js file. It accepts the email, username, telephone, and password from the user.
import React, { useState } from "react";
import { useNavigate } from "react-router-dom";

const Signup = () => {
    const [email, setEmail] = useState("");
    const [username, setUsername] = useState("");
    const [tel, setTel] = useState("");
    const [password, setPassword] = useState("");
    const navigate = useNavigate();

    const handleSubmit = (e) => {
        e.preventDefault();
        console.log({ email, username, tel, password });
        setEmail("");
        setTel("");
        setUsername("");
        setPassword("");
    };
    const gotoLoginPage = () => navigate("/");

    return (
        <div className='signup__container'>
            <h2>Sign up </h2>
            <form className='signup__form' onSubmit={handleSubmit}>
                <label htmlFor='email'>Email Address</label>
                <input
                    type='email'
                    name='email'
                    id='email'
                    value={email}
                    required
                    onChange={(e) => setEmail(e.target.value)}
                />
                <label htmlFor='username'>Username</label>
                <input
                    type='text'
                    id='username'
                    name='username'
                    value={username}
                    required
                    onChange={(e) => setUsername(e.target.value)}
                />
                <label htmlFor='tel'>Phone Number</label>
                <input
                    type='tel'
                    name='tel'
                    id='tel'
                    value={tel}
                    required
                    onChange={(e) => setTel(e.target.value)}
                />
                <label htmlFor='tel'>Password</label>
                <input
                    type='password'
                    name='password'
                    id='password'
                    minLength={8}
                    required
                    value={password}
                    onChange={(e) => setPassword(e.target.value)}
                />
                <button className='signupBtn'>SIGN UP</button>
                <p>
                    Already have an account?{" "}
                    <span className='link' onClick={gotoLoginPage}>
                        Login
                    </span>
                </p>
            </form>
        </div>
    );
};

export default Signup;
The PhoneVerify page
Update the PhoneVerify.js file to contain the code below. It accepts the verification code sent to the user's phone number.
import React, { useState } from "react";
import { useNavigate } from "react-router-dom";

const PhoneVerify = () => {
    const [code, setCode] = useState("");
    const navigate = useNavigate();

    const handleSubmit = (e) => {
        e.preventDefault();
        console.log({ code });
        setCode("");
        navigate("/dashboard");
    };
    return (
        <div className='verify'>
            <h2 style={{ marginBottom: "30px" }}>Verify your Phone number</h2>
            <form className='verify__form' onSubmit={handleSubmit}>
                <label htmlFor='code' style={{ marginBottom: "10px" }}>
                    A code has been sent your phone
                </label>
                <input
                    type='text'
                    name='code'
                    id='code'
                    className='code'
                    value={code}
                    onChange={(e) => setCode(e.target.value)}
                    required
                />
                <button className='codeBtn'>AUTHENTICATE</button>
            </form>
        </div>
    );
};

export default PhoneVerify;

The Dashboard page
Copy the code below into the Dashboard.js file. It is a protected page that is accessible to authenticated users only.
import React, {useState} from "react";
import { useNavigate } from "react-router-dom";

const Dashboard = () => {
    const navigate = useNavigate();

useEffect(() => {
        const checkUser = () => {
            if (!localStorage.getItem("username")) {
                navigate("/");
            }
        };
        checkUser();
    }, [navigate]);

    const handleSignOut = () => {
        localStorage.removeItem("username");
        navigate("/");
    };

    return (
        <div className='dashboard'>
            <h2 style={{ marginBottom: "30px" }}>Howdy, David</h2>
            <button className='signOutBtn' onClick={handleSignOut}>
                SIGN OUT
            </button>
        </div>
    );
};

export default Dashboard;
Creating the authentication workflow
Here, we'll create the authentication workflow for the application.
When creating an account, the application accepts the user's email, username, telephone number, and password. Then redirects the user to the sign-in page, where the email and password are required. The application sends a verification code to the user's phone number to verify their identity before viewing the dashboard page.
The Sign up route
Create a function within the Signup component that sends the user’s credentials to the Node.js server.
const postSignUpDetails = () => {
    fetch("http://localhost:4000/api/register", {
        method: "POST",
        body: JSON.stringify({
            email,
            password,
            tel,
            username,
        }),
        headers: {
            "Content-Type": "application/json",
        },
    })
        .then((res) => res.json())
        .then((data) => {
            console.log(data);
        })
        .catch((err) => console.error(err));
};

const handleSubmit = (e) => {
    e.preventDefault();
    //👇🏻 Call it within the submit function
    postSignUpDetails();
    setEmail("");
    setTel("");
    setUsername("");
    setPassword("");
};
Create a POST route within the index.js file on the server that accepts the user's credentials.
app.post("/api/register", (req, res) => {
    const { email, password, tel, username } = req.body;
    //👇🏻 Logs the credentials to the console
    console.log({ email, password, tel, username });
})
Since we need to save the user's credentials, update the POST route as below:
//👇🏻 An array containing all the users
const users = [];

//👇🏻 Generates a random string as the ID
const generateID = () => Math.random().toString(36).substring(2, 10);

app.post("/api/register", (req, res) => {
    //👇🏻 Get the user's credentials
    const { email, password, tel, username } = req.body;

    //👇🏻 Checks if there is an existing user with the same email or password
    let result = users.filter((user) => user.email === email || user.tel === tel);

    //👇🏻 if none
    if (result.length === 0) {
        //👇🏻 creates the structure for the user
        const newUser = { id: generateID(), email, password, username, tel };
        //👇🏻 Adds the user to the array of users
        users.push(newUser);
        //👇🏻 Returns a message
        return res.json({
            message: "Account created successfully!",
        });
    }
    //👇🏻 Runs if a user exists
    res.json({
        error_message: "User already exists",
    });
});
Update the postSignUpDetails function within the Signup component to notify users that they have signed up successfully.
const postSignUpDetails = () => {
    fetch("http://localhost:4000/api/register", {
        method: "POST",
        body: JSON.stringify({
            email,
            password,
            tel,
            username,
        }),
        headers: {
            "Content-Type": "application/json",
        },
    })
        .then((res) => res.json())
        .then((data) => {
            if (data.error_message) {
                alert(data.error_message);
            } else {
                alert(data.message);
                navigate("/");
            }
        })
        .catch((err) => console.error(err));
};
The code snippet above checks if the data returned from the server contains an error message before navigating to the log-in route. If there is an error, it displays the error message.
The Login route
Create a function with the Login component that sends the user's email and password to the server.
const postLoginDetails = () => {
    fetch("http://localhost:4000/api/login", {
        method: "POST",
        body: JSON.stringify({
            email,
            password,
        }),
        headers: {
            "Content-Type": "application/json",
        },
    })
        .then((res) => res.json())
        .then((data) => {
            console.log(data);
        })
        .catch((err) => console.error(err));
};
const handleSubmit = (e) => {
    e.preventDefault();
    //👇🏻 Calls the function
    postLoginDetails();
    setPassword("");
    setEmail("");
};
Create a POST route on the server that authenticates the user.
app.post("/api/login", (req, res) => {
    //👇🏻 Accepts the user's credentials
    const { email, password } = req.body;
    //👇🏻 Checks for user(s) with the same email and password
    let result = users.filter(
        (user) => user.email === email && user.password === password
    );

    //👇🏻 If no user exists, it returns an error message
    if (result.length !== 1) {
        return res.json({
            error_message: "Incorrect credentials",
        });
    }
    //👇🏻 Returns the username of the user after a successful login
    res.json({
        message: "Login successfully",
        data: {
            username: result[0].username,
        },
    });
});
Update the postLoginDetails to display the response from the server.
const postLoginDetails = () => {
    fetch("http://localhost:4000/api/login", {
        method: "POST",
        body: JSON.stringify({
            email,
            password,
        }),
        headers: {
            "Content-Type": "application/json",
        },
    })
        .then((res) => res.json())
        .then((data) => {
            if (data.error_message) {
                alert(data.error_message);
            } else {
                //👇🏻 Logs the username to the console
                console.log(data.data);
                //👇🏻 save the username to the local storage
                localStorage.setItem("username", data.data.username);
                //👇🏻 Navigates to the 2FA route
                navigate("/phone/verify");
            }
        })
        .catch((err) => console.error(err));
};
The code snippet above displays the error message to the user if there is an error; otherwise, it saves the username gotten from the server to the local storage for easy identification.
In the upcoming sections, I'll guide you through adding the SMS two-factor authentication using Novu.
How to add Novu to a Node.js application
Novu allows us to add various forms of notifications, such as SMS, email, chat, and push messages to your software applications.
To install the Novu Node.js SDK, run the code snippet below on your server.
npm install @novu/node
Create a Novu project by running the code below. A personalised dashboard is available to you.
npx novu init
You will need to sign in with Github before creating a Novu project. The code snippet below contains the steps you should follow after running npx novu init
Now let's setup your account and send your first notification
❓ What is your application name? Devto Clone
❓ Now lets setup your environment. How would you like to proceed?
> Create a free cloud account (Recommended)
❓ Create your account with:
> Sign-in with GitHub
❓ I accept the Terms and Condidtions (https://novu.co/terms) and have read the Privacy Policy (https://novu.co/privacy)
> Yes
✔️ Create your account successfully.
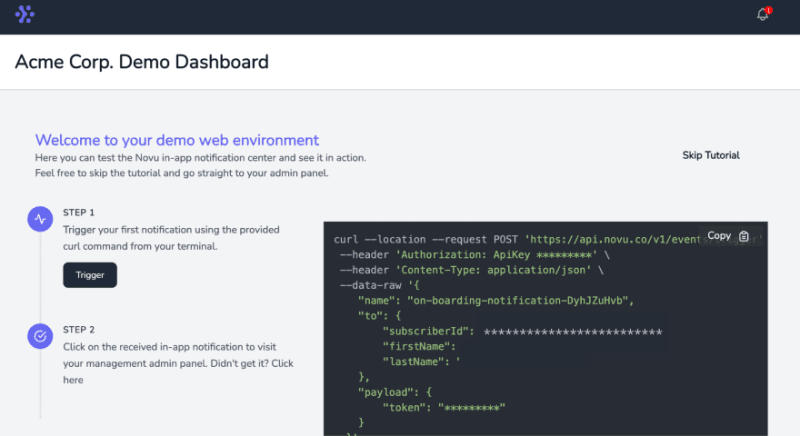
We've created a demo web page for you to see novu notifications in action.
Visit: http://localhost:57807/demo to continue
Visit the demo web page http://localhost:57807/demo, copy your subscriber ID from the page, and click the Skip Tutorial button. We'll be using it later in this tutorial.
Copy your API key available within the Settings section under API Keys on the Novu Manage Platform.

Import Novu from the package and create an instance using your API Key on the server.
//👇🏻 Within server/index.js

const { Novu } = require("@novu/node");
const novu = new Novu("<YOUR_API_KEY>");
Adding SMS two-factor authentication with Novu
Novu supports several SMS text messaging tools such as Twilio, Nexmo, Plivo, Amazon SNS, and many others. In this section, you'll learn how to add Twilio SMS messaging to Novu.
Setting up a Twilio account
Go to the Twilio homepage and create an account. You will have to verify your email and phone number.
Head over to your Twilio Console once you're signed in.
Generate a Twilio phone number on the dashboard. This phone number is a virtual number that allows you to communicate via Twilio.
Copy the Twilio phone number somewhere on your computer; to be used later in the tutorial.
Scroll down to the Account Info section, and copy and paste the Account SID and Auth Token somewhere on your computer. (to be used later in this tutorial).
Connecting Twilio SMS to Novu
Select Integrations Store from the sidebar of your Novu dashboard and scroll down to the SMS section.
Choose Twilio and enter the needed credentials provided by Twilio, then click Connect.

Next, create a notification template by selecting Notifications on the sidebar.

Select Workflow Editor from the side pane and create a workflow as below:
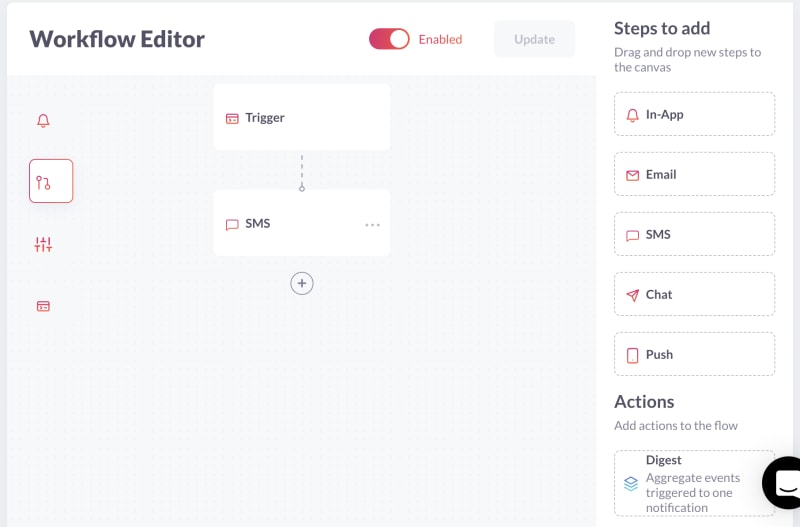
Click the SMS from the workflow and add the text below to the message content field.
Your verification code is {{code}}
Novu allows you to add dynamic content or data to the templates using the Handlebars templating engine. The data for the code variable will be inserted into the template as a payload from the request.
Go back to the index.js file on the server and create a function that sends an SMS to verify the users when they log in to the application. Add the code below into the index.js file:
//👇🏻 Generates the code to be sent via SMS
const generateCode = () => Math.random().toString(36).substring(2, 12);

const sendNovuNotification = async (recipient, verificationCode) => {
    try {
        let response = await novu.trigger("<NOTIFICATION_TEMPLATE_ID>", {
            to: {
                subscriberId: recipient,
                phone: recipient,
            },
            payload: {
                code: verificationCode,
            },
        });
        console.log(response);
    } catch (err) {
        console.error(err);
    }
};
The code snippet above accepts the recipient's telephone number and the verification code as a parameter.
Update the login POST route to send the SMS via Novu after a user logs in to the application.
//👇🏻 variable that holds the generated code
let code;

app.post("/api/login", (req, res) => {
    const { email, password } = req.body;

    let result = users.filter(
        (user) => user.email === email && user.password === password
    );

    if (result.length !== 1) {
        return res.json({
            error_message: "Incorrect credentials",
        });
    }
    code = generateCode();

    //👇🏻 Send the SMS via Novu
    sendNovuNotification(result[0].tel, code);

    res.json({
        message: "Login successfully",
        data: {
            username: result[0].username,
        },
    });
});
To verify the code entered by the user, update the PhoneVerify component to send the code to the server.
const postVerification = async () => {
    fetch("http://localhost:4000/api/verification", {
        method: "POST",
        body: JSON.stringify({
            code,
        }),
        headers: {
            "Content-Type": "application/json",
        },
    })
        .then((res) => res.json())
        .then((data) => {
            if (data.error_message) {
                alert(data.error_message);
            } else {
                //👇🏻 Navigates to the dashboard page
                navigate("/dashboard");
            }
        })
        .catch((err) => console.error(err));
};
const handleSubmit = (e) => {
    e.preventDefault();
    //👇🏻 Calls the function
    postVerification();
    setCode("");
};
Create a POST route on the server that accepts the code and checks if it is the same as the code on the backend.
app.post("/api/verification", (req, res) => {
    if (code === req.body.code) {
        return res.json({ message: "You're verified successfully" });
    }
    res.json({
        error_message: "Incorrect credentials",
    });
});
Congratulations!🎊 You've completed the project for this tutorial.
Conclusion
So far, you've learnt what two-factor authentication is, its various forms, and how to add it to a web application.
Two Factor Authentication is added to software applications to protect both the user credentials and the resources users can access. Depending on your application, you can add 2FA at specific parts where significant changes occur.
The source code for this application is available here: https://github.com/novuhq/blog/tree/main/2FA-with-react-nodejs-and-novu
Thank you for reading!
P.S I would be super grateful if you can help us out by starring the library 🤩
https://github.com/novuhq/novu
You can also learn How to get GitHub stars


Top comments (21)
Thank you for great tutorial
Thank you for the kind words 🙌🏻
Amazing work, clearly guided
Thank you Harold!
Wonderful
Thank you very much 🤩
♥
❤️
Thanks for putting this together 👍✨💯
Thanks a lot for this... I am gonna add this in my final year project❤🤞
Thank you very much, very helpful
Dude, pls don't save the raw password, a hash is sufficient!
This is how halve the world got pownd 🙄
Nice authentication method for the server and the front end, but how would you advice to make the same and integrate it with Java in the back end and connecting to a database?``
Such a helpful blog! :)
Nice authentication method for the server and the front end, but how would you advice to make the same and integrate it with Java in the back end and connecting to a database?
Just loving this!
This is really a good guide to implementing 2FA. Thank you
Great !!
Nice authentication method for the server and the front end, but how would you advice to make the same and integrate it with Java in the back end and connecting to a database?****