Two years ago, I published the first version of elm-arborist, a package for editing generic tree structures in Elm. I didn't advertise it too much at the time so it quietly went through 2 major re-writes and elm bump-ed all the way up to version 8.2.0. All the while, it kept supporting more and more sophisticated needs in the NLX Studio app, where I use it to visually define conversational logic for chatbots.
Whether you have a complex use-case or not (after all, tree structures are everywhere), the goal of the library is to make editing trees smooth, contained and flexible:
- Arborist takes care of editing the structure (adding new nodes, rearranging subtrees etc.).
- you take care of editing the internals of each node.
- divide and conquer any use-case by combining the two together with minimal glue code. And since I can't help it: #functor.
We will look into how this works in this post. But first, a quick origin story.
Where It All Began
In a previous career in the architecture world, I spent a lot of time working with a tool called Grasshopper, a visual programming extension for the 3d modeling program Rhino:
In this environment, variables are represented as sliders, connected to boxes that either did transformation on their values or used them as coordinates to draw shapes. The resulting cable salads - found in countless other tools such as cables.gl - were beautiful and weird and full of possibilities. Finally, the structure of the 'code' was visual in a way a static folder structure could never truthfully represent.
When NLX Studio, my current startup, developed a need for a tool to model conversation logic, we thought of something similar, yet simpler and easier to organize. Instead of Grasshopper's directed graph, how about a (non-binary) tree? This is what Arborist wound up supporting: utilities to create a tree holding a generic data structure, a fully flexible way to render it, along with an event handling machinery allowing users to expand and alter the structure visually.
Let's see how it all works.
Creating an Editable Tree
tldr; this section runs through a simple Arborist example. Feel free to just read the example on its own.
We start by defining a Node type, and build up a starting tree using the Arborist.Tree module.
import Arborist
import Arborist.Tree as Tree

type alias MyNode =
  { question : String
  , answer : String
  }

startingTree : Tree.Tree Node
startingTree =
  Tree.Node
    ( MyNode "How are you?" "Fine, thanks" )
    [ Tree.Node
        ( MyNode "Great. Would you like coffee?" "Absolutely" )
        []
    ]
We can define each tree with the Tree.Node constructor that takes the root node and an array of child nodes that are of the same recursive structure.
Creating trees in Elm this way is nothing new or special. It is, in fact, a very common example when talking about the language's type system.
Next, we lay out a Model that contains this tree, as well as some internal state that Arborist will need:
type alias Model =
  { tree : Tree.Tree MyNode
  , arboristState : Arborist.State
  }

init : Model
init =
  { tree = startingTree
  , arboristState = Arborist.init
  }
The editor will need some initial settings:
arboristSettings : List (Arborist.Setting MyNode)
arboristSettings =
    [ Settings.keyboardNavigation True
    , Settings.defaultNode (MyNode "A" "Q")
    , Settings.nodeWidth 100
    , Settings.level 80
    , Settings.gutter 20
    ]
Arborist will send a single message that updates the model like so:
update : Msg -> Model -> ( Model, Cmd Msg )
update msg model =
    case msg of
        Arborist updater ->
            let
                ( newState, newTree ) =
                    updater model.arborist model.tree
            in
            ( { model
                | arborist = newState
                , tree = newTree
              }
            , Cmd.none
            )
Instead of new state and tree values, Arborist's message comes with a function that computes them based on the current values. This is set up this way in order to prevent potential frequently fired mouse events from undoing each others' changes.
Finally, the view:
view : Model -> Html.Html Msg
view model =
    Arborist.view
        []
        { state = model.arboristState
        , tree = model.tree
        , nodeView = nodeView
        , settings = arboristSettings
        , toMsg = Arborist
        }
See the full example to see how these pieces fit together exactly.
Towards a Full-featured Editor
The simple example is a few steps behind the full-featured Arborist home page example. Here are the most important methods from the library that will get us there:
-
activeNode and setActiveNode: when a tree node is focused, you can retrieve it using
activeNodeand use it to render a piece of UI responsible for editing its internals. UsesetActiveNodein the update method to persist changes in the tree. -
subscriptions: like the updater from the
updatemethod above, Arborist'ssubscriptionstake a bit of type-fu to set up. In the end, though, they won't take up that much space, and add a lot of goodies like animations and keyboard navigation outlined in the remainder of this post.
See the full example for details.
The UX Features that Count
The first few versions of the package focused on making things work and making sure that the tree could be completely separated from the Node data type it is used with. With v8.0.0, it was UX time: making complicated trees intuitive to edit.
Keyboard Navigation
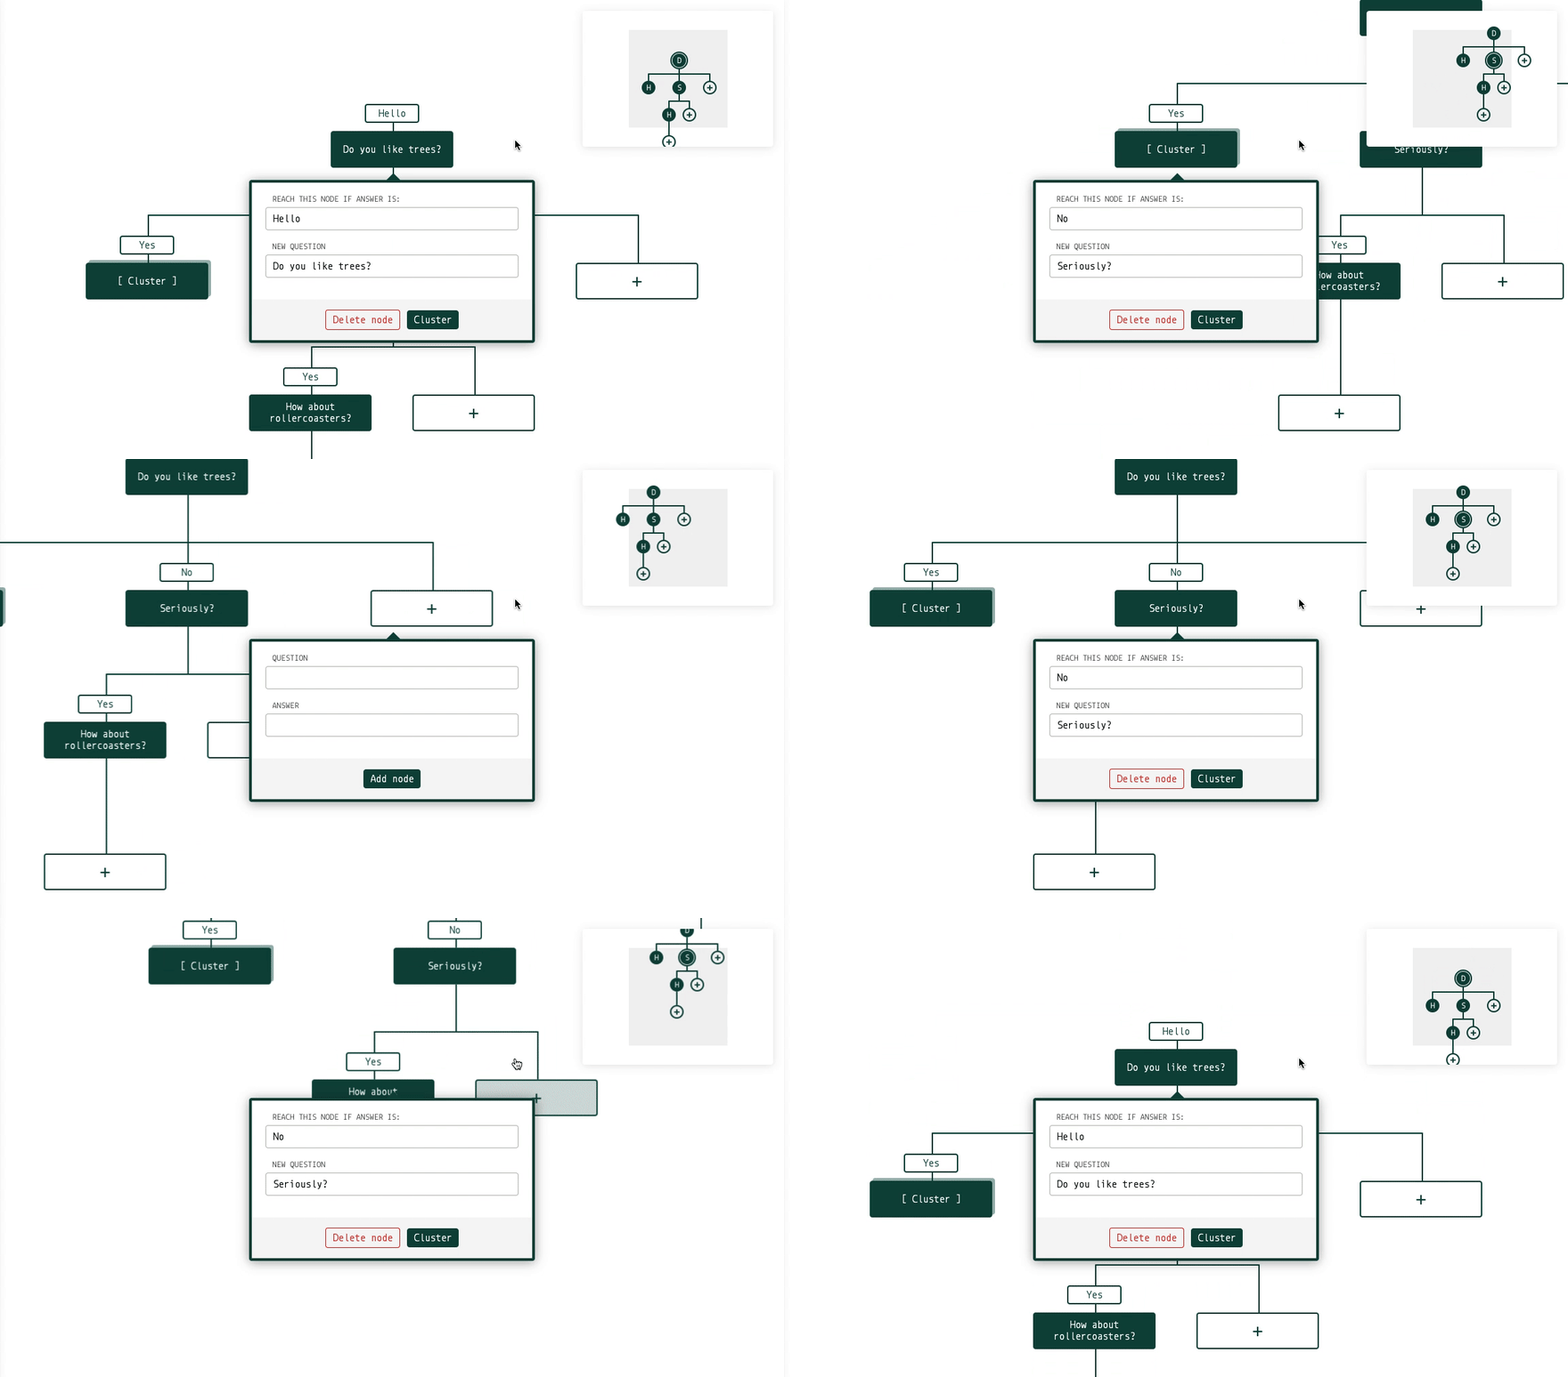
Instead of laboriously panning and padding around to find nodes, trees can now be traversed using arrow keys:
Clustering
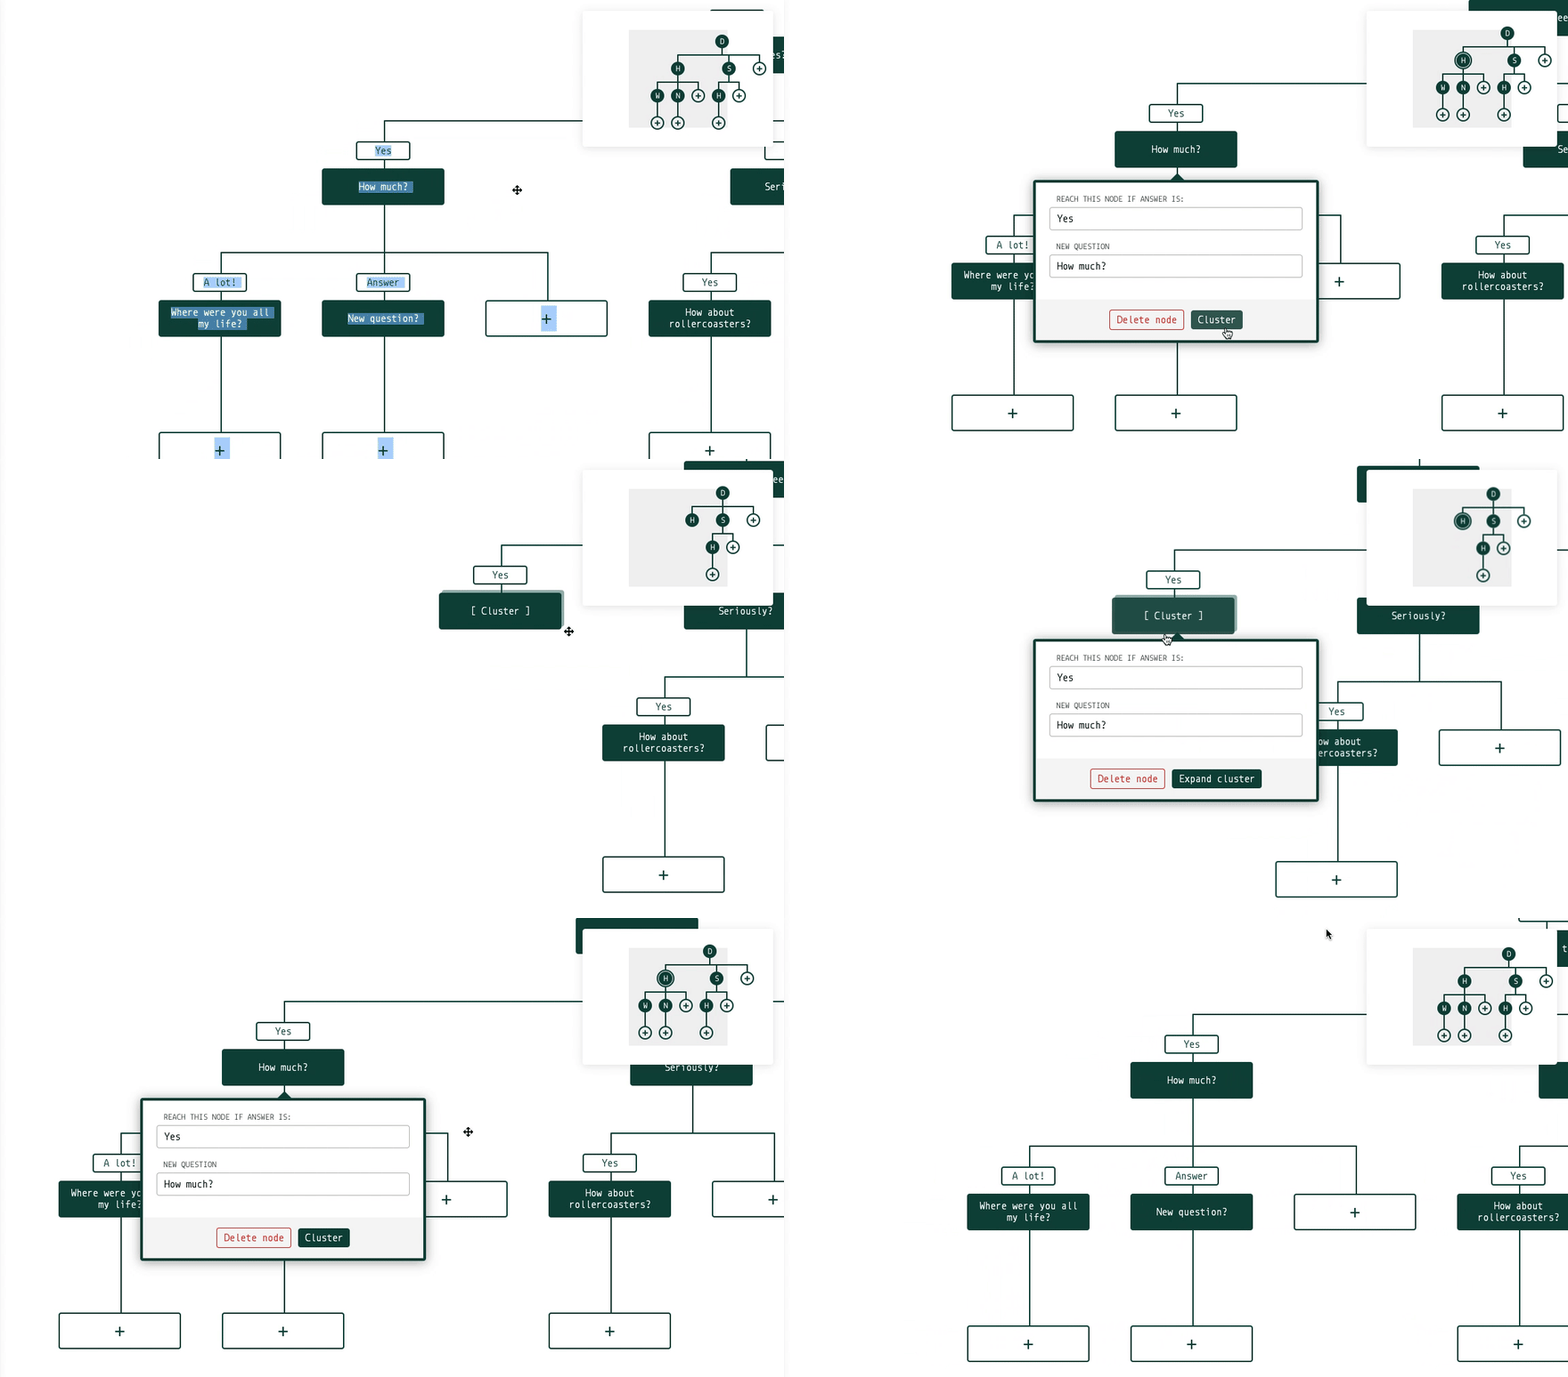
What I really loved in Grasshopper is that you could take a portion of a cable salad and pull it together in a single box with the appropriate number of inputs and outputs, the visual equivalent of factoring out a pure function. Arborist can do this for subtrees:
To implement this feature, simply add the isNodeClustered logic in settings, 'teaching' the layout algorithm whether the subtree under a node should be hidden. Edit the corresponding flag for any given node with setActiveNode.
The Minimap
The clustering feature, effective for grouping a logically coherent subtree, is not effective for making large trees easy to navigate. To cover that front, Arborist makes it easy to create synced minimaps like the ones we are used to in our IDE's:
To create a minimap in Arborist, simply re-use the arborist internal state on a new piece of Arborist.view with new settings for a smaller geometry and new views for nodes. The design of this internal state makes sure that when you interact with your tree in either views, the viewport stays in sync:
Adding these goodies to the library has been very exciting - and hopefully, there is a lot more to come.
Next up for Arborist
The next steps for the library will likely focus on performance for very large trees. My workplace needs up to this point did not include trees larger than 50 nodes, but I would be curious to look for windows of optimization in the library's codebase to become a whole lot more ambitious than that.
Do you have other ideas? Let me know by opening an issue or reaching out to me under @peterszerzo on Elm Slack or Twitter. Until then!


Top comments (2)
I love what the library does. It makes me want to think up a project just to use it. Thank you. :)
Thanks Dirk, look forward to seeing what you come up with :)