This tutorial will give you an introduction to GraphQL and how you can integrate external data sources like MongoDB using AWS AppSync and AWS Lambda, it is easy to follow even if you aren't familiar with AWS
What is GraphQL?
GraphQL is a new standard for API, you can do queries at the API level and retrieve only the data you need, which is a perfect fit for mobile applications where bandwidth is limited and you want to retrieve all the data you need (and nothing more) in a single network request.
How does GraphQL compares with REST API then?
Using traditional REST APIs, say when we want to get the title, year released and director of a particular movie, we would need to send a HTTP GET request to the /movies endpoint. Here is the response we get from the server:
"title": "Star Wars: Episode IV - A New Hope",
"year": 1977.0,
"rated": "PG",
"runtime": 121.0,
"countries": ["USA"],
"genres": ["Action", "Adventure", "Fantasy"],
"director": "George Lucas",
Hmm, but we just want the movie's title, year and director, and the server is sending us a bunch of information we don't need. And how about if we want to retrieve the information about the director? We would need to send another GET request to the /director endpoint again...
Can we do better?
With GraphQL, we can select what information we need when we make a request to the server (a.k.a. query), so let's say this time we want the title of a movie, its actors and metacritic rating, then we will send a query like this:
query{
    getMovieByTitle(title: "'Star Wars: Episode IV - A New Hope\"') {"
        title
        actors
        metacritic
    }
}
And here is the server response:
{
    "data": {
        "Movies": [
            {
                "title": "Star Wars: Episode IV - A New Hope",
                "actors": ["Mark Hamill", "Harrison Ford", "Carrie Fisher", "Peter Cushing"],
                "metacritic": 92
            }
        ]
    }
}
Much better, isn't it?
Creating our first GraphQL API
Account setups
For this tutorial, we will be using AWS and MongoDB Atlas, and we will need to create free-tier accounts for both of them. The good news is, all services we use in this tutorial are covered by the free-tier, so we don't have to pay for even a penny.
Setting up our AWS Account
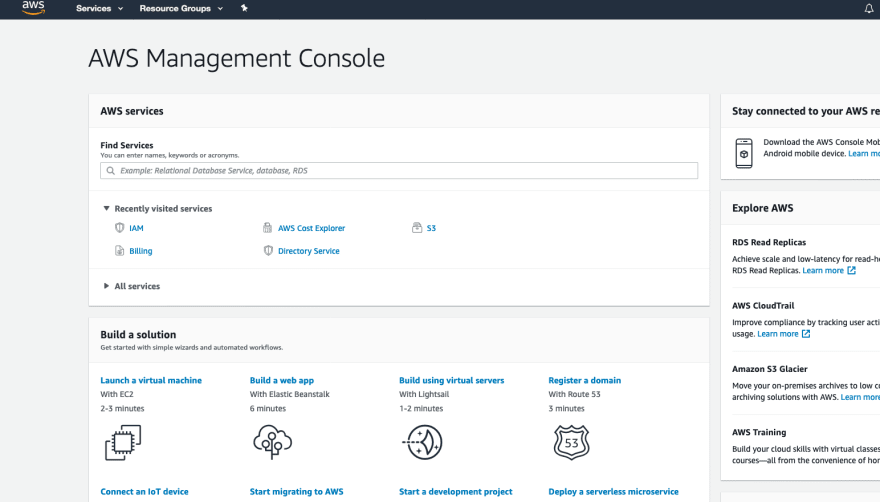
- Go to the AWS Console. (Note: a credit card is needed for registration, but we won't incur any charge so no worries)
-
Now we have our root account set up, but it is generally a bad idea to do stuffs with that, so we will create a new user to work with.
Follow this guide to create a new IAM user in the console
Once you see the AWS Console, you're good to go!
Setting up our MongoDB Atlas Account
- Register an account at the MongoDB Atlas Website
- Create an organization
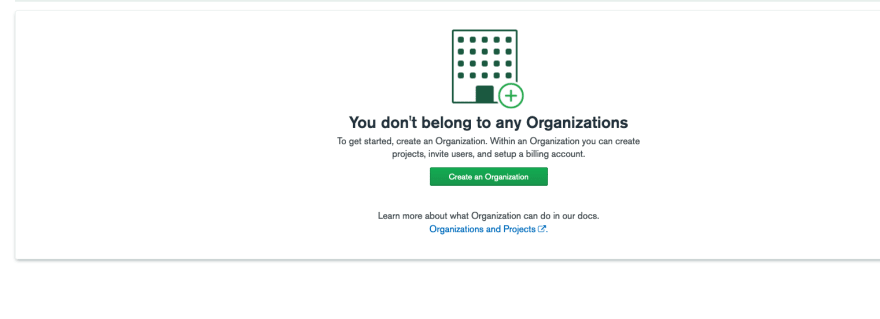
- Enter a name for the organization, choose MongoDB Atlas, click 'Next' and create the organization
- Click 'New Project'
- Give this project a name, we will use 'graphql-demo' here, click 'Next' and create the project.
- Now we can build our cluster! Click the green 'Create Cluster' button
- Free cluster is fine for us, and for the deployment option we will be using the following settings:
 Ideally, we will want our cluster in the same AWS region we will be using (us-west-2 for this case, and if you want to use another region, just make sure AWS AppSync is available in that region)
 - Hit 'Create Cluster', and our cluster will be ready in few minutes. Meanwhile, we will set up our development environment in AWS
Setting up our development environment
We will be using Cloud9 as our development machine, so it doesn't matter whether we are using Mac or Windows.
You can also work on your local machine using VSCode or other IDE as you like, but you may have to install some additional tools required for this tutorial, which Cloud9 has them pre-packaged already.
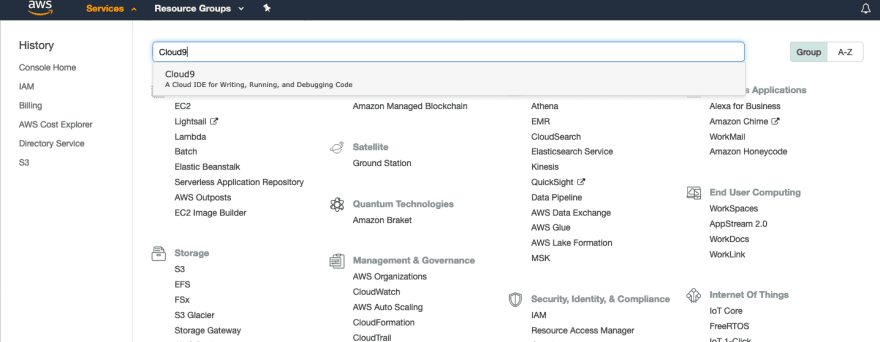
- In the AWS Console, click 'Service' and search for Cloud9
-
Let's change our region to 'Oregon' (us-west-2)
You can find the region selector near your account number on the upper right corner
Click 'Create Environment'
Let's call our development machine 'AppSync-Cloud9' and click 'Next Step'
For Platform, select Ubuntu Server 18.04 LTS and click 'Create Environment'
Now let's wait for our IDE to load, and once it is ready we can see the welcome screen with a terminal below it. In the terminal, enter the following command:
git clone https://github.com/gai6948/appsync-mongodb-tutorial.git && cd appsync-mongodb-tutorial
We have just downloaded the code for this tutorial and we will set up our database first for now.
Setting up our MongoDB database
Create our database and collection
- Go back to our MongoDB Atlas console, select the project we created previously
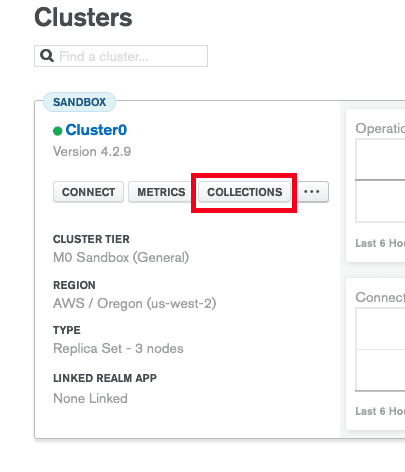
- On our cluster, select 'Collections'
- Select 'Add My Own Data'
- Enter 'appsync-db' for database name, and movies for collection name, and click 'Create'
Configuring Database Access
We will need to create a database user for our Lambda function (to be created later) to talk to the database.
- Click Database Access under the section of Security
- Click 'Create Database User'
-
Enter a username and password, and leave other settings as default and create the user
Normally, we should limit the user access to just our movies collection, but for simplicity we will leave the settings as default in our tutorial
We will also need to configure the IP whitelist for our Lambda, click Network Access and Add IP Address
Select 'Allow access from anywhere' and Confirm
Installing MongoDB tools on our Cloud9 Environment
To import data to our MongoDB Atlas Cluster, we will need to install the mongo tools on our Cloud9 Instance first.
Switch back to the Cloud9 IDE, and execute the following command in the terminal:
sudo apt-get install gnupg
sudo apt-key adv --keyserver hkp://keyserver.ubuntu.com:80 --recv E52529D4
echo "deb [ arch=amd64,arm64 ] https://repo.mongodb.org/apt/ubuntu focal/mongodb-org/4.2 multiverse" | sudo tee /etc/apt/sources.list.d/mongodb-org-4.2.list
sudo apt-get update
sudo apt-get install -y mongocli
sudo apt-get install mongo-tools
After executing the above command, run mongocli --version to verify the installation
Import our dataset
We will use a trimmed down version of the IMDB movie database as our sample dataset, you can inspect the raw data here
- Go back to the 'Cluster' Tab
- Click on the 'Command Line Tools' tab after the database is created
- Look for the section 'Data Import and Export Tools', and copy the mongoimport command
- Now go back to our Cloud9 console, and paste the command into the terminal, but let us change some parameters first:
- Change <PASSWORD> to the database user password we just created
- Change <DATABASE> to appsync-db
- Change <COLLECTION> to movies
- Change <FILETYPE> to json
- Change <FILENAME> to movieDetails.json
We should see 'imported 100 documents' in the command output
Create our GraphQL Schema
Before we start working on our code, let us define our GraphQL Schema first, the schema acts as a contract between the client and the server on the data types client can request.
Create our AppSync API
AWS AppSync is a managed GraphQL service that let us define a GraphQL schema and leverage various data sources such as Lambda, DynamoDB and much more. It is fully serverless and we don't have to worry about servers at all. The cool thing about AppSync is you can define your schema and let AppSync creates a DynamoDB table and ElasticSearch cluster for you, without you having to set them up manually. But we will be using Lambda as our data source in this tutorial, so we can connect to our MongoDB database.
- Open the AppSync Console in a new tab.
- Click 'Create API'
- Select 'Start from scratch' and click the start at the top
- Click 'Create', you can also give the API a name but that's optional
- Once the API is created, click 'Edit Schema'
Work on our GraphQL Schema
A GraphQL Schema consists of three types: query, mutation and subscription. Query allow us to specify what data we want, mutation lets us insert or update new data and get back the result as confirmation, while subscription allows us to listen for data updates and be notified when they happen. We will work with queries in this tutorial, and add mutations later. You can learn more about GraphQL Schema here
- Remove everything in the schema first, we won't need them
-
Add the following code at the beginning of the schema, they are the root types that we allow, which is query for now.
schema { query: Query } -
Add the type definition for movies below the root definition:
type Movie {
  actors: [Actor!]!
  director: String!
  genres: [String]
  id: ID!
  title: String!
  year: Int!
}
Here we define the data types for movies, ! behind the data type means the field cannot be null, gnere: [String] means the field genres would return an array of genre, and [Actor] means we expect an array of Actor object to be returned, we will define the Actor object in a moment.
-
Add the type definition for actors below movies:
type Actor {
    featured_in: [Movie!]
    name: String!
}
An actor can appear in multiple movies, so we define a list of movies for the field featured_in.
Now we have our data types defined, we can define the queries and mutations now. -
Add the query definition below:
type Query {
    getMoviesByGenre(genre: String!): [Movie]
    getMoviesByTitle(title: String!): [Movie]
}
We will allow clients to query for movies using genre or title as argument, and return a list of matching movies. The completed schema should look like this:
We can also allow more query patterns like by director or year, and you can add them easily after learning how to write resolvers for queries and fields, which we will cover soon.
Create our Lambda resolver function
The magic that we can get whatever data we want is made possible by resolvers, they gather the required data and pass them back to the client in the format defined. Resolvers can be defined at query level or field level. For example we can create a resolver for our getMoviesByGenre query, which can 'resolve' all or part the fields defined in the [Movie] type. We can also set resolvers at field level, like I can define a resolver getYearInMovie which only 'resolves' the field year. In this tutorial, we will have 2 query level resolvers to handle getMoviesByGenre and getMoviesByTitle respectively, and a field level resolver to resolve the [Actor] field.
In AWS AppSync, there are different types of resolvers:
* [AWS Lambda](https://aws.amazon.com/lambda/?nc2=h_ql_prod_fs_lbd), which is <strong>serverless</strong> function that only run when being invoked

* [DynamoDB](https://aws.amazon.com/dynamodb/?nc2=h_ql_prod_fs_ddb), which is a serverless NoSQL database in AWS

* [Aurora Serverless](https://aws.amazon.com/rds/aurora/?nc2=h_ql_prod_db_aa), which is also a serverless database but it is relational and compatible with MySQL or PostgresQL

* [Amazon ElasticSearch](https://aws.amazon.com/elasticsearch-service/?nc2=h_ql_prod_an_es), which lets you implement text-based searching for your application

* <strong>HTTP Endpoint</strong>, which lets you call a REST API to other data sources
We will create a Lambda function now to act as a resolver for our GraphQL Schema, and we will use AWS SAM for that.
Create our Lambda function via SAM template
Let us go back to our Cloud9 IDE and run
sam initon the terminalChoose AWS Quickstart Template for template source, nodejs12.x for runtime, we will name our project appsync-demo and we will choose Hello World Example as a starting point
Once finished, a new directory will be created with the required files like this:
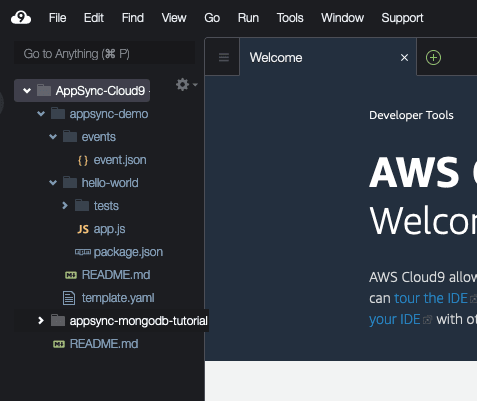
We will define our code inhello-world/app.js, andtemplate.yamlis where we specify properties of our Lambda function-
Double click the
template.yamlfile to edit it, and replace the whole content with the following one:Here is what we changed:
- Set the function timeout to 30 seconds so that would allow enough time for our lambda to retrieve data from our MongoDB cluster.
- Removed the default API Gateway which is not required in our scenario, our function will be invoked by AWS AppSync.
-
Added an environment variables MONGODB_URI which will be our connection string to MongoDB Atlas, to get the connection string please follow the following steps:
- Go back to the home page of your MongoDB Atlas Cluster.
- Click the 'Connect' Label
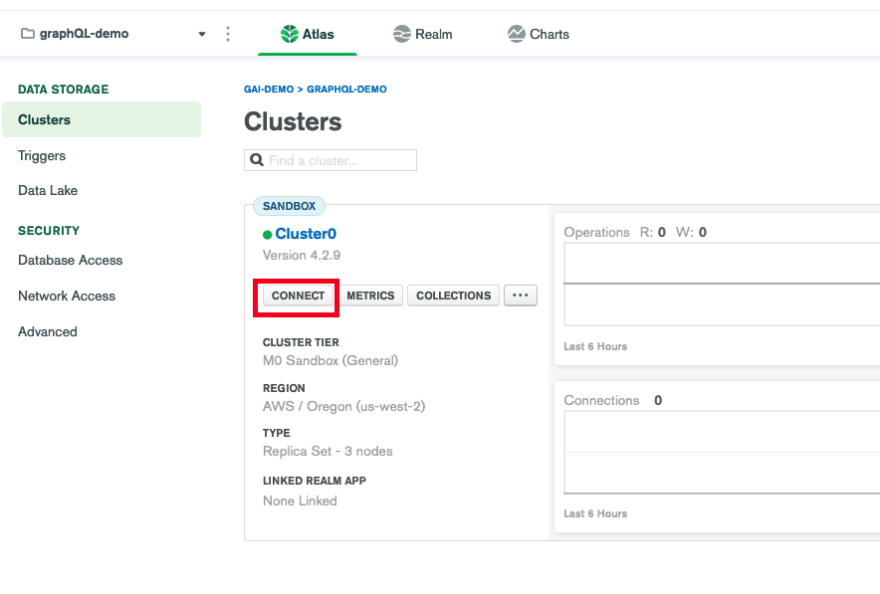
- Select 'Connect your application'
- Copy the connection string and paste it as the value of MONGODB_URI
Remember to change them according to the database and password you defined in MongoDB Atlas (*without enclosing <>)*
Press CMD+S (Mac) or CTL+S(Windows) to save the template file
Work with our Lambda code
Double click the
app.jsfile in thehello-worlddirectory-
Paste the following code first, we will go through them by section. Also in case you did not name your MongoDB Atlas database as
'appsync-db'and collection asmovies, you have to change them in the code to match your database/collection name.In our code, we first imported the mongodb driver for connecting to our database, then for our async lambda handler (Yes it is async so we supply a callback so whenever we finish execution we pass in either error message if any, or the result), we initialize connection to our Mongo database using the URI you just set as environment variable in the template.
This function will serve as multiple resolvers depending on which query pattern our client use (by movie title or genre in our case). The resolver for actor is to resolve nested array of movie objects representing the movies that an actor had featured in. We switch between different functions depending on the field supplied as event when AppSync resolves our GraphQL queries. You can consider event is something like arguments in a function. (We will set how AppSync resolves fields by passing different values into event later so no worries if it makes no sense to you now)
For each resolver function, we extract the argument from event and use it as query parameter in our MongoDB queries. Once we get the results from our database we will append each result into an array of
Moviesobject which is returned to AppSync.It is important that we enclose the async database query inside a try-catch block so we can return errors if there is any.
Save the file
-
Run the following command one-by-one to initialize npm and install the MongoDB driver we need for our code.
cd ~/environment/appsync-demo/hello-world
npm init
npm install -y mongodb
Deploy our code to AWS Lambda
We can now build our function and deploy it to Lambda using SAM CLI.
-
Let's go back to where our
template.yamlis defined and build the function code with our dependencies
cd .. sam build -
(
Optional) We can test our Lambda function locally before pushing to production, using SAM's local testing feature. If you want to test the function, replace theevents/event.jsonfile with the following one:
This event simulates that a client query for movie by title "Wild Wild Test". For our GraphQL API the actual event is created by AppSync once we define how AppSync resolves the fields, we will do that later.
Now execute this command to test our function using our newly modified event file
sam local invoke -e events/event.jsonIf your function runs correctly it should produce this result:
[{"id":"5f3149e44ea473d321c2a796","title":"Wild Wild West","year":1999,"director":"Barry Sonnenfeld","genres":["Action","Western","Comedy"],"actors":[{"name":"Will Smith"},{"name":"Kevin Kline"},{"name":"Kenneth Branagh"},{"name":"Salma Hayek"}]}]If your function goes into error go check if you have provided a correct connection URI to MongoDB.
Every time you modify your code remember to save it and run
sam buildagain before invoking it -
Now we will create an S3 bucket, and package our code to it so SAM can deploy the code for us
Execute the following command on Cloud9 terminal:
SAM_BUCKET=sam-staging-bucket-$(uuidgen)
aws s3 mb s3://$SAM_BUCKET --region us-west-2
sam package --s3-bucket $SAM_BUCKET --output-template-file output.yaml
Finally we can deploy our code to Lambda by running
sam deploy --template-file output.yaml --stack-name appsync-demo --capabilities CAPABILITY_IAMIf we go to the Lambda Console, we can see our function is created.

Add our Lambda resolver to our AppSync Schema
Now we have our Lambda function ready, it's time for us to tell AppSync how to interpret GraphQL queries or mutations and use our Lambda to resolve the fields for the client. The way it works is by passing different values in the event to Lambda using VTL Templates. You can tell the template to query against DynamoDB tables, Aurora cluster, make REST API calls, etc. But now we will set the template to transform client query into event for Lambda
Add our Lambda function as data source for AppSync
Go back to the AppSync Console and find the API you created earlier
Select 'Data Sources' on the left and click 'Create Data Source'
Create a Lambda data source like this:

Hit 'Create'
Setting up the resolvers
Go to Schema
You should see the 'Query' section for 'Resolvers'
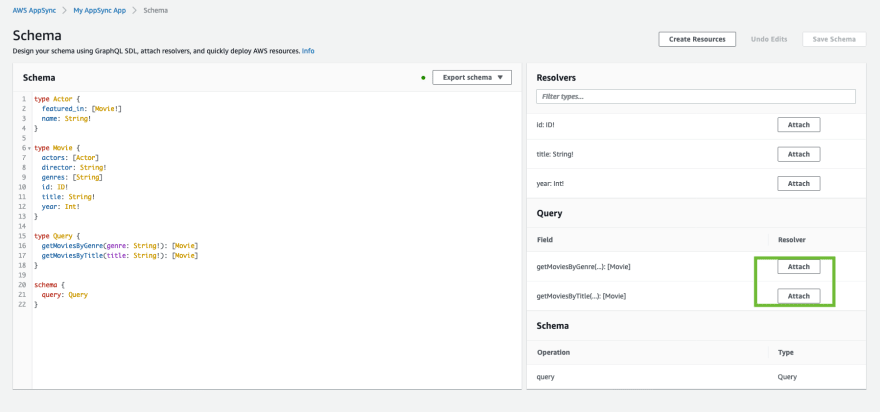
Click 'Attach' for
getMoviesByGenreSelect our only data source and enable both Request and Response mapping template
-
Replace the default request mapping template with this one:
{
  "version" : "2017-02-28",
  "operation": "Invoke",
  "payload": {
    "field": "getMoviesByGenre",
    "arguments": $util.toJson($context.args)
  }
}
On the
operationfield we specify 'Invoke', which means calling a Lambda Function.The
payloadfield lets us specify what values to put in the event for our Lambda function, remember we set a switch onfield? We will tell AppSync to pass in the value 'getMoviesByGenre' to our Lambda if the query is taking genre as argument, and for the actual argument we will use the default utility function to transform the format that is readable by our Lambda function.Remember to click Save Resolver at the top
-
Attach a resolver for
getMoviesByTitlethis timeThe steps are the same as before, but for the request mapping template we will be using this:
{
  "version" : "2017-02-28",
  "operation": "Invoke",
  "payload": {
"field": "getMoviesByTitle",
    "arguments": $util.toJson($context.args)
  }
}
Now we have two root-level resolvers set up. In the AppSync console we can set resolvers at field-level, but for most of the fields we don't have to do so because if the parent resolver returns an object with keys matching the child field names, then most GraphQL engines (like AppSync) will use the fields returned from parents unless you explicitly override.
We only have 1 field-level resolver to set, and that is
featured_infor theActorobject-
Do the same steps as how you set the resolver for the parents, but the request mapping template will be this:
{
  "version" : "2017-02-28",
  "operation": "Invoke",
  "payload": {
"field": "getMoviesByActor",
    "arguments": $util.toJson($context.source)
  }
}
Our GraphQL API is ready for now
Playing around with our GraphQL API
We can now go to the <strong>Queries</strong> tab and play around with our API. Click the <strong>+</strong> icon near Query to add a query, and select what fields you want for your query. You can also type your query in the IDE if you prefer it.
The result should be something like this:
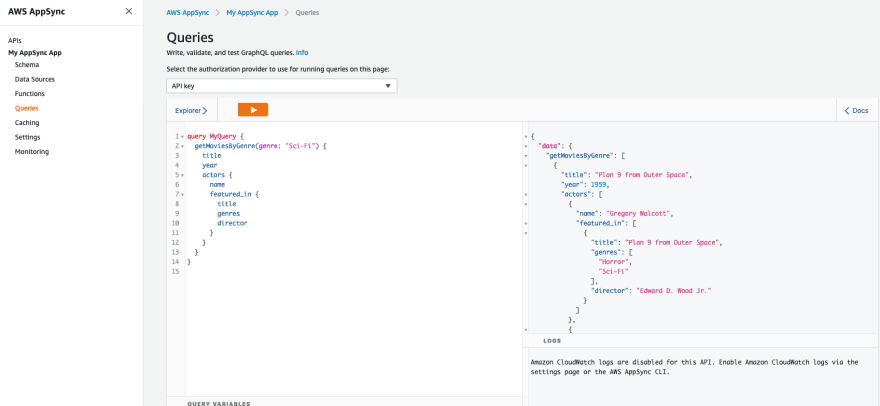
You may notice we can go a few layers deep and answer questions like given a movie title, find the movies that its actors have featured in. This is not easy to achieve using traditional REST API. Also we have the freedom to choose how much data we need, no more no less, and this is the power of GraphQL
What's next?
🎉🎉🎉 Hurray, we now created our first GraphQL API!
I have only showed you a subset of AppSync's capabilities, in fact, combining AppSync with AWS Amplify can give you the ability to create a full-stack web/mobile app in days.
I suggest you read Nader Dabit's tutorial on building a full-stack app with AWS AppSync and TypeScript, and also Traversy Media's Youtube Tutorial on building a full-stack app using AWS Amplify and AWS AppSync.
Stay tuned for more content 🔥🔥🔥🔥


Top comments (6)
What will be the most efficient caching strategy for this application? Cloudfront or Appsync - and how to go about it?
Thanks for replying. For my example application probably I will use the native AppSync cache for its simplicity, it allows me to cache the results based on user identity or arguments provided. For example certain actors or directors are more popular than the others so caching by arguments when users search for movies featuring a particular actor/director makes sense. The good point is you don't have to write a lot of custom code to handle the caching, you just specify what key and TTL to AppSync and it is handled for you. In this case if I cache results by arguments, I am also safe to set a higher TTL because the access pattern is not something that requires a strong consistency.
Caching with Cloudfront is also a solution, but I will consider caching with Cloudfront only if the native cache (basically a redis) cannot handle the load (i.e. thundering herd when many users query for the same movie at the same time). Caching with Cloudfront involves much more efforts, you have to find the optimal TTL settings on both Cloudfront and AppSync which is not simple work. But of course using Cloudfront to handle surge of request is going to be cheaper than paying for a larger instance of Redis.
So in conclusion, start small with the native cache in AppSync, if it doesn't work well, start think of Cloudfront. And besides caching, batching (using Dataloader for example) can also be employed, although you usually pick between caching and batching.
Besides caching, when using Lambda as resolver to query database, remember to set callbackWaitsForEmptyEventLoop to false in order to reuse DB connections. This is especially true in Node.js.
mongodb.com/blog/post/optimizing-a...
Thanks Gauis, after much consideration and reading, I've to move to API gateway to use Cloudfront caching for certain paths/endpoints. Because there is no cheap or easy alternative for implementing caching on Appsync, the appsync resolver cache costs you money straightaway and Cloudfront with Appsync can't be implemented without Redis.
Nice to hear that Rajat!
I agree caching on AppSync is not straightforward either unless using the provided Redis.
For me personally I am also evaluating between AppSync and Redis Streams for the pub-sub functionality in my new application (Cannot use SNS for some reason). Redis Streams is quite powerful not only as a cache but also moving data around, but at the end I decided to stick with AppSync because I want to go full serverless (My database is Timestreams which is also serverless)
hi, beginner of graphql and trying to use appsync to connect to mongodb.
Based on the tutorial above, it means that i can have different resolvers that connect to to different tables within the same lambda function by having different resolvernames in the switch cases?