
- Step 1: Getting Started with Azure Command and Query
- Step 2 : Setting up the Azure Environment
Coding for the cloud can seem a mountainous challenge at the start. What resources do you need, how can you best use them, and just what will it cost to run your solution?
In our previous step we built an application that exposes a WebAPI to receive new subscriptions to a book club.
This is then stored in an Azure storage account queue, so that the user can continue whilst we process the request further using an Azure Function.
The Azure function is triggered by the queue, and writes the data to table storage in the same storage account for us.
To aid our development, and to allow us to focus, we used the Azure Storage Emulator to fake our storage account, and ran both the WebAPI and Function with 'F5' using the standard Visual Studio tooling to allow them to run locally.
This is great for development and experimentation. But we need to deploy at some point.
In this tutorial we are going to create an environment in Azure using the Azure Portal, and publish our code for testing.
Getting Started
You can find the starting point in the GitHub repo here
Clone the repo, if you haven't already and checkout step-two-start
The Azure Portal
Before we can make the changes that we need to in our code, we first need an environment to communicate with, and deploy to.
Note: For these steps you need a Microsoft Account. If you do not have one with access to Azure resources then you will need to create one. We are not covering that in this tutorial, but you can read more here
- Open portal.azure.com
- Login into your Microsoft Account
We are now on the home page of the Azure Portal. Amongst other things from here we can check the state of your account, navigate around current resources and create new resources. It's the later that is important for us today.
Resource Groups
The first thing that we need to set up is an environment is a resource group. As the name implies a resource group ties the resources together in one group.
This allows easy management of the resources. All related resources are located together, the costs for all related resources are grouped, and when the time comes to clean up your environment all are located together.
- Click on the 'Resource Groups' icon
![]()
- On the Resource Groups page click the '+ Create' button.

- Select the subscription to attach the resource group to
- Give your resource group a meaningful name
- Select the region to store the metadata for your resource group
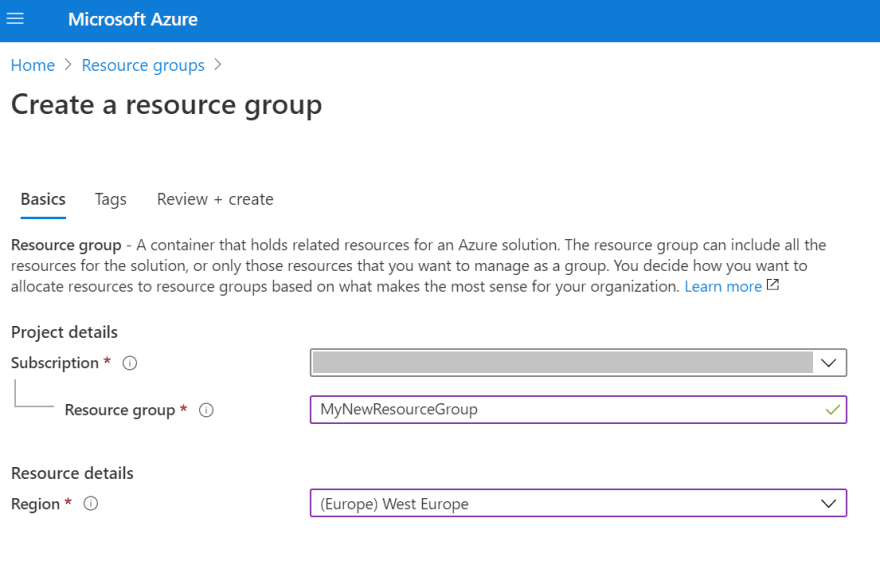
- Click the 'Review and Create' button

- Check that the data entered is correct and press 'Create'

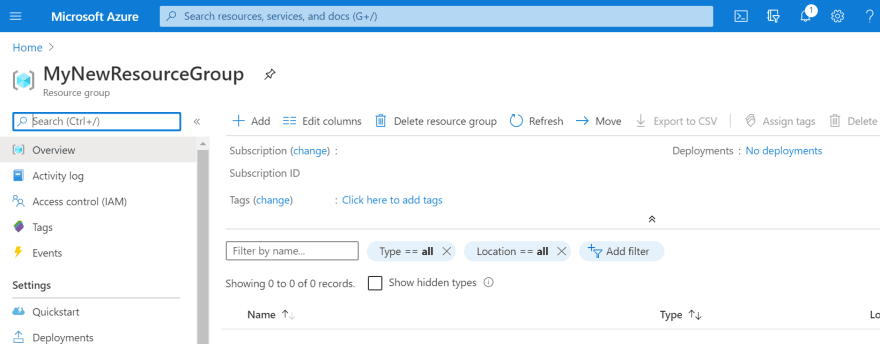
Azure will now create your resource group for you
- Refresh the Resource Group List and you should now see your resource group

Most resources take some time to create, the resource group is an exception to this and appears almost immediately.
Creating the Web App
Now we need to add something to it, the first thing that we need to be able to deploy our app is a Web App.
We need a Web App in order to deploy our Web API application. Think of this like the IIS of a Windows Server.
- Go to the page for the resource group that we just made
- Click on the
Add

- Click on `Web app'
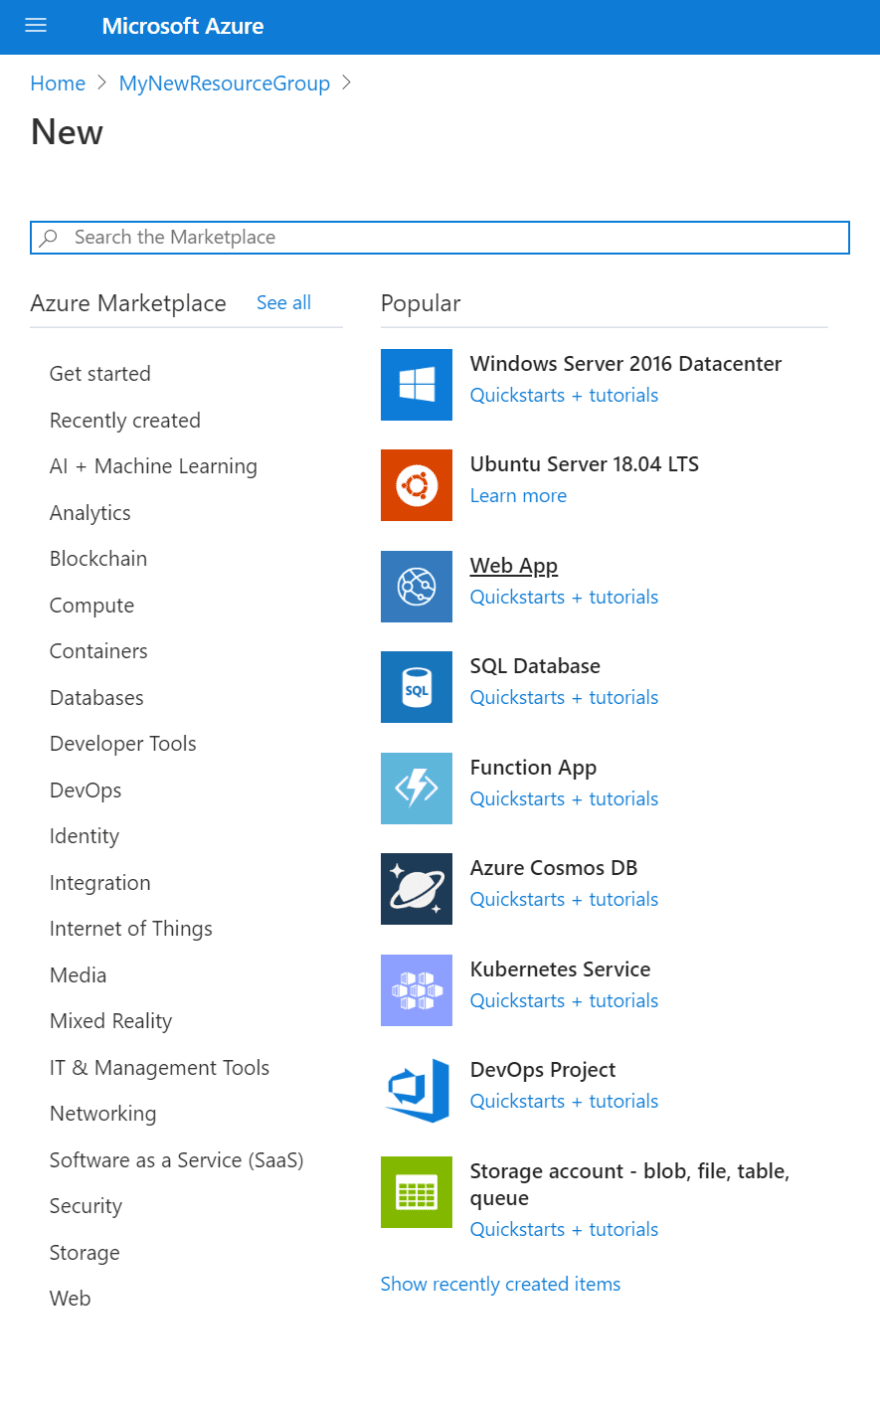

Click on the
Web Applink, otherwise we'll find ourselves in the quick start page 😉
- We should now be on the page to create a new web app - it should look like this

- Make sure that the right subscription is selected
- Make sure that the right resource group is selected (if you created the resource from the resource group this will be prefilled)
- Give your Web App a name
This name cannot contain spaces, and needs to be unique, globally. If someone else has used this name already you will get an error message

- For publishing click
Code - Runtime stack is
.Net 3.1 LTS - Select
Windowsfor the Operating System
Note: There are limitations with Linux App Service plans when using consumption based Function Apps (as we will later in this tutorial), so we are using Windows. If we were to use two Resource Groups to separate this App Service plan from the Function App then we could use Linux for our hosting. For more information see this wiki
- For region select the same as your Resource Group
Note: Depending on the subscription that you have you may not be able to select every region. In which case
Central US- this one has always worked for me
App Service Plan
That is all of the settings that we'll be using today for the Web App itself, but you may have noticed that there are still some settings that we need to look at.

The Web App needs somewhere to run. This is the App Service. If you think of the Web App as IIS, then think of the App Service as the machine it runs on.
As we don't have an App Service in our Resource Group we are going to need to create one.
- Click the
Create Newlink

- In the pop-up that opens fill in the name for your app service
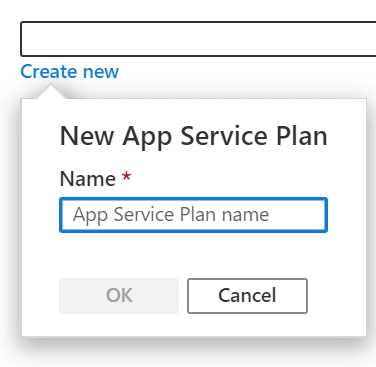
- Fill in a name (this does not have to be globally unique)
- Click
OK - Now we want to select the SKU and size of our App Service.
- Click on
Change Size

We should now have a new fly-in open, allowing up to pick what specifications we want for our App Service
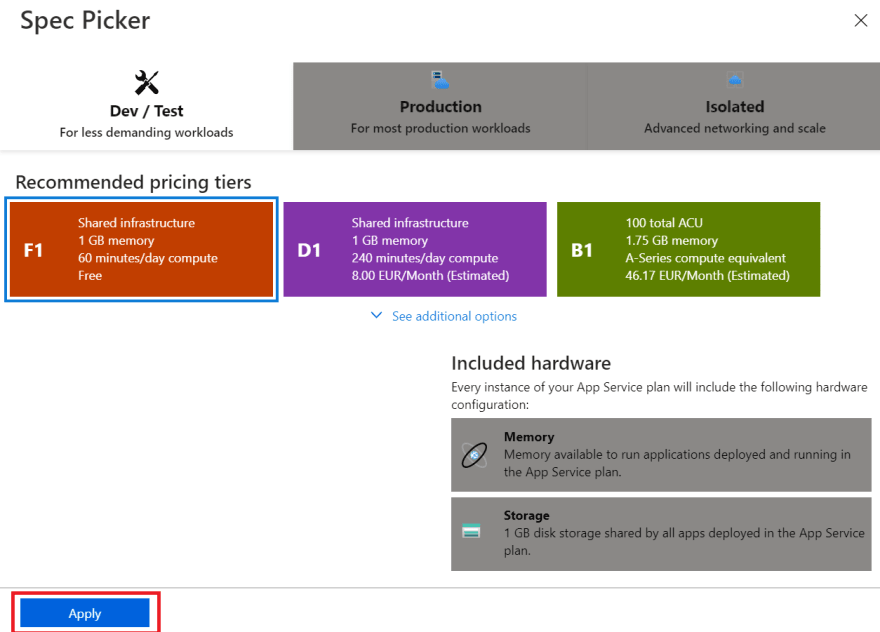
Here we can find all of the options available to us for development, testing, production and isolated instances. Have a look around to see what is available
Pick Dev / Test
Pick
F1 Shared Infrastructure. For our demo free is good enough!
For practice, and demonstrations I always use the Dev/Test F1 tier. This is free, has 60 minutes run time a day and is good enough for what we are doing today.
60 minutes a day does not mean it is only available for 60 minutes a day. It means you only get 60 minutes of actual compute time. If our service is only busy for 1 minute per hour then you would only use 24 in that day even though it was available for the whole 24 hours.
- Click apply
We should now have a screen in front of us that looks a little like:
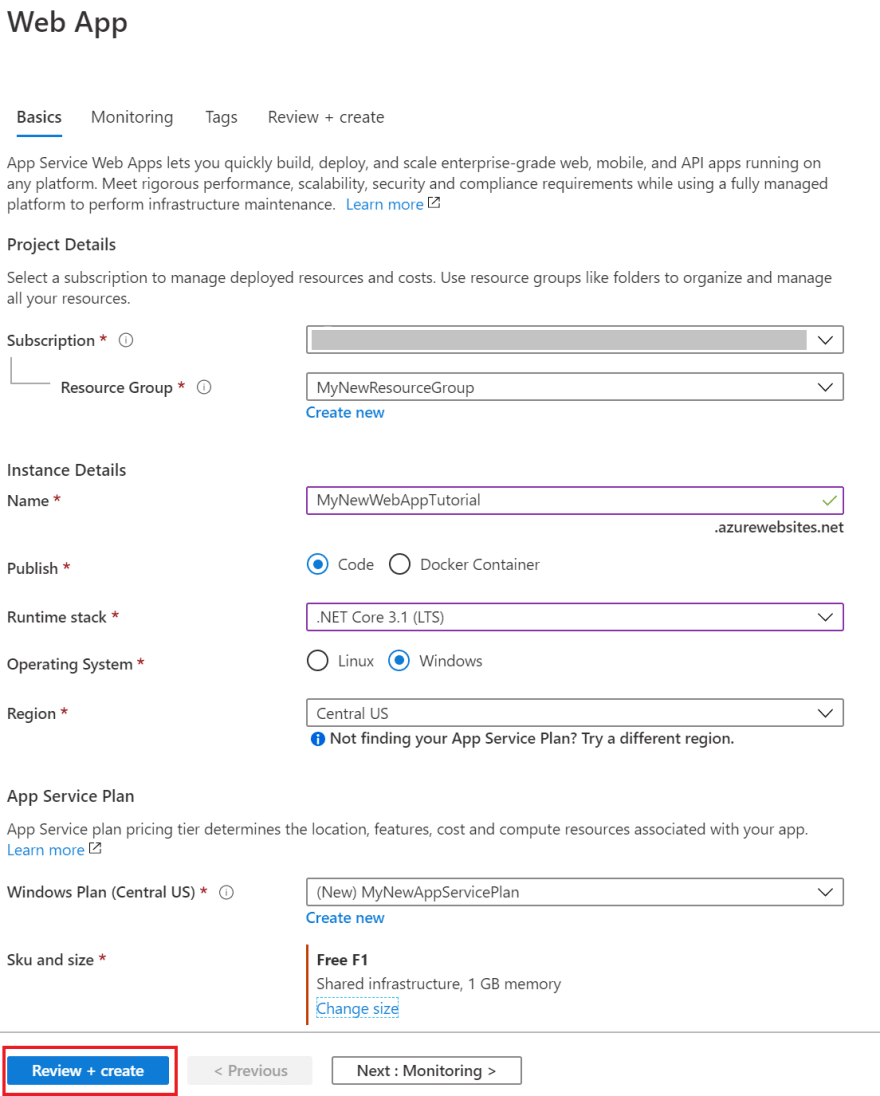
- Click
Review + Create - Check that everything on the review page looks OK

- Click
Create
Azure will now create the resources for us, this will take a few minutes.
Creating the Azure Storage Account
The Web App allows us to host our API, but now we need some storage for it to talk to.
- Go back to the page for the resource group, now with an App Service and Web App
- Click on the
Addbutton to open the new resource blade
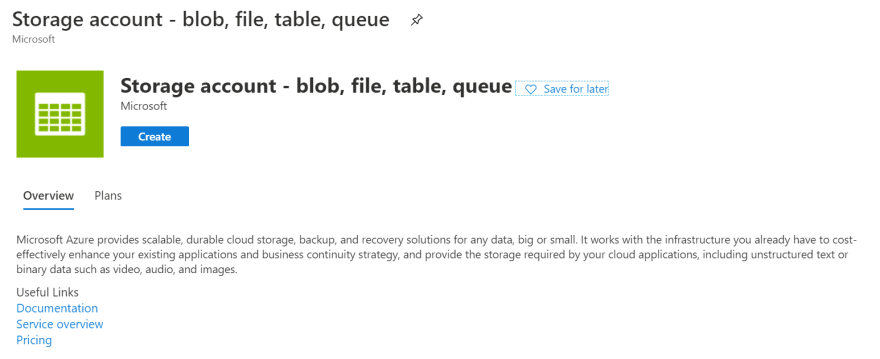
- Search for
Storage Account

Click on the
Storage Account - blob, file, table, queueoptionIn the marketplace page that opens, click on
Create
- In the creation screen make sure that the subscription and resource group are correct

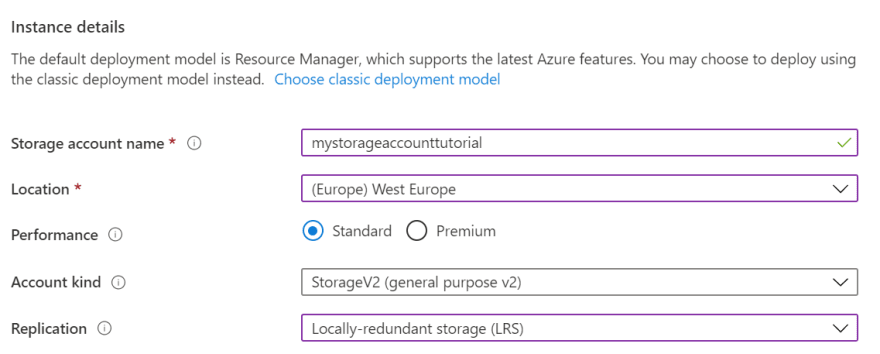
- Fill in the `Instance Details' using this information as a guide
- Click
Review and Create

- Check that the validation has passed, and that all of information is as you intended it to be
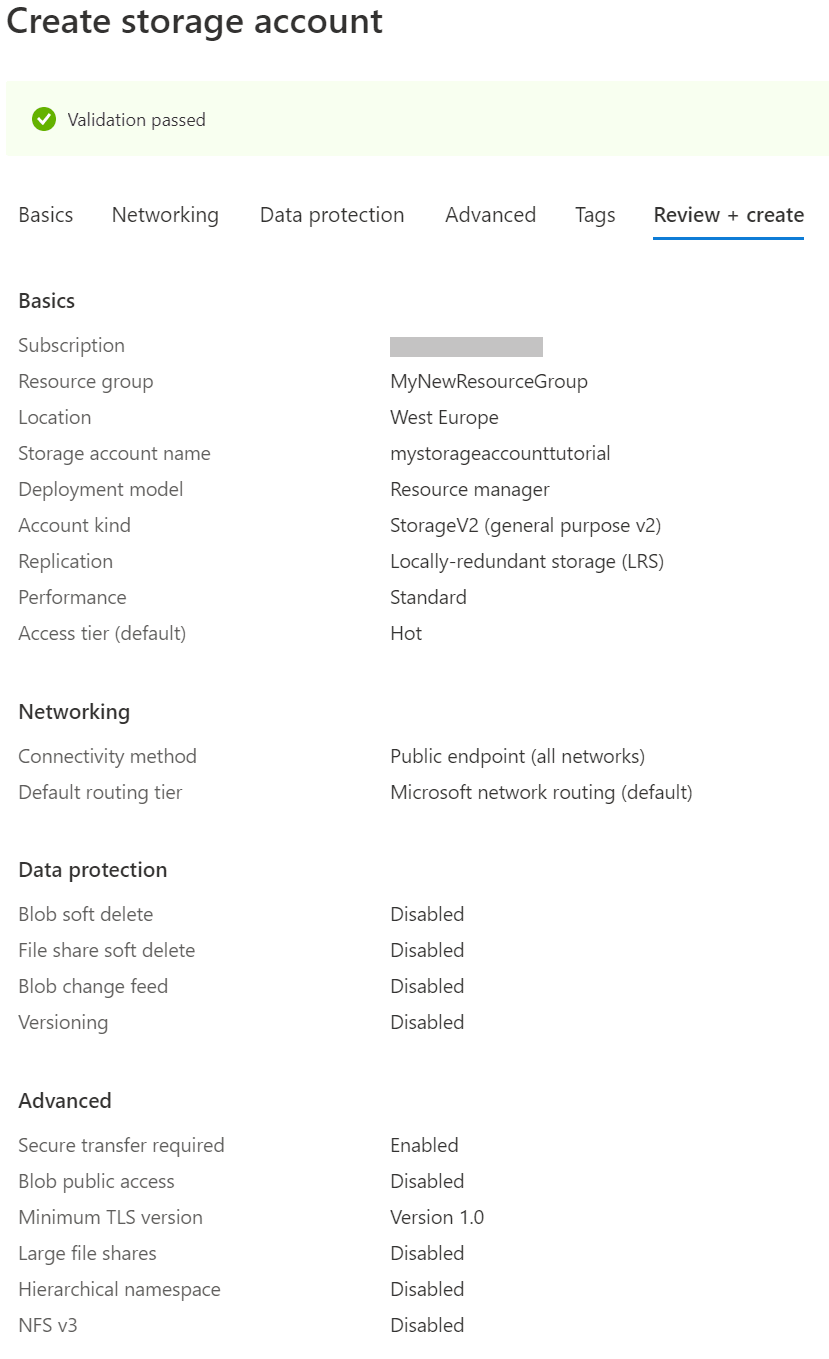
- Click
Create

Azure will now provision our storage account for us!
Whilst it's doing that lets take a quick look at those `Instance Details
Storage Account Name
The storage account name is a globally unique name within Azure.
The same as our Web App, this means that we need to pick a name here that no one else has used.
Unlike the Web App, we have more limitations with the name.
The only characters allowed are lowercase letters and numbers. No PascalCase, camelCase or kebab-case names are allowed.
Yes, this makes the name harder to read. Sorry.
Location
There are two rules of thumb here:
- Keep it close to the metal where it will be written and read.
- Make sure that your users data is compliant with local rules regarding data location.
Performance
For this example we do not need a high data throughput, or extreme response times, so the cheaper standard performance is good enough.
Account Kind
There are three account kinds:
- Storage V2 (general purpose v2)
- Storage (general purpose v1)
- BlobStorage
The Storage V2 accounts are general purpose accounts for File, Table, Queue and Blob storage. For general purpose use this is what we should always use. V1 accounts should only be used for legacy applications that need it. BlobStorage accounts are specialised for high performance block blobs, not for general purpose use.
Replication
Storage accounts always replicate data, but you can specify different levels of replication. This comes at a price, the further down this list you go, the more you pay.
- LRS: Cheapest, locally redundant in 1 data center
- ZRS: Redundant across multiple data centers in one zone
- GRS: Redundant across two zones
- RA-GRS: As above, but with read access across the zones
- GZRS: Redundant across multiple data centers in the first zone, and a single data center in the second
- RA-GZRS: As above, but with read access across the zones
Updating the WebAPI with the Storage Account
Now that we have an Azure Storage Account we can start to use it, to do so we need to make some changes to our WebAPI application.
Get the connection string for the Storage Account
- Open the resource group
- Click on the Azure Storage Account created in the last step to open the resource

- Click on 'Access Keys'

The Access Keys are in the
Settingssection

- On the screen that opens we can see two keys and connection strings. Copy one of the connection strings

You can do this easily using the copy button next to the connection string

Note: Do not post keys online, the storage account is open for attack with these keys available. The keys seen here are no longer valid, which is why they are shared for demonstration purposes 😉
Update the WebAPI with the copied connection string
- Open the WebAPI code
- Open the
QueueAccess.csfile - Replace the
_connectionStringstring literal with the connection string copied from the Azure Portal
It should look like this, but with your storage account connection string:
C#

  public class QueueAccess

  {

    private const string _connectionString = "DefaultEndpointsProtocol=https;AccountName=mystor...";
Test the WebAPI and Queue
We are now ready to run!
- Start the WebAPI in debug mode
- Open the following folder in a terminal (command prompt, Windows PowerShell, Bash etc). The folder is relative to the base folder of the git repo for this tutorial)
<git repo folder>\front-end
- Start the Angular front end application by running:
ng serve
Note: For this you need to have npm and the angular CLI installed. We are not covering that in this tutorial, but you can find more information here Angular CLI and here npm and NodeJS.
- Browse to
http://localhost:42005 Fill in a name, email and preferred genre - Click
Submit

- Open the Azure Portal
- Go to the Azure Storage Account we created
- Open the Storage Explorer from the side bar

Note: The Azure storage explorer is still in preview, as such there may be some issues. But for our example here it works without a problem.
- Open the
Queues\bookclubsignups - We can see our sign up data in the queue!

Deploying the WebAPI to Azure
So now we have all of the resources that we need in Azure to host our WebAPI and to hold our queue, and we have a WebAPI that can send messages into our queue.
It's time to deploy our code and see it work in the wild!
- Open the
SignupApisolution in Visual Studio - Right click on the
SignupApiproject
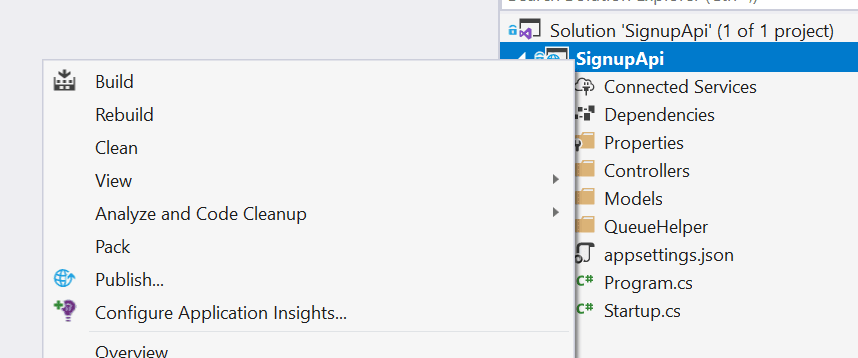
- Click
Publish
Note: There are several notable public speakers who use the phrase friends don't let friends right click publish. But for experimentation and a quick deploy it's very useful!
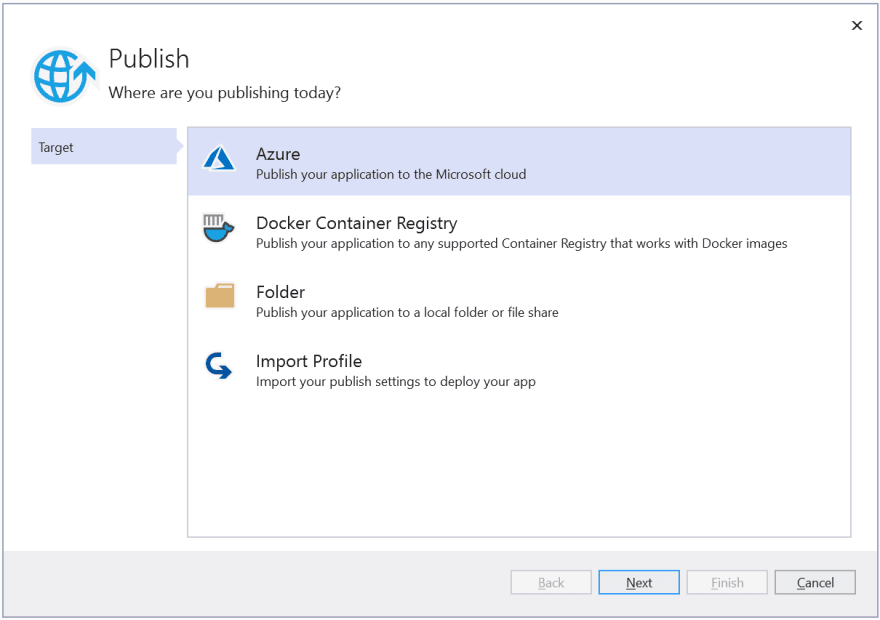
- In the window that opens select 'Azure'
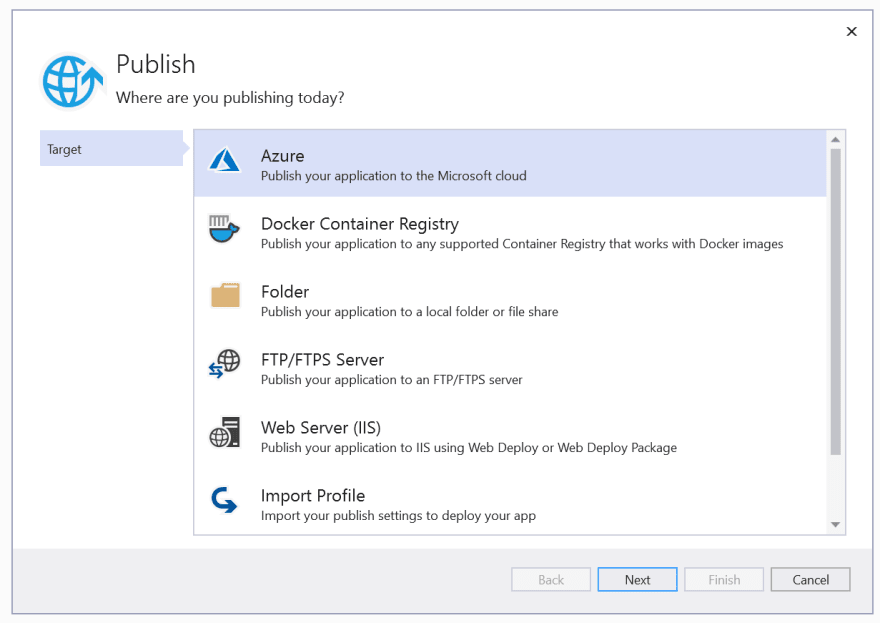
- In the 2nd step select
Azure App Service (Windows)

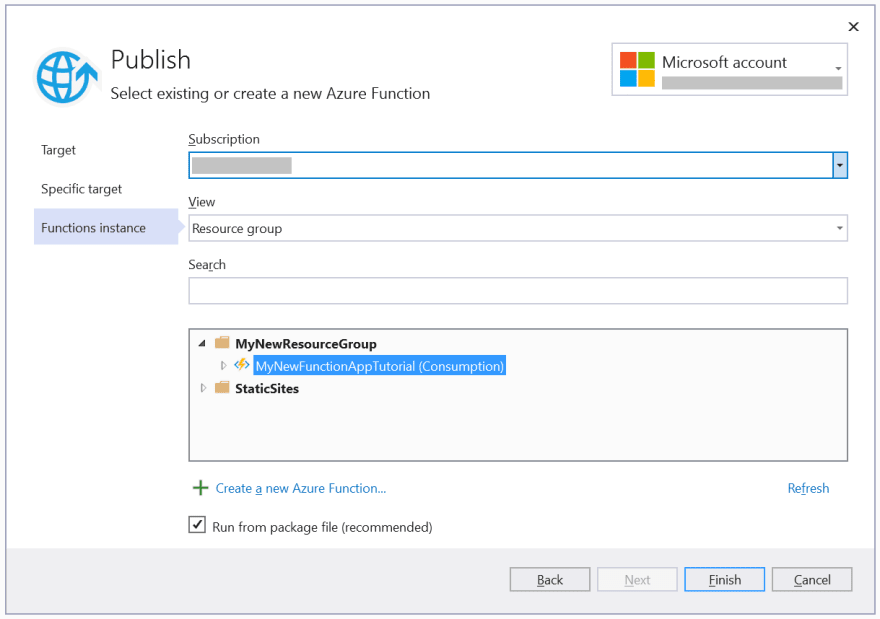
- In the 3rd step select the resource group inside your Azure subscription, and pick the WebApp from the tree view.
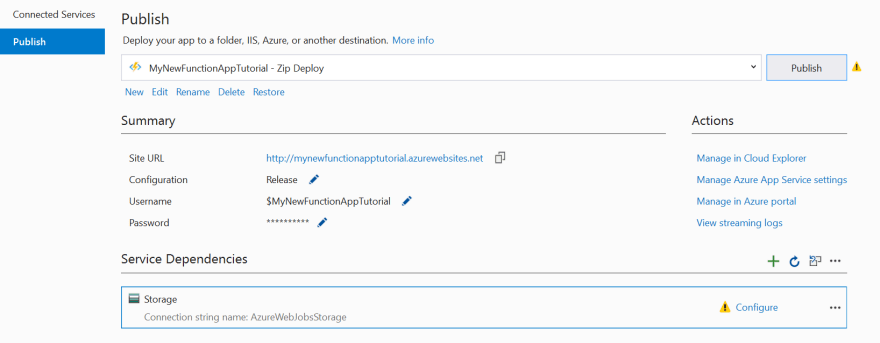
- We now have our publish profile set up. We also have the option for setting up our storage account, which has been detected, and even a pipeline for CI deployments. But for now we are simply going to press the
Publishbutton

Visual Studio will run some checks to ensure that our code will run in the cloud, build, publish and push our code to Azure, and when everything is complete open a browser with the URL of the service.
Don't worry that this shows an error, we only have one route set up for our WebAPI, so the root won't show anything...
But do copy the URL!
Testing the Azure Service
We can test that our API is working using our front end application.
- Open the front end angular project folder in VS Code
<git rep folder>\front-end
- Open the
SubscriptionServiceclass
src\app\service\subscription.service.ts
- Change the URL for the API from localhost to the deployed web app
From:
tshttps://localhost:44343/api/bookclubsignup`;
const url =
`
To:
tshttps://.azurewebsites.net/api/bookclubsignup
const url =;
- Run the Angular app and add a new sign up the the book club
- Recheck the Azure Storage Account and check that your new signup is saved, below you can see Rory has signed up for book club now as well

Creating the Azure Function
We now have a working WebAPI, deployed and sending requests to the queue. Now we need to read that queue and store the data in a table.
To do that we need to deploy our Azure Function, so we need a new resource.
- Open the Azure Portal
- Go to the Resource Group
- On the Resource Groups page click the '+ Add' button
- Click on the
Function Applink (notQuick starts + tutorials)

In the Create Function App Basics make sure the correct subscription and resource group are selected
Give the function app a name, this has to be unique in Azure
For
PublishselectCodePick
.NET Corefor theRuntime StackSelect
3.1forVersionMake sure that the Function App is located in the same
Regionas the Storage Account and Resource group

- Click 'Next: Hosting >'
- For the
Storage Accountpick the one we created in this tutorial
Note: If this isn't available then double check your regions - you can only pick storage accounts in the same region as you are creating the Function App
- Pick
Windowsfor the operating system
Note: As said earlier, there are limitations with Linux App Service plans when using consumption based Function Apps, so we are using Windows. If we were to use two Resource Groups to separate this App Service plan from the Function App then we could use Linux for our hosting. For more information see this wiki
- For the
Plan TypepickConsumption (Serverless)

- Click
Review + Create

- Check the details of the Function App and if all are correct click
Create


Azure will now deploy the resources needed for our new Function App
Once deployed, our resource group is now complete, and should look like this
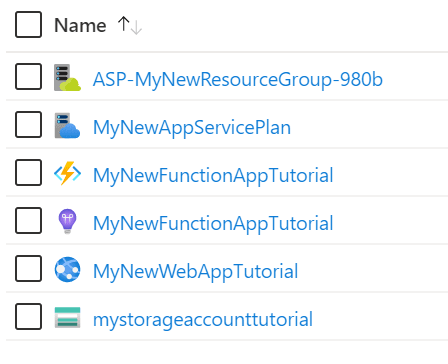
The function app creation also created the Application Insights resource, but we are not going to be using that for this tutorial, so we can ignore it.
We can also see the new App Service Plan that has been created for the Function App. This will be spun up when the Function App is called, and the code for the function deployed to it from the Storage Account.
Note: This does mean that there is a delay when calling a consumption based Function App from cold before it responds. This is why we have used a regular WebAPI hosted in a Web App for our API layer.
Updating the Function App with the Storage Account
Now that we have our Function App available we can update our Function App code to to triggered from our queue, and to write our data to the queue.
Updating the Function App trigger to use the Storage Account
There are three changes that we need to make to change the trigger
- Open the Function App solution
- Open the
serviceDependencies.local.jsonfile

- Copy the JSON below into the file
json

{

  "dependencies": {

    "storage1": {

      "resourceId": "/subscriptions/[parameters('subscriptionId')]/resourceGroups/[parameters('resourceGroup')]/providers/Microsoft.Storage/storageAccounts/<Storage Account Name>",

      "type": "storage.azure",

      "connectionId": "AzureWebJobsStorage"

    }

  }

}
Note: The
resourceIdends with the Storage Account of our queue. In our example we usedmystorageaccounttutorial, that is what we would use here. Whatever the name of the Storage Account is should be used.
- Copy the connection Azure Storage Account connection string from the Azure Portal, as we did earlier
- Open the
local.settings.jsonfile
You may need to recreate this file due to
.gitignoresettings. If so create it in the root of the Functions project
- Replace the value of
AzureWebJobsStorage(currently"UseDevelopmentStorage=true") with the value copied from the Azure portal
It should now look like this, but with your storage account connection string:
json

{

  "IsEncrypted": false,

  "Values": {

    "AzureWebJobsStorage": "DefaultEndpointsProtocol=https;AccountName=mystor...",

    "FUNCTIONS_WORKER_RUNTIME": "dotnet"

  }

}
Note: This setting allows us to run the solution locally, but using the Azure Storage Account rather than the Storage Emulator
- Finally, open the
StorageTableAccess.csfile - Replace the
_connectionStringstring literal with the connection string copied from the Azure Portal
It should look like this, but with your storage account connection string:
C#

  public class StorageTableAccess

  {

    private const string _connectionString = "DefaultEndpointsProtocol=https;AccountName=mystor...";
Test the full application locally
We can now do a full local test! From web application, through our WebAPI, Azure Function running locally and into our Storage Table.
- Start the function in Debug mode
NOTE: Function Apps run in specialised environments in Azure, when you run your app in debug mode Visual Studio spins up an Azure Function Tools application to create this environment locally.
- Run through the same same steps as our previous test - but don't look in the
Queuesection! - Instead, look in the
Tablesection, where we should now see our latest test:

Deploying the Function App to Azure
Now on to the last step, deploying our BookClubSignupProcessor to Azure!
This flow is similar to deploying the WebAPI to azure
- Open the
BookClubSignupProcessorsolution - Right click on the
BookClubSignupProcessorproject
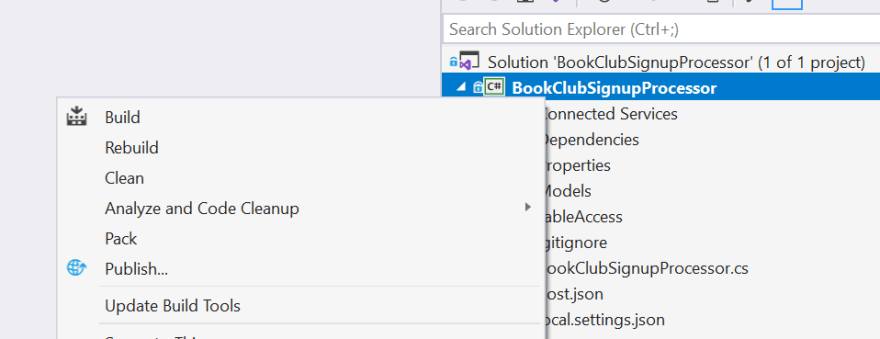
- Click
Publish
- In the window that opens select 'Azure'
- In the 2nd step select
Azure Function App (Windows)

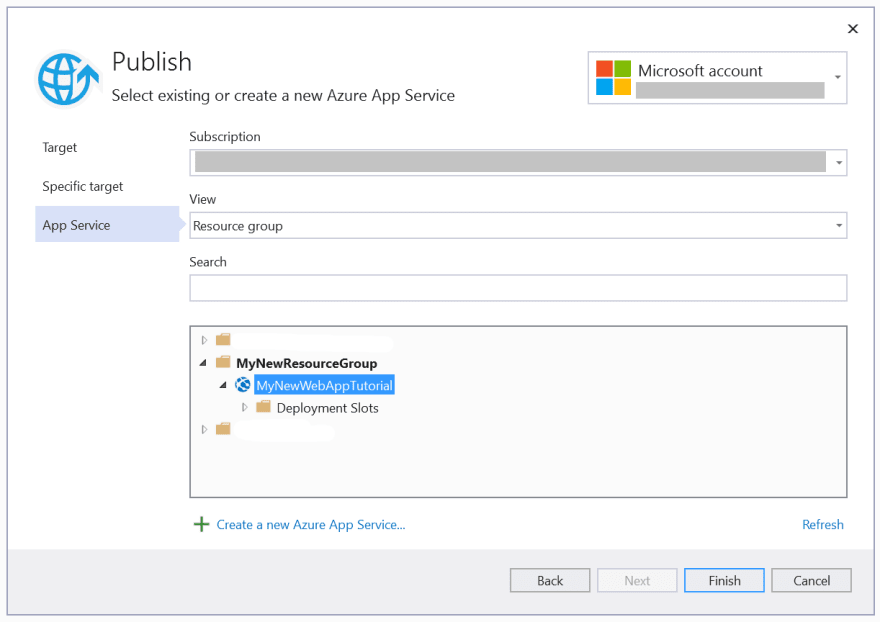
- In the 3rd step select the resource group inside your Azure subscription, and pick the Azure Function from the tree view.
- We now have our publish profile set up. We also have the option for setting up our storage account, which has been detected, and even a pipeline for CI deployments. But for now we are simply going to press
Publish
Note: Here we see a big difference from the WebAPP deploy. The Azure Function has a dependency on the Storage Account, which has a warning. We are going to ignore it for now
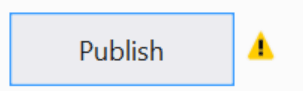
- Click the
Publishbutton
Now it's deployed, we can take a look at the function in the Azure Portal to ensure that it worked correctly.
Check that the function has been deployed and is available
Now that we have deployed our function app we can see it in the Azure portal
NOTE: Functions take time to spin up, it may be that after you have deployed it doesn't appear straight away
- Open the Azure Portal
- Go to the Resource Group
- In the list of resources click on the Function App created

- In the side menu of the Function App click
Functionsin the groupFunctions

- In the blade that opens we can see all of the functions within the Function App, the type of trigger and if they are enabled

Now that we know our Function is deployed and available we can run our final test!
Test the deployed Function App
We now have a full environment deployed and can do one final test to make sure that everything is set up as it should be.
We are going to use the same test as we did running the Function locally. The only thing we need to run locally now is our front end!
Closure and Next Steps
You can find the end point in the GitHub repo here
Clone the repo, if you haven't already and checkout step-three-start
Files will need editing to run - ensure that the correct connection strings and storage account names are set. Due to the nature of publish profiles and their access tokens these files are not included - you will need to follow the publish steps yourself to deploy this repo.
Our solution is now deployed, and running in the cloud. Using a Web App, Azure Storage Account and Azure Function to run in the wild.
As with our previous work, this has been a quick skim through, and is just the start of making a maintainable cloud solution. In the following posts, over the coming months, we'll be
- Taking a look at the Azure cost calculator so that we can check what the associated costs of that environment will be
- Taking a deeper dive into each of the Azure resources we need for this experiment
- Taking a deeper dive into each of the APIs that we are using to access them!
- Finally, we'll be automating the deployment, using Azure DevOps, and quickly throwing a static Angular site into the air so that we can interact with our API


Top comments (0)