In the last post, we reviewed the design of our project and setup our project environment. In this post, we're going to start setting up the working components of our project and start testing it out.
Creating Compute Images
This is the part of exercise that can become a bit confusing for some with so many different ways to provide a solution. Because of the multitude of ways an image can be generated, not to mention the multitude of formats it can support, I will instead focus on deploying VM images using reproducible processes. I will avoid looking at containers as this requires the Magnum Container Orchestrator or Zun Container Server, but definitely worth taking a look in another series.
Once you consider OpenStack is an orchestration technology (like Kubernetes but for Virtual Machines), you can start to understand that Nova (Compute component) as a Virtual Machine controller like QEMU, VirtualBox, or Xen. This means the same ways you can spin up a VM on your local machine can be similar to what can be done with OpenStack. Let's take a look at some of these ways.
Loading Base Images
Before starting to cover anything in this section, all options require uploading a new image at some point. Let's first get this ready with ready-made images from popular distributions. OpenStack provides a list of popular options that can be supported. A big consideration for future automation is the inclusion of cloud-init in the base package. There's ways to do this automatically (via DevStack's local.conf file) when we first set up our instance.
I will be using the Debian Buster Cloud Image in this project for its simplicity and stability.
- Go to the link above and find the latest release. Download the
debian-10-openstack-amd64.qcow2file from the list. - Once Downloaded, open the Project section in OpenStack Dashboard and select Images. Select "Create Image" to open the Create Image dialog.
- In the new dialog specify the following options:
-
Image Name:
debian-buster -
File: Find the file downloaded (
debian-10-openstack-amd64.qcow2) -
Format:
QCOW2 -
Minimum Disk (GB):
3. Set this if you want to prevent headaches in the future. -
Visibility: (optional) set to
Public. This provides accessibility across all projects See more in the wiki: Glance V2 Community Image Visibility Design
-
Image Name:

- Click on Create Image to upload the image into Glance.
Once complete, the image is ready to use. Follow these same steps for other image types in the next sections.
Pre-built Images
Since we're effectively building VM's within OpenStack, it's possible to create the VM image ahead of time and load it into OpenStack once it's ready. I'll skip over many things here since we won't be following these steps.
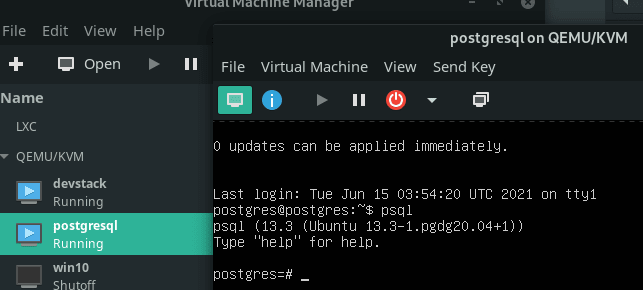
For example, using QEMU/Virtual Manager on Linux, I was able to prepare a VM using Ubuntu 20.04 with a 10GB (unfilled) disk, follow the instructions from the console and install PostgreSQL 13 onto it (from the PostgreSQL APT repos).
Once you have the image at the state you want it and can auto-start all required services, shut down the instance and upload the QCOW2 (or other disk format) for the VM into OpenStack. From the Project section, open Images and "Create Image" for the image you just created.
Once available, "Launch Instance" will prepare this image into Disk Volume to be in a VM and started. Select the Disk Size, Instance Flavor (like m1.medium) then Launch the instance. This will create the disk using the image, configure the VM on the available network and get it started.

Now there are a number of issues that comes with this type of loading:
- Takes up much more memory as you have to store a 2-5GB sized image. There are also problems loading larger images as the service can error with a timeout during upload.
- Requires your network interface be configured as DHCP Automatic if you want to deploy more than one instance of an image.
- Will need to configure each image specifically for each instance.
Manual Instance Creation
One way to improve this process is to use the OpenStack environment as your Virtual Machine controller to configure your instances without needing to upload new images each time. This should drastically reduce the number of images to maintain and saves time managing those instances.
Like before, instead of creating a VM in your controller of choice, you choose a base image to start a new instance (we've already uploaded one) and configure it that way.
I won't go into the details, but the steps are basically the same as before, just in a slightly different order (set up the image after launching the instance in OpenStack instead of before). This will greatly improve disk usage and time, allows for very custom configurations as you interact with each instance individually.
But it still has its problems:
- Takes a long time to set up for any large application
- Lots of manual interactions means lots of potential for Human Error
cloud-init to the rescue
cloud-init is a standalone package containing scripts and applications installed into base images that run at first boot and listens for configurations to be provided. These configurations define all aspects of system configuration and commands to run to set up the instance quickly. These configurations can easily be saved and managed in Git repositories or in other locations. If anything happens or goes down, you can start up a new instance using the available configuration quickly.
OpenStack provides access to cloud-init UserData via an EC2-compliant Metadata Service during the boot process to allow you to include the configurations needed to define the instance automatically. This means after you've launched your base instance, you can log into it with all OS provisions, user accounts created and applications installed.
For this exercise, we want to create a database host using PostgreSQL 14 to store our object metadata and querying capabilities while allowing for scaling/multi-server configurations later.
Start Instances with cloud-init Config
Cloud-Init has many parts that can be used to configure an instance. Some of these parts can be "baked-in" to the base image while other parts can be provided through the Metadata Service. What we will be providing will be the cloud-config (or User Data) part that will allow us to create users, set up the OS after it's been initialized, and start installing applications and setting them up.
Since our project contains two nodes, we'll first start with the node that requires us to start building an application, the Database Server. We'll follow through the same steps defined to launch an instance but before finishing, we want to also include the configurations necessary in the "Configuration" section. Here we can include a configuration file (often as a YAML file) that will provide what we want to set up.

-
Details: set Instance Name to
db -
Source:
-
Size (GB):
5 - Allocate
debian-busterimage
-
Size (GB):
-
Flavor:
- Allocate
ds2G
- Allocate
- Configuration: Include the following code under Customization Script:
#cloud-config
users:
  - name: app
    ssh-authorized-keys:
      - $SSH_PUBLIC_KEY
    sudo: ['ALL=(ALL) NOPASSWD:ALL']
    groups: sudo
    shell: /bin/bash

growpart:
  mode: auto
  device: ["/"]
  ignore_growroot_disabled: False
package_update: true
package_upgrade: true
runcmd:
  - apt install -y curl ca-certificates gnupg
  - curl https://www.postgresql.org/media/keys/ACCC4CF8.asc | gpg --dearmor | tee /etc/apt/trusted.gpg.d/apt.postgresql.org.gpg >/dev/null
  - echo "deb http://apt.postgresql.org/pub/repos/apt buster-pgdg main" > /etc/apt/sources.list.d/pgdg.list
  - apt update
  - apt install -qy postgresql-14
  - echo "host all all  0.0.0.0/0 scram-sha-256" > /etc/postgresql/14/main/pg_hba.conf
  - sed -i \"s/^#listen_addresses = 'localhost'/listen_addresses = '*'/g\" /etc/postgresql/14/main/postgresql.conf
  - systemctl restart postgresql
  - sudo -u postgres createuser app
  - sudo -u postgres createdb app
  - sudo -u postgres psql -c "alter user app with encrypted password '$APP_PASSWORD';"
  - sudo -u postgres psql -c "grant all privileges on database app to app;"
This YAML configuration includes configurations specific to cloud-init (like creating the user account and various os changes. The runcmd section then lists all of the commands I want to run at the end of the set up to finalize the system with what I need.
NOTE: Remember to replace both
$SSH_PUBLIC_KEYand$APP_PASSWORDwith the values relevant for your setup. Your Public SSH Key (often found in your home directory, like ".ssh/id_rsa.pub") will allow you to SSH into your new instance without needing a password. You may even provide multiple SSH keys if you intend to connect from multiple machines. For the DB Password, use something unique as this will be used by our application to connect to the database.
Once entered, click Create Instance to create the new instance and load it's configuration. The Log tab will show you a truncated output of the recent logs generated on this system. Even if the system finished starting up, the cloud-init tasks may still be running. You know it is complete once you see "Reached target Cloud-init target". Even though we do have access to the Console tab which gives a virtual viewer into our new instance, because our user account does not have a password, we won't be able to log into this instance from here. We will get to that in a moment.

Connect to your new instance
Now that you have a running database instance, we want to use it to test our connection and start developing with it. This requires a few things which we will setup here:
- Floating IP: Used to access our instance, even if it's temporary, from outside the cloud.
- SSH Tunnel: This will allow us to create a port tunnel from our DevStack host into our Database server. We will use this for testing our connection and developing our code.
Assign Floating IP to our instance
We've already created a Floating IP in our last post but figured we should explain a little bit more about what they do here.
Floating IPs are interfaces (or gateways, or tunnels) for an internal network to open a device to a public network (as long as a router has been specified). Instead of thinking of the public network as a network we must route to, it's best to think of it as a pool of public addresses we can reserve. Other projects will also pull from this "pool" so more than likely, you will be limited in the number of Floating IPs you can create.
For example a public network with a CIDR of 172.24.0.0/27, the bit range is 5 (32 - 27) which translates to 29 interfaces (25 - 1 network address - 1 gateway, if used - 1 broadcast) giving you a pool of 172.24.0.2 - 172.24.0.30. If working with a hosted OpenStack, the administrator will likely put a lot of restrictions to how many Floating IPs a project can create, thus reserving a set number to each project.
It's also good to remember, a Floating IP is an interface (or access point) into our project. In production environments, this becomes an attack vector and security risk, so we must limit how many our projects use. Even for our own private clouds, there can be limitations to using too many Floating IPs. It would be easy enough to provide unlimited Floating IPs to our projects, but then our hardware resources now needs to handle all the traffic rules (Security Groups) controlling traffic through these interfaces.
For the purposes of our project, we will set up a Floating IP solely to test our database (in the future, we would use a Jump Host to perform this task).
Continuing our work from our new db instance, click on the drop-down menu in the top-right corner. This will provide a long list of actions that can be done to our instance. For our exercise, we want to select "Associate Floating IP".

A dialog will appear which will prompt you to assign an existing IP, we have the option to generate new IPs (using the + button) but we have one available already. Select the drop down in the dialog to assign the IP to this instance.

Create an SSH Tunnel
Up to now, if you've done everything right, you should have a VM Instance with a PostgreSQL Database, OpenSSH server started with your OpenStack host's SSH Public Key, and has a publicly-accessible (or at least accessible outside of OpenStack) IP address. Let's use it!
To start, we're going to test access to our new instance. Since this is on our DevStack VM, we'll need to SSH into that first. If you're using a VM with a desktop, log into it's graphical console.
ssh stack@my_devstack_vm
Next we'll need to SSH into our new PostgreSQL VM. Since we assigned it a Floating IP, we'll use that to access our DB
ssh app@172.24.0.196 # Or whatever your Floating IP generated.
After confirming the system's SSH Fingerprint, you should now be on your new VM. This is just like any other system. You can play around on this system, but we've got work to do. Since this will be our Application's DB, we should access that database.
psql -d app -U app
\q   # to exit
From here, you can run some commands to verify what's available, but there should be no database configured yet other than the database and user. We'll take care of that in the next post. But let's get to the good part, create an SSH Tunnel.
Since our SSH Keys have been identified on this new instance, we can create a tunnel between our DevStack host and this DB. This will open a port on our DevStack host which will pass all traffic to our DB making it look like our DB is on the Host machine itself. The command to do this (from the DevStack Host) looks like:
ssh <user>@<host_address> -L [<bind_address>:]<local_port>:<target_address>:<target_port>
A short description of this command is:
- host_address is the address we are going to SSH into. This is where the other end of the tunnel will exist.
- local_port is the local port number that will be opened to handle the traffic
-
target_address is the address where traffic will be pushed to. In this case, because we are creating a tunnel into our DB, this will be
localhost. This command can also be used with jump hosts andtarget_addresswill be any address the jump host will have access to. -
target_port will be the port number on the
target_addressthat will be connected. - The optional bind_address tells who will have access this port. By default, it'll only create a local socket (you can only access it from the local machine). Adding a binding address can allow other systems on your network to connect.
Coming back to our setup, we are already in an SSH instance on our DevStack host. From here, we will create a tunnel directly into our PostgreSQL DB instance. Our command then will look like:
ssh app@172.24.0.196 -L 0.0.0.0:5432:localhost:5432
This will open an SSH connection in your console, but in the background, port 5432 is also opened on the DevStack host. As long as this connection stays open, this port will be active.

Testing it out, if we open a new console (and you have the psql command installed locally or some IDE with the PostgreSQL drivers configured), you should have access to this database. For example, below is the
connection made from my local PyCharm instance:

Conclusion
This was a big post, but we covered a lot of ground here:
- Added a base image into our OpenStack project
- Created a new instance using
cloud-initto set up our account, copy SSH Keys, install a DB and start configuring the DB. - Created and associated an externally-available Floating IP to our DB for development purposes.
- Using the new Floating IP, covered how to connect to our DB from our local machine using an SSH Tunnel.
The project is starting to take shape and in the next post, we'll cover the coded component of our work. Don't worry, I've done all the work, you just need to deploy it. But it should also give you good coverage of SOME of the features OpenStack has to offer, including internal network communications, interacting with OpenStack's STaaS (Storage as a Service) Swift Object Store, and deploying applications.
Thanks for following up to now and love to hear any feedback you may have. I've got lots of ideas of follow-up projects on this to cover more areas of OpenStack, but want to know what areas you want me to cover first.


Latest comments (0)