Table of Contents
- Introduction
- Linux File System Hierarchy: What’s Where?
- Essential Linux Commands Should Know
- Real-World Practical Tasks
- Conclusion
- Let's Connect
Introduction
Day 2 is all about getting comfortable with the Linux terminal, understanding how the system is structured, and getting hands-on with must-know commands.
These are the kind of basics that real companies expect you to be fast with, no guesswork, no Googling. Just second nature. But first we will get to understand the file system layout.
Linux File System Hierarchy: What’s Where?
Linux is clean and structured. Think of it as a tree, starting from the root /.
Here’s a simple rundown of major directories you will use daily.
| Directories | Purpose |
|---|---|
/
|
Root of the filesystem (everything starts here). Like the number one directory at the top level. |
/root
|
This is the home directory of the root user with (The Admin) |
/home
|
User directories |
/etc
|
System config files |
/var
|
Logs, spool files, variable data |
/usr
|
Installed applications, binaries |
/sbin
|
System binaries, stores commands for the super user (root) |
/bin
|
Essential command binaries (ls, cp, mv) |
/opt
|
Optional third-party software |
/tmp
|
Temporary files (auto-deletes on reboot) |
/dev
|
Device files (disks, USBs, etc) |
/proc
|
Kernel and process info (virtual filesystem) |
Essential Linux Commands Should Know
It is a best practice to always know where you are operating at every point in time. One wrong command in the wrong directory can break your system. Here is a list of core Linux commands and their uses.
| Commands | Purpose |
|---|---|
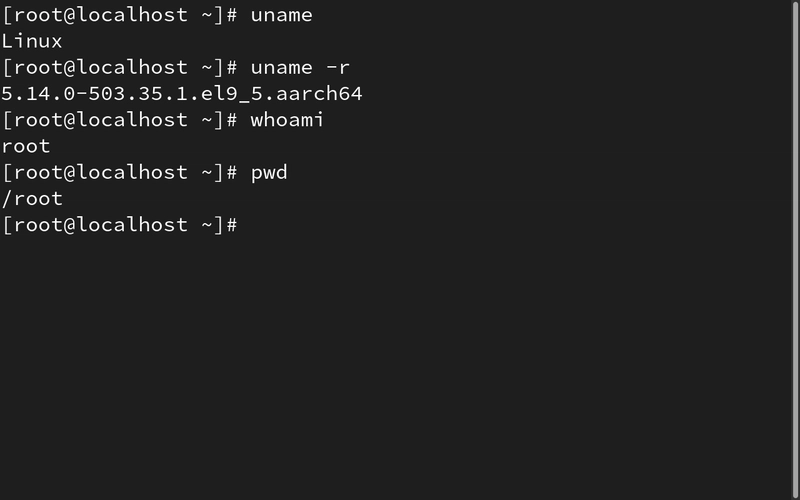
pwd
|
means print working directory. Shows your current working directory |
whoami
|
Shows your current user. To check the user currently using the kernel |
cd
|
Change directory, just as the name means changing into any directory to work on |
cd ..
|
Means going one step back in changing directory. |
mkdir
|
Make Directory is used to create folders |
touch
|
For creating files |
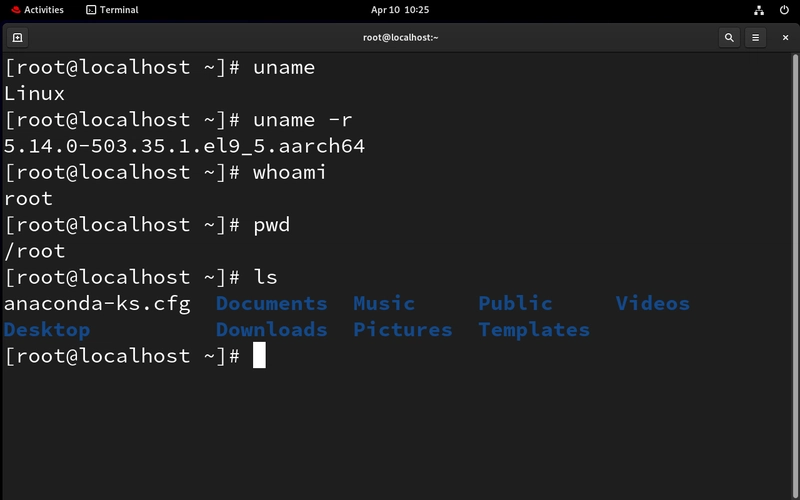
ls
|
This is for listing all folders |
cp
|
This is for coping files |
mv
|
This is for moving or renaming a file or folder |
rm
|
This is for removing or deleting files |
rmdir
|
This is for deleting empty folders |
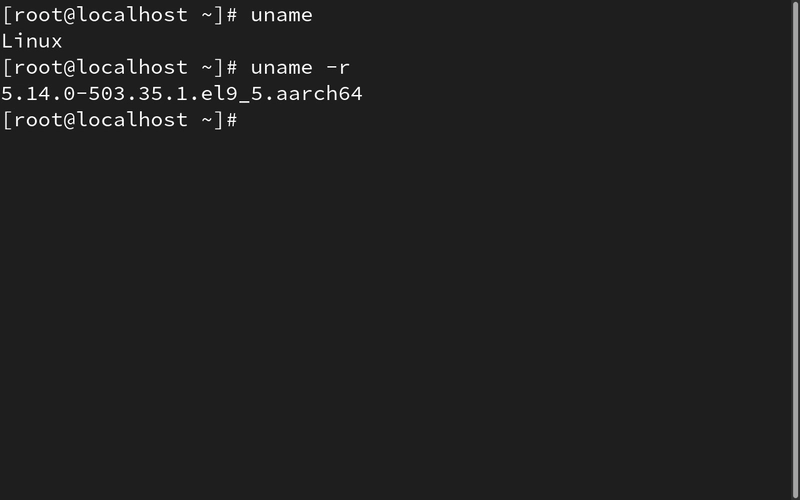
uname
|
Shows the current kernel running. Example;Linux |
uname -r
|
Checks the kernel version |
date
|
For displaying date |
History
|
Shows all the commands you have used in a session |
tree
|
Displays the tree structure of your folders |
useradd
|
For creating new users |
clear
|
For cleaning up your terminal screen |
exit
|
For exiting the terminal |
Real-World Practical Tasks
Here is an example of a daily task you may receive as a Cloud SysAdmin who just got hired!
"Hey, get familiar with the terminal. Create a clean workspace under your home directory. Add some folders and dummy files. Don’t break anything 🙂"
Simple? Yes. But this is how it starts. Here is how I broke it down and tackled it.
Goal: Create a Workspace with 3 Folders and Files
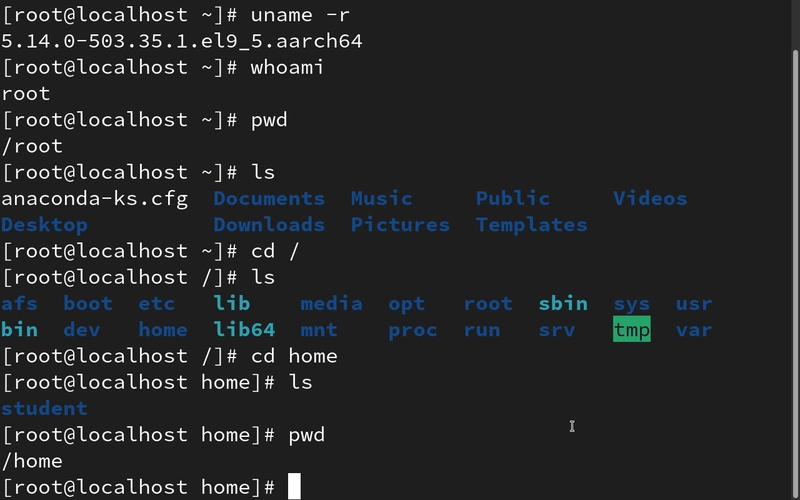
- Check the kernel and the version
- Check the user
- Cross-check your current directory
- List the directories and Navigate to your home directory
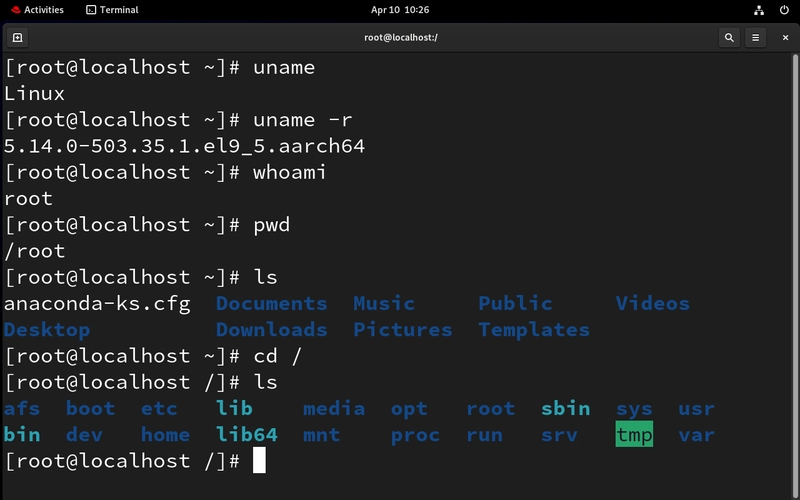
- Since we are in the root directory, we cannot see the home here. Therefore we have to change the directory to the top level. Remember the file hierarchy where
/is the top level? Great! we move here. And we will list the directories here.
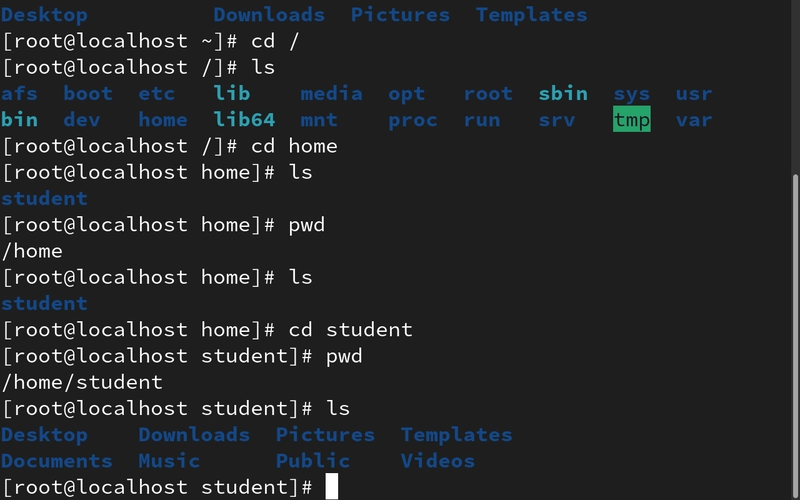
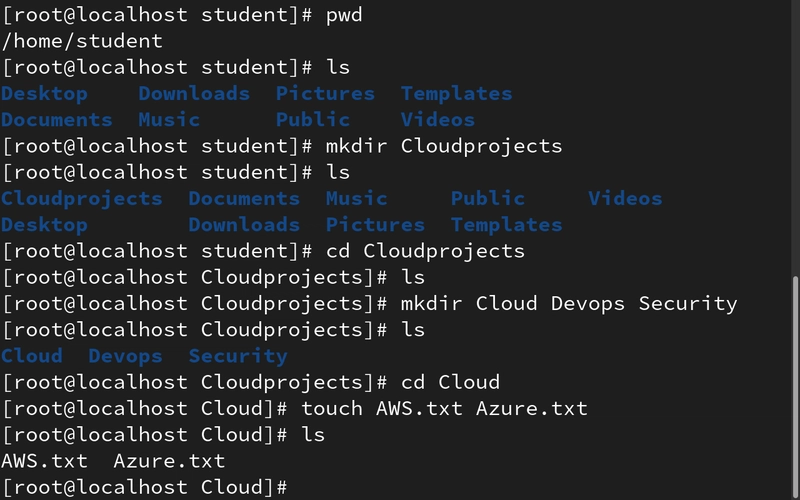
- Change directory to home directory, list its content, and print the current directory in the terminal. Here you will see your folders for your users. For this illustration mine is called 'student'.
- Now we are in the home directory. We will now change directory again to student. Print the directory and list the content.
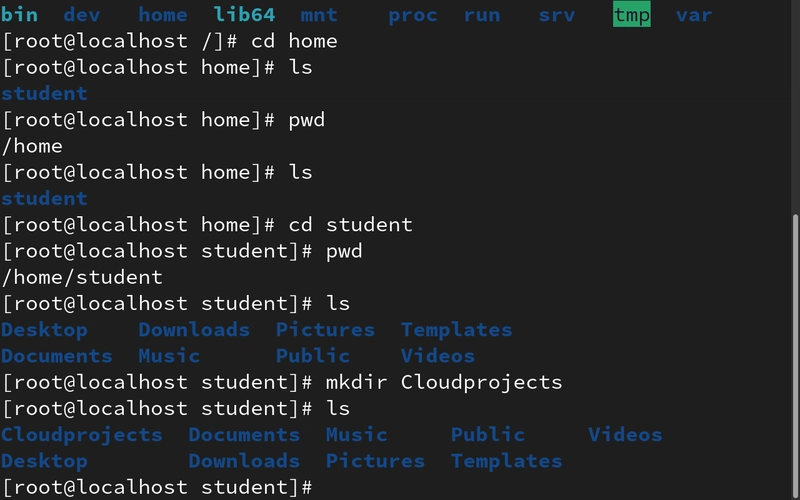
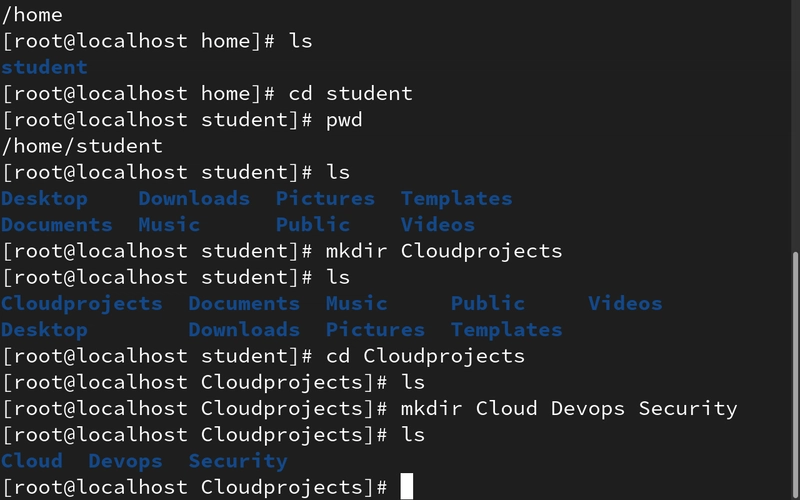
- Let's create a folder called “Cloudprojects”. We will list it now and see that we have this new folder we just created.
- Time to create 3 folders (Cloud, Devops, Security) inside the Cloudprojects folder. List the folders. This is to be sure you did the right thing.
- These are empty folders. Let's go ahead and add two files called "AWS.txt" and "Azure.txt" in "Cloud folder"; "Linux.txt" in "Devops folder"; we will leave the "Security folder" empty.
For Cloud folder:
- Change directory into the Cloud folder. Use
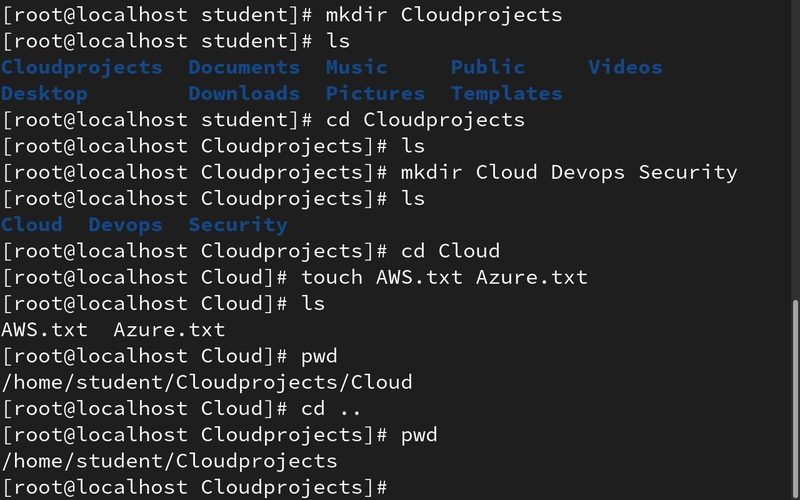
touchto create "AWS.txt" and "Azure.txt" files same time, separated by a space. Go ahead to list the newly created files.
For Devops folder:
- Print the current directory. You will notice we are at the Cloud folder and need to return to Cloudprojects folder.
- Now we will use the
cd ..command to move back one step, back to the Cloudprojects folder.
- Great! we can now change directory now to Devops folder and create the "Linux.txt" file and list it.
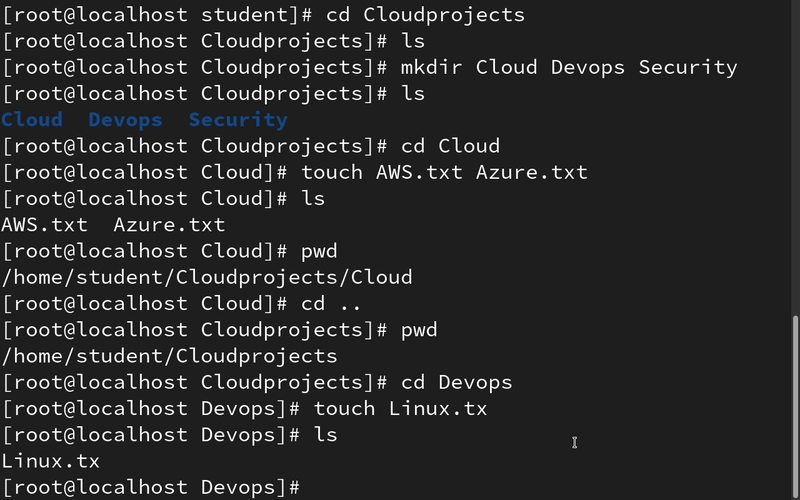
- Remember no file for the "Security folder".
- You may sometimes get confused if you actually created that file or not. You might want to see everything in one go. If you use the list command. this might not be feasible enough.
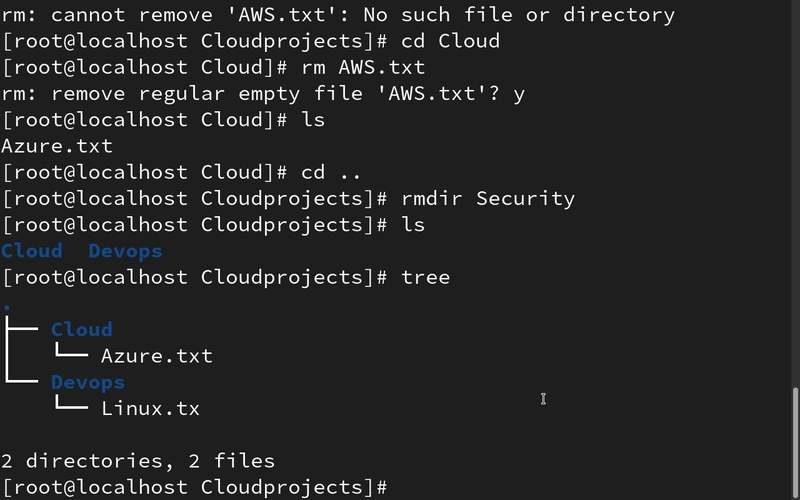
- Hold on! We have a solution to this. We can see all that we have created with the
treecommand.
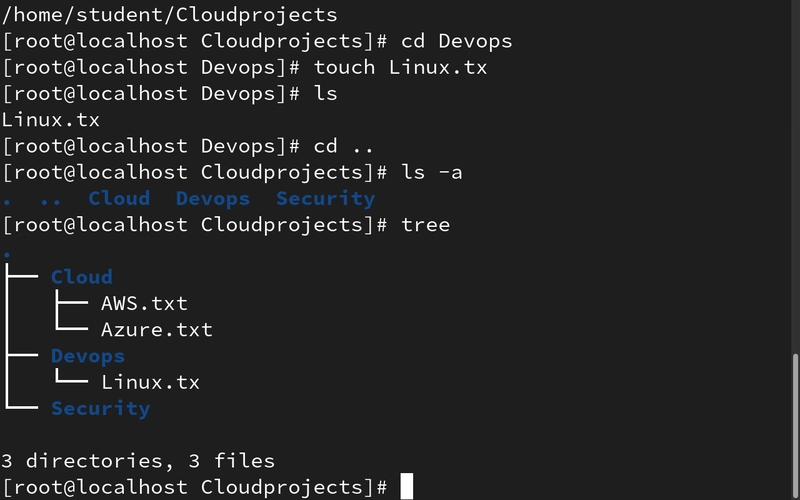
You will notice the number of directories and files we created which is 3 directories and 3 files.
Time to delete some files!
Deleting files or folders has a whole lesson for it but we will keep this simple for now.
- Change into the folder you want to specifically delete its file. and delete. (If not you will get an error)

- Delete the folder called 'Security'

- Now we can see the remaining folders and files we have created
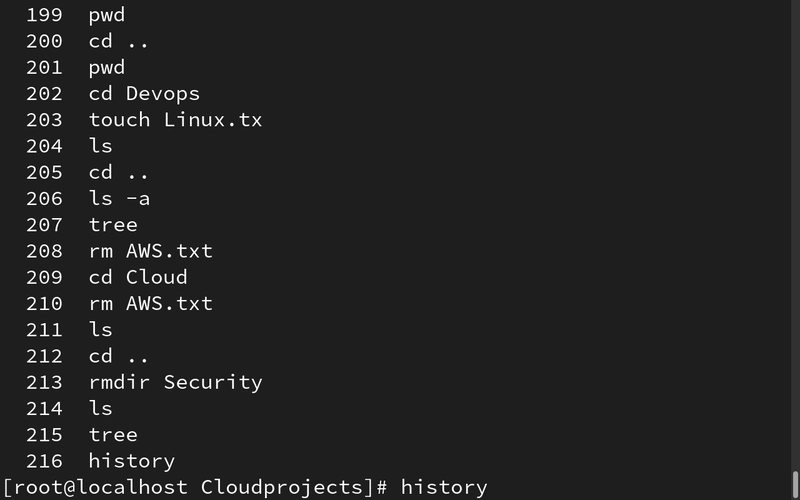
- You can review the commands you have used so far by using
history.
- You can clean the terminal by using the
clear.

- You can now exit the terminal with the
exitcommand.

Conclusion
Day 2 was foundational but this is the type of work that builds strong habits. Real-world Linux System Admins don’t just memorize commands. They build repeatable workflows, stay organized, and understand why each step matters.
If you are preparing for RHCSA, RHCE, or just sharpening your Linux skills for a DevOp, SRE or any role, save this.
Next, we will be diving into user and group management, adding users, setting passwords, and understanding permissions the right way.
Follow me for Day 3!
Let's Connect!
If you want to connect or share your journey, feel free to reach out on LinkedIn.
I am always happy to learn and build with others in the tech space.
#30DaysLinuxChallenge #Redhat#RHCSA #RHCE #CloudWhistler #Linux #Rhel #Ansible #Vim #CloudComputing #DevOps #LinuxAutomation #IaC #SysAdmin#CloudEngineer

Top comments (0)