Hello Backend devs...
Here let's go through the setting up new NestJS project with basic features.
🟢 Create a new project
Now is time to create a new NestJS app. The NestJS provide awesome command line tool to generate app and the main building blocks. Install NestCLI as a global package using your favourite package manager, then generate the app,
# add nest cli
$ pnpm add -g @nestjs/cli

# generate app
$ nest new project-name
Now, everything ready to customise the app as you needed. The whole boilerplate with minimal features is there. Run the following command to make sure that everything is working,
# start the app server
$ pnpm start:dev

# check everything works
$ curl http://localhost:3000

# you should see
Hello World!
🟢 Create a first module
Now, let's say, you want to add a new feature to your app. Example, user management, auth, etc...
There are few CLI commands to understand based on the requirement. There is a patter in the command,
$ nest generate <module|controller|service|resource> <name>

# eg. generate new module for user management, and the controller
$ nest generate module user

# generate controller
$ nest generate controller user
Please pay attention on name of the module (user) and the name of the controller (user). Those has to be same in order to NestJS understand both should generate to the same feature. Let's create the service also,
$ nest generate service user
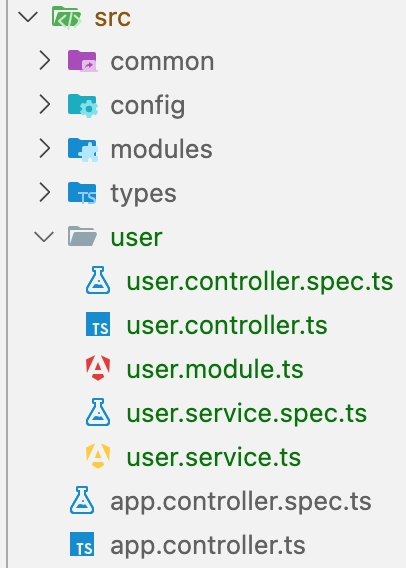
Now, you should see the new folder and bunch of files created by NestCLI,
What is the resource command does? If you want to create whole crud feature at the same time, you can use it. Make sure that you use either options,
$ nest generate resource user
🟢 How to use main building blocks
Now, you have user module boilerplate to start coding. Mostly, use module, controller and the service. When you go deeper, you need guards, pipes, filters, etc..
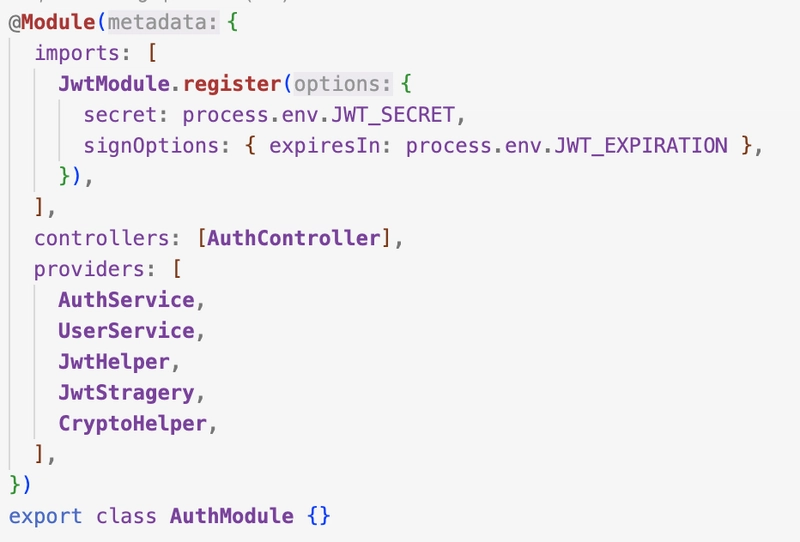
- Module: Connect everything needed for feature. You have nothing to do here, unless you have Injectable classes to be used or another module need to be used in this module. Basically, whatever connected to the DI (Dependency Injection) container, we can connect from here. If you do not have anything from outside, then leave it as it is. See bellow some usage of another module (auth),
- Controller: The request handler in NestJS level. Basically, routes are defined here. Guard, Interceptors like other decorators can be applied to this level, before request goes to the service level. Let's say I have following API requirements,
- Get all users: GET ->
http://localhost:3000/user - Get a specific user: GET ->
http://localhost:3000/user/1 - Create a new user: POST ->
http://localhost:3000/user
Look at the bellow code carefully. Main controller decorator define the 'user' part of the route. Rest of the path defined in function decorator. @Get, @Post, @Param and @Body are the main decorators used to make our life easier.
@Get: Define as GET http verb
@Post: Define as POST http verb
@Params: Read query params and return to id variable
@Body: Extract body contents and assign to user object
import { Body, Controller, Get, Param, Post } from '@nestjs/common';
import { UserService } from './user.service';
import { CreateUserDto } from './dto/create-user.dto';

@Controller('user') // main route path
export class UserController {
  // inject user service into the controller
  constructor(private readonly userService: UserService) {}

  @Get('/') // get all users
  allUsers() {
    return this.userService.findAll();
  }

  @Get(':id') // get a specific user. eg. user/1
  findOne(@Param('id') id: string) {
    return this.userService.findById(+id);
  }

  @Post('/') // create a new user
  createUser(@Body() user: CreateUserDto) {
    return this.userService.createUser(user);
  }
}
- Service: The business logic layer. This is going to be Injectable to the DI container. Which means can be use from anywhere who can connect with the DI container. Can talk to database from here as well. And other processing and manipulations. Finally, return the response to the controller. Look at our user service bellow,
import { Injectable } from '@nestjs/common';
import { CreateUserDto } from '../modules/user/dto/create-user.dto';

@Injectable() // inject to the DI container
export class UserService {
  findAll() {
    // find all users from database

    // return list of users
    return [];
  }

  findById(id: number) {
    // find user from database

    // return user
    return id;
  }

  createUser(user: CreateUserDto) {
    // user creation logic

    // return created user
    return user;
  }
}
That's it for a basics to play around with the NestJS REST API creation.
🎯 Give it a try yourself and let me know how it goes!
🤝 Let's connect with the database click here
Cheers... Happy coding!!!

Top comments (0)