
This is a submission for the Pulumi Deploy and Document Challenge: Fast Static Website Deployment
What I Built
The goal of this project is to use AWS services, notably S3 and CloudFront, and Pulumi to deploy a static website. Infrastructure as code (IaC) makes managing cloud resources easier while guaranteeing scalability, security, and effectiveness.
Live Demo Link
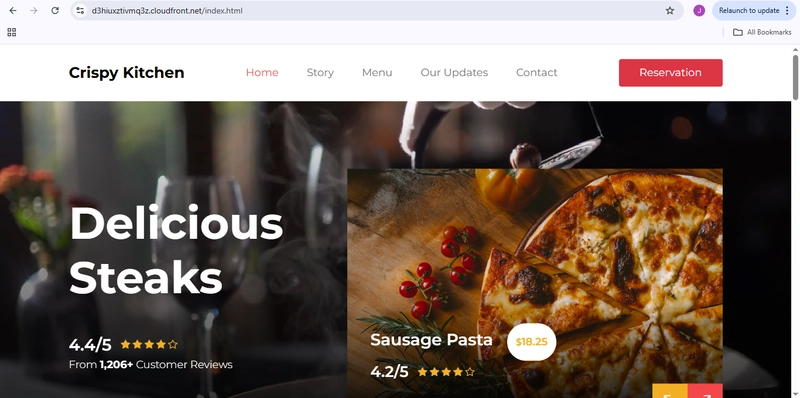
https://d3hiuxztivmq3z.cloudfront.net/index.html
Project Repo
https://github.com/dey-yemi/pulumi-static-website
My Journey
Technologies used
This project utilizes the following technologies:
Cloud provider: AWS
Key services: S3 Bucket, CloudFront
Programming language: Python 3.x
Prerequisites
Before getting started, ensure you have the following:
· An AWS account and a basic understanding of AWS services and python
· Familiarity with linux commands
· A Pulumi account to access the free Pulumi copilot, which can assist you throughout the project.
Installing Pulumi
Open PowerShell in administrator mode and use the Chocolatey package manager to install Pulumi. Run the following command:
choco install pulumi
This will install Pulumi along with all required dependencies, as illustrated in the image below.

One issue I encountered during installation was not running powershell in administrator mode. This led to errors preventing Pulumi from being installed. To avoid this mistake, always launch powershell as an administrator before proceeding with the installation.
Next, create a Pulumi account and explore its services, products, documentation, and solutions. This will give you a clear understanding of what Pulumi offers and how it can support your infrastructure needs.
Configuring iAM roles
Log in to your Aws management console and navigate to the IAM service. Under users, click add user and enter a username - I used pulumi-deploy-user as an example.
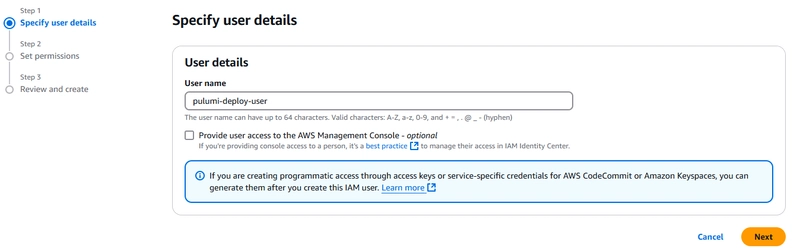
Next, select attach existing policies, search for AdministratorAccess and AmazonS3FullAccess, and attach them to the user.
Once the user is created, you'll receive an access key id and secret Access Key. Keep these credentials secure and download the .csv file for safekeeping.
Next, open your VS Code terminal and run the aws configure command.
Your access key ID, secret access key, AWS region, and other necessary information will be requested.
Be sure to keep your credentials private and never share them with anyone to maintain security.
Setting up Pulumi
Run the pulumi login command to authenticate your Pulumi cli with the Pulumi cloud or a self-hosted backend.
This step is crucial for storing your infrastructure state and managing deployments efficiently. Before running this command, ensure you've created a directory for your project within your VS code terminal. In this case, the directory is named static-website-pulumi.
Next, initialize a new Pulumi project by executing the following commands:
pulumi new aws-python
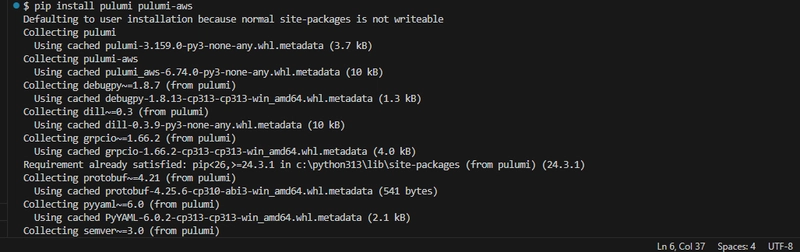
pip install pulumi pulumi-aws
By initialising a new Pulumi project specifically designed for AWS using Python, the pulumi new aws-python tool creates the necessary configuration files and directory structure.
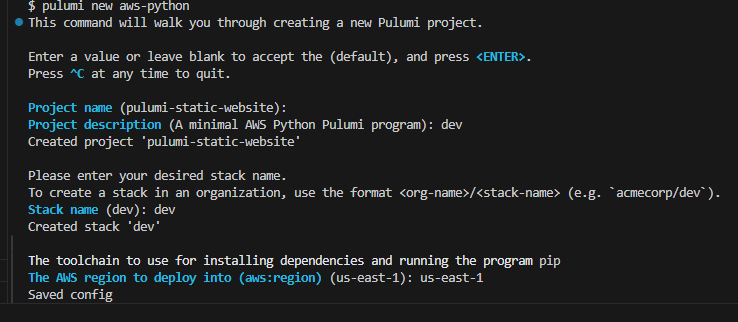
The Pulumi SDK and aws provider are then installed by running pip install pulumi pulumi-aws, enabling smooth infrastructure provisioning and management for your project.
Deploy your website
Create a directory for your website files. Download your website template using the provided link, then extract the zip file. Move all extracted files and folders into the "website" directory you created earlier.
Next, update your__main__.py file by replacing its content with the Python code provided below.
import os
import mimetypes
import pulumi
import pulumi_aws as aws

# Create an S3 bucket for the website
site_bucket = aws.s3.Bucket("static-website-bucket",
    website=aws.s3.BucketWebsiteArgs(
        index_document="index.html",
        error_document="error.html",
    ))

# Create a bucket policy access
bucket_policy = aws.s3.BucketPolicy("bucket-policy",
    bucket=site_bucket.id,
    policy=site_bucket.id.apply(
        lambda id: f"""{{
            "Version": "2012-10-17",
            "Statement": [{{
                "Effect": "Allow",
                "Principal": "*",
                "Action": ["s3:GetObject"],
                "Resource": ["arn:aws:s3:::{id}/*"]
            }}]
        }}"""
    ))

# Helper function to recursively upload files
def upload_directory(directory_path, parent_path=""):
    for item in os.listdir(directory_path):
        item_path = os.path.join(directory_path, item)
        if os.path.isdir(item_path):
            # Recursively upload subdirectories
            upload_directory(item_path, os.path.join(parent_path, item))
        else:
            # Create an S3 object for each file
            file_path = os.path.join(parent_path, item)
            content_type = mimetypes.guess_type(item_path)[0] or "application/octet-stream"

            aws.s3.BucketObject(
                file_path.replace("\\", "/"),
                bucket=site_bucket.id,
                key=file_path.replace("\\", "/"),
                source=pulumi.FileAsset(item_path),
                content_type=content_type
            )

# Upload website files to S3
website_dir = "./website"
if os.path.exists(website_dir):
    upload_directory(website_dir)
else:
    print(f"Error: Website directory {website_dir} does not exist")

# CloudFront distribution for better performance
cdn = aws.cloudfront.Distribution("website-cdn",
    enabled=True,
    origins=[aws.cloudfront.DistributionOriginArgs(
        origin_id=site_bucket.arn,
        domain_name=site_bucket.website_endpoint,
        custom_origin_config=aws.cloudfront.DistributionOriginCustomOriginConfigArgs(
            http_port=80,
            https_port=443,
            origin_protocol_policy="http-only",
            origin_ssl_protocols=["TLSv1.2"],
        ),
    )],
    default_cache_behavior=aws.cloudfront.DistributionDefaultCacheBehaviorArgs(
        target_origin_id=site_bucket.arn,
        viewer_protocol_policy="redirect-to-https",
        allowed_methods=["GET", "HEAD", "OPTIONS"],
        cached_methods=["GET", "HEAD", "OPTIONS"],
        forwarded_values=aws.cloudfront.DistributionDefaultCacheBehaviorForwardedValuesArgs(
            query_string=False,
            cookies=aws.cloudfront.DistributionDefaultCacheBehaviorForwardedValuesCookiesArgs(
                forward="none",
            ),
        ),
        min_ttl=0,
        default_ttl=3600,
        max_ttl=86400,
    ),
    price_class="PriceClass_100",
    restrictions=aws.cloudfront.DistributionRestrictionsArgs(
        geo_restriction=aws.cloudfront.DistributionRestrictionsGeoRestrictionArgs(
            restriction_type="none",
        ),
    ),
    viewer_certificate=aws.cloudfront.DistributionViewerCertificateArgs(
        cloudfront_default_certificate=True,
    ))

# Export the URLs
pulumi.export("website_url", site_bucket.website_endpoint)
pulumi.export("cdn_url", cdn.domain_name)
Run pulumi preview to simulate the deployment and verify the expected changes.
If everything looks correct, proceed with deploying your website by running:
pulumi up
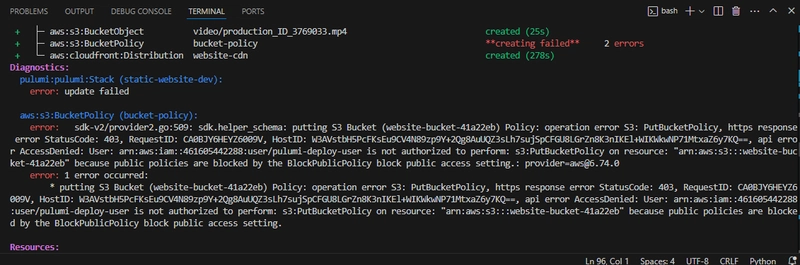
While running pulumi up, I encountered an error as seen above. Initially, I thought it was due to not granting S3BucketFullAccess policy, but the actual issue was that S3 Block public access was enabled.
To ensure your website runs smoothly on S3 and cloudFront, make sure to disable Block public access settings for your S3 bucket if it's enabled.
Rerun pulumi up, then verify that your website is live by opening the provided CloudFront or S3 bucket URL in your browser.
Cloud deployments with Pulumi
Using code to specify and automate deployments, Pulumi simplifies infrastructure administration while deploying a static website.
Scalable, secure, and affordable hosting solutions may be easily created by combining AWS services like S3 and CloudFront.
Correctly creating IAM roles, modifying S3 public access settings, and properly configuring Pulumi are essential stages for a smooth deployment.
Using Pulumi
In this project, I used Pulumi to deploy a static website on AWS using Python. Pulumi simplified the Infrastructure as Code (IaC) process, allowing me to define and provision AWS resources efficiently.
Pulumi Copilot Usage:
I leveraged Pulumi Copilot to generate efficient infrastructure definitions, resolve policy issues, and automate configuration. Some key prompts included:
· How do I create an S3 bucket for a static website?
· What’s the correct way to attach an IAM policy for public read access to an S3 bucket in Pulumi?
· How do I troubleshoot 'Access Denied' errors when hosting a static site on S3
· Set up a CloudFront distribution with an S3 origin in Pulumi.

Top comments (0)