
What is a Linux Virtual Machine?
A Virtual Machine (VM) is like a computer in the cloud. In this case, we’ll be creating a Linux-based VM, which can run distributions like Ubuntu, CentOS, or Red Hat. Instead of managing physical hardware, you can use Azure to deploy and manage your Linux VM securely.
Step 1: Create a Linux VM in Azure
Now, let’s create the Linux VM in Azure.
- Sign in to Azure Portal: Go to the Azure Portal and log in with your credentials.
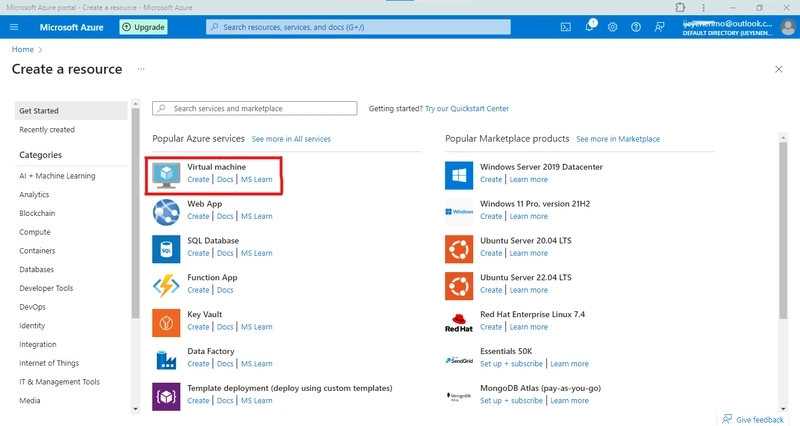
Click “Create a Resource”: In the left-hand menu, click “Create a resource”.

Select “Virtual Machine”: Choose the option and click “Create.”
-
Configure Basics:
- Subscription: Select your subscription.
- Resource Group: Create a new one or use an existing one.
- Virtual Machine Name: Enter a name.
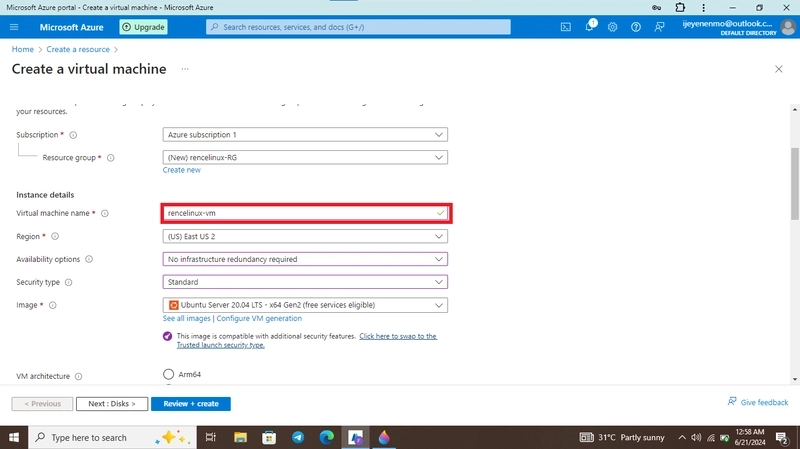
- Region: Choose the region closest to you.
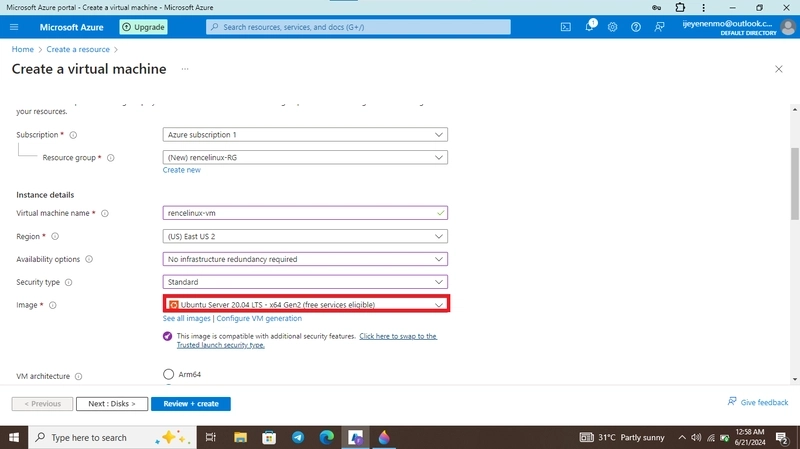
- Image: Select a Linux distribution.
- Authentication Type: Choose “SSH public key.”
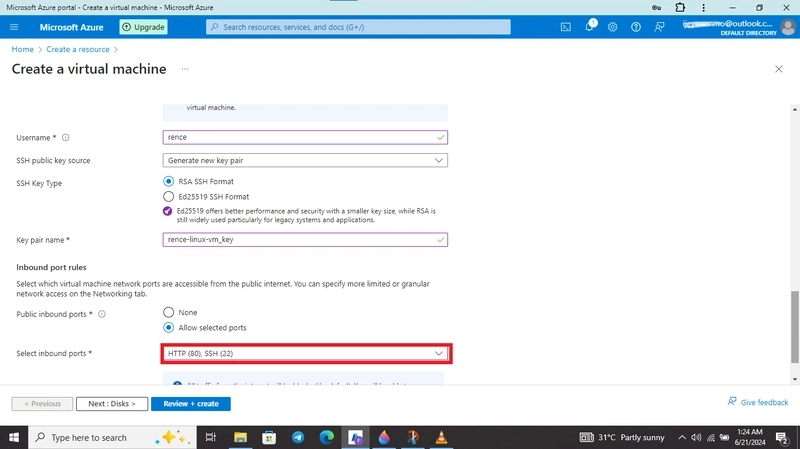
- Username: Enter a username.
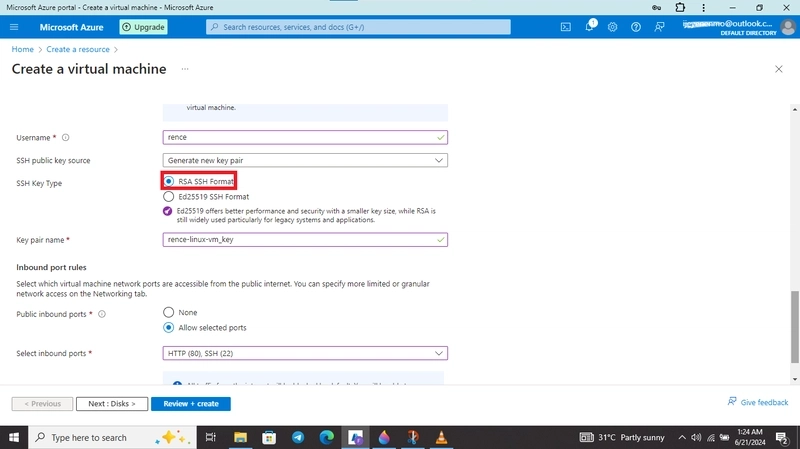
- SSH Key Type: Select "RSA SSH Format".
- Select inbound ports: Select "HTTP(80), SSH(22)".
- Configure Networking: Leave the default settings unless you need custom configurations.
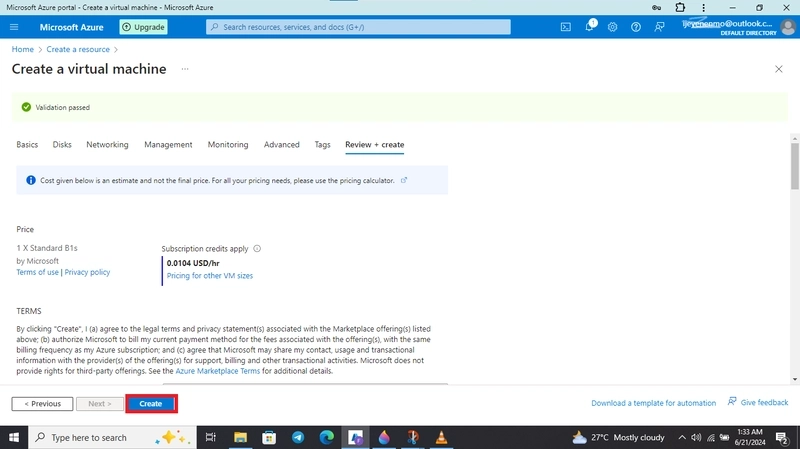
- Review + Create: Review all settings and click “Create” to start deploying your VM.
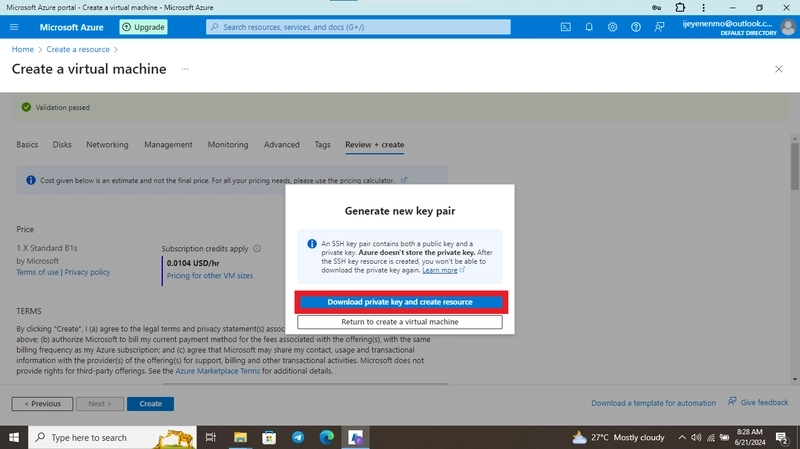
Step 3: Wait for Deployment and Download private key
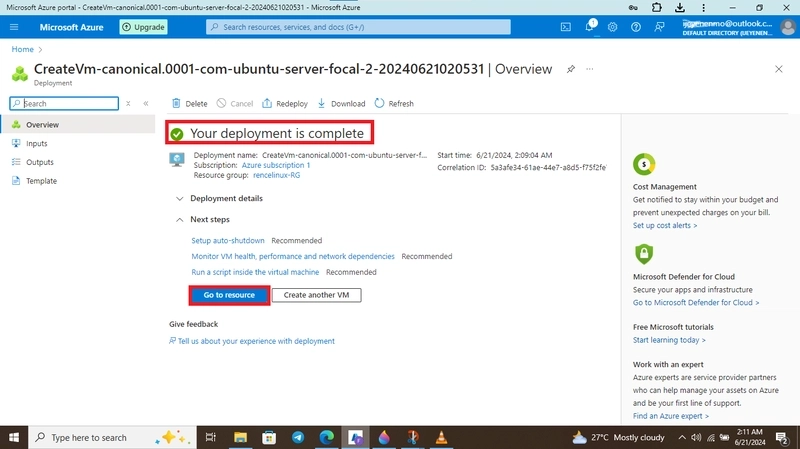
Azure will take a few minutes to create your VM. Once the deployment is complete, you’ll see a notification saying, “Your deployment is complete.”
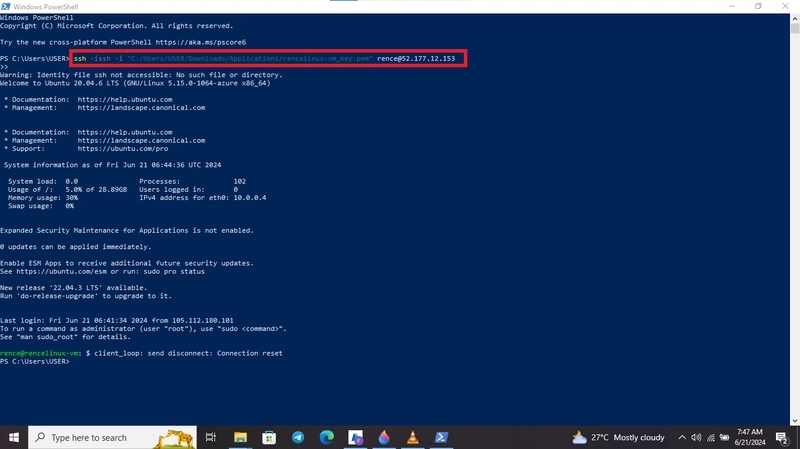
Step 4: Connect to Your Linux VM
Now that your VM is deployed, let’s connect to it using SSH.
-
Connect via SSH:
- Open a terminal (on macOS/Linux) or a tool like PuTTY/Windows Terminal (on Windows).
- Run the following command:
ssh azureuser@<Public-IP-Address>Replace
<Public-IP-Address>with the actual IP address of your VM andazureuserwith the username you configured earlier.
-
Authenticate:
- If you set a passphrase for your private key, you’ll be prompted to enter it.
- Once authenticated, you’ll see the Linux shell prompt, and you’re now connected to your VM!
Step 5: Manage and Delete Your VM
When you’re done using your VM, it’s important to manage it properly to avoid unnecessary costs.
- Stop the VM: To save costs, stop the VM when you’re not using it. You can do this from the Azure Portal by clicking “Stop” on the VM overview page.
- Delete the VM: If you no longer need the VM, delete it to stop incurring charges. Make sure to also delete associated resources like disks and network interfaces.
Conclusion
Congratulations! You’ve successfully created and connected to a Linux Virtual Machine on Microsoft Azure using a public key. This method is secure, efficient, and widely used in cloud environments. Whether you’re testing applications, running scripts, or learning Linux, Azure provides a flexible and powerful platform to meet your needs.
Keep experimenting with Azure’s features, and soon you’ll feel confident managing cloud resources!.

Top comments (0)