Lets start by creating a react native project using expo
npx create-expo-app my-app && cd my-app
Run the app using npx expo start. Ensure your react native app is up and running!
Now let's create a google console project to get the google API access.
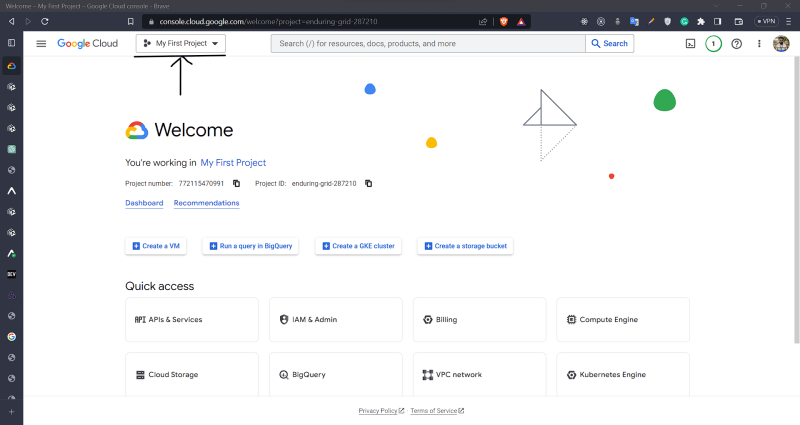
- Open Google console. On the top left click on the rectangular button . It should mostly say My First project if you havent worked in GCP before else click if you are too lazy here
Click on new project
Give a name
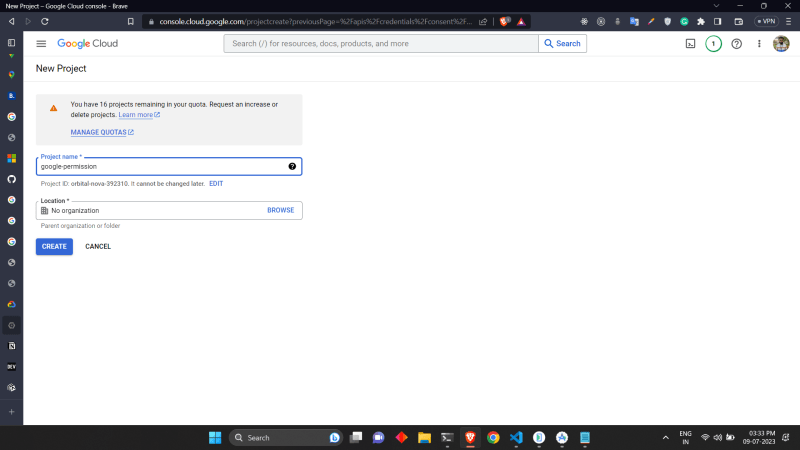
Click on create .
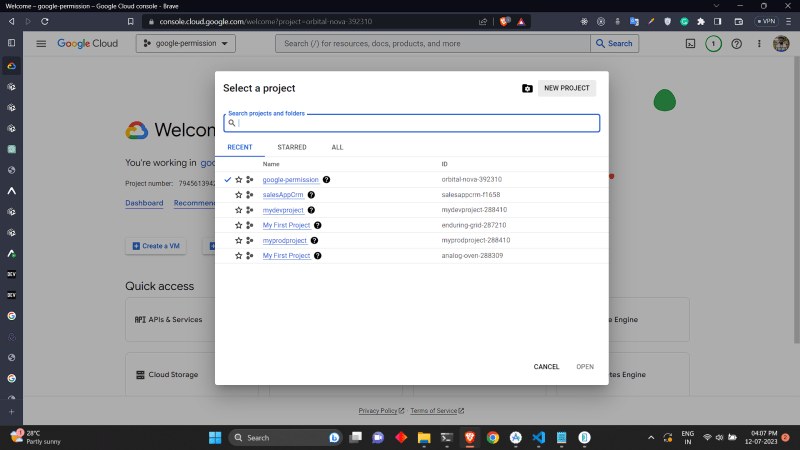
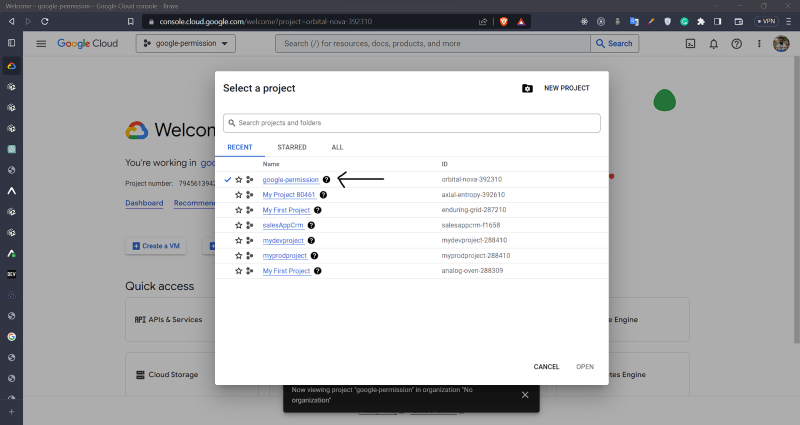
After creating the project, now when you click on the top left button, the newly created project should be visible (google-permission) . Select the project.
Now click on the navigation menu

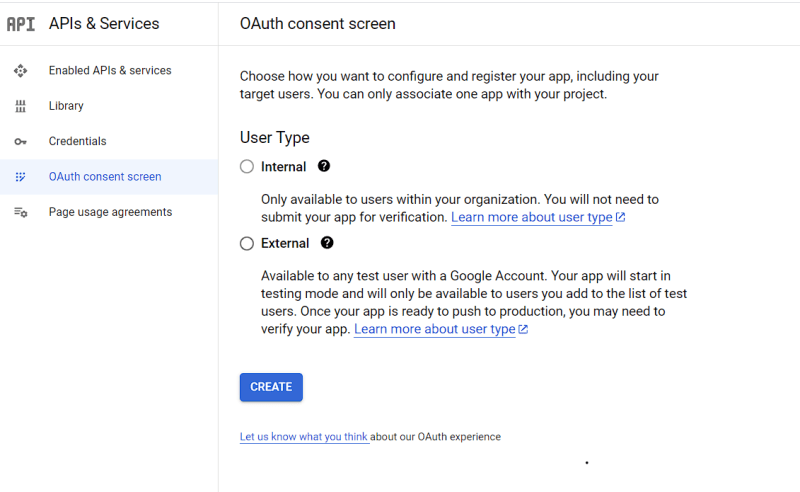
Select APIs & Services > oAuth Consent screen
Choose the desired User type .
I will be choosing External and proceeding further .
Fill in the consent form with app name, user supported email and developer information.

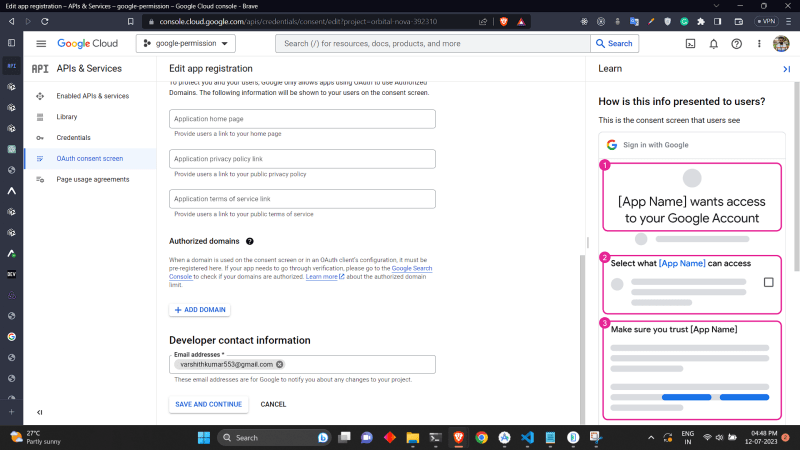
Click save & continue .
SKIP this if your life is good till here:
Sometimes you might get an error saying something went wrong. This is mostly because of the app name. Instead of you asking chatGPT and going through stack-overflow . I have a solution.
The solution is to change your app name to your project ID.
Where do you find the project ID?
On the top left , click on the rectangular button with your project name and you should find the project ID here
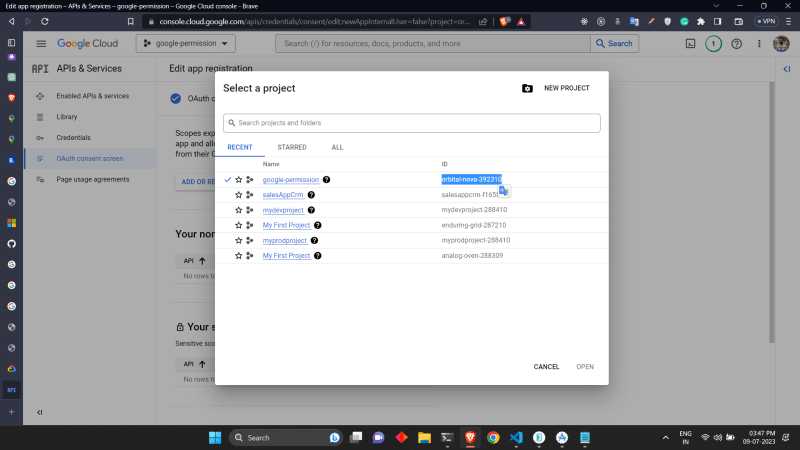
My project ID was orbital-nova-392310 and I pasted that and submitted. Now you should be able to navigate to step of the form.
In the scope section, click on Add or remove scopes . Select some basic info APIs - openID,profile,email.
Scroll down, there will be a section called manually add scope.
Here you can add any scope of your choice but for this article we will stick to gmail send API.
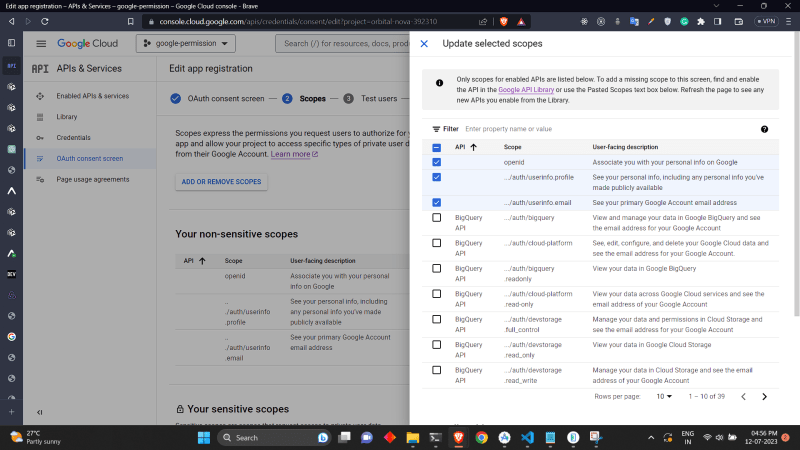
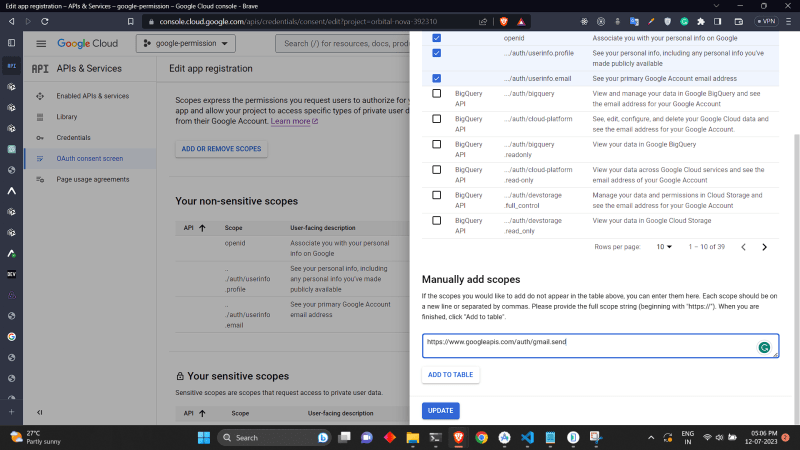
Paste the scope URL, click on add to table and then update.
To see all the list of the scope you can refer: Scope list page
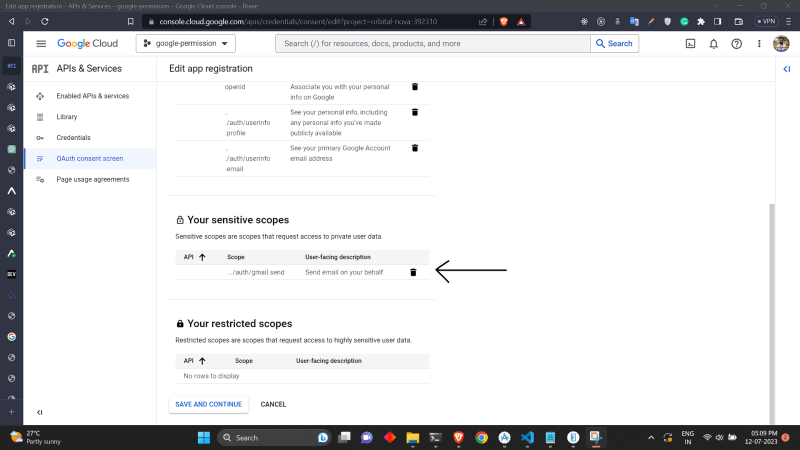
Now under your sensitive scopes section you should see the gmail send scope added. Click on Save and continue.
Add test users in your application and then again click save and continue.

In the summary section, scroll down and click on the back to dashboard button.
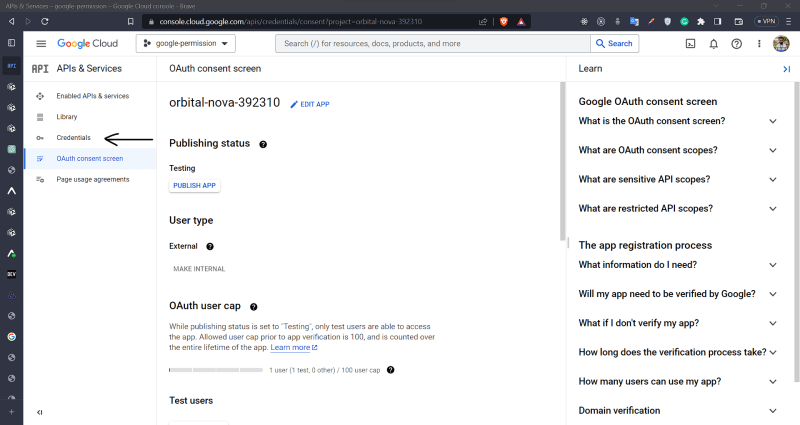
With this oAuth consent screen info is filled successfully.
- Now let us create credentials required for our app. Click on the credentials option in the navigation menu.
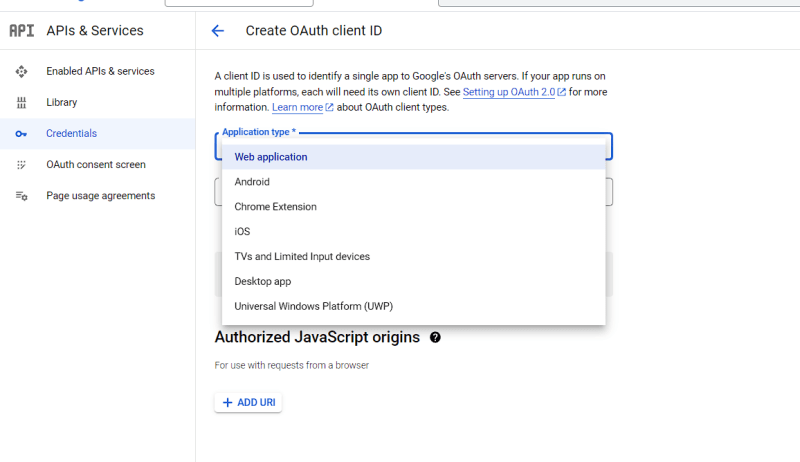
Click on create credential,thens elect oAuth Client ID.

Select the application type as web application .( Do not select android, in this article ,the google API permissions will be requested from a browser)
Give the authorized redirect URL . This url is basically your web server url . I have added a ngrok url and localhost url . Click on Create.

Now a modal pops up. Download your credential json file .

There is one more thing left to start building. That is to Enable GAMIL API.
Click on Enabled APIs and services in the navigation menu. Search and enable the GMAIL API.
YAY!! Your gmail API setup is done.
We can now use this in our react native application .
Reat native frontend code - https://github.com/codefromrvk/gmail-api-react-native.
There are two buttons, verify identity and send email.
Verify identity button, opens the browser and requests permission to the google account .
Send email button , sends email from the authorized email.
There are two REST endpoints used in the above frontend code:
/gmail/link, /gmail/send-proposal.
I have used express as my backend framework to built them.
// router.js
router.get("/gmail/link", getGmailLink);
router.get("/gmail/send-proposal", sendProposal);
// controller.js

const getGmailLink = async (req, res) => {

  try {

    // When generating the url if you want the userId( or any other key) to be also present as a param for your frontend to identify, you can concat it with the generated url.

    const genURL = generateURL();

    // + `&state=${userID}`;


    res.status(HttpStatus.StatusCodes.OK).send({
      status: "Email sent successfully",
      data: genURL,
    });
  } catch (error) {
    console.log(error);
  }
};


const sendProposal = async (req, res) => {

  try {
    const emailQR = await gmailSVC.sendGmailProposal();
    res.status(HttpStatus.StatusCodes.OK).send({
      status: "Proposal sent ",
      data: emailQR,
    });
  } catch (error) {
    res.status(HttpStatus.StatusCodes.INTERNAL_SERVER_ERROR).send({
      status: "Failed to send proposal ",
    });

  }
Note: config.json is the json file you downloaded from your GCP project
// service.js

const credentials = require("config.json");
const { google } = require("googleapis");
const GMAIL_SCOPES = ["https://www.googleapis.com/auth/gmail.send"];

function generateURL() {
  try {
    const { client_secret, client_id, redirect_uris } = credentials.web;
    const oAuth2Client = new google.auth.OAuth2(
      client_id,
      client_secret,
      redirect_uris
    );

    const url = oAuth2Client.generateAuthUrl({
      access_type: "offline",
      prompt: "consent",
      scope: GMAIL_SCOPES,
    });
    return url;
  } catch (error) {
    throw error;
  }
}


const sendGmailProposal = async () => {
  return new Promise(async (resolve, reject) => {
    try {
        const fileContent = fs.readFileSync("credentials.txt", "utf-8");
        const [accessToken, refreshToken] = fileContent
          .split("\n")[1]
          .split(",");

        console.log("Access Token:", accessToken);
        console.log("Refresh Token:", refreshToken);

        const messageId = await sendMail(refreshToken);
        resolve(messageId);
    } catch (error) {
      reject(error);
    }
  });
};
// util.js
const { google } = require("googleapis");
const MailComposer = require("nodemailer/lib/mail-composer");
const credentials = require("config.json");

const createMail = async (options) => {
  const mailComposer = new MailComposer(options);
  const message = await mailComposer.compile().build();
  return encodeMessage(message);
};

const sendMail = async (refresh_token) => {
  const gmail = await getGmailService(refresh_token);
  const fileAttachments = [
    {
      filename: "TestAttachment.jpg",
      path: "[imageURL]",
    },
  ];

  const options = {
    to: `varshithkumar553@gmail.com`,
    subject: "Sales Proposal",
    text: "This email is sent from the command line",
    html: `<body>
    <h4>Hello world</h4>


  </body>`,
    // attachments: fileAttachments,
    textEncoding: "base64",
    headers: [
      { key: "X-Application-Developer", value: "VARSHITH" },
      { key: "X-Application-Version", value: "v1.0.0.2" },
    ],
  };
  console.log("Before rawMessa");

  const rawMessage = await createMail(options);
  // console.log("after rawMessa",rawMessage);
  try {
    const {
      data: { id },
    } = await gmail.users.messages.send({
      userId: "me",
      resource: {
        raw: rawMessage,
      },
    });
    console.log("id generated", rawMessage);
    return id;
  } catch (error) {
    console.log({ error });
  }
};


const encodeMessage = (message) => {
  return Buffer.from(message)
    .toString("base64")
    .replace(/\+/g, "-")
    .replace(/\//g, "_")
    .replace(/=+$/, "");
};
Thats it! Now you can send any number of emails from your gmail account.
Feel free to reach out to me @ varshithkumar553@gmail.com
Twitter
Github


Top comments (0)