In this tutorial, we’ll look at creating an installer for a Winforms desktop application using Visual Studio 2022 that we can share with people.
Prerequisites:
The only prerequisite for this tutorial is Visual Studio Community edition, go ahead and download the installer here
After downloading, go ahead and open Visual Studio.
Next, we want to create a project, we will create a small Winforms application for this demo.
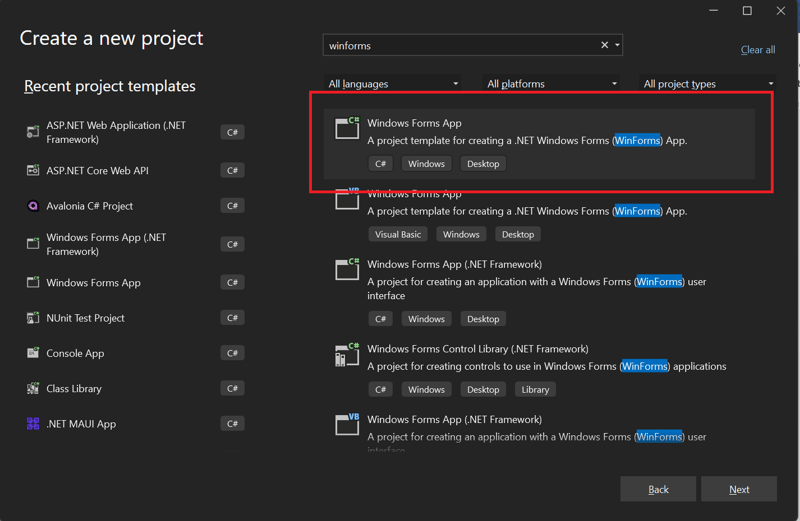
Click on Create a new project and search for Winforms App with C#
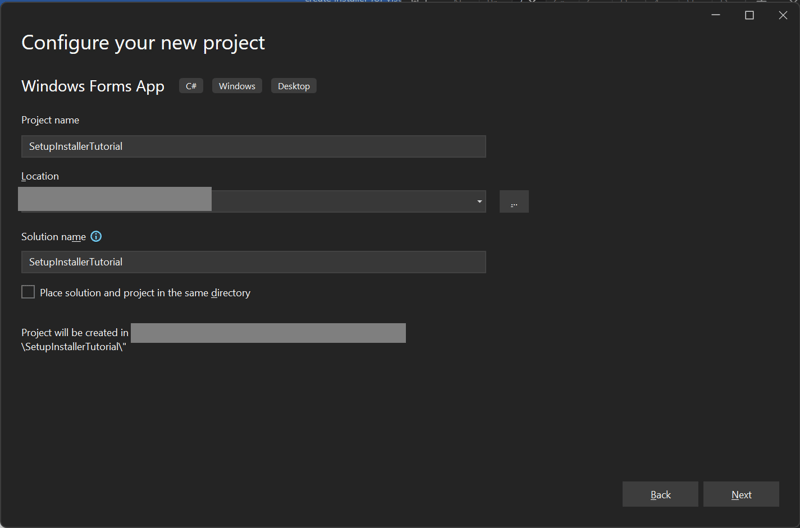
Give your project a name, I have called mine SetupInstallerTutorial
Choose .NET 8 as your Framework and click on Create.
Your project is created. It might take some time for your designer to be loading so be patient.
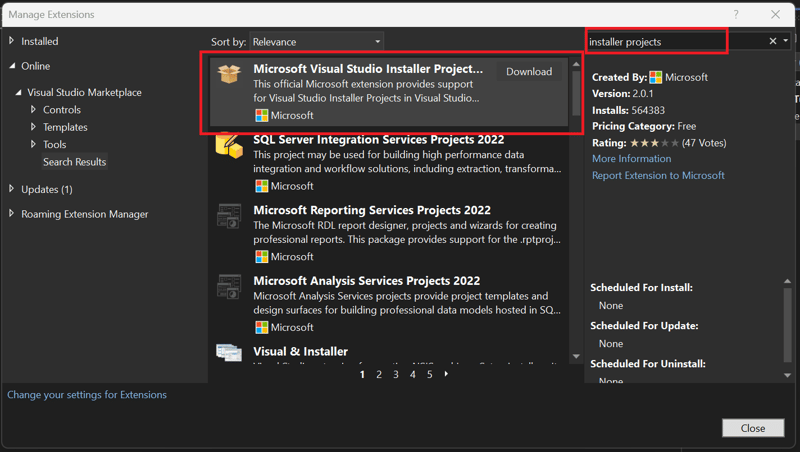
While we wait for the designer to finish setting up, let’s go ahead and install the extension we’ll use to setup our installer. Go ahead and click extensions and then click Manage extensions
Search for installer projects, You will see Microsoft Visual Studio Installer project, click download
After downloading, Close your Visual Studio instance.
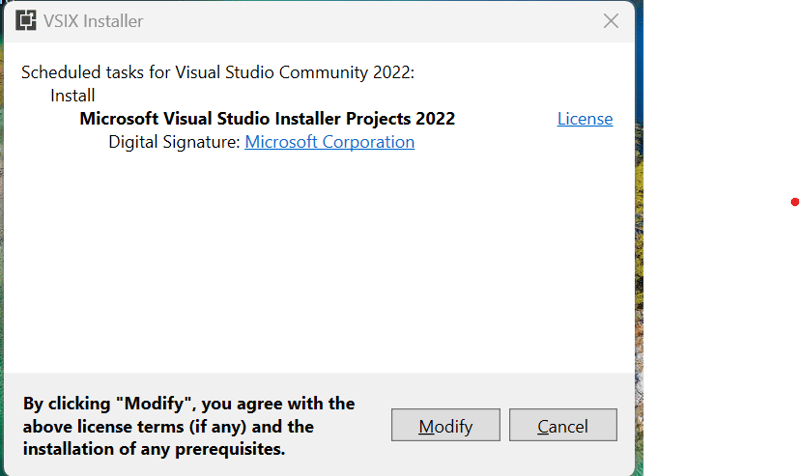
The VSIX installer comes up, go ahead and click modify
After the modification is done, go ahead and reopen your project again in Visual Studio. The extension should be added to your installed extensions.
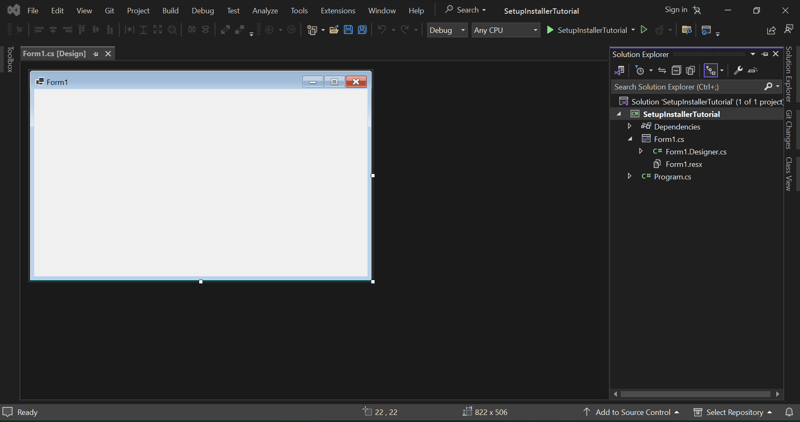
Our Winforms app has also finished loading, so your project should look something like this.
Now, let’s make a small adjustment to our app, so it at least does something.
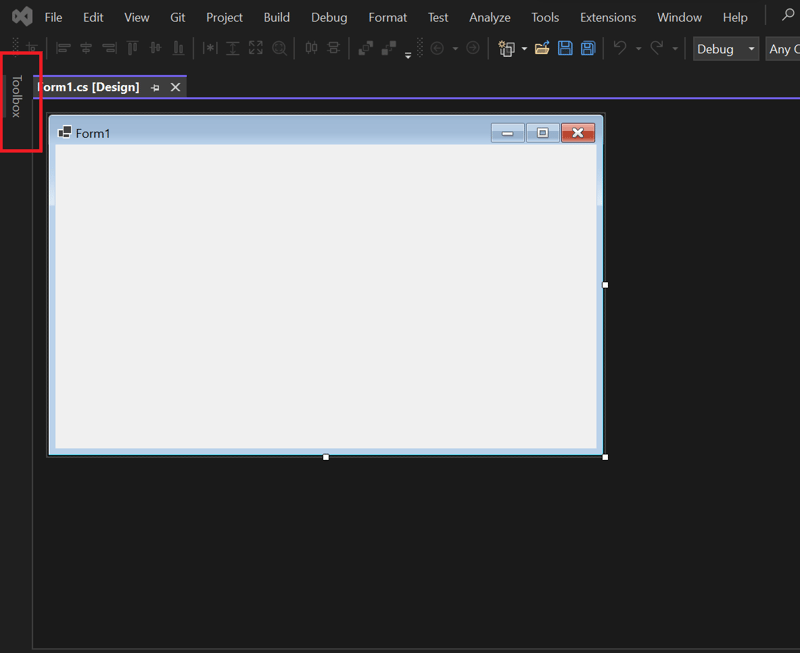
Click on the toolbox to the left
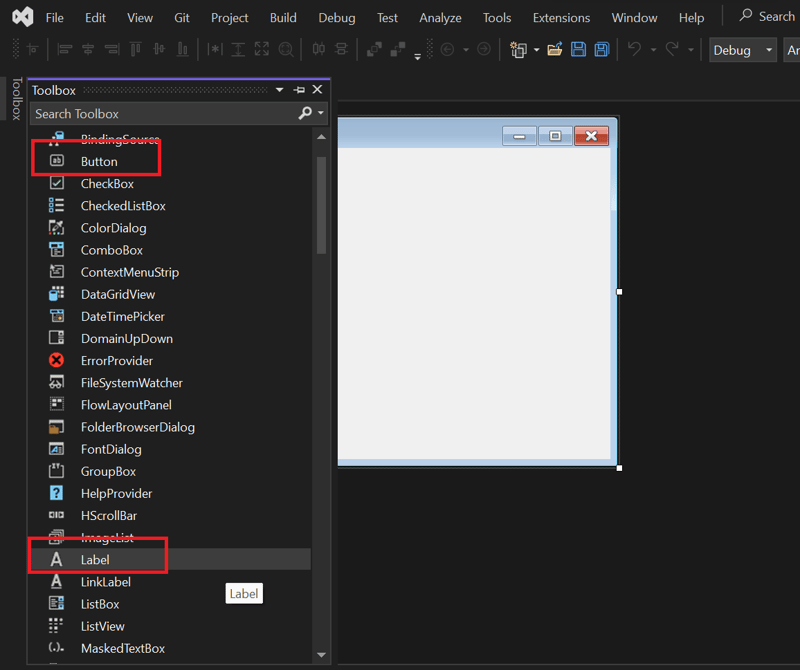
You will see a list of components, go ahead and drag a label and a button onto your form designer
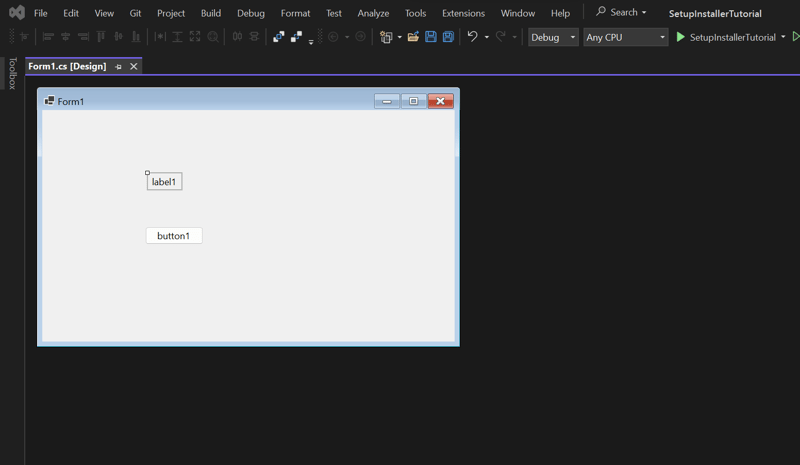
Your form designer should look like this after.
Great now, we just want to change a few things. We want to make it so that when we click on the button the label displays some text. So go ahead and double-click on the button.
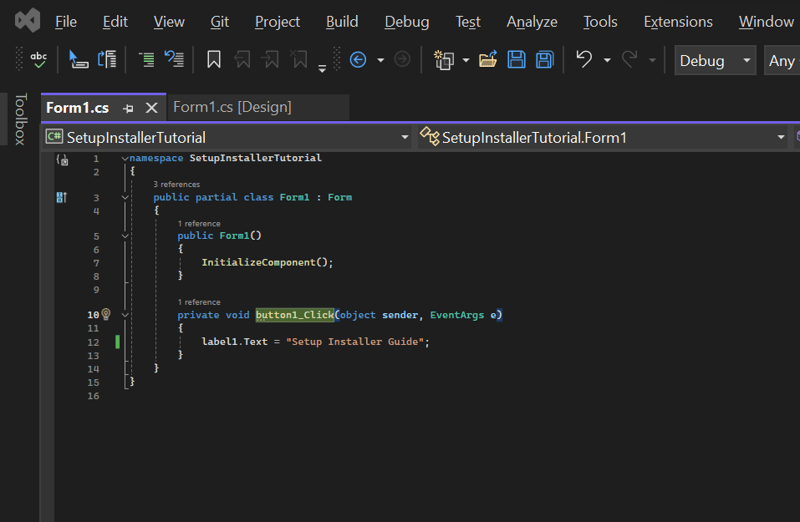
After clicking, a method called button1_Click is generated. Add this code inside it like so;
Great, so if you run your application now using fn + f5 and click on button1, your text appears.
Okay, our application is complete, let's create an installer for it.
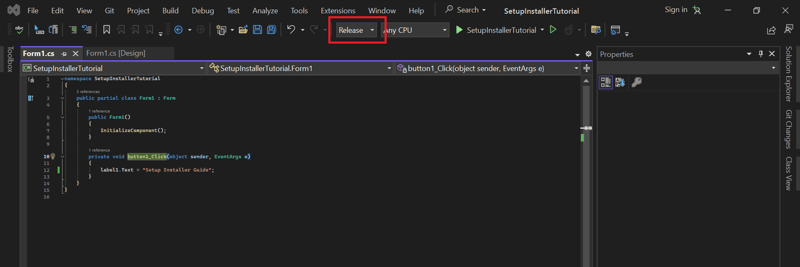
Before we do that, we will change our configuration to Release since we are configuring an application we want to share/ release to outsiders.
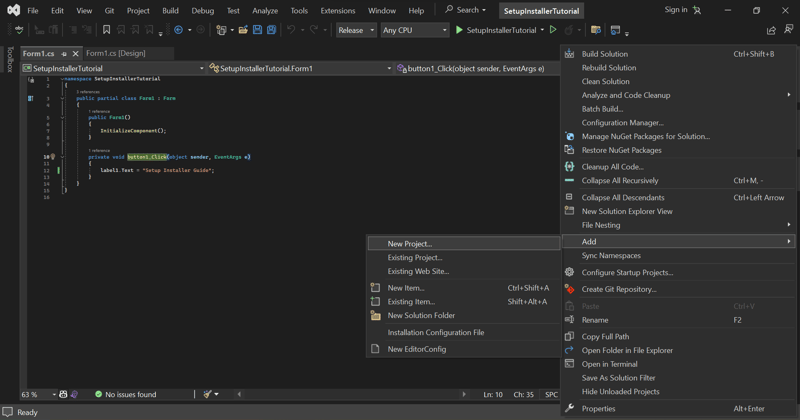
Alright so, right click on your solution in the solution explorer, click on add, and then click Add new project
In the Add project modal, we will see a list of new projects that have been installed. Go ahead and click Setup project
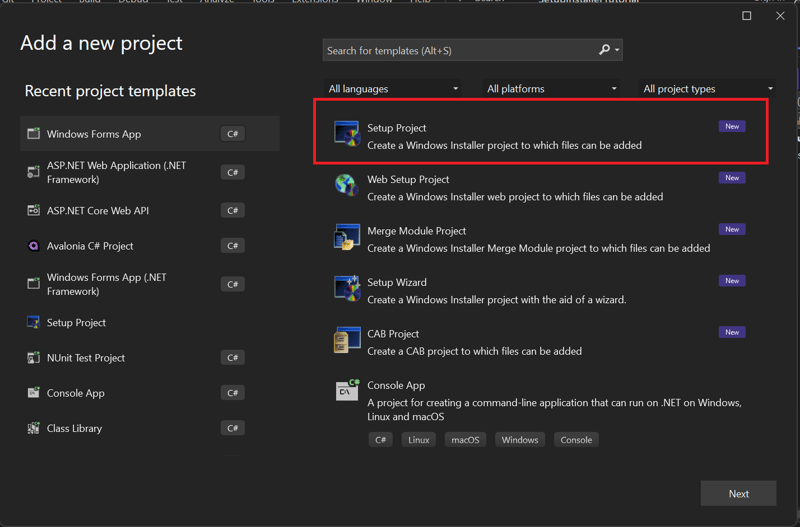
Give your project a name, I have called mine SetupInstaller and click Create.
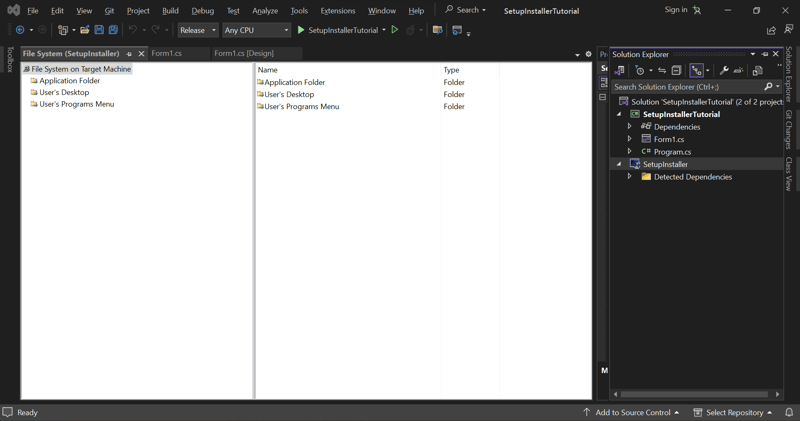
Great, a new interface was generated with a couple of folders, let's run through them;
- Application folder: This is where your application’s libraries are going to be stored.
- User’s Desktop: This is the folder we can define if we want to add a shortcut of our application to the desktop.
- User’s Program menu: This is inside our program files in our C drive.
Let’s begin, click on the Application folder on the left
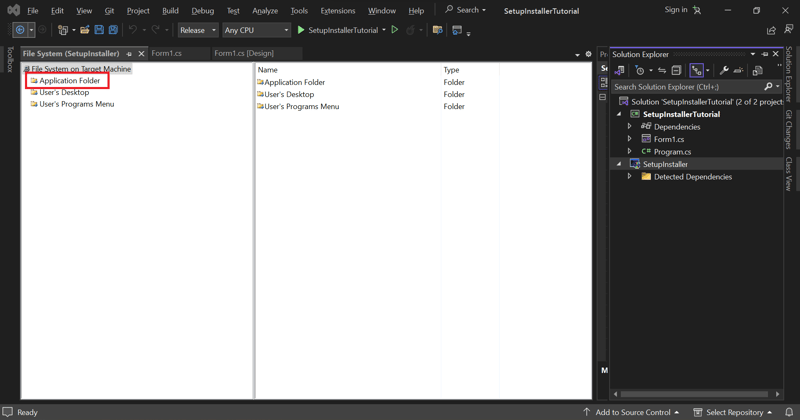
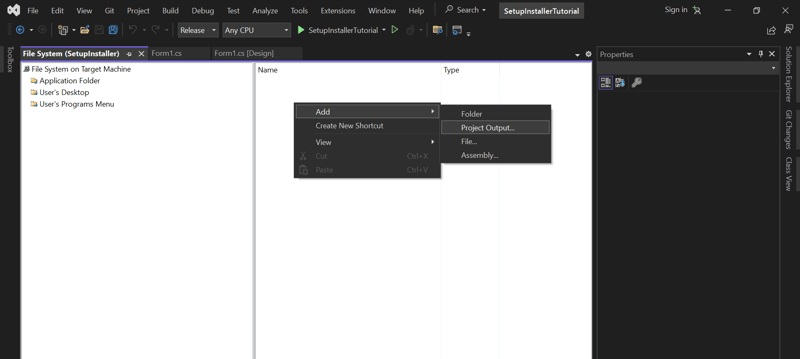
Next, right-click on the right pane, and click add, then click project output
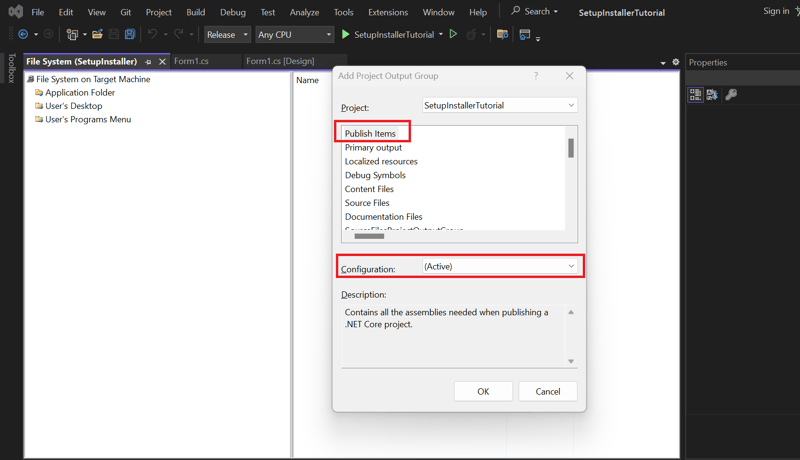
We will see an Add project output modal, select publish items, then make sure Configuration is set to active and click Ok.
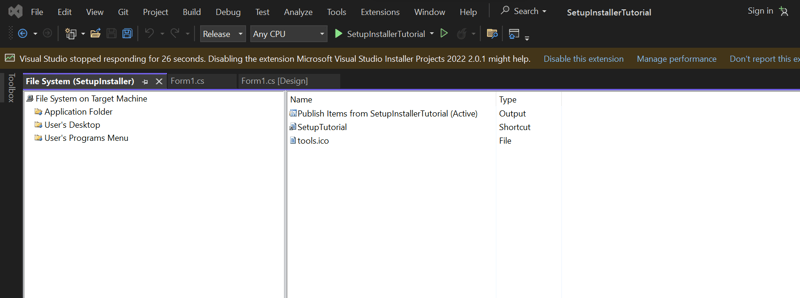
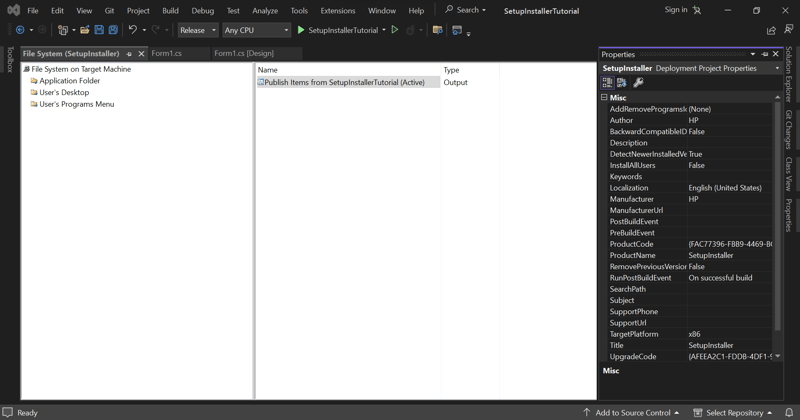
After clicking Okay, we see our publish item has been added to our output along with a properties pane.
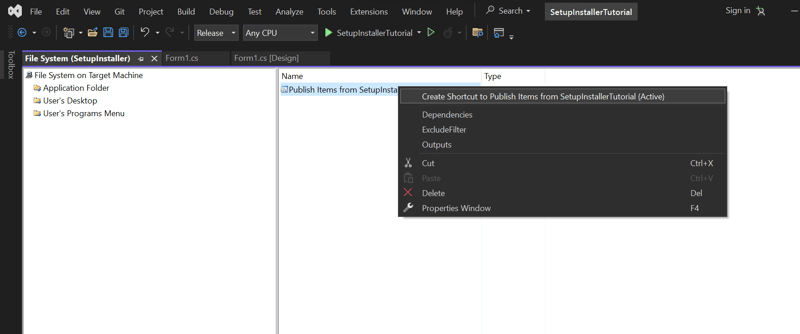
Next, we want to create a shortcut for our application, so right-click on the Publish item we just created and click on Create shortcut for publish item
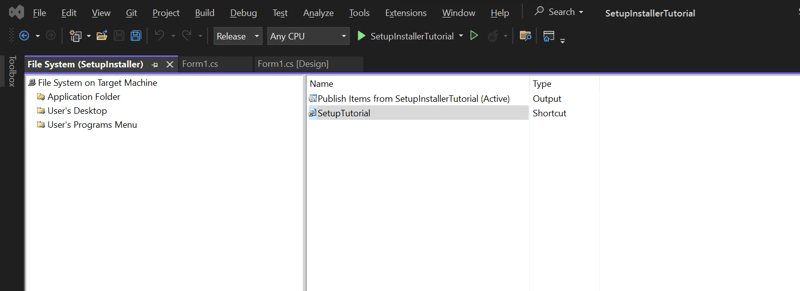
After the shortcut is created, go ahead and rename it, I have called mine SetupTutorial
Now, we need to add an icon for our application, you can add any icon you like but I am using a tools picture icon from here
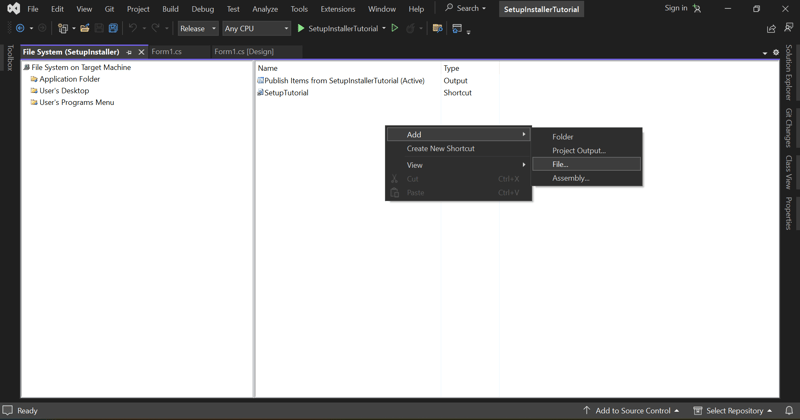
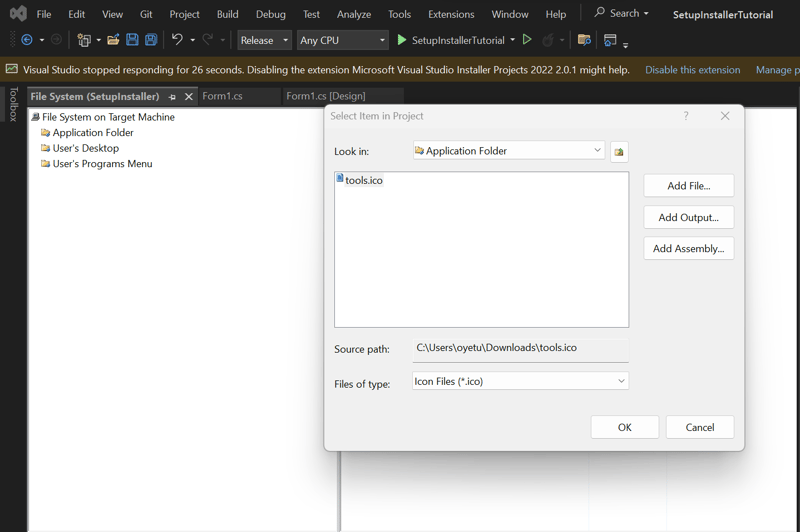
Next, right-click your right pane again, click on Add, and click on file, then add the file you want.
After adding your icon,
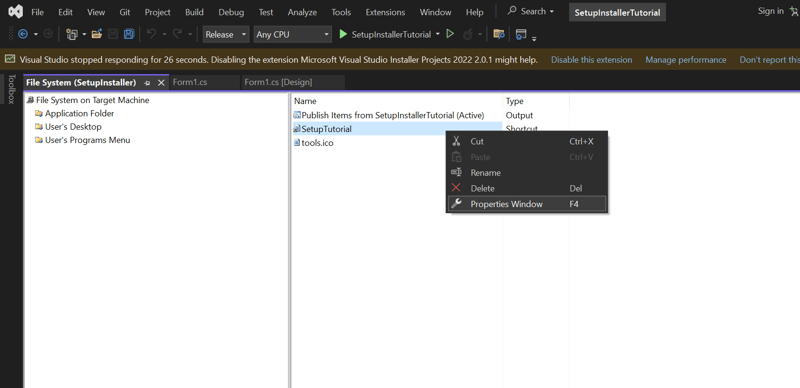
Next, to add your icon to your project shortcut, right-click on your shortcut and click the properties window
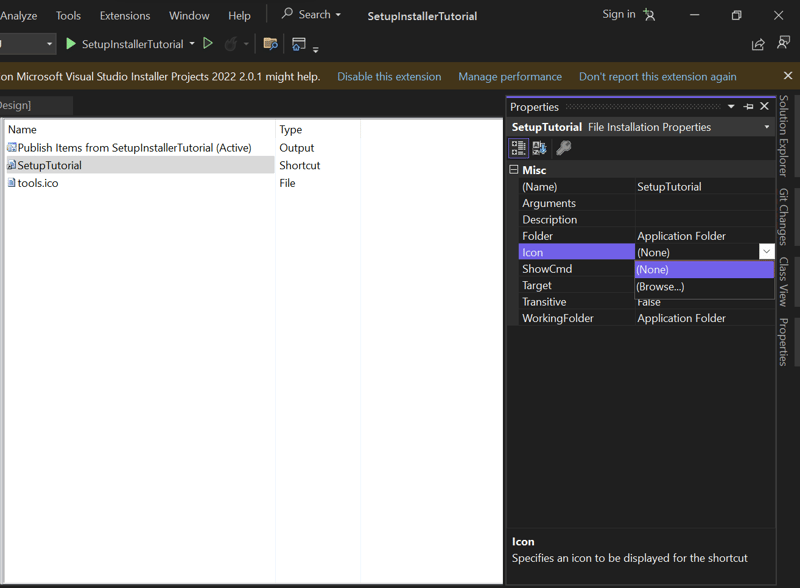
Then in the properties window, click on the drop-down for icon and click browse
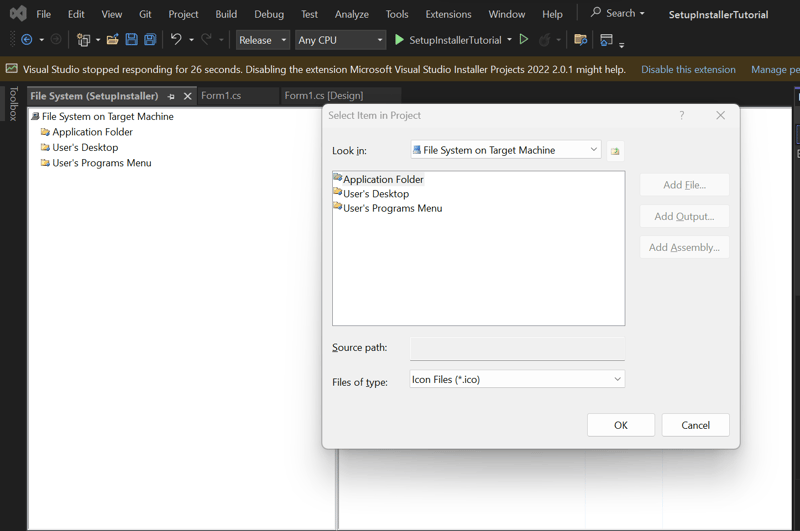
When the icon modal comes up, click on browse
Next double click your applications folder
Then click on the icon you added to your application folder and click ok
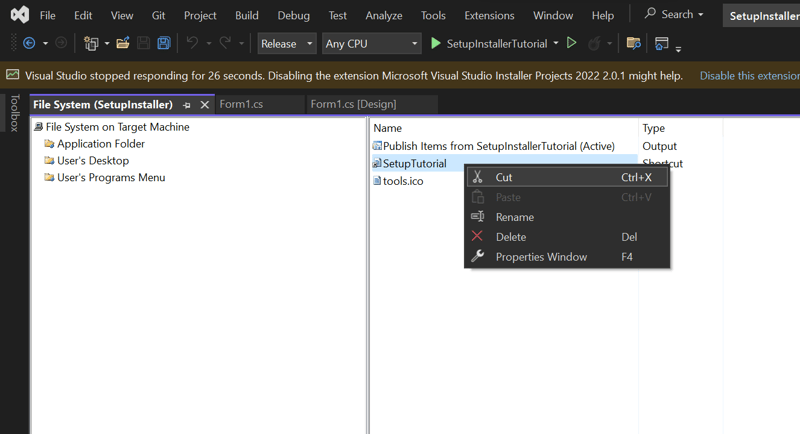
Next, we want to add our shortcut to our desktop, right click on the shortcut, click cut
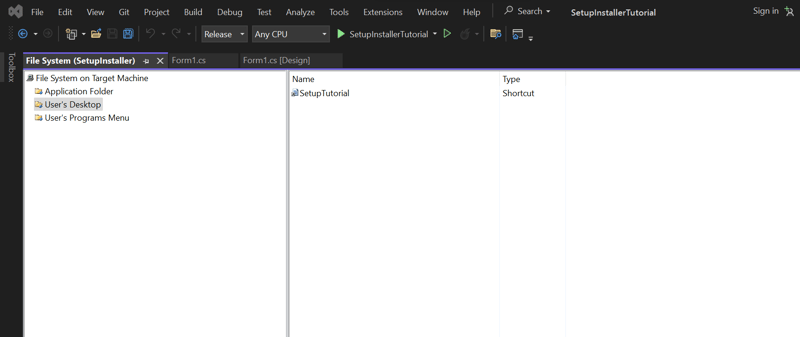
Then click on the User’s Desktop folder and paste it there
To add your shortcut to the User’s programs menu, simply create the shortcut again in the Application folder and follow all the steps, but this time, paste the shortcut you cut in the User’s program menu.
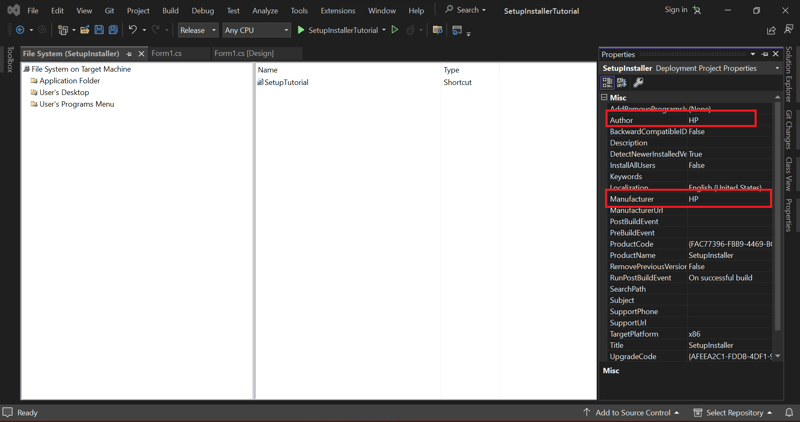
Next, we want to change the Author and manufacturer of our application, so click on the setup project, click on properties then change the author and manufacturer from HP to your name
NB: The project structure of your setup project must mirror the project structure of your actual application, in terms of placement of folders and naming.
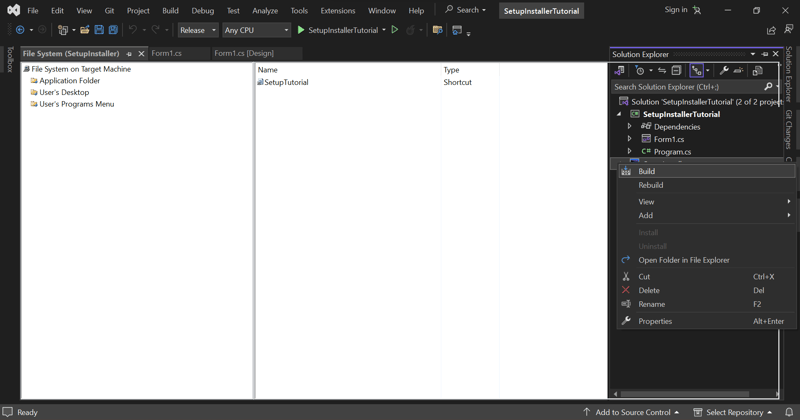
Now, our setup project is ready, right click on your Setup project and click build.
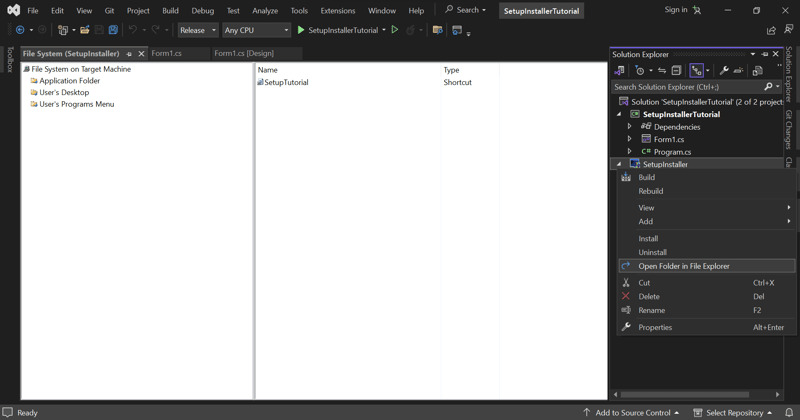
After successfully building right-click on your setup project and click Open folder in File Explorer
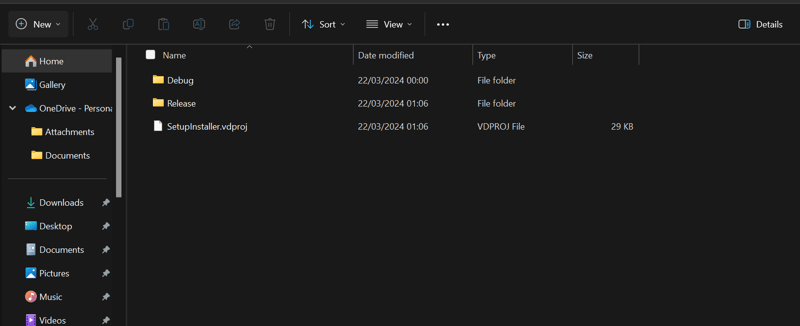
The File Explorer opens showing 2 folders Debug and Release
Since we configured our setup project to be built under release, our installer will be inside the release folder, so click on that.
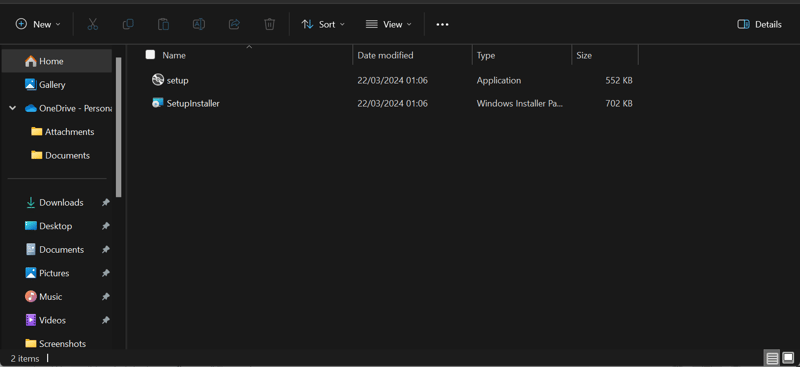
And that’s it. Our installer for our application has been built, you can go ahead and run either file to install your WinForms application.
The source code for this tutorial can be found here
Happy coding everyone.



Top comments (0)