Getting Started with React
The goal of this tutorial is to walk you through bootstrapping your first React app. Once you finish, continue it with Part II which includes state handling with Hooks along with Git/GitHub.
This article was initially created as a lab assignment in an intro to software engineering course I've taught at Cal Poly. Follow me, and soon you'll see a series of other articles associated with this project.
The only hard prerequisite is to have previous knowledge of programming in any language. Basic knowledge of HTML and JavaScript definitely helps, but if you don't have it, you will still be able to follow this tutorial. Several good HTML and JavaScript resources are available online, and you can't go wrong with these: HTML Guide and JavaScript Guide.
0 - Installing Node.js and npm
In this article, we will not use Node.js, but we'll need npm that comes with Node.js. If you have it already on your computer, skip this section. Otherwise, go to https://nodejs.org/en/download/ and install it according to your operating system. npm is a top-rated package manager that we'll use to install the starter code for this tutorial. It'll be useful on the next tutorials, too.
1 - Pulling Starter Code
For this section, you need npm (see the previous section). You can check it by running
npm -version
Fortunately, Facebook has created Create React App, an environment that comes pre-configured with everything you need to build a React app. To set up create-react-app, run the following code in your terminal, one directory up from where you want the project to live.
npx create-react-app react-tutorial1
Once the installation finishes, you'll see a folder named 'react-tutorial1'. Move to this folder and run the starter app.
cd react-tutorial1
npm start
A new window will popup at localhost:3000 with your new React app.
To see how the environment automatically compiles and updates your React code, find the line that looks like this in /src/App.js:
Edit <code>src/App.js</code> and save to reload.
And replace it with any other text. Once you save the file, you'll notice localhost:3000 compiles and refreshes with the new data.
Cool. You just ran a sample React app. Now, it's time to create our own.
2 - Creating Our First App
We'll reuse the environment we installed in the previous section, but we'll not use their application code. So, we'll go ahead and delete all the files in /src folder (and keep the folder).
Let's create our own boilerplate files without any bloat in our /src folder: index.css and index.js
In index.css, just copy-and-paste the contents of Primitive CSS into the file. If you want, you can use Bootstrap or whatever CSS framework you want, or nothing at all (just pure HTML without any style). Note: if you're lost on what CSS is, check other resources online, such as this page.
Now, in index.js, here's the code to add:
import React from 'react';
import ReactDOM from 'react-dom';
import './index.css';
function MyApp() {
    return (
      <div>
        <h1>Hello, React!</h1>
      </div>
    );
}
ReactDOM.render(<MyApp />, document.getElementById('root'));
In this index.js module, we're importing React, ReactDOM, and the style file (CSS). Then, we define the MyApp component as a function that returns what is supposed to be rendered on the screen. React functional components must return an element to be rendered on the page. The element can be a nested structure, as you see in the example.
The very last line in that file is going to make our React component (named here as 'MyApp') to be injected in the root of an HTML page that goes into the browser.
3 - More Components and Modularizing them in Separate Files
Almost everything in React consists of components, which can be functional components or class components (we're using functional components only). Although not required, it's a good practice to keep groups of co-related components in separate files. It helps to read and navigate through a larger codebase, and ultimately maintain it over time. So, we'll extract our MyApp component to a separate file. As a result, we'll have:
src/index.js
import React from 'react'
import ReactDOM from 'react-dom'
import MyApp from './MyApp'
import './index.css'

ReactDOM.render(<MyApp />, document.getElementById('root'));
src/MyApp.js
import React from 'react'
function MyApp() {
    return (
      <div>
         <h1>Hello, React!</h1>
      </div>
    );
}
export default MyApp;
Note the last line in the MyApp.js file. It makes the component available to be imported into other modules (like we did in the index.js - see the import).
Now, let's create another React component. We're going to create a table on the page. Create Table.js, and fill it with the following sample data.
src/Table.js
import React from 'react'
function Table() {
    return (
      <table>
        <thead>
          <tr>
            <th>Name</th>
            <th>Job</th>
          </tr>
        </thead>
        <tbody>
          <tr>
            <td>Charlie</td>
            <td>Janitor</td>
          </tr>
          <tr>
            <td>Mac</td>
            <td>Bouncer</td>
          </tr>
          <tr>
            <td>Dee</td>
            <td>Aspiring actress</td>
          </tr>
          <tr>
            <td>Dennis</td>
            <td>Bartender</td>
          </tr>
        </tbody>
      </table>
    );
}
export default Table;
With that, we just created a new component called Table. Essentially, this is a custom-made HTML table that we coded as a React component. Note that we capitalize React component names (as we did with MyApp component) to differentiate them from regular HTML elements.
Back in MyApp.js, we can load in the Table, first by importing it in, then by loading it into the return block of MyApp, where before we had "Hello, React!". I also added the style class of the outer container (note the className property of the div element pointing to a style class from the CSS file).
src/MyApp.js
import React from 'react'
import Table from './Table'
function MyApp() {
  return (
      <div className="container">
        <Table />
      </div>
  );
}
export default MyApp;
If you check back on your live environment, you'll see the Table loaded in. If you don't see any results, make sure you haven't killed the "npm start" process. Also, if for some reason you closed your browser, you can reload the app by accessing http://localhost:3000 again.
4 - Components and Sub-components
Besides nesting HTML elements we can also nest React components. Let's take our Table and make two simple components for it - a table header and a table body.
src/Table.js
function TableHeader() {
  return (
    <thead>
      <tr>
        <th>Name</th>
        <th>Job</th>
      </tr>
    </thead>
  );
}
src/Table.js
function TableBody() {
  return (
    <tbody>
      <tr>
        <td>Charlie</td>
        <td>Janitor</td>
      </tr>
      <tr>
        <td>Mac</td>
        <td>Bouncer</td>
      </tr>
      <tr>
        <td>Dee</td>
        <td>Aspiring actress</td>
      </tr>
      <tr>
        <td>Dennis</td>
        <td>Bartender</td>
      </tr>
    </tbody>
  );
}
Now our Table module will look like this. Note that the TableHeader and TableBody components are all in the same file, and being used by the Table functional component.
src/Table.js
function TableHeader() { ... }
function TableBody() { ... }
function Table() {
    return (
      <table>
        <TableHeader />
        <TableBody />
      </table>
    );
 }
export default Table;
Everything should appear as it did before. As you can see, components can be nested in other components. We kept the table components (Table, TableHeader, and TableBody) in the same module since they're closely related to each other so there's no need to define them in separate modules.
5 - Props
Right now, we have a cool Table component, but the data is being hard-coded. One of the big deals about React is how it handles data, and it does so with properties, referred to as props, and with state. Now, we'll focus on handling data with props. In Part II we'll deal with state handling.
First, let's remove all the data from our TableBody component.
src/Table.js
function TableBody() {
  return <tbody />
}
Then let's move all that data to an array of objects. We'll create this array inside our top component in the hierarchy MyApp and then pass the data down to the children.
src/MyApp.js
const characters = [
      {
        name: 'Charlie',
        job: 'Janitor',
      },
      {
        name: 'Mac',
        job: 'Bouncer',
      },
      {
        name: 'Dee',
        job: 'Aspring actress',
      },
      {
        name: 'Dennis',
        job: 'Bartender',
      },
];

function MyApp() {
    return (
      <div className="container">
        <Table />
      </div>
    );
}
Now, we're going to pass the data through to the child component (Table) with properties. We can call the property whatever we want, as long as it's not a reserved keyword, so I'll go with characterData. The data I'm passing through is the characters variable, and I'll put curly braces around it as it's a JavaScript expression within an HTML element.
src/MyApp.js
return (
  <div className="container">
    <Table characterData={characters} />
  </div>
)
Now that data is being passed through to Table, we have to work on accessing it from the other side.
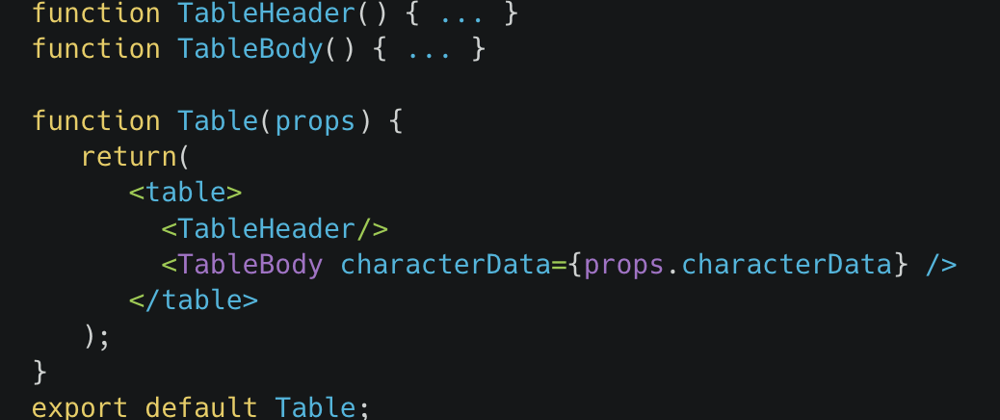
src/Table.js
function TableHeader() { ... }
function TableBody() { ... }

function Table(props) {
   return(
      <table>
        <TableHeader/>
        <TableBody characterData={props.characterData} />
      </table>
   );
}
export default Table;
In Table, we can access all props. We're only passing one prop through (characterData), so we'll use props.characterData to retrieve that data.
Since our Table component actually consists of two smaller simple components, I'm going to pass it through to the TableBody, once again through props.
Right now, TableBody takes no parameters and returns a single tag. We're going to pass the props through as a parameter, and map through the array to return a table row for each object in the array. This map will be contained in the rows variable, which we'll return as an expression.
src/Table.js
function TableHeader() { ... }

function TableBody (props) {
  const rows = props.characterData.map((row, index) => {
    return (
      <tr key={index}>
        <td>{row.name}</td>
        <td>{row.job}</td>
      </tr>
    );
  });
  return (
      <tbody>
         {rows}
      </tbody>
   );
}

function Table(props) {
   return(
      <table>
        <TableHeader/>
        <TableBody characterData={props.characterData} />
      </table>
   );
}
export default Table;
If you view the resulting page of the app, all the data is loading in now.
You'll notice we've added a key index to each table row. You should always use keys when making lists in React, as they help identify each list item. We'll also see how this is necessary in another tutorial when we want to manipulate list items.
Props are an effective way to pass existing data to a React component, however, the component cannot change the props - they're read-only. In the next React article (Part II), we'll learn how to use state to have further control over handling data in React.
This article was adapted from https://www.taniarascia.com/getting-started-with-react
If you want to discuss anything related to this content, please drop me a line on Twitter (@BrunoDaSilvaSE) or a comment below.
I welcome your feedback!


Top comments (0)