I was inspired to write this short blog by not having clear docs on running local builds for expo on Windows OS. So in order to save somebody time and suffering, here are up to date instructions.
Expo
Expo is a great framework and platform to get started up to track with React native app development. One of the advantages of expo is the simplified building of the app, also you don't need to spend time configuring it by yourself and if you use the expo cloud you don't need to have MAC to build iOS apps.
The disadvantage of building an app using the expo server is that it is limited for free usage, so builds may take longer and you have a limited amount of builds per month.
Logically you will go with the option for local build but then the problem you might have is when you want to build the app, and you have Windows OS.
If you read the expo docs you will find a simple command to start building the app locally.
Which goes by eas build --platform android --local and when you run it from your source code path
You get an error: Error: Unsupported platform, macOS or Linux is required to build apps for Android.
Now after some research, you may end up like me seeing many problems with expo and building apps locally with Windows.
Immediate thought is let's just leave the expo and start with react native cli, but nothing is lost yet.
There is a nice solution for building expo from Windows which is Windows Subsystem for Linux (WSL). So no need to install Linux on a virtual machine to be able to create builds.
WSL installation
1. Method by terminal
Open start on Windows and search for Command Prompt
Run command:
wsl --installRestart your PC
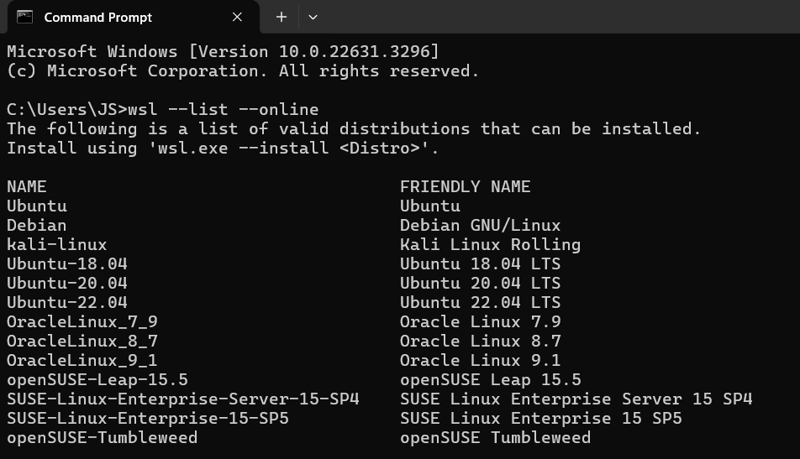
Run the command to see the list of all WSL distros with command:
wsl --list --online
For this case, you can go with Ubuntu:
- Run command :
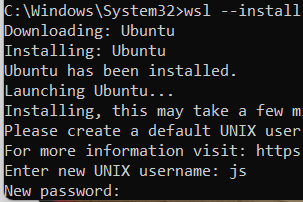
wsl --install -d Ubuntu
You will be prompted to create Unix user, so add your name and password
After that, you are ready to use it
2. Method Install WSL from Microsoft Store
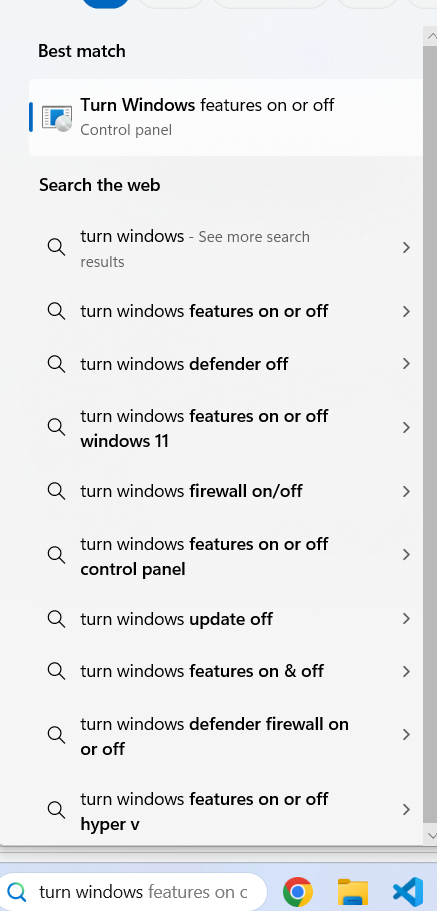
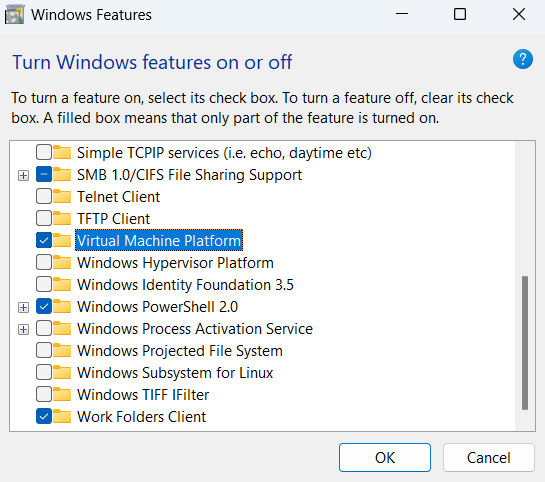
- First is needed to Enable Virtual Machine Platform on you machine. To do that type in search on your windows machine “Turn Windows features on off”
- After clicking on Turn Windows features on off you will see
And then select Virtual Machine Platform
Click OKThen you will be prompted to restart the PC, to finish adding changes.
Open Microsoft Store(from search bar or from pressing start)
Search Windows Subsystem for Linux
Install it
Also check Official Windows docs to install wsl
Install Necessary tools
Now open your installed WSL Ubuntu terminal
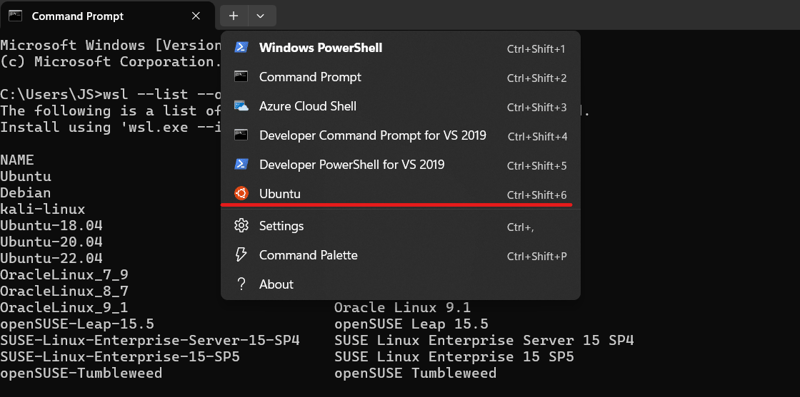
- You can do it by running cmd and then selecting installed Ubuntu
Or
- Run it from Windows search by simply searching for Ubuntu
Or you can:
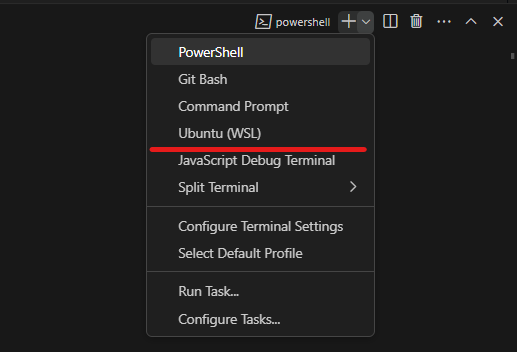
- Run it from VS code terminal where you will be already in the path of your project
Once we have prepared the WSL Ubuntu terminal and got to the path of our project we can start installing all the neccessary tools
- Install OpenJDK you can set the version that you want, in my case I used version 17:
sudo apt install openjdk-17-jdk-headless gradle
- set path to JAVA_HOME
export JAVA_HOME=/usr/lib/jvm/java-17-openjdk-amd64
- Install Android command-line tools:
cd ~
curl https://dl.google.com/android/repository/commandlinetools-linux-8512546_latest.zip -o /tmp/cmd-tools.zip
mkdir -p android/cmdline-tools
unzip -q -d android/cmdline-tools /tmp/cmd-tools.zip
mv android/cmdline-tools/cmdline-tools android/cmdline-tools/latest
rm /tmp/cmd-tools.zip
- Set correct path for variables:
export ANDROID_HOME=$HOME/android
export ANDROID_SDK_ROOT=${ANDROID_HOME}
export PATH=${ANDROID_HOME}/cmdline-tools/latest/bin:${ANDROID_HOME}/platform-tools:${ANDROID_HOME}/tools:${ANDROID_HOME}/tools/bin:${PATH}
- Accepting SDK licenses:
yes | sdkmanager --licenses
- Installing SDK components (set correct android versions):
Find a version of SDK in your project in android/build.gradle then see targetSdkVersion and buildToolsVersion
Then Install that specific version in my case :
sdkmanager --update

sdkmanager "platforms;android-33" "build-tools;33.0.0"
Run local build for expo
From expo docs you can see commands for local build:
eas build --platform android --local

eas build --platform ios --local
Now run them from the WSL Ubuntu terminal and get your build!
Note one error that was happening to me multiple times when opening a new WSL terminal is that ANDROID_HOME could not be found, then JAVA_HOME was not found or SDK path was not found. Even though I have run commands and set the correct path already. So what needed to be done to resolve this error was to just run commands again and then it all worked.
Happy coding!




Top comments (0)