
Building a react dashboard panel can quickly get complicated especially if you'll be working on multiple modules. Think of building software that models a human resource management system, that has a time and attendance management module, finance management module, recruiting, hiring, employee management, etc.
What if there's an out of the box solution to drastically reduce the lines of codes you'll be writing. A mini framework that takes care of creating, updating, deleting, getting your items to display on the screen, state management, and themed with one of the best design systems. That's is what a singular took will be using can do for us.
In this tutorial, we'll be using the react-admin package to bootstrap our application. At the end of this tutorial, you should be able to
- Create a basic dashboard of users and post
- Be able to create new users/post
- Be able to edit new user/post
- Be able to Adds new user/post
- Be able to update new user/post
- Be able to able to create your own data provider(more to that in the tutorial).
So let's jump in 😊
You should have the nodejs installed on your system to download all the needed packages. download the nodejs on your system if you don't have one installed.get it here
if you have it installed, open up your terminal and type
node -v
node --version

First, we will be installing the, create react app to get started.
open up your terminal
create-react-app reactadmin

hit enter, it'll take a while for all the needed packages to get installed, depending on your internet speed.
after installation, type, npm this will start up your application and you should be greeted with a frontend as below.
start

Now, we're set to begin the react-admin project.
open up your terminal and type in
i react-admin ra-data-json-server prop-types

Go to your source file, open your app.js and replace the codes with the ones below;
// in src/App.js
import * as React from "react";
import { Admin, Resource, ListGuesser } from 'react-admin';
import jsonServerProvider from 'ra-data-json-server';

const dataProvider = jsonServerProvider
 (
'https://jsonplaceholder.typicode.com'
 );
const App = () => <Admin dataProvider={dataProvider} />;

export default App;
Save your changes and check your browser, if everything works fine with no error, you should be greeted with a page as below.

Mapping And Adding Our Resources
Our preferred API we'll be using is the popular JSON placeholder API, we will pulling out the users, and post resources available to us from the API.
if you hit the user's endpoint(get), you should be greeted with a response as below.

One of the props, the Admin component will be expecting is the dataProvider props, this is what inject the data from an API into the app, because, we're using the JSON placeholder as a test here, we have the dataProvider already prepared for consumption later on we'll go ahead to add our own custom one, but for now, we'll be sticking with the available one.
The Admin Component will also expect one or more of Resources components as its child children. We can have one or two or more even depending on our use case scenario.
Our code should look like this.
import * as React from "react";
import { Admin, Resource, ListGuesser } from "react-admin";
import jsonServerProvider from "ra-data-json-server";

const dataProvider = jsonServerProvider("https://jsonplaceholder.typicode.com");

const App = () => (
  <Admin dataProvider={dataProvider}>
    <Resource name="users" list={ListGuesser} />
  </Admin>
);

export default App;
Note the addition of the name prop, users, list prop, ListGusser.
The name prop users is synonymous with we telling react-admin to fetch our data from https://jsonplaceholder.typicode.com/users.
Then we have the list props, which is getting the data and mapping it for us. The ListGuesser is great a tool for us to know how to build the components returning our data on the UI, from the name guesser it's guessing what our structure should look like. if you save your changes and look at your UI, you will see a list of users displayed on the screen.

Now, things are getting interesting, 🤓
Under the hood, react-admin is displaying our data with what is known as ListGuesser, these components can only be used in the development, well, should be used only in the development phase, let's proceed to get rid of it and build our own components to display the same content. Go ahead to open the console, ListGuesser will tell us how our new component should look like.

We'll now go-ahead to create that component and import it into our app.js. A pattern I'll like to follow is creating a component folder, inside that, I can begin to create all other components. Note, this is not mandatory this is a personal preference to make sure everything stays organized.
//Post.js

import React from "react"
import { List, Datagrid, TextField, EmailField} from 'react-admin';


export const UserList = props => (
    <List {...props}>
        <Datagrid rowClick="edit">
            <TextField source="id" />
            <TextField source="name" />
            <TextField source="username" />
            <EmailField source="email" />
            <TextField source="address.street" />
            <TextField source="phone" />
            <TextField source="website" />
            <TextField source="company.name" />
        </Datagrid>
    </List>
);
And in our app.js we'll delete the ListGuesser, import our post component, and pass the List prop as the List value
import * as React from "react";
import { Admin, Resource } from "react-admin";
import jsonServerProvider from "ra-data-json-server";
import { UserList } from "./Components/Post.jsx";

const dataProvider = jsonServerProvider("https://jsonplaceholder.typicode.com");

const App = () => (
  <Admin dataProvider={dataProvider}>
    <Resource name="users" list={UserList} />
  </Admin>
);

export default App;
Save and check out your browser, you'll discover nothing changed, but we have successfully removed the Guesser component.

You can begin to do amazing stuff, with this setup, like rendering the list, showing a set maximum number of items on the page, selecting and deleting items We're getting to where to edit and add items in a moment.
While deleting, react-admin makes use of what is called optimistic UI updates. What does this even mean? 🤔
Stay with me, I'll not bother you with the database, response jargon.😄 When we're making an update to a UI, for example delete functionality, there's a time lag to when the data is actually removed from the server.
Ultimately when the data is no more present in the database it'll be removed from the UI, however, we want to create an illusion for the user, such that when they hit the delete button it's removed automatically from the UI and the request is sent to the database.
Behind the scene, in this scenario we're hopeful/optimistic it'll truly be removed from the database without any issue. But if anything goes wrong probably a sudden slow internet connection, server, etc. The removed item will be reinstated back to the UI.
Using the pessimistic approach, we'll send our request to the backend and wait until we get a response before we can update the UI.
react-admin use an optimistic approach, which is cool by the way, 🥳.
One thing you may notice is, we're getting and mapping all the data returned to us from the serve. Ideally, we only want some certain data on the UI not all.
The Datagrid in the Post.js is responsible for allocating different data types to our returned information, we'll go ahead to trim down our information. Under the Datagrid, we have different components, and so many of them. I'll proceed to remove the address, textfield, company name, and leave the rest for now.
Relationship Between Data
One thing react-admin is capable of doing is handling the relationship between data between APIs it can detect the relationship between them and help us to render our view in the most appropriate way. Let's render another set of data to the screen using the same API but this time, the post endpoint.
We're going to first use the ListGuesser, then create a new component as suggested by the ListGuesser and import it inside our app.js just like how we did the users' components.

Let's remove the guesser, create a new component in the component folder, and import it.
import React from "react";
import { List, Datagrid, TextField, ReferenceField } from "react-admin";

export const PostList = props => (
  <List {...props}>
    <Datagrid rowClick="edit">
      <ReferenceField source="userId" reference="users">
        <TextField source="id" />
      </ReferenceField>
      <TextField source="id" />
      <TextField source="title" />
      <TextField source="body" />
    </Datagrid>
  </List>
);
Let's go through some of the components given to us in the posts. First is the , the reference field does not actually add any markup to your UI, what it does is get some data from an external source prepare and get it ready to be consumed by its children component.
In our example, the userId prop is telling the reference field to use the data here as the entry point to begin to fetch data from the reference "users". I hope that makes sense to you.
The is what is actually consuming our and displaying our data. Looking at the post, the column Id not actually making much sense, let's switch it to display the author's name instead.
 <TextField source="name" />

```, this is what we now have instead of using the id.

I'll go ahead to trim down the data, put the post-Id as the first column, remove the *<TextField />, and add an edit button to the UI. I'll be importing the Edit button component to our UI and removing the "rowClick" prop on our Datagrid component.
import React from "react";
import {
List,
Datagrid,
TextField,
ReferenceField,
EditButton,
} from "react-admin";
export const PostList = props => (
);
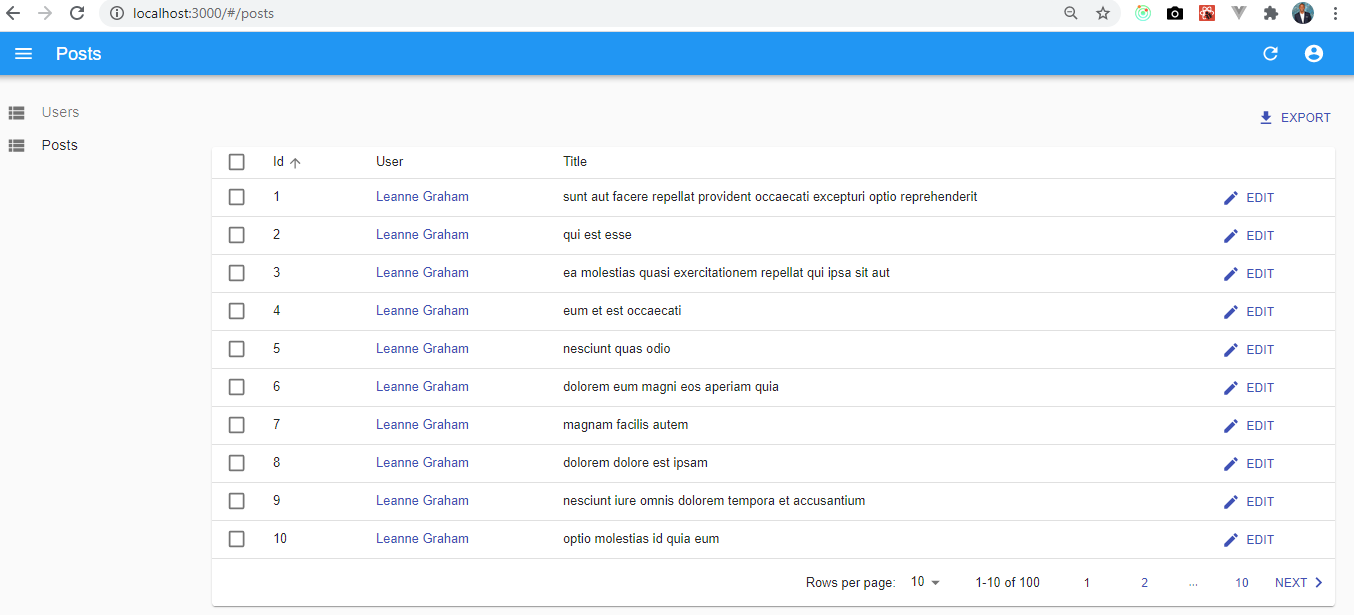
Our UI should look like the above screenshot. 😎
###Editing and Adding New Records.
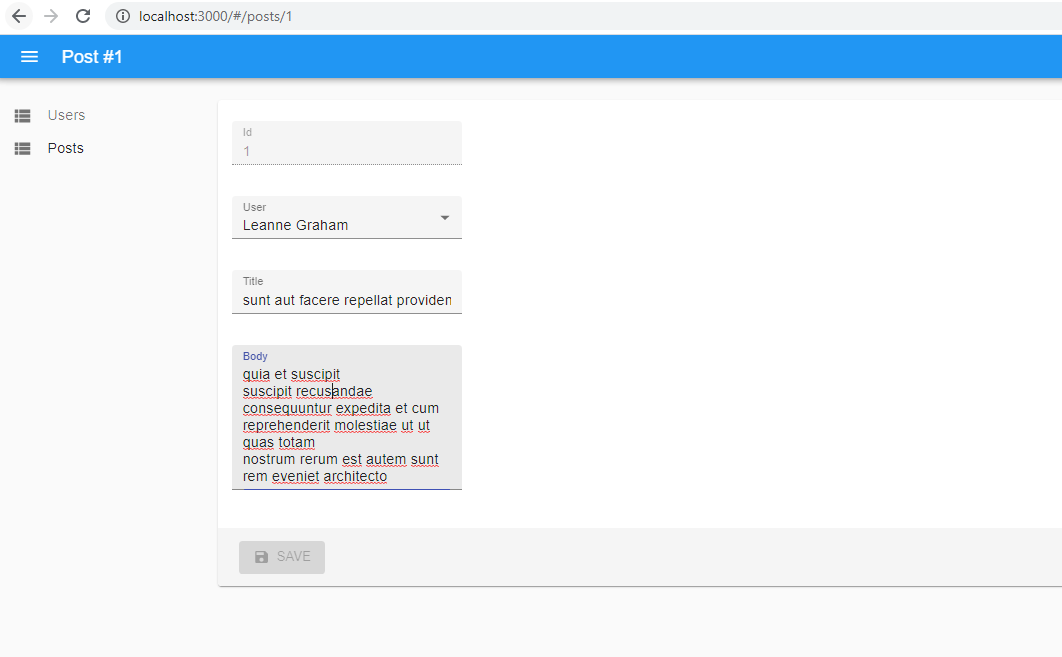
up until now, we have been viewing, deleting our records, it's time to edit and add new records.
Like the ListGuesser component, we also have what we call the EditGuesser component, sweet! right? 😇
In our app.js, we'll be importing the EditGuesser, check our console, to see the guessed components that will enable us to edit our displayed items.
So, we will have some like this in our app.js
import * as React from "react";
import { Admin, Resource, EditGuesser } from "react-admin";
import jsonServerProvider from "ra-data-json-server";
import { UserList } from "./Components/User.jsx";
import { PostList } from "./Components/Post.jsx";
const dataProvider = jsonServerProvider("https://jsonplaceholder.typicode.com");
const App = () => (
);
export default App;
We imported the EditGuesser, add another prop, edit to our post component, and give it the value EditGuesser. Sure we'll be removing the EditGuesser and replace it with our created component as suggested by the EditGuesser.

//EditPost.jsx
import React from "react";
import {
Edit,
SimpleForm,
ReferenceInput,
TextInput,
SelectInput,
} from "react-admin";
export const PostEdit = props => (
);
This is our newly created edit component, I have successfully removed the EditGuesser and everything still works well.
Let's make some adjustments to our EditPost component to improve its UX.
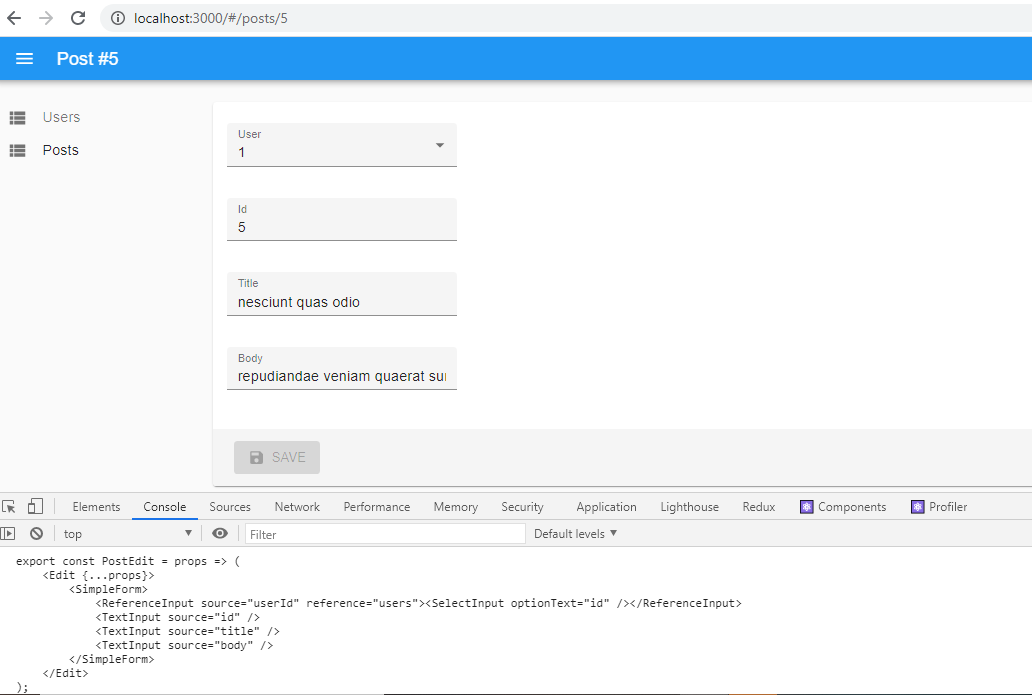
First, we want to make sure the user options is giving us the name of the user, not its id, we want to make sure the id of the id is read-only and should be placed at the top of the component, lastly, the body section should be able to expand and display the text at only.
We'll be placing the textfield component immediately after the simpleform component, add a disabled prop to it. One issue is settled.
We'll be changing the SelectInput OptionText from the value id to name, to reflect the name of the posts' author.
We'll add the multiline prop to the textinput body, this will expand the text input for the user to see all the text at once.
//EditPost.jsx
import React from "react";
import {
Edit,
SimpleForm,
ReferenceInput,
TextInput,
SelectInput,
} from "react-admin";
export const PostEdit = props => (
);
Our code should be above as above and UI should change to what we have below.
###Adding New Records.
For us to be able to add a new record, we just have to copy the PostEdit component add little tweaks and we're good to go.
Create a PostCreate component, replace the Edit with Create, remove the *<TextInput disabled source="id" />* and import the new component into our app.js
//CreatePost.jsx
import React from "react";
import {
Create,
SimpleForm,
ReferenceInput,
TextInput,
SelectInput,
} from "react-admin";
export const PostCreate = props => (
);
In our app.js, under our Resources component, add a new prop "create" and let the value be the newly imported "PostCreate".

We have successfully added the ability to create, update, delete, and view our records. 🎉🎉🎉

Note, because the JSON placeholder API is read-only when we attempt to create a new record it doesn't appear on our records, if we're using a real API that accepts a post request then everything should work fine.

##Adding Filters To Our Post

From our previous work, we have been able to sort, view according to pages but not the ability to filter our records, filtering our records is short and simple and let' do just that.
//FilterPost.jsx
import React from "react";
import { Filter, ReferenceInput, TextInput, SelectInput } from "react-admin";
export const PostFilter = props => (
);
The **<Filter>** component comes in handy from react-admin, the source prop of the value "q" is pertaining to the JSON placeholder API the alwaysOn makes our filter feature always visible in the UI.

We'll be embedding our filter component in a different way compared to how we have been adding other components to the app.js. This time we'll be adding it as a prop to the List Component in Post.jsx.

Import the FilterPost Component, add the "filters" props to the List component and let the value be the FilterComponent, just like what we have below.
import React from "react";
import {
List,
Datagrid,
TextField,
ReferenceField,
EditButton,
} from "react-admin";
import { PostFilter } from "./FilterPost";
export const PostList = props => (
} {...props}>
);
Now, we can filter our records, and users can even add search criteria.
###Adding Homepage to our Dashboard
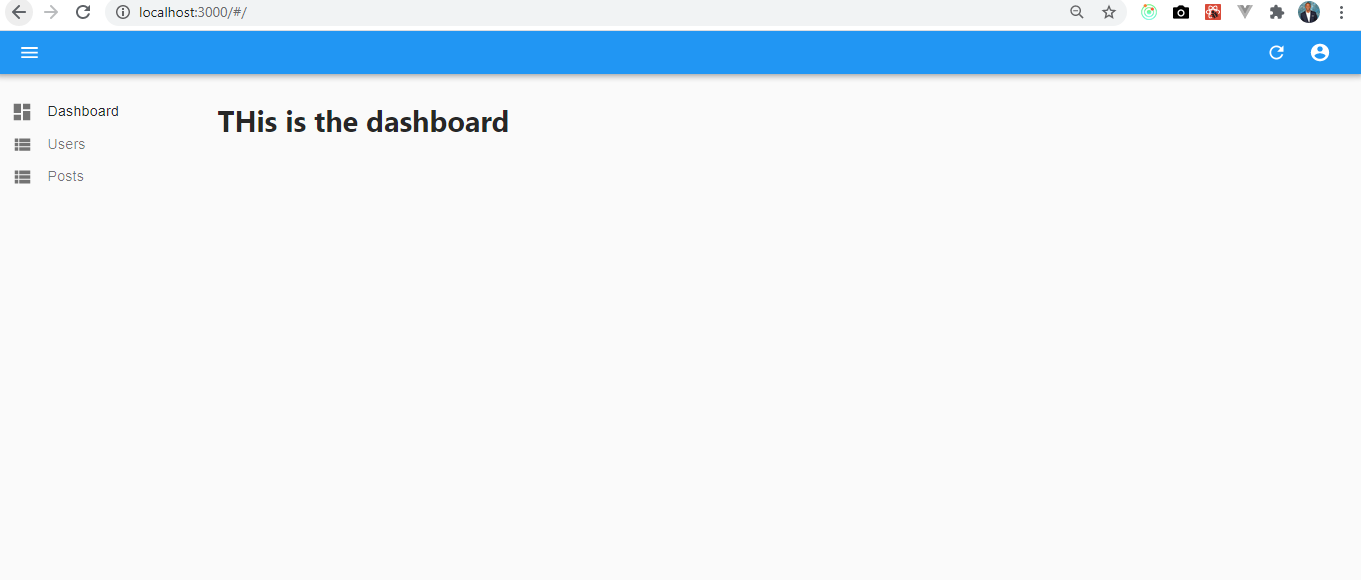
Let's add a home page to our dashboard. By default react-admin places the first resource as the home page, we can however change that and add our own custom dashboard home.
import * as React from "react";
export const Dashboard = () =>
THis is the dashboard
;
Create a dashboard.jsx in the components folder, go to the source folder, app.js, and import the newly created dashboard.js as a dashboard prop to our **<Admin />** component.
import * as React from "react";
import { Admin, Resource } from "react-admin";
import jsonServerProvider from "ra-data-json-server";
import { UserList } from "./Components/User.jsx";
import { PostList } from "./Components/Post.jsx";
import { PostEdit } from "./Components/EditPost.jsx";
import { PostCreate } from "./Components/CreatePost.jsx";
import { Dashboard } from "./Components/DashBoard.jsx";
const dataProvider = jsonServerProvider("https://jsonplaceholder.typicode.com");
const App = () => (
name="posts"
list={PostList}
edit={PostEdit}
create={PostCreate}
/>
);
export default App;
There are a couple of things we can still do to make this dashboard, a little better, for example, supporting mobile devices, how to add own API instead of the JSON placeholder, and build a custom dataprovider, this will be rolled out in the next post. So keep your eyes peeled.
[Source code available on Github](https://github.com/okeken/react-admin-tutorial)
UPDATE: The Part 2 is available <a href="https://dev.to/okeken/how-to-create-an-admin-panel-in-react-js-part-2-3j9">here </a>

Top comments (16)
I apologize beforehand, but I can't make it past this sentence. So what you are essentially saying is we have come full circle and we are going back to full CRUD apps instead of the statically generated websites? No, because they never really went away.
For me, that opening paragraph takes credibility away from the article, and maybe incorrectly highlights the author's lack of knowledge and expertise.
Thanks for your thoughts, essentially we're able to build more complicated apps & websites even faster compared to what we have decades ago. That's the main point I was trying to drive at. The rest of the article is illustrating how to build a react admin panel which is technical by the way. Think of the heavy lifting that has been done for us, just because of using only one tool.
Allan, after reading the first sentence I stopped and went directly to comments to leave a reply like yours.
Nice explanation! 💗 the depth!
Glad you found it helpful.
The tutorial is amazing.
I have a question, with ListGuesser is working but when i use URL i am getting empty view on screen with error httpError not found please guide me.
Hi Ali, I'll updating this article in the next coming weeks to use a real url...pls stay tuned till then.
Very helpful article and good explanation.
Thanks to the author for bringing my attention to the React-Admin framework.
Glad you like it.
When you r going to build it further?
I'll drop the rest of the tutorial soon 😊
This was excellent! Thank you so much. Please drop the next one soon 🤗🤗
thank you for the explanation, really a been helpful.
i was hoping to know more about image upload using react-admin.
is it possible to change the enctype of the SimpleForm in react-admin?
@okeken
How about styling? I wish to restyle the dashboard
Thanks man 😊 your explanation are just awesome, like you covered all the necessary things. we don't have to go anywhere to find extra details
Some comments have been hidden by the post's author - find out more