What is IoT?
IoT stands for Internet of Things.
Secure and dependable connectivity between your IoT solution and the devices it controls is made possible by Azure IoT Hub. In order to connect devices, IoT Hub offers a cloud-hosted solution backend with scaled provisioning, device management, and per-device authentication.
How does it works?
Main Azure PaaS (Platform as a Service) that facilitates bidirectional connectivity between IoT devices and a cloud solution is Azure IoT Hub. Any IoT solution begins with the IoT Hub, which also includes certain crucial features that are shared by all IoT implementations. These include security, networking, computing, and storage capacities.
Creating IoT Hub on Azure portal
- Sign in to the Azure Portal: -Open your web browser and go to the Azure Portal. -Sign in with your Azure account.
- Navigate to "Create a resource":
- In the left sidebar, click on "Create a resource" or the "+" icon.

- Search for "IoT Hub":
- In the "Search the Marketplace" box, type "IoT Hub" and press Enter.
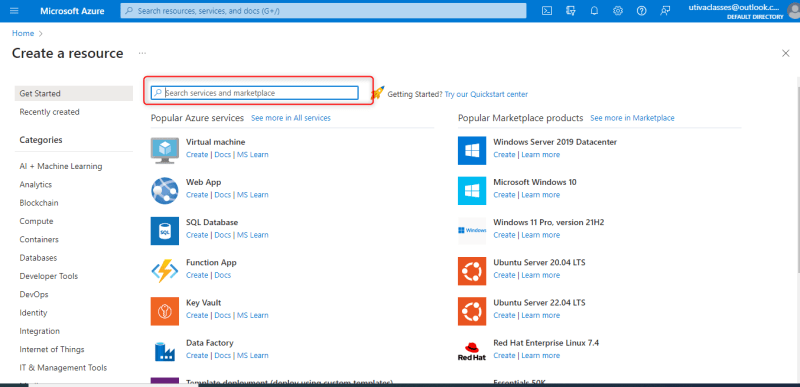
- Select "IoT Hub" from the results:
- In the search results, click on "IoT Hub" from the list of services.
- Click "Create":
- On the "IoT Hub" page, click the "Create" button to start the creation process.
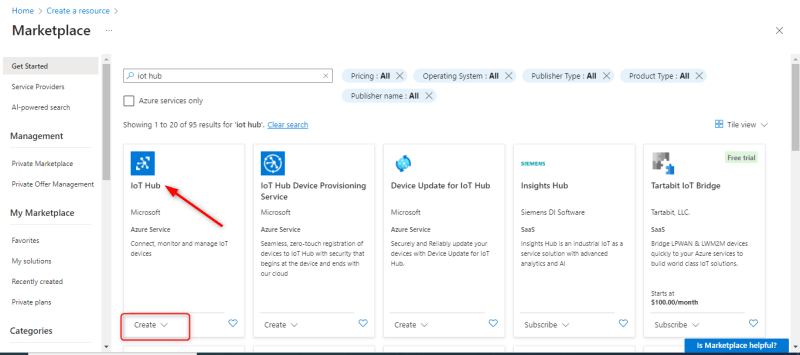
- Fill the basic information
- select your subscription
- select or create a resource group

- create the IoT hub name
- Select region

- click Review + create

- After validation, click create and wait for it to deploy.
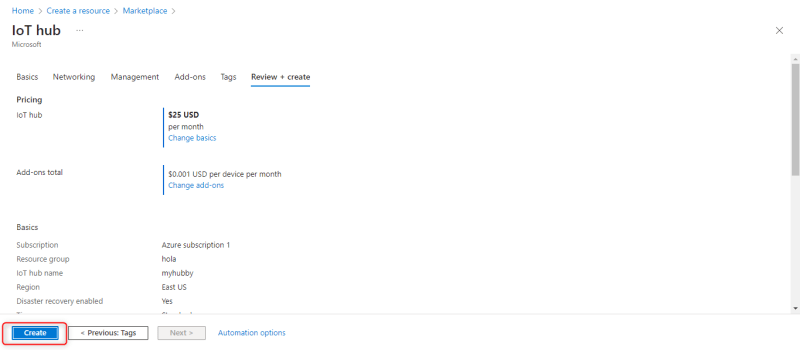

- once the deployment is complete, click go to resource

- Select devices
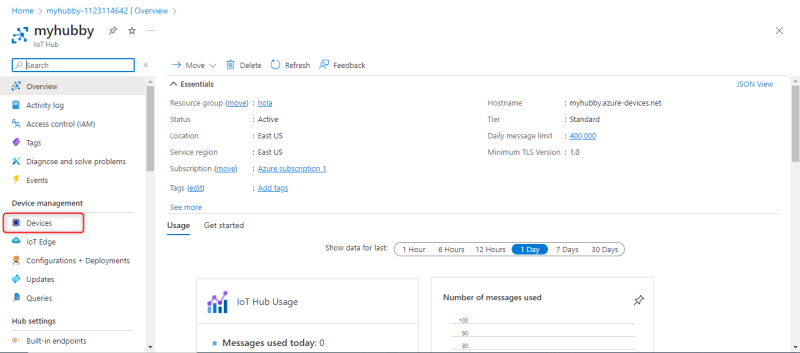
- Click add device
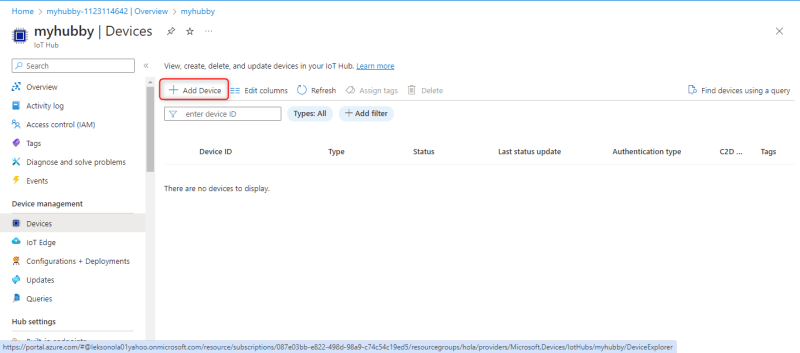
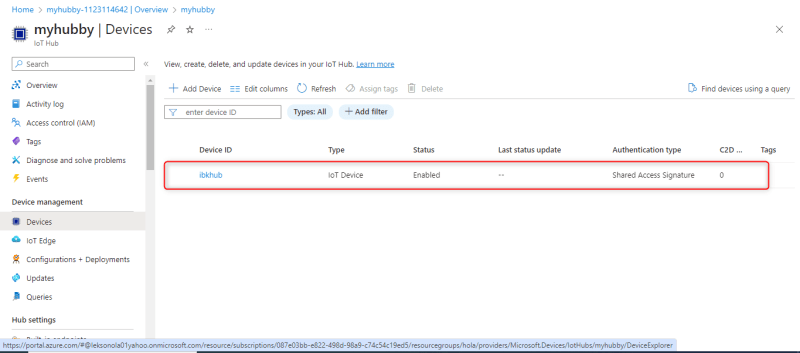
- Choose and type a Device ID and leave the rest as default.

- Click save

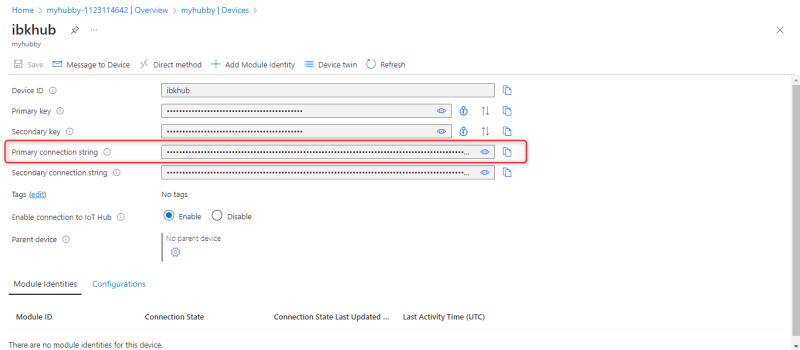
- Click on your device under Device ID
- Copy primary connection string
How to connect IoT Hub to Raspberry pi Simulator
- Use this link to go directly to Raspberry Pi Simulator
https://azure-samples.github.io/raspberry-pi-web-simulator/
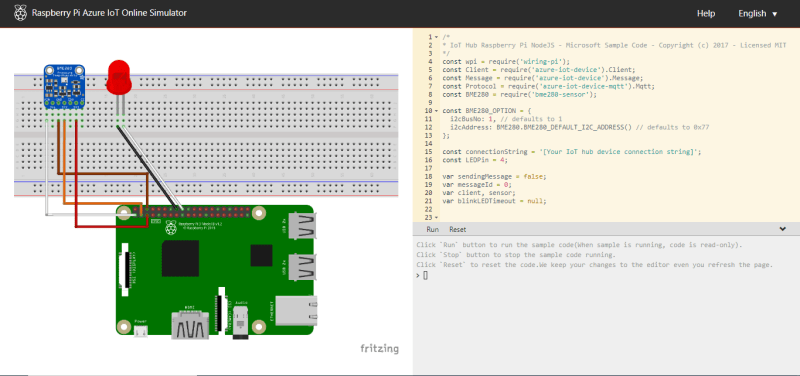
- On line 15, remove what is written between the '' and paste your copied primary connection string.
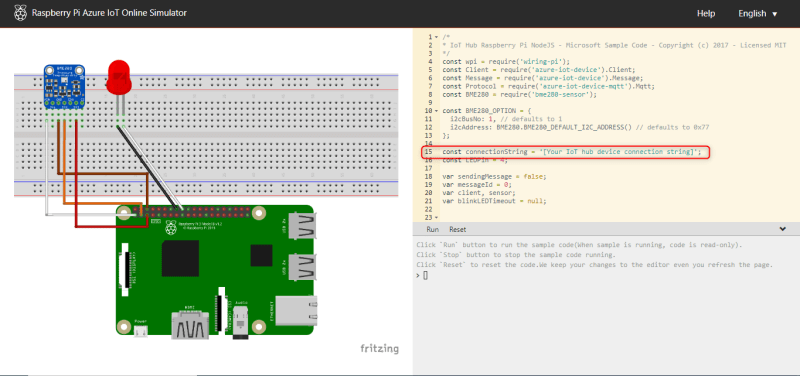 Notice that the led light does not blink before connecting, also the message used today and IoT devices in the IoT overview page before connect must 0 and 0 respectively.
 - Click run
The light on the simulator will start blinking and you will see sending message column


Top comments (0)