Project Description:
To develop an e-commerce website for a new online marketplace name "Agate Interior". This platform will feature product listings, a shopping cart, and user authentication.
Task:
- To utilize Git for version control, develop the platform in a Linux environment, and deploy it on an AWS EC2 instance.
- Continous integration and development workflow
- Developing New features and fixes
- Version Control with Git
- Pull Requests and Merging to ain branch
- Deploying Updates to the Production Server
- Testing the new changes
Step 1:
Initialize Git Repository
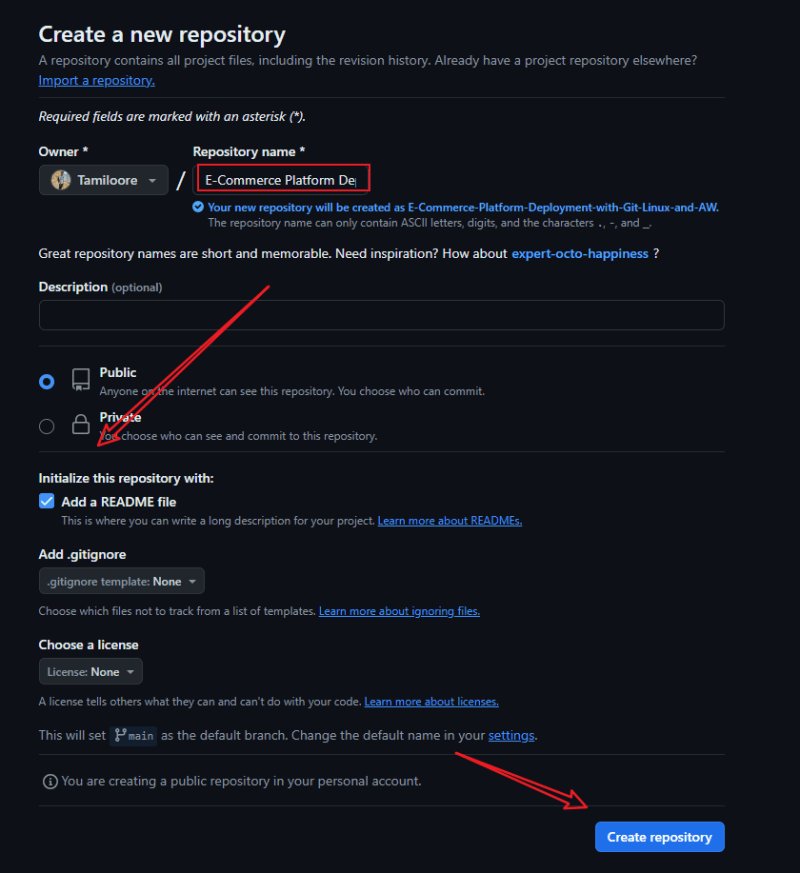
- Create a new Repository
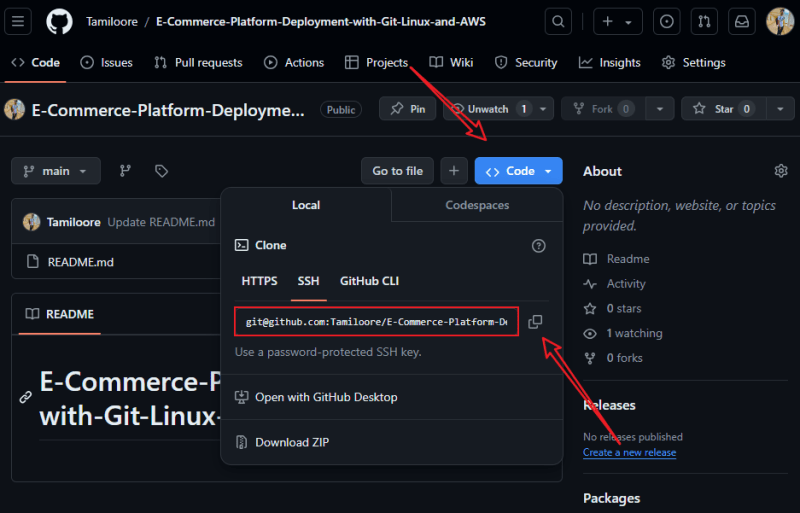
- Copy SSH/HTTP (depending on the one you use best)
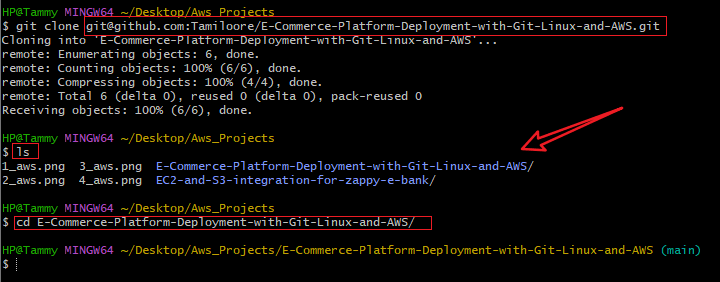
Clone the Repo
git clone "Paste the URL"Confirm it has been successfully downloaded into your local Repo
## Step 2:
Obtain and Prepare the E-Commerce Website Template
Instead of developing the website from scratch, use a pre-existing e-commerce website template
- Download A website template from (https://www.tooplate.com/) or any website template hub you know
Extract the Downloaded template into your project Directory that you've created
Customize the template if you have a basic web development skill. (I Tailored mine to Agate Interior)
## Step 3:
Stage and Commit the Template to Git
- Run
lsto confirm the directory -
git add "Directory_name"to stage the codes
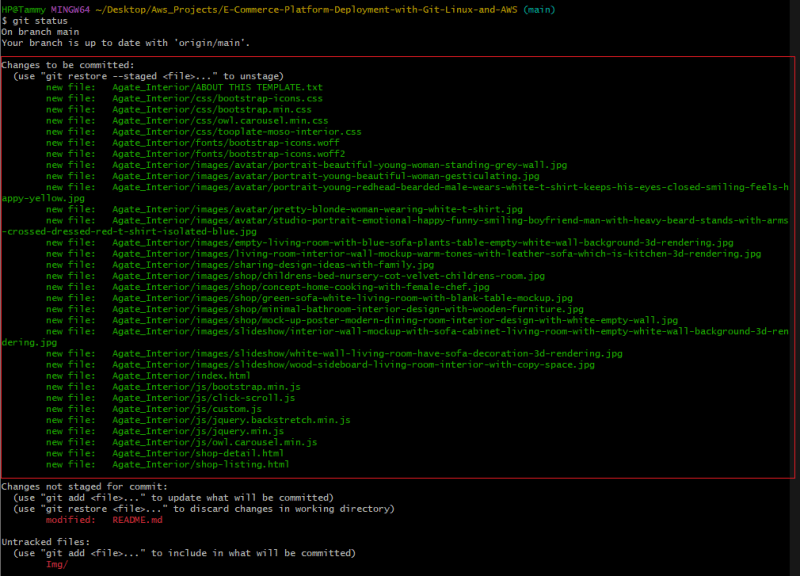
- Run
git statusto see if it's successfully staged
- Run
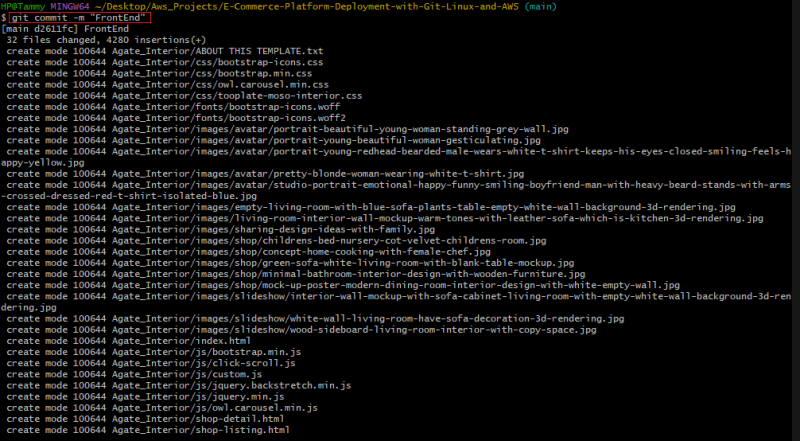
git commit -m "your message"to commit your code
-
git push/git push -u origin mainto push your code to your remote Repo
- Go to your Github to confirm the changes
## Step 4:
AWS Deployment
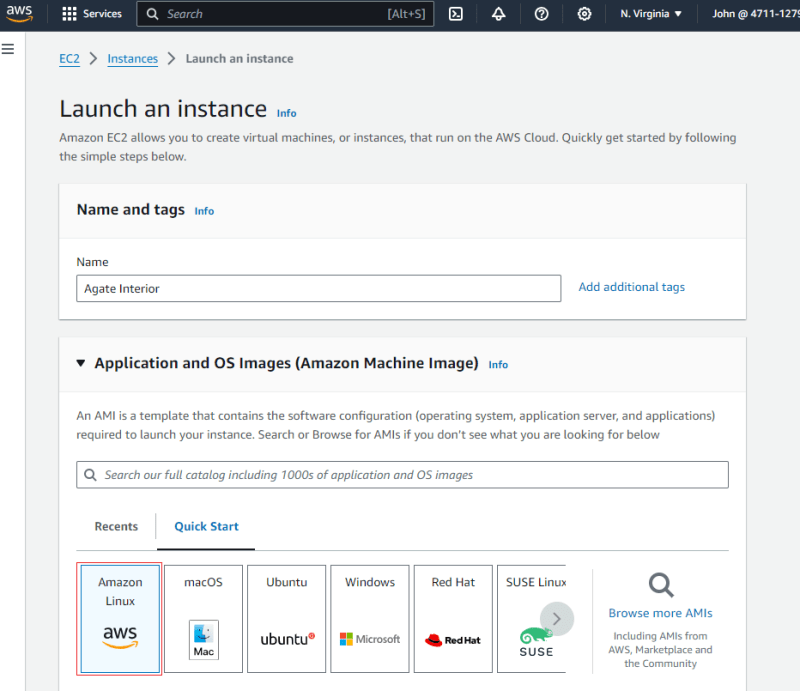
To deploy, you'll start by setting up an Amazon EC2 instance
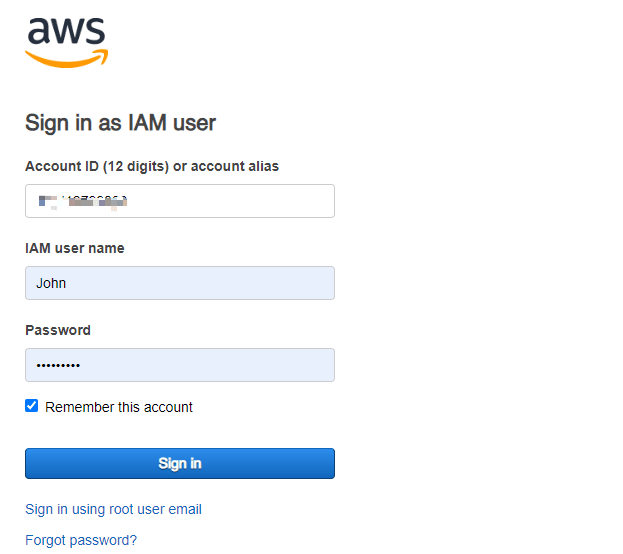
- Log in to the AWS Management Console
Launch An EC2 Instance Using an Amazon Linux AMI
Remember to download a key pair
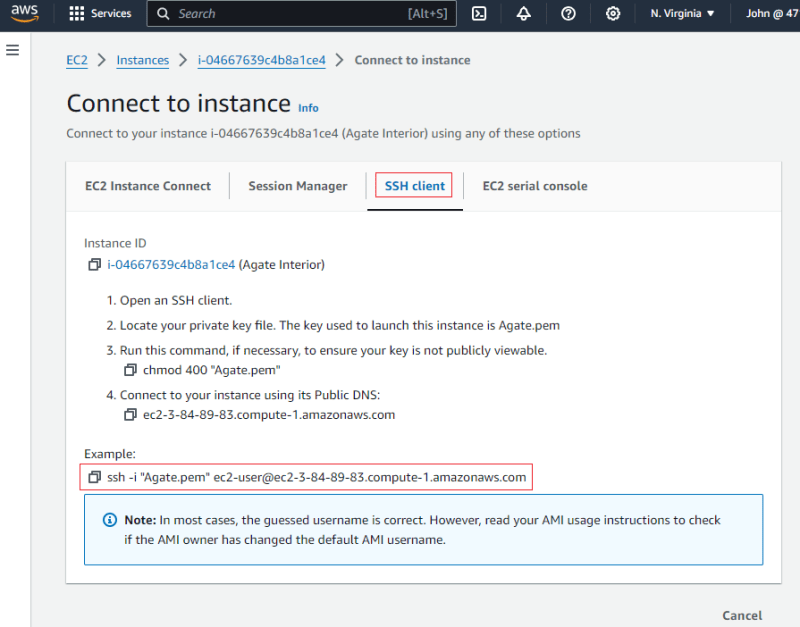
- Connect to the to your local Repo using SSH
- Copy the URL
You have successfully launched an EC2
## Step 5:
Connect and Clone the repository on the Linux Server
You need to clone the GitHub repository to your AWS EC2 instance. This process involves authenticating with GitHub using SSH
- Open your Local Server
- Paste the URL copied from your EC2 to connect your local server to the remote server
Run
ssh-keygento generate an SSH keypairPress enter to use the default file directory and passphrase
- Run
cat /home/ec2-user/.ssh/id_rsa.pub(copy the content)
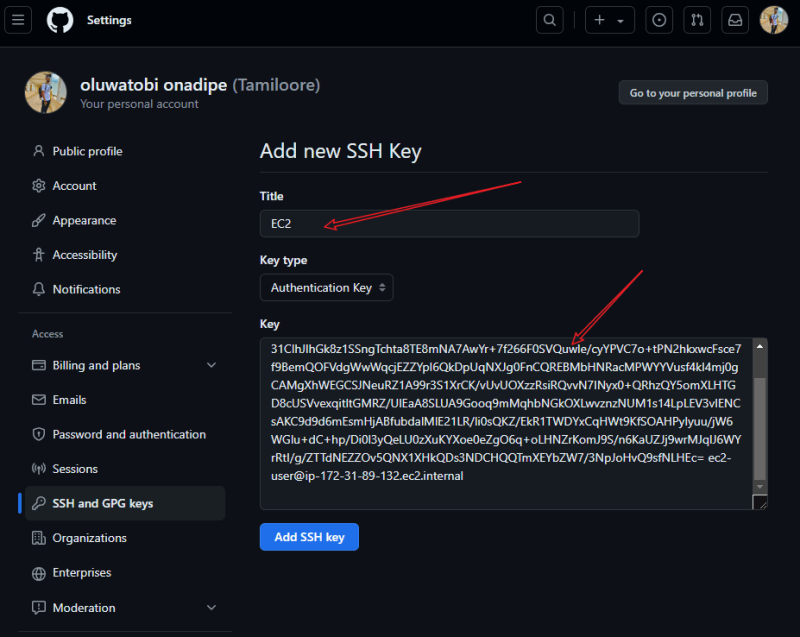
- Navigate to your Repository in GitHub Console, click on settings
- Navigate to SSH and GPG key, create a new SSH key
- Paste the Copied content, and add the SSH key
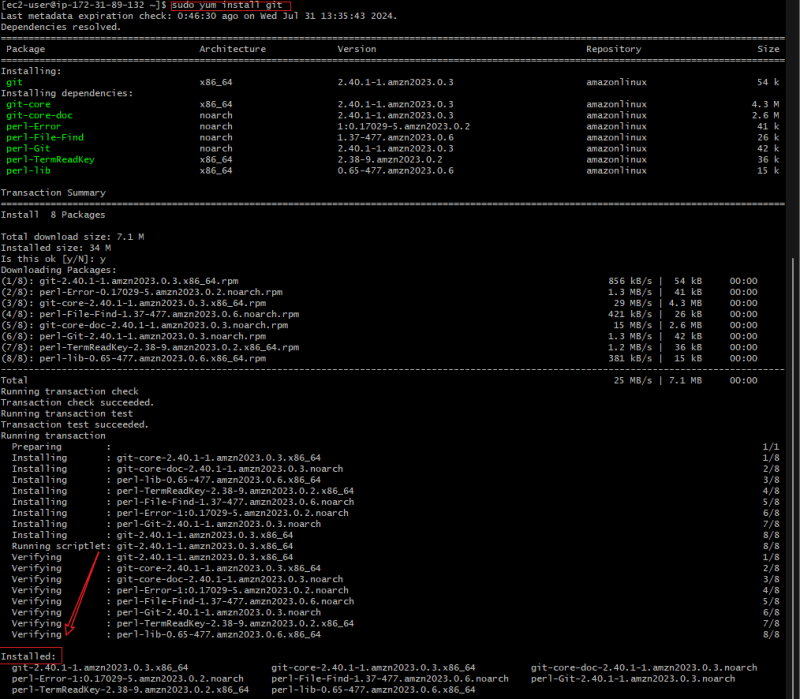
Install git on your EC2 server if you have it installed
To check if it is installed or not
- Run
which git
- To install, run
sudo yum install git
Clone the Repository
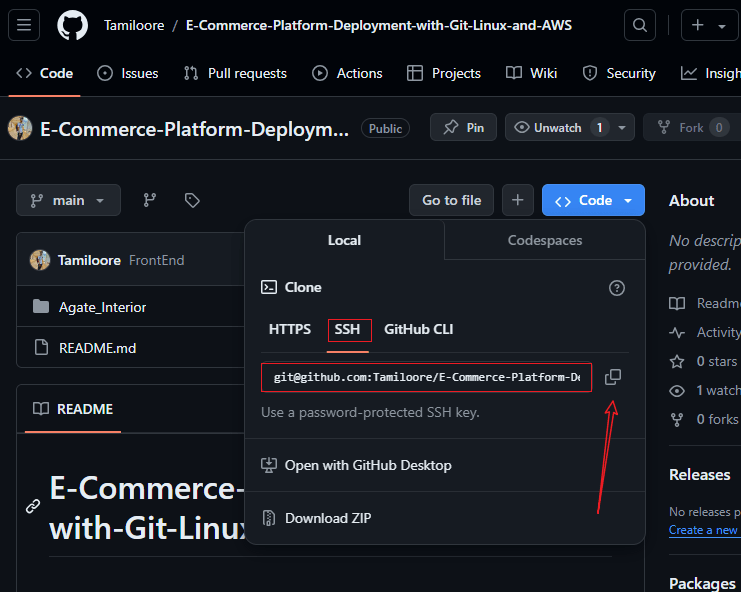
- Navigate back to Repo and copy the SSH URL
- Clone Repo
## Step 6:
Install a Web Server on EC2
Apache HTTP Scerver
Installing it on Linux EC2 server allows you to host "Agate Interior"
- Install the Apache web server on the EC2 instance.
sudo yum update -y
sudo yum install httpd -y
sudo systemctl start httpd
sudo systemctl enable httpd
- Configure httpd for the website
sudo rm -rf /var/www/html/*
sudo cp -r ~Agate_interior/* /var/www/html/
- Reload httpd
sudo systemctl reload httpd
Step 7:
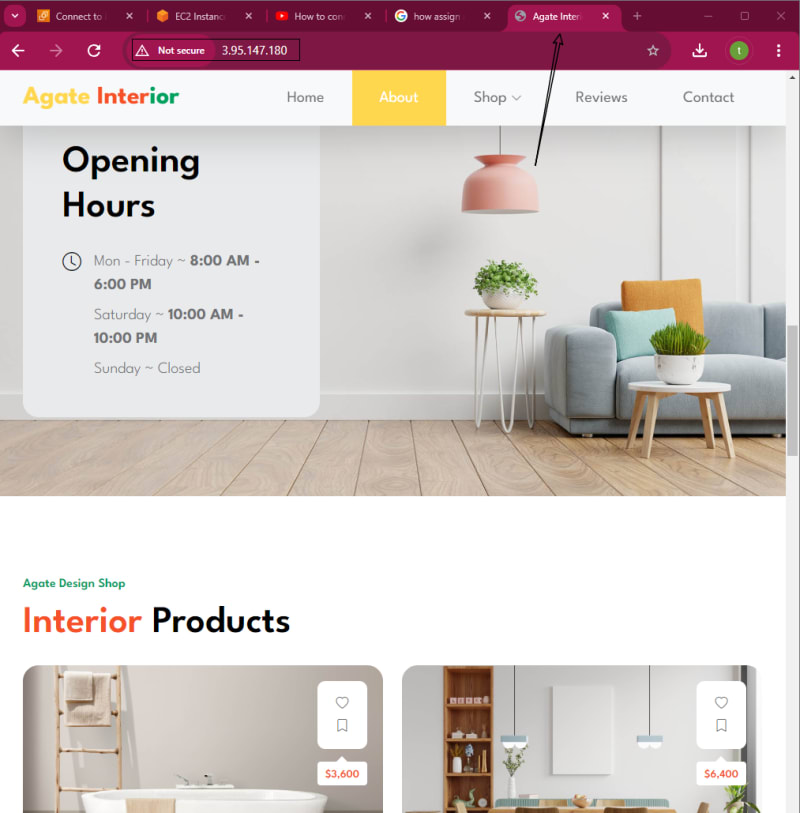
Success Website from browser
- Open a web browser and access the public IP of your EC2 instance to view the deployed website
## Step 8:
Continuous Integration and Deployment Workflow
Developing New Features and fixes
git checkout -b Developmentto create a new branch
- Make your New development
- Stage your Edit
git add "index.html"
git commit -m "your message"
git push
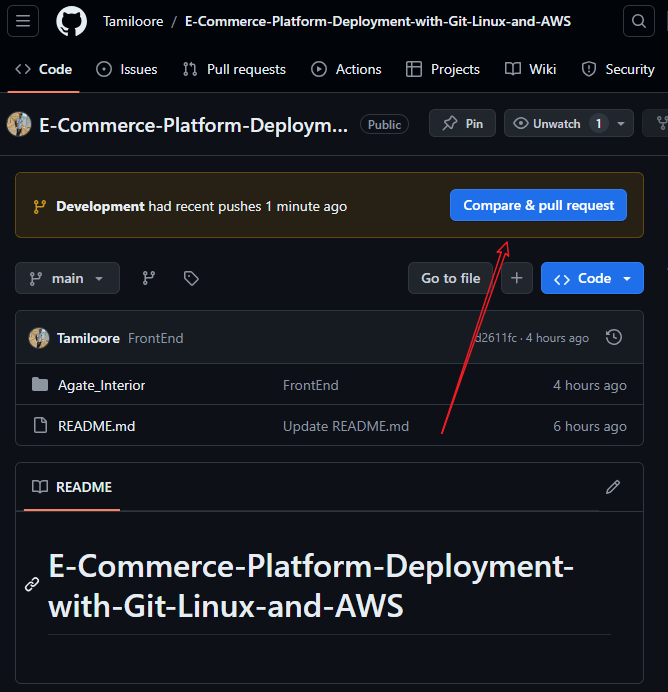
- Go to your GitHub
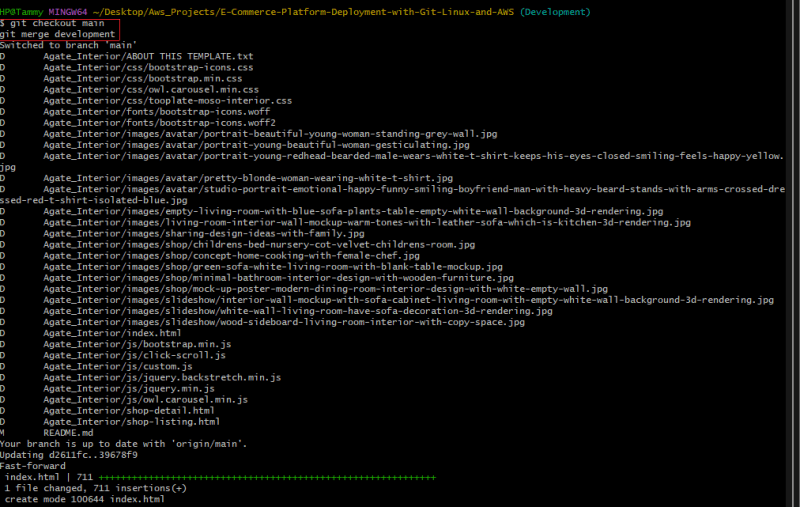
- Git pull
Step 8:
Deploying Updates to the Production Server
- Pull the latest changes on the Server
- Follow and study the code
- Code Updated



















Top comments (0)