Hey there fellow developers and tech enthusiasts, have you ever heard about the Django framework. Lets work together to create this simple blog application with a step by step guide..
You have to be familiar with the Django framework and have some experience with it. We start off by initializing the virtual env, I use the pipenv and I will be using visual studio code as my editor for this tutorial.
If you don't have pipenv installed start by running the following command
pip install pipenv
once pipenv is installed choose a directory for your project you can use the mkdir command to create a new directory or navigate to a new directory using the cd e.g
cd desktop
mkdir Django-blog
After choosing the directory run the command
pipenv install django
Wait for Django to be installed and all the requirements, after this is done run the command
pip freeze > requirements.txt
This will generate a requirements.txt folder which will be very useful later on.
Make sure you have navigated to your new directory in which you are going to work in. If you were working on your terminal and want a shortcut make sure you are in the directory you want to open and if not you can access using the cd command and once you in the directory you want to open run the command code .
They are other options to create a virtual environment but I prefer to use the pipenv as it is much simpler and more modern.
LETS NOW BEGIN WORKING ON THE PROJECT
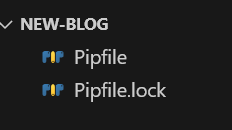
If you followed my guide on using the pipenv you should be seeing something like this:
If you have those two important files you are completely on the right path and you can initialize your project
django-admin startproject your-project-name .
The full stop at the end will avoid creating two directories with the same name which mostly leads to confusion. You can run
py manage.py runserver
on your terminal to test and see if everything is ok and your website is running live.
We will need to have another whole "app" in our project which will act as new directory similar to the one created on initializing the project. This will be great to work with as Django give one the opportunity and flexibility to divide a big project into many other independent small sections which one can handle and be able to manage even very huge projects. Run the following command on your terminal.
python manage.py startapp your-app-name
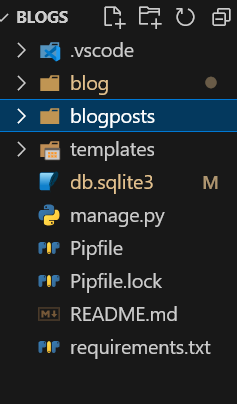
Make sure you assign a different name, personally this is how my directories look like:
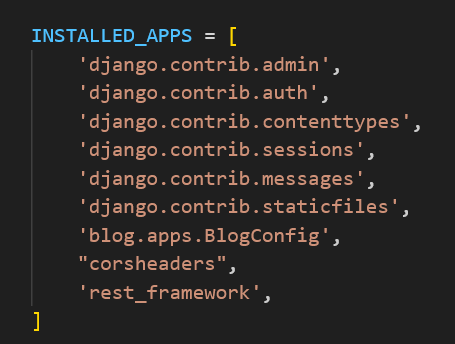
This will now come in hand when it comes to managing our modules and more. Navigate to your setings.py in the root directory and head over to the INSTALLED_APPS and add your new app.
Head over to the urls.py to configure your urls to include the urls that you will have on your new app directory:
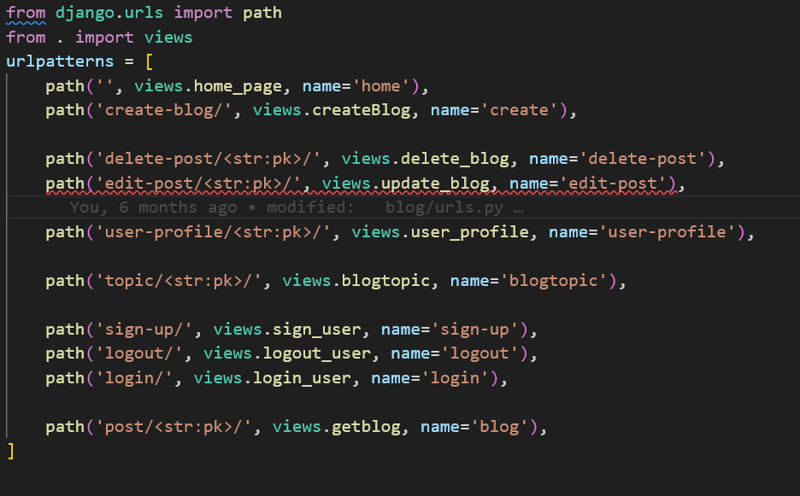
Now make sure you have models.py, urls.py and views.py on your admin directory.This is how the urls.py in the new app directory will be looking like:
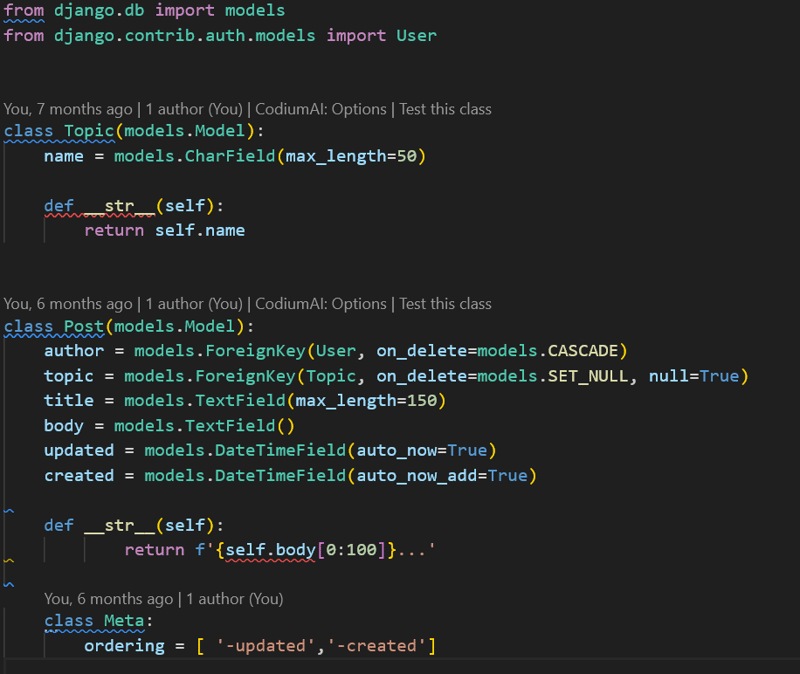
Let's create the models.py :
We create a class called Post and Topic and we define our models as I have done. I have also added authentication to my blog website and a video of how it operates Link to video. I cannot be able to complete the whole tutorial with this one blog so I have a part two blog which will elaborate more and finish on the tutorial




Top comments (0)