When you create a new virtual machine in Azure, it typically comes with at least one disk, which is the operating system (OS) disk. The OS disk contains the operating system and associated files necessary for the virtual machine to run. However, by default, a new virtual machine does not come with an attached data disk.
If you need additional storage space for your virtual machine beyond what the OS disk provides, you would need to add a separate data disk. Data disks are used to store data, applications, files, and other information. They can be attached to a virtual machine to provide extra storage capacity and help improve performance, especially for scenarios that involve a lot of data processing or storage.
So, while a new virtual machine includes an OS disk by default, any additional data disks need to be added manually.
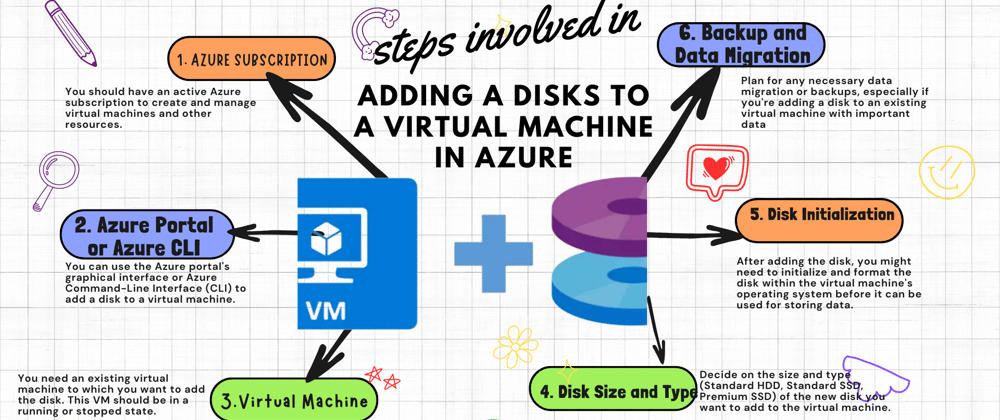
The Steps involved in adding a data disk to a virtual machine are highlighted below.
Once a Virtual Machine has been created, you can go ahead and add a data disk
1. The Virtual machine named "SamVm" has just been created.
a. Open the Virtual Machine's overview to display all the information about it.
b. Select "Disks" and click "Create and attach a new disk". You can either create and attach a new disk or attach an existing disk
- Properly configuring and managing LUNs, naming disks descriptively, understanding and meeting IOPS needs, and selecting appropriate storage types can lead to better resource utilization, improved application performance, and streamlined management of your virtual machine storage.
Considering these factors collectively can significantly impact the performance, scalability, and efficiency of your virtual machine environment.
- Once all the parameters above have been properly configured, Click "Save"
- Connect the Vm via the local RDP
- Download the RDP file
- Save the RDP file on your local PC
- Click on Connect on the Remote Desktop Protocol(RDP) pop-up.
- Enter the Administrator's details; username and password.
- Click YES
- The Virtual machine is fully created and connected.
- Format and configure the storage for the new Virtual machine.
a. Check the GPT (GUID Partition Table) and click OK
Checking the GPT (GUID Partition Table) option while configuring disks in a new virtual machine is an important decision that affects how your storage is organized and managed.
The choice between using GPT or MBR (Master Boot Record) for partitioning your disks has significant implications for your virtual machine's performance, scalability, and compatibility.
Advantages of checking GPT over MBR
a. Disk Capacity Utilization:
GPT supports larger disk capacities compared to MBR. If you're using large virtual disks or have plans to scale up your storage needs, GPT is essential to ensure that you can fully utilize the available space without limitations.
b. Support for More Partitions:
GPT allows for a larger number of primary partitions compared to MBR. This is beneficial if your virtual machine requires multiple partitions, such as separate partitions for the operating system, data, and applications.
c. UEFI Compatibility:
GPT is the recommended partitioning scheme for modern systems using UEFI (Unified Extensible Firmware Interface) instead of the traditional BIOS. UEFI provides improved security, faster boot times, and support for larger disks.
d. Data Integrity and Redundancy:
GPT includes a backup of the partition table at the end of the disk, enhancing data recovery in case of corruption or errors in the primary table. This redundancy contributes to data integrity and reliability.
e. Security and Protection:
GPT includes a feature called "Protective MBR" that helps prevent older, MBR-based utilities from accidentally damaging or overwriting GPT disks.
f. Compatibility with Modern Operating Systems:
GPT is better suited for modern operating systems, including recent versions of Windows, Linux, and macOS. If you plan to install or migrate to newer OS versions, GPT is the more compatible choice.
g. Alignment and Performance:
GPT partitions are aligned more optimally on modern storage devices, leading to potential performance improvements, especially on SSDs and advanced storage technologies.
- The Data Disk has 32G unallocated storage. Right-click on the unallocated storage to configure the "New Simple Volume"
Follow the "New Simple Volume" Wizard until Finish
A brand new Disk named G with 32G storage space has been successfully added to the new Virtual Machine.
In conclusion, with this step-by-step guide, I have officially added a massive 32GB Data Disk to my brand-new virtual machine, setting the stage for limitless scalability and performance.


Top comments (0)