
Are you a Node.js developer looking to integrate email capabilities into your applications? Look no further than Nodemailer - the powerful and flexible Node.js module that simplifies sending emails from your server.

Wanna get started with nodemailer : A Beginner’s Guide to Nodemailer
In this comprehensive guide, we'll explore the world of Nodemailer, covering everything from basic setup to advanced configurations. We will ensure you have all the tools to master email delivery in your Node.js projects.
Introduction to Nodemailer
Nodemailer is an open-source Node.js module that easily allows you to send emails from your server. Whether you need to communicate with users, send notifications, or handle transactional emails, Nodemailer has covered you.
With its simple yet robust API, Nodemailer abstracts away the complexities of email delivery, allowing you to focus on building amazing applications.

Build an Advanced Contact Form in React with Nodemailer
Getting Started with Nodemailer
Before we dive into the nitty-gritty details, let's set up our Node.js environment and install Nodemailer. First, ensure your system has installed Node.js and npm (Node Package Manager). You can verify this by running the following commands in your terminal:
node -v
npm -v
If both commands return their respective versions, you're good to go. Otherwise, visit the official Node.js website and download the appropriate installer for your operating system.
Next, create a new directory for your project and navigate into it using the following commands:
mkdir nodemailer-project
cd nodemailer-project
Once inside the project directory, initialize a new Node.js project by running:
npm init -y
This command will create a package.json file, keeping track of your project's dependencies.
Now, it's time to install Nodemailer. Run the following command to add Nodemailer to your project:
npm install nodemailer
Nodemailer is now installed and ready to be used in your Node.js application.
Sending Your First Email with Nodemailer
With Nodemailer set up, let's dive into sending our first email. Create a new file, e.g., app.js, and add the following code:
    const nodemailer = require('nodemailer');

    // Create a transporter object
    const transporter = nodemailer.createTransport({
      service: 'gmail', // Use Gmail as the email service
      auth: {
        user: 'your-email@gmail.com', // Your Gmail email address
        pass: 'your-email-password' // Your Gmail password
      }
    });

    // Define the email options
    const mailOptions = {
      from: 'your-email@gmail.com', // Sender's email address
      to: 'recipient@example.com', // Recipient's email address
      subject: 'Hello from Nodemailer', // Subject line
      text: 'This is a test email sent using Nodemailer!' // Plain text body
    };

    // Send the email
    transporter.sendMail(mailOptions, (error, info) => {
      if (error) {
        console.log(error);
      } else {
        console.log('Email sent: ' + info.response);
      }
    });
In this example, we first import the Nodemailer module and create a transporter object using the createTransport method. We specify 'gmail' as the email service and provide our Gmail email address and password for authentication.
How do you secure your personal mail service? Find out in this guide

Securing Nodemailer with Proper Authentication
Next, we define the email options using the mailOptions object. This object includes the sender's and recipient's email addresses, subject line, and email body.
Finally, we call the sendMail method of the transporter object, passing in the mailOptions object.
Nodemailer will handle the email delivery process, and depending on the outcome, we'll receive a success or error message in the console.
Remember that using your actual Gmail credentials in your code is not recommended for production environments, as it poses a security risk. Instead, you should use environment variables or a secure credentials management system.
Configuring Nodemailer with Gmail
While the previous example demonstrates sending emails using Nodemailer and Gmail, an additional step is required to ensure reliable delivery. Gmail has implemented security measures that may block emails from untrusted sources, including your Node.js application.
To overcome this obstacle, you must configure your Google Cloud Platform (GCP) account and enable the Gmail API. This process involves creating a new GCP project, enabling the Gmail API, and generating OAuth 2.0 credentials. Don't worry; we'll guide you through the entire process step by step.
If you don’t have a Google Cloud Platform account, set one up as a prerequisite. Once you have that setup, create a new project by clicking on the dropdown menu in the upper left corner.
![]()
Select the New Project option:

In the next window, we must give our project a name. Pick whatever you like, but we will continue with out NodemailerProject name. For the location property, you can leave it as No organization.

It may take a few seconds to for the project to be set up, but after that you will be able to see this screen:

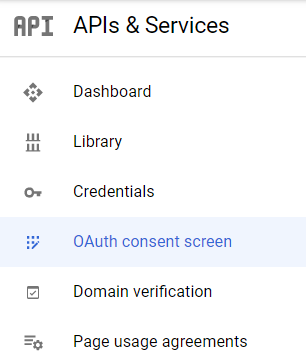
Open up the navigation menu by clicking the three dashed lines in the top left corner and select APIs and Services:

To use Nodemailer and Gmail, we will have to use OAuth2. If you aren’t familiar with OAuth, it is a protocol for authentication. I won’t get into the specifics here as it is unnecessary, but if you want to understand more, go here.
First, we will have to configure our OAuth Consent Screen:
If you are not a G-Suite member, the only option available will be External for User Type.
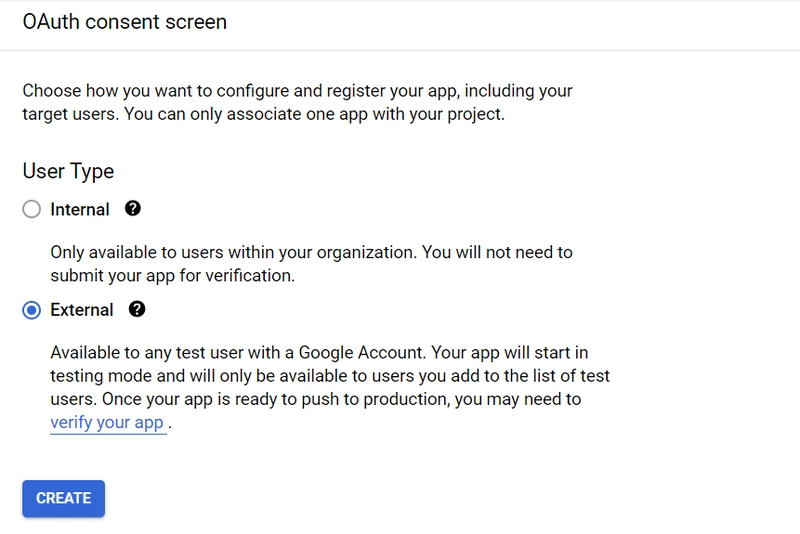
After clicking create, the next screen requires us to fill out the application’s information (our server):
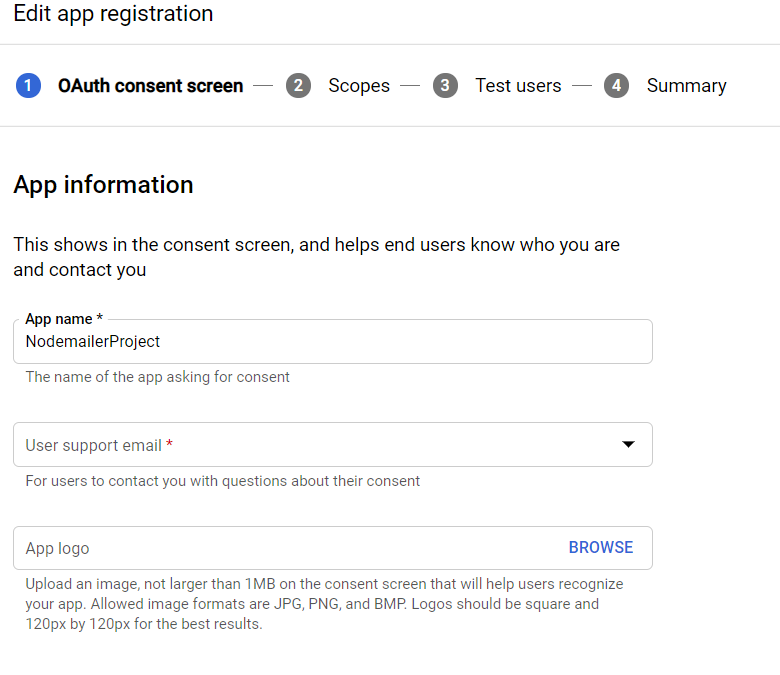
Fill in your email in the User support email field and also in the Developer contact information field. Clicking Save and Continue will bring us to the Scopes phase of this configuration. Skip this phase, as it is irrelevant to us, and head into the Test Users phase.

Here, add yourself as a user, click Save, and continue.
How to Configure Your OAuth Settings
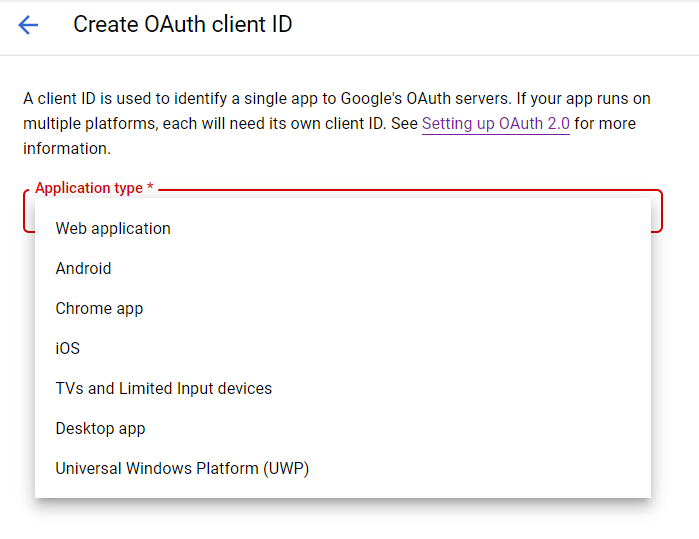
In this phase, we will create OAuth credentials for use with Nodemailer. Go to the Credentials tab above the OAuth Consent Screen. Click on the plus (➕) sign with the text Create Credentials ****** and choose OAuth Client ID.

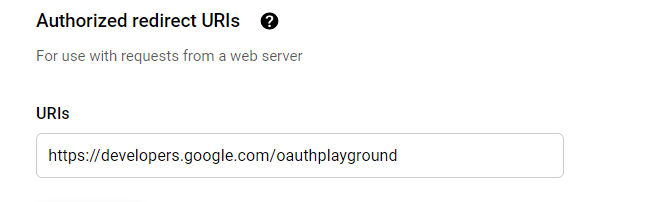
In the Application type dropdown menu, choose Web Application:
In the Authorized Redirect URIs section, make sure to add OAuth2 Playground (https://developers.google.com/oauthplayground) as we will use it to get one of the keys that were mentioned at the beginning of this article.
After clicking Create, you will receive your client ID and client secret. Keep these to yourself and never expose them in any way, shape, or form.
Get Your OAuth Refresh Token
To get the refresh token, which we will use within the transporter object in Nodemailer, we need to go to the OAuth2 Playground. We approved this URI for this specific purpose at an earlier stage.
- Click on the gear icon to the right (which is OAuth2 Configuration) and check the checkbox to use your own OAuth2 Credentials:

- Look over to the left side of the website and you will see a list of services. Scroll down until you see Gmail API v1.

Click Authorize APIs
You will be given a screen to login to any of your Gmail accounts. Choose the one you listed as a Test user.The next screen will let you know that Google still hasn’t verified this application, but this is ok since we haven’t submitted it for verification. Click continue.

- On the next screen, you will be asked to grant your project permission to interact with your Gmail account. Do so.

- Once done, you will be redirected back to the OAuth Playground. An authorization code is in the menu to the left.
Click on the blue button labeled Exchange authorization code for tokens.
The fields for the refresh token and the access token will now be filled.
-
Update your Nodemailer code: Replace the
authobject in your Nodemailer transporter configuration with the following:
    auth: {
      type: 'OAuth2',
      user: 'your-email@gmail.com', // Your Gmail email address
      clientId: 'your-client-id', // OAuth 2.0 client ID
      clientSecret: 'your-client-secret', // OAuth 2.0 client secret
      refreshToken: 'your-refresh-token' // OAuth 2.0 refresh token
    }
By following these steps, you'll ensure that your Node.js application is authorized to send emails through the Gmail service, improving the reliability and deliverability of your emails.
Advanced Nodemailer Features
Nodemailer offers many advanced features and configurations to enhance your email delivery capabilities. Here are a few notable examples:
- HTML Email Templates: Nodemailer supports sending HTML-formatted emails, allowing you to create visually appealing and responsive email templates.
- Attachments: You can attach files, such as documents or images, to your emails using Nodemailer's built-in attachment handling.
- Embedded Images: Nodemailer enables you to embed images directly within the email body, enhancing the visual appeal of your messages.
- Custom Email Headers: Customize email headers to include additional metadata, such as X-headers or custom tracking parameters.
- Email Previews: Nodemailer allows users to preview email templates before sending them, ensuring they look exactly as intended.
- Templating Engines: Integrate popular templating engines, like EJS or Handlebars, to create dynamic and reusable email templates.
- Scheduling and Queueing: Implement email scheduling and queueing mechanisms to manage high-volume email delivery effectively.
- Email Testing and Debugging: Utilize Nodemailer's built-in testing and debugging tools to identify and resolve issues during development and deployment.
These are just a few examples of Nodemailer's advanced features. As you delve deeper into the email delivery world, you'll discover even more powerful capabilities tailored to your specific project requirements.
Conclusion
Nodemailer is a versatile and indispensable tool for Node.js developers seeking to integrate email functionality into their applications. With its straightforward setup, beginner-friendly API, and advanced features, Nodemailer empowers you to deliver engaging and reliable email experiences to your users.
Following this guide, you've learned how to set up Nodemailer, configure it with Gmail, and leverage its advanced capabilities to enhance your email delivery pipeline.
Whether you're building a simple notification system or a complex transactional email platform, Nodemailer has everything you need to succeed.
So, what are you waiting for? Dive into the world of Nodemailer, master email delivery in Node.js, and take your applications to new heights!

Top comments (1)
Thanks for sharing this trick since I can't use only gmail and pass, but are there any ways to make the token expires longer?