Is it not cool to create your own Custom VS Code Theme and publish it on Visual Studio Marketplace so that everyone can install it on their computer?
Sounds good? right.
Yes it is.
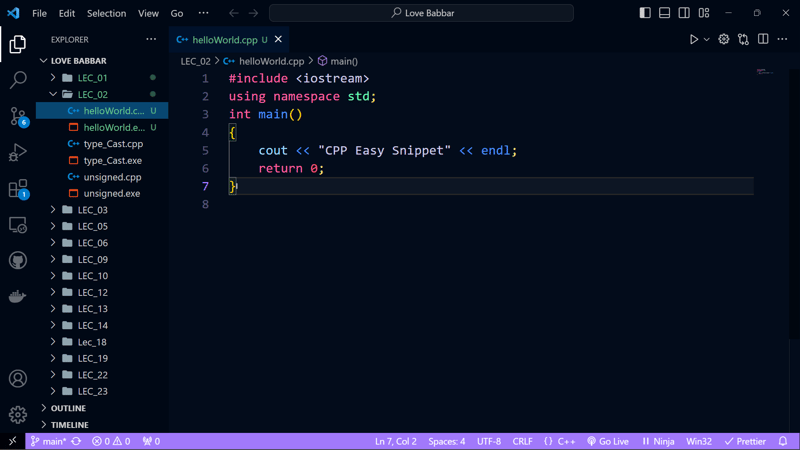
Recently I have created a VS Code Extension called "Sparkling Theme" which can change the look of your VS Code. The theme is also published on Microsoft VS Code Marketplace.
Now install My Theme 🧑💻
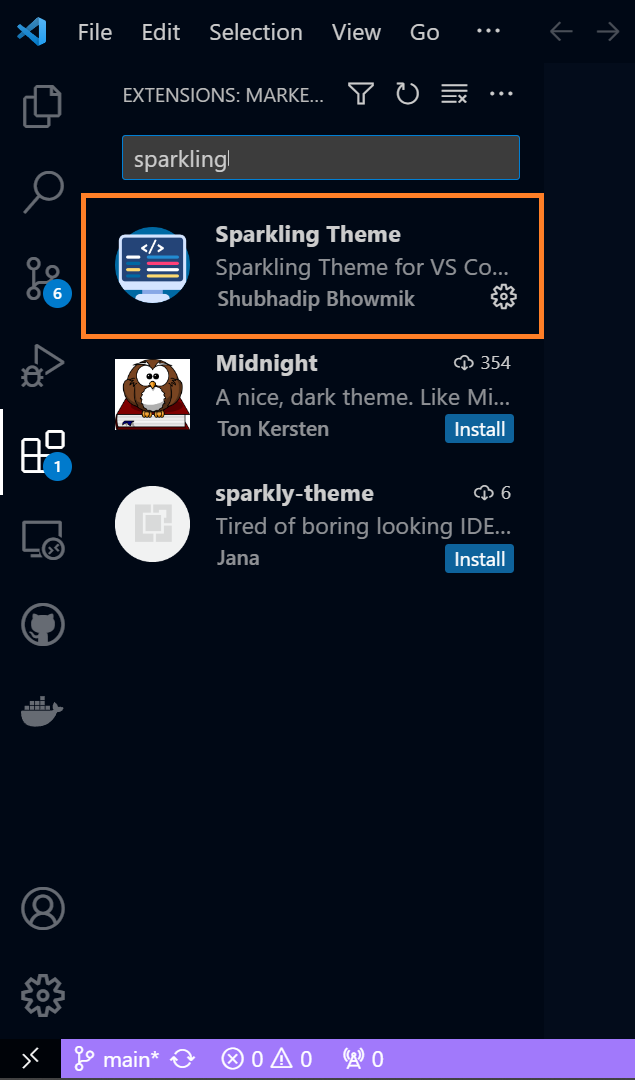
- Open VS Code
- Go to "Extension Tab"
- Search "Sparkling Theme" or "Shubhadip Bhowmik"
- Click on Install
- Restart VS Code.
- Open setting > Color Theme > Sparkling Theme
- Now see the magic
Install Now
To install click here
OK. Now follow my steps to create a theme like this and publish it on the VS Code Marketplace.
Requirements:
- Node.js installed
- Visual Studio Code
Steps to Create Your First VS Code Extension:
STEP 01: Install Yo Code
Open Command Prompt or Terminal and run the command below
npm install -g yo generator-code
It will install the all packages of Code Generator for VS Code globally in your machine.
Now run the code below:
yo code
STEP 02: Choose Extension type
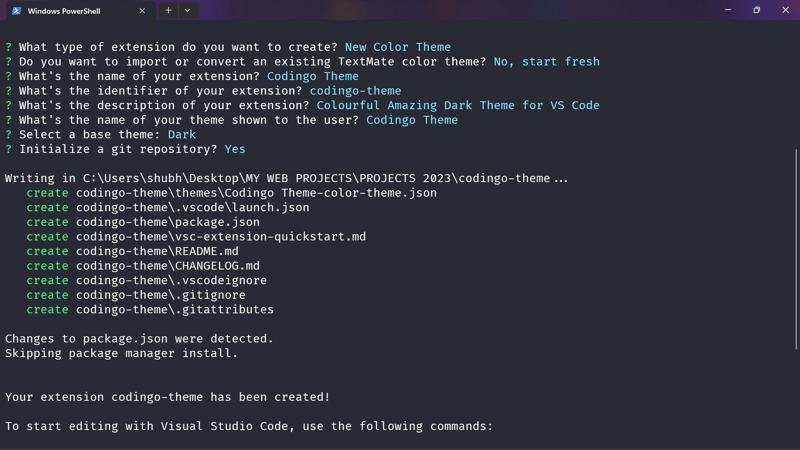
Now here you have to choose which type of extension you want to create. So as we are going to create a Theme Extension, follow the steps as below. Choose these options as described below.
- New Color Theme
- No, start fresh
- Give a name of your extension i.e Codingo Theme
- Keep the identifier name as default and hit enter
- Add some description of your extension
- Put a name of your theme, which will reflect to the users
- Now select the base of the theme
There will be 4 types of theme in VS Code editor
- Dark
- Light
- High Contrast Dark
- High Contrast Light
Now Press 'Y' for git inisialize
Now everything almost done.
To make sure you choose all the options please see the image below options.
Press enter to open the folder in Vs Code directly
Now there will be a lots of folders and files. No need to worry about it. We only need to know about two most important files.
- package.json - manifest file for our extension
- Codingo Theme-color-theme.json in themes folder - it contains all themes color properties of our theme.
Now open the theme.json file under Themes folder
Here you will see all the colors for different section of the VS Code Editor is defined. If you are not aware about Colors, no worry my friend. I am with you.
Now go to VS Code Theme editor and create an account here. You will find lots of eye catching VS Code theme just choose any of these, and download the theme file.
I have already created a theme for you for making it easier click here to fork my theme.
Now go to open the theme.json file and replace it's existing code with the code of newly downloaded code file.
That's it. Your theme is ready. Now it's time to test your theme. To test your theme just use F5. A debugger will open. Create new files and you will see that the color of your VS Code has already change.
Now all set. Congratulations! You made your own theme.
Now we are in the next phase. Yes you are right. We will publish the theme to VS Code marketplace so that everyone on the internet can install and use in to their computer.
To publish an Extension you need to create an account on MS Azure Devops. Go to MS Azure Devops
Just Create a free account and follow the next steps.
Crete a Project
- Add Project Name
- Add Description of the Project (optional)
- Select as Private
- Click Create
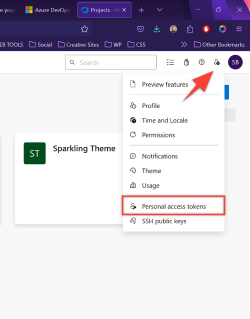
- Click on the right top side
- Choose Personal Access Tokens
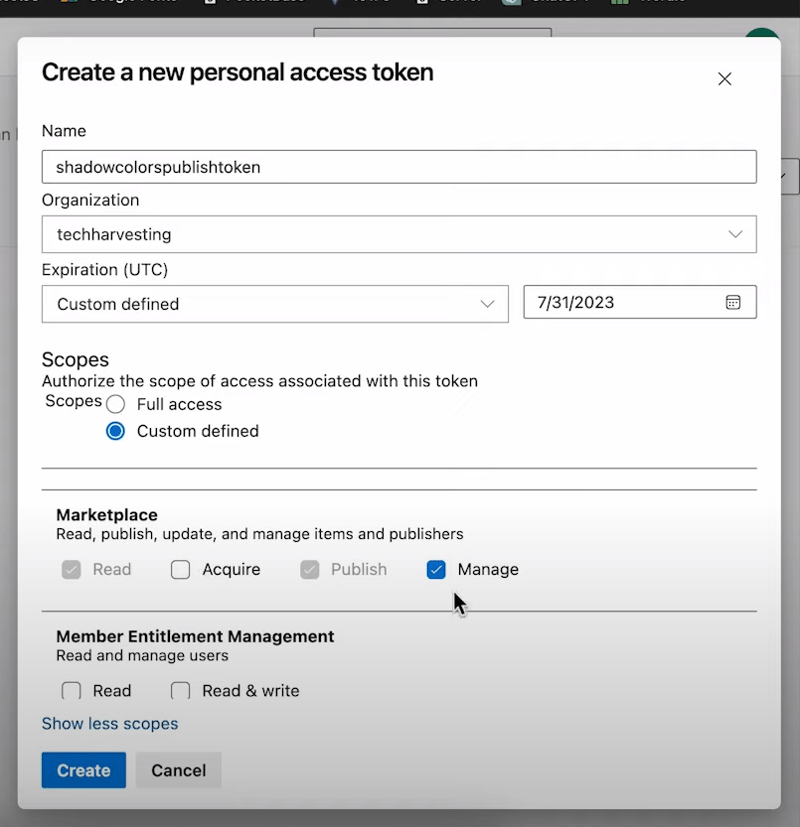
- Create a token
- Add name
- Select a organisation else create new
- for Expiration Choose Custom defined and add a date and year [maximum 1 Year]
- For Scope make it default
- Then click show all scopes and scroll down and find Marketplace and tick on manage.
- Click install ** See these images for references.**
Choose Options for Creating Token
A token will be generated. Make sure you keep it in a safe place. It will be used later.
Now Create a Publisher Account from where you can actually manage all of your VS Code Extensions.
Go to VS Code Marketplace and create a account with the same email adress which you earlier used for creating Microsoft Azure Devops Account.
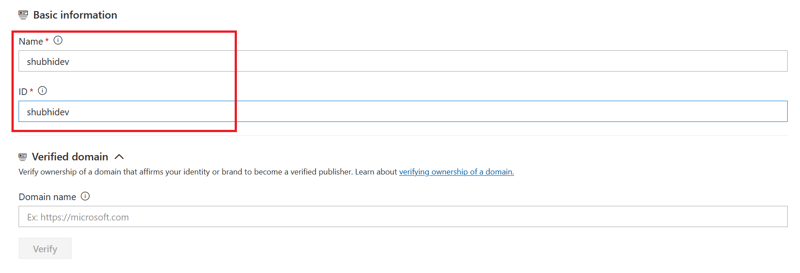
Fill basics information and create it.
You can take reference from this image to fill the details.
Make sure you note the Publisher Name and Publisher ID. It will be used in the later part.
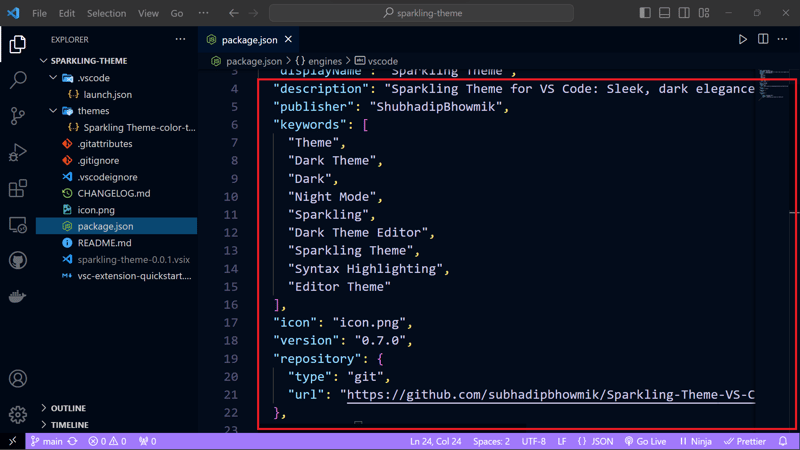
Now open the VS Code and go to package,json file. Here you need to add some extra informations to publish the extensions. You have to add metadata like publisher, repositories, keywords update version code etc.
"publisher": "Your Publisher Id",
  "keywords": [
    "Theme",
    "Dark Theme",
    "Dark",
    "Editor Theme"
  ],
  "version": "1.0.0",
  "repository": {
    "type": "git",
    "url": "Your Git Repo Link"
  },
Just copy and paste the code just after *description * of your code. See the code below.
Update Readme.md file as per your wish.
Create Extension Package
It is the most important part to build the package of your extension. Run this command to install vsce which will help to create the package of your extension.
npm install -g @vscode/vsce
Next run the command below:
vsce login your-publisher-id
Here you will be asked for your token. Copy and paste the token that you generated previously.
After that run the command below
vsce package
Now you will see that a new file has been created with the file extension called .vsix
This is the last step to publish your extension to VS Code Marketplace.
Just Run
vsce publish
Now check your VS Code Marketplace. Your extension will be deployed with in 10 minutes. It usually take 5-10 minutes to verify your extensions.
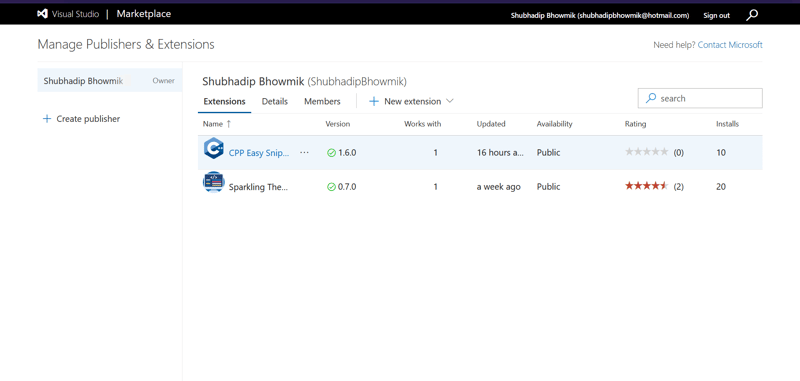
That's it. You are done. Congratulations for successfully create and publish your VS Code Extension for free.Now you can manage all of your extensions as below.
Thank you for Crafting Your Own VS Code Theme! 🎨
I appreciate you joining me on this thrilling journey of creating and publishing your unique VS Code Theme. By following these detailed steps, you've not only personalized your coding environment but also contributed to the diverse world of coding aesthetics.
Your Contribution Matters 🚀
As you release your theme into the global coding community, it becomes a source of inspiration for developers worldwide. Your creativity adds a distinctive touch to their coding experience, fostering a sense of individuality in an ever-evolving tech landscape.
Stay Connected for More Insights
For the latest insights into coding, theme development, and technology trends, consider following me on x. Let's stay connected and continue to explore the exciting realms of computer science.
Happy Coding, Theme Creator!
Thank you for investing your time and creativity. May your theme bring joy and productivity to developers across the globe. 🌐✨





Top comments (0)