
Display images from cloneable fields is a common task for those who are building a website. For example, you may want to display a series of brand logos of typical clients or partners, even a testimonial section with an avatar along with the clients’ name and quote. In this series, we will take a ride to do it with a simple case study, brand logos.
If you are using Gutenberg, this part is for you. For other page builders, please wait for the upcoming tutorials.
Before Getting Started
We’ll need Meta Box and some of its extensions for this practice:
- MB Settings Page: it helps you to create settings pages, we’ll need a settings page to place the custom fields into;
- Meta Box Builder: it provides a UI to create custom fields easily;
- Meta Box Group: this extension helps to organize custom fields into cloneable groups, where we input images today;
- MB Views: it helps you to create templates as well as get and display fields’ values without touching the theme’s files.
You can install these extensions individually or use Meta Box AIO.
Video Version
https://www.youtube.com/watch?v=nteLH6DDKSI
Step 1: Create a Settings Page
Normally, we’ll create a Custom Post Type to create multiple posts for brands then each post is for a brand. But, today, I do a more convenient and simple way - creating a Settings Page. The information about all the brands will be input to that page. It means that all of them will be in one place only.
Now, go to Meta Box > Settings Page > Add New. In this case, the Settings Page is quite simple to contain the image of each brand, so just change the option name.
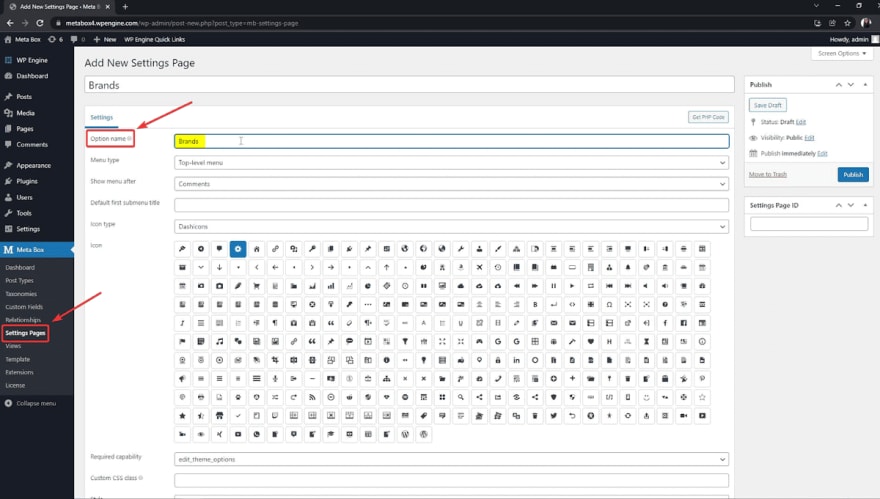
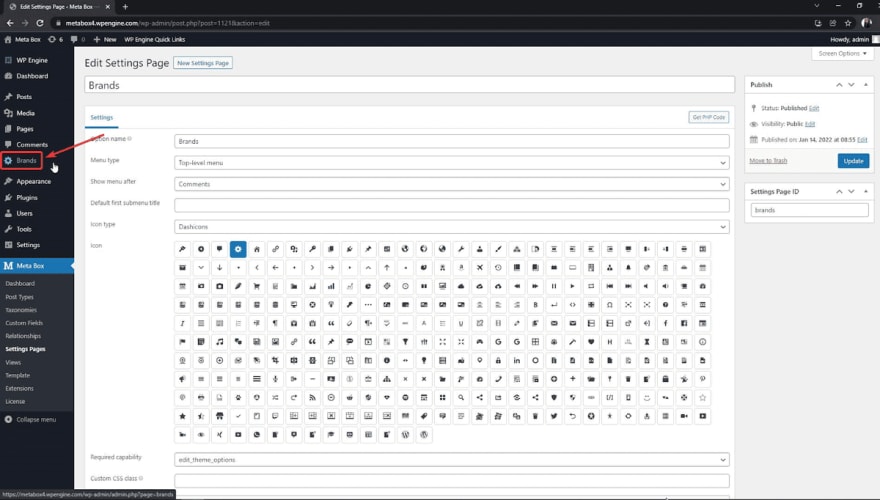
Now, a new menu named Brands appears. It’s my new Settings Page.
Step 2: Create Custom Fields for the Settings Page
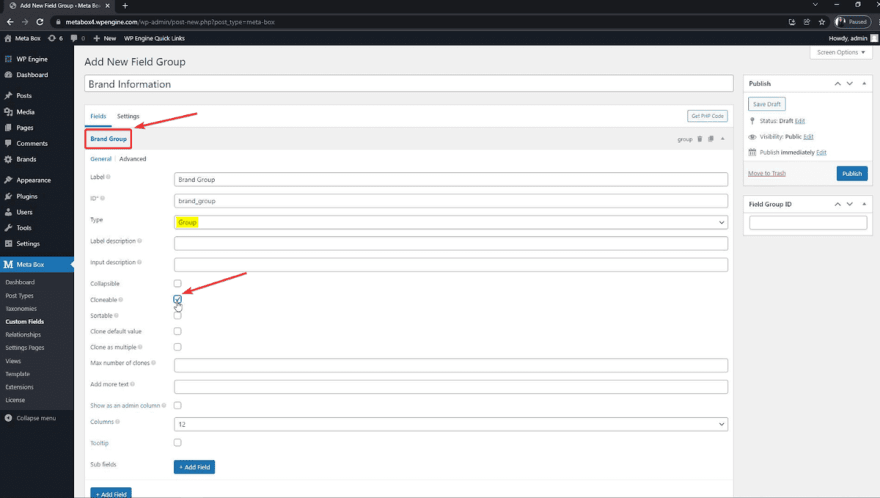
In the Admin Dashboard, go to Meta Box > Custom Fields > Add New. I created fields with the below structure.
|
Field |
Types of Field |
ID |
|---|---|---|
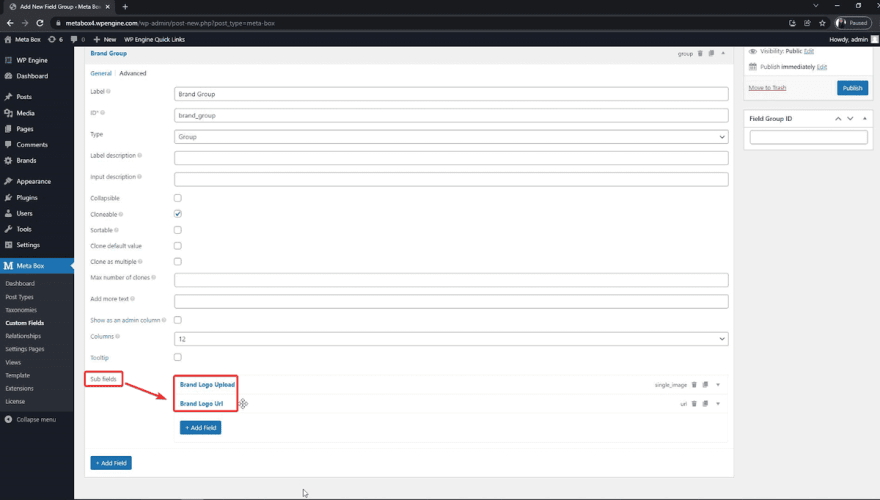
| Brand Group | Group | brand_group |
| Brand Logo Upload | Single Image | brand_logo_upload |
| Brand Logo Url | Url | brand_logo_url |
| Brand Name | Text | brand_name |
This is a group with three sub-fields inside. This group is set to be cloneable to have more spaces to add different brands information.
As you can see in the structure, I added 2 fields which are Single Image and Url. One allows you to upload images and save them in the library, and one allows you to input a link of an image from anywhere.
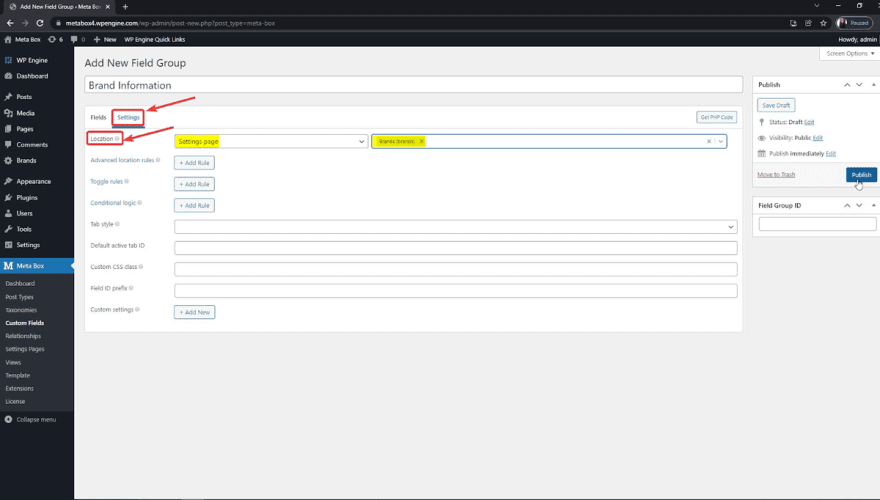
After having all the needed fields, go to the Settings tab and choose the Location as the Settings Page that we’ve just created to apply the custom fields to it.
Back to the Settings Page, you’ll see all of the created custom fields. You can click Add more to add another brand’s information.
Now, let’s fill the information into the fields and move to the next step.
Step 3: Display Brands Information
To display the brand information, you normally must go to the theme’s files to add code or use a page builder. However, you have another way with Meta Box. We have the MB Views extension to create templates without touching the theme’s files.
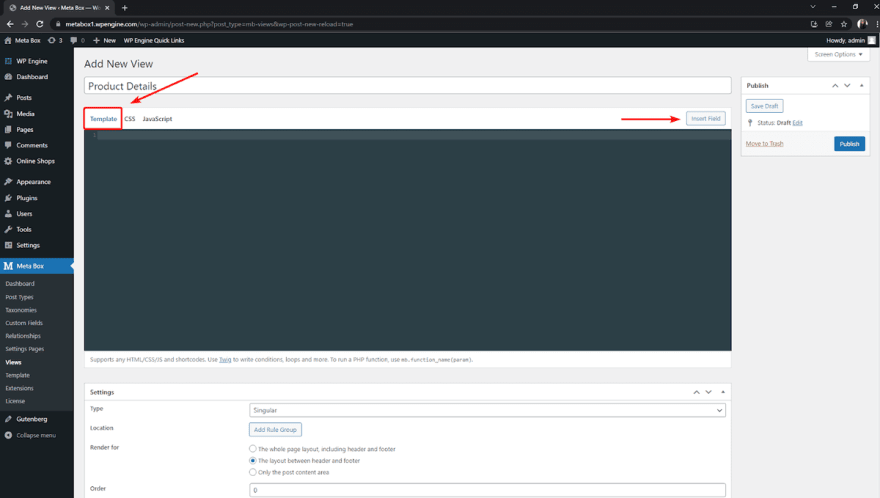
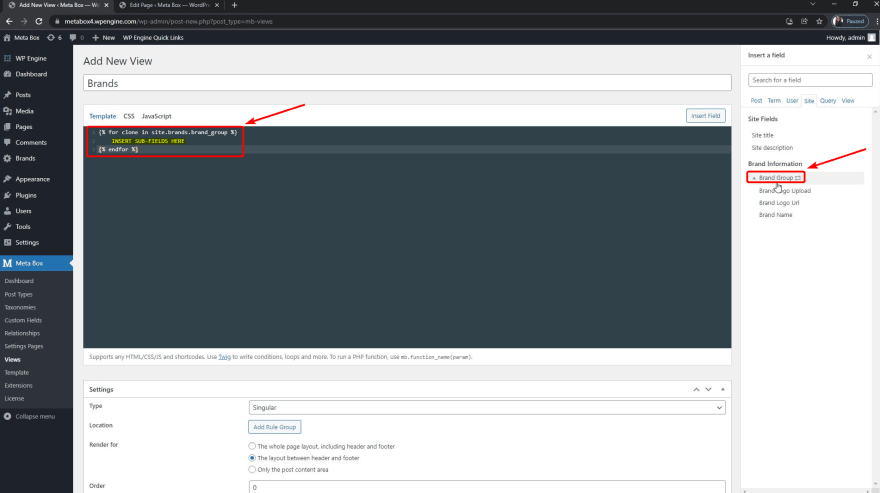
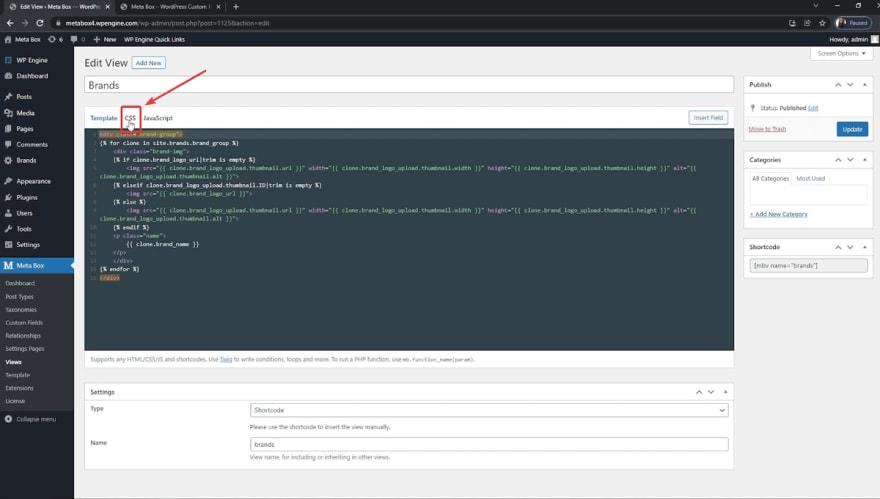
Instead of typing code into the box in the Template tab, you can insert fields to get their data. And, in the previous tutorial, we used to create custom fields for posts, so we choose one from the Post tab. But, in this practice, we created custom fields for the Settings Page, so we go to the Site tab then find the custom fields that I created.
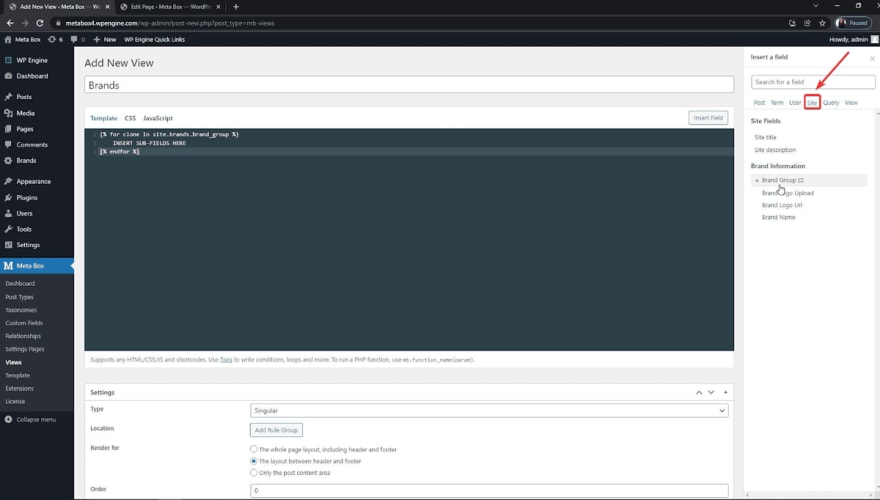
Because this group is cloneable so whenever you open the group here to find any field, it will auto-generate a Loop.
When inserting the fields, I also edit the code a little bit to create a rule for displaying images.
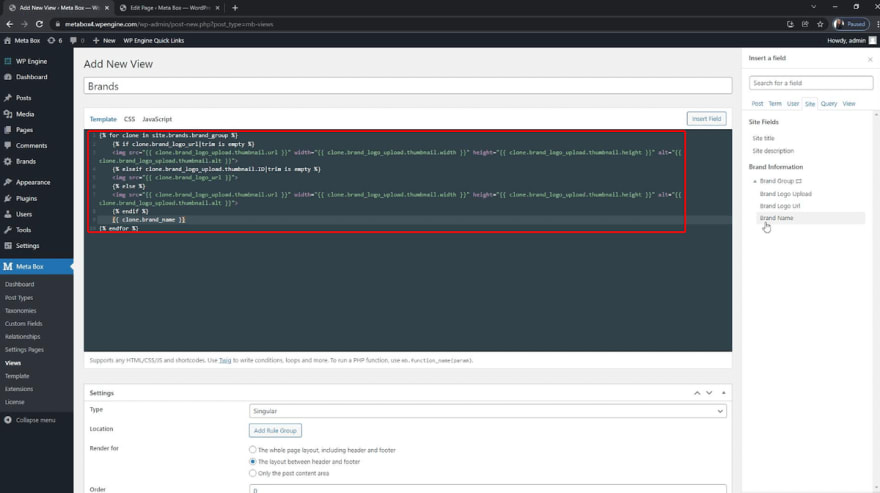
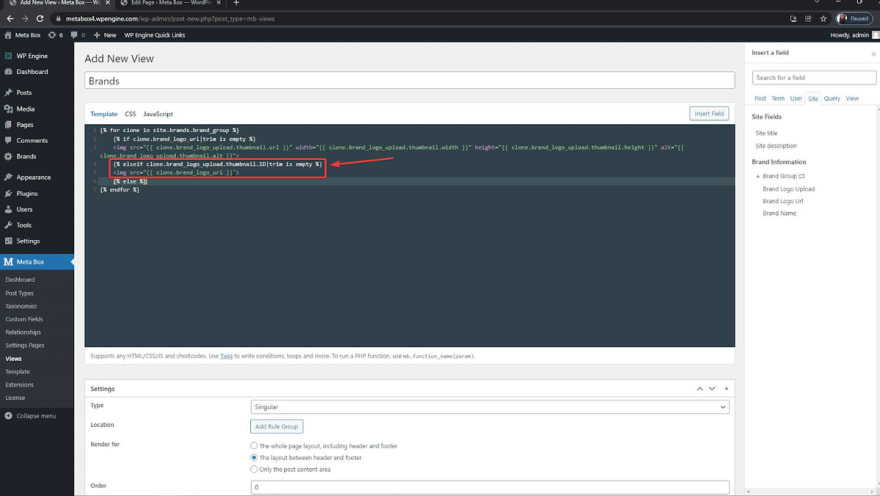
The first part is to set a rule that if there is no URL input to the URL field, the value from the Single Image field will be obtained and displayed.
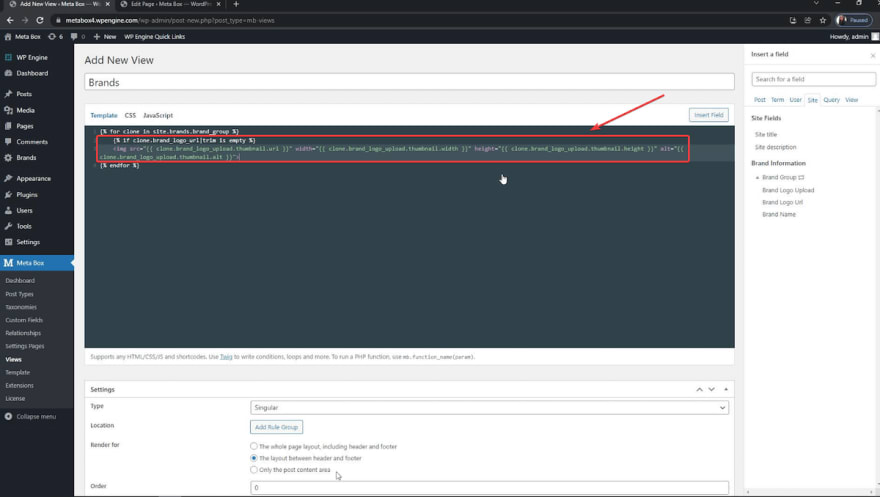
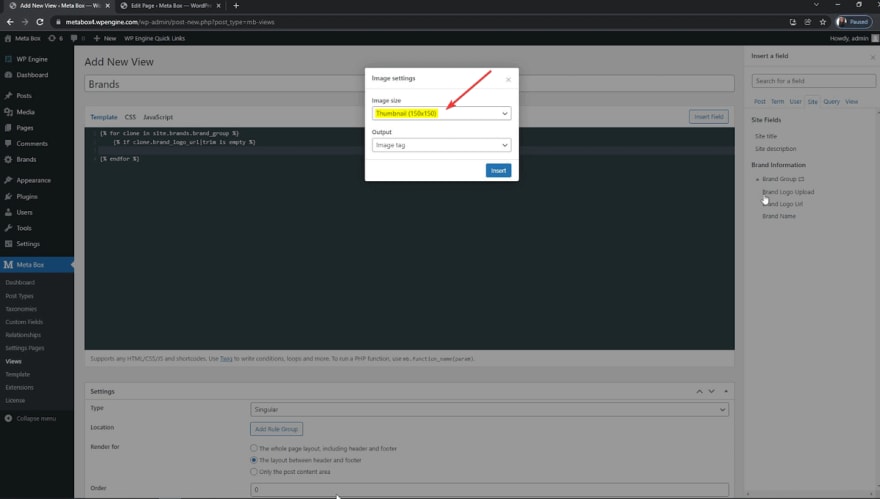
When you insert the logo from the Single Image field, you can choose to size to output. Here I set it to be the thumbnail.
In the event that there is no input data in the Brand Logo Upload field, the image from the link in the URL field will be displayed.
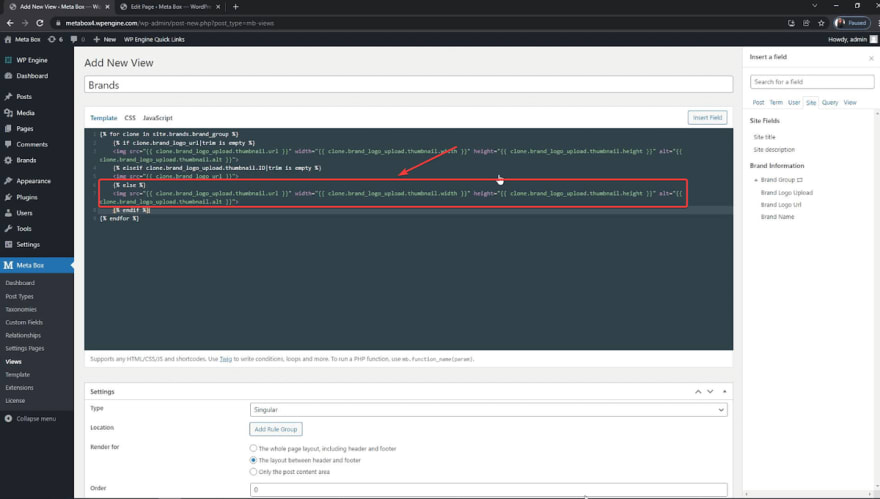
If there is data in both the Image Upload and URL field, I set priority to display the image of the Brand Logo Upload field.
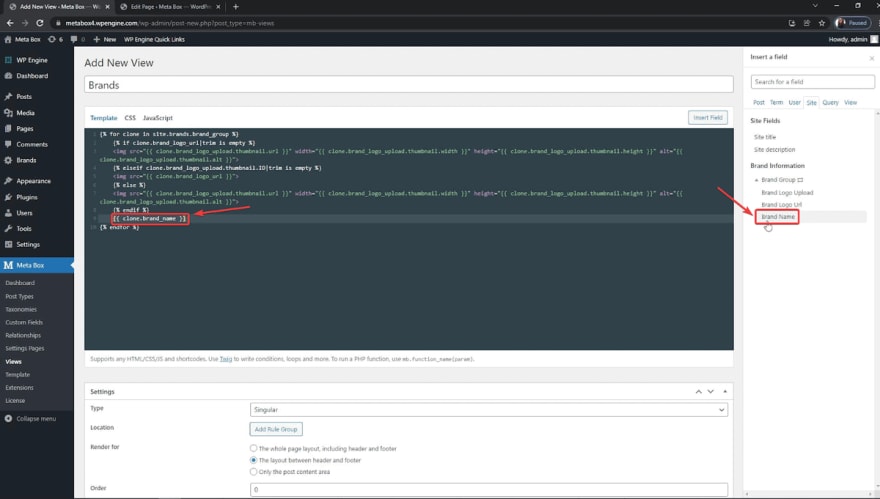
If you have any further information for the brand, such as the Brand Name I have in this case, remember to insert them in the next lines.
If you want to style this section, add some div tags. I also did it and here is all the code.
<div class="brand-group">
{% for clone in site.brands.brand_group %}
    <div class="brand-img">
    {% if clone.brand_logo_url|trim is empty %}
        <img src="{{ clone.brand_logo_upload.thumbnail.url }}" width="{{ clone.brand_logo_upload.thumbnail.width }}" height="{{ clone.brand_logo_upload.thumbnail.height }}" alt="{{ clone.brand_logo_upload.thumbnail.alt }}">
    {% elseif clone.brand_logo_upload.thumbnail.ID|trim is empty %}
        <img src="{{ clone.brand_logo_url }}">
    {% else %}
        <img src="{{ clone.brand_logo_upload.thumbnail.url }}" width="{{ clone.brand_logo_upload.thumbnail.width }}" height="{{ clone.brand_logo_upload.thumbnail.height }}" alt="{{ clone.brand_logo_upload.thumbnail.alt }}">
    {% endif %}
    <p class="name">
        {{ clone.brand_name }}
    </p>
    </div>
{% endfor %}
</div>
To finish, move to the Settings section, choose the type of view as Shortcode.
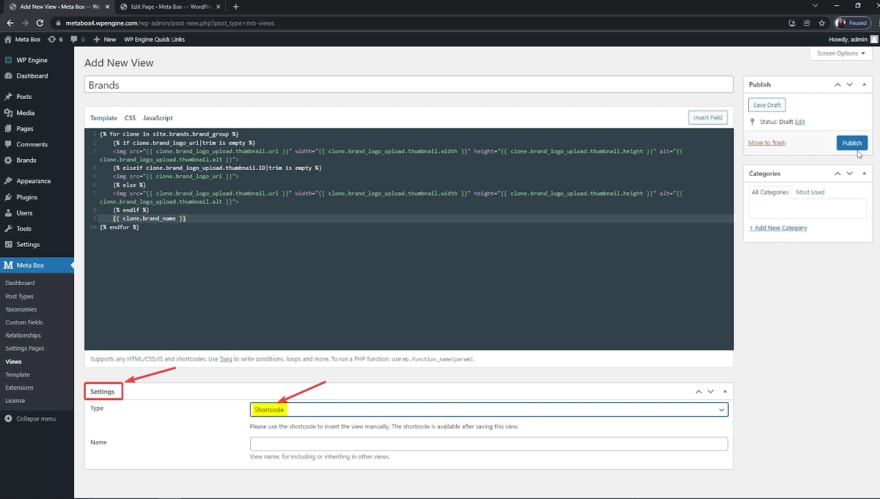
After publishing this view, a shortcode will be generated automatically. You can copy and paste it to any page you want to display the template.
Now, you can see all of the brand logos along with their names displayed already.
You see that this section hasn’t looked good yet. Thus, we’ll need some JS and CSS to make it look better.
Step 4: Create Slider for the Brand Logos
As you see in the first image I put at the beginning of this post, the logos are in a slider, and brand names are displayed correspondingly. To have it, I’ll use some JS and CSS.
However, I’m using the My Custom Functionality plugin instead of adding them directly to the theme. Thanks to that, the slider won’t be affected when I change the theme. You can download this plugin from GitHub and install it on your website.
Download the JS and CSS Library
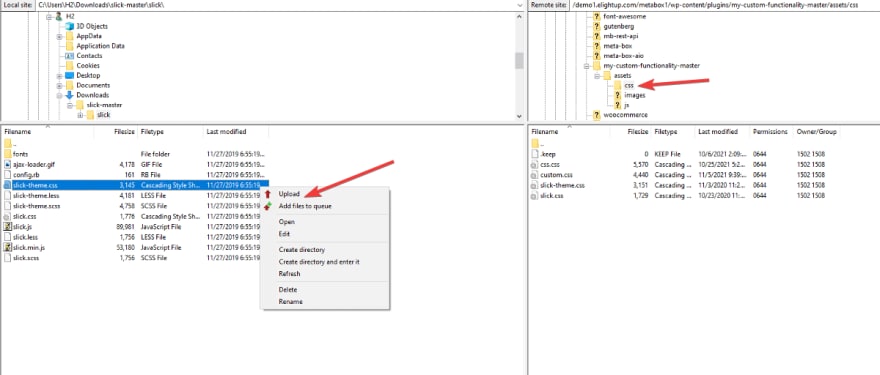
For the JS and CSS, I use the Slick library. It’s also available on Github. It includes several files, but we just need three of them.

Go to the folder of the My Custom Functionality plugin. Upload them into the corresponding JS and CSS folders.
Create Custom JS for Slider and Rules
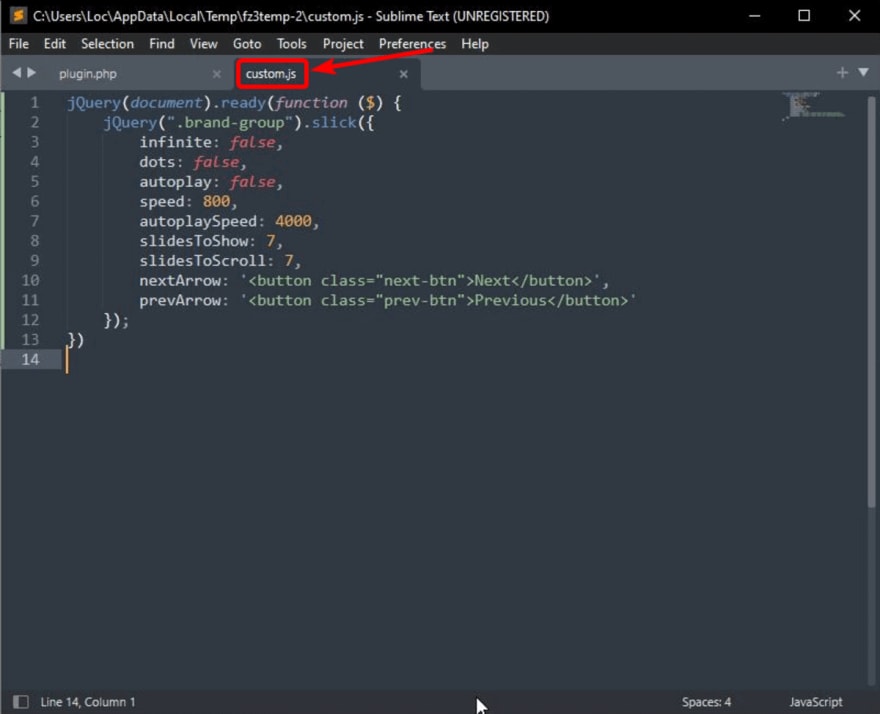
Create a custom.js file in the JS folder, and add code.
jQuery(document).ready(function ($) {
    jQuery(".brand-group").slick({
        infinite: false,
        dots: false,
        autoplay: false,
        speed: 800,
        autoplaySpeed: 4000,
        slidesToShow: 7,
        slidesToScroll: 7,
        nextArrow: '<button class="next-btn">Next</button>',
        prevArrow: '<button class="prev-btn">Previous</button>'
    });
})
jQuery(".brand-group").slick({ }) is used to create a slider for the elements which have .brand-group class.
Declare the JS and CSS Files
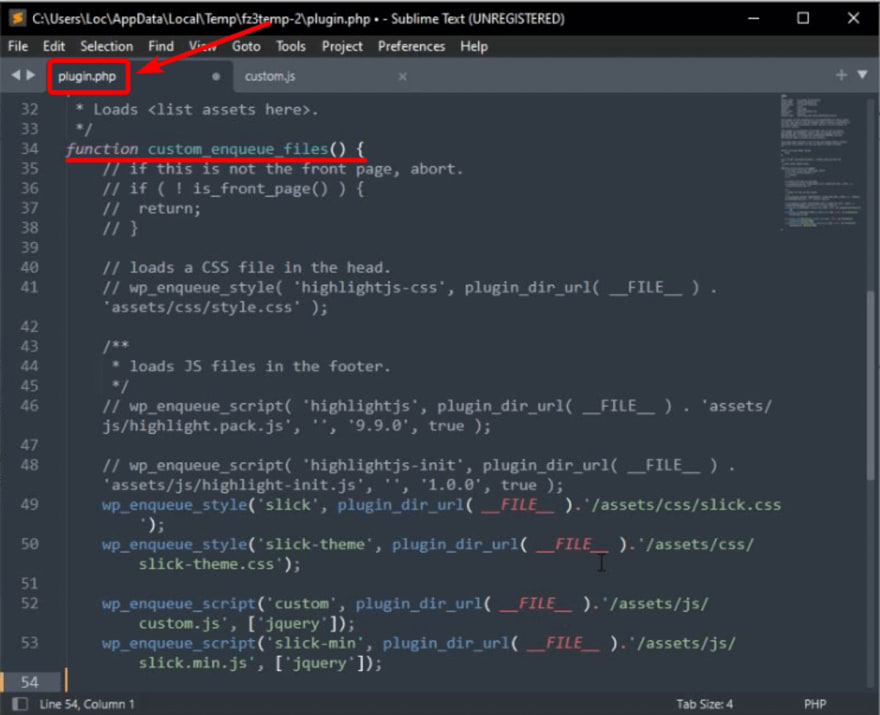
We need to declare all the JS and CSS files that we have just uploaded and created. I add this code inside the custom_enqueue_files() function in the plugin.php file.
wp_enqueue_style('slick', plugin_dir_url( __FILE__ ).'/assets/css/slick.css');
wp_enqueue_style('slick-theme', plugin_dir_url( __FILE__ ).'/assets/css/slick-theme.css');

wp_enqueue_script('custom', plugin_dir_url( __FILE__ ).'/assets/js/custom.js', ['jquery']);
wp_enqueue_script('slick-min', plugin_dir_url( __FILE__ ).'/assets/js/slick.min.js', ['jquery']);
Now, the brand images have already turned into a slider.
We still need to add some CSS to make it look better.
Step 5: Style the Slider using CSS
Traditionally, you have to add CSS to the Customizer or the theme’s files. But, with MB Views, you have a CSS tab for it.
All the CSS code is uploaded to Github, you can refer to it.
After adding CSS, my brand section turned into a new look.
Last Words
You see that displaying images from cloneable fields using Meta Box is not a difficult task. In my opinion, it’s very practical in some cases. We hope that this tutorial will help you to do it easier.
Remember to keep track of our channel for more upcoming tuts and feel free to leave a comment if you have any ideas or concerns.

Top comments (0)