What to expect
This blog post will walk you through the basics on how to set up a local development environment for Azure Durable Functions using WSL2 and nodeJS. It should especially help beginners to kick start their development journey and get some obstacles out of their way.
Prerequisites
We will not completely start from scratch when it comes to some prerequisites. So before we start, let us make sure that some things are in place on your system,
- WSL 2 needs to be installed. If you have not yet done this, follow along the official documentation that guides you through this. In this blog we use the Ubuntu image.
Remark: Although WSL2 is available for "older" versions of Windows10, you might face some problems if you are using a laptop/PC provides by your corporate as there might be restrictions due to that. So if you run into issues with WSL2 _per se it might be useful to sort out limitation due to corporate images or configurations._
- The WSL environment for NodeJS development must be enabled. There is a very useful description for that on the official help page
Remark: I use nvm to manage my NodeJS environment and set it to nodeJS version 14
To do local Azure Functions development we need to install the Azure Functions Core tools. Again the official Microsoft documentation helps us with this task.
In addition, start VS Code in your WSL2 environment and install the Azure Functions Extension for VS Code

As we want to see that things get stored correctly, we also need the Azure Storage Explorer installed on our Windows system.
Last but not least, we also want to see how things work out with remote containers. You probably guess it: the official Microsoft documentation got you covered.
Remark: I personally also like the description on that topic on the Visual Studio Code page quite useful as supplementary material.
Phew, quite some things to make sure, but now we are good to go.
What's New in Local Development with Azurite
Local development of Azure Durable Functions comes with one central prerequisite: a storage emulator in order to allow the Durable Functions to store their state and context locally. This was possible on Windows systems for quite some time via the Microsoft Azure Storage Emulator.
As Microsoft aims to support cross-platform development there was an alternative for MacOS and Linux systems called Azurite. Unfortunately, this emulator came with one flaw: it did not support the table storage features needed for Azure Durable Functions.
However, things changed on the first of May 2021 when release 3.12.0 came out: it contained a preview of the needed Table Service.
This means all signs on go for developing Azure Durable Function in a local setup in WSL2.
Remark: The Microsoft Azure Storage Emulator is in maintenance mode, so no new features of the Azure Storage API will be supported. If you are developing on Windows I also recommend to get accommodated with Azurite there.
Installing Azurite
First of all we open a shell into our Linux (Ubuntu) system. I would recommend to use the Windows Terminal for that.
Azurite is available as npm package and as a docker image. For this blog post we install Azurite as an npm package in our WSL2 environment via:
npm install -g azurite
Azurite needs a directory to store its data, so we create one e.g. in the home directory:
mkdir ~/azurite_storage
Next we can spin up the emulator via the following command:
azurite -s -l /home/<YOUR USER>/azurite_storage -d /home/<YOUR USER>/azurite_storage/debug.log'
The output should then look like this:

We can also check the directory that we pointed Azurite to and will see that some basic setup took place:
With that we can start playing with Azure Durable Functions.
Remark: You have a lot of options in the Azurite CLI to fine tune your setup. They are listed on the GitHub page of the project.
Local Development in WSL2 with Azurite
Let us start with one simple "Hello World"-ish Durable Function that comes out of the box with the template for Durable Functions in the Azure Functions Extension for VS Code.
We start VS Code from WSL2 and:
- Create our local project
- Install the Durable Functions npm package
- Create the Orchestrator Function
- Create the Activity Function
- Create the Client Function
If you choose TypeScript as programing language make sure that your dev dependencies in the project.json file contain the node types (@types/node), otherwise your build will fail.
Before we start the Azure Functions, we need to make sure that the Azure Function runtime knows where to look for the storage. We adjust the local.setting.json file accordingly by setting the value for the AzureWebJobsStorage to use the development storage :
"AzureWebJobsStorage": "UseDevelopmentStorage=true"
Is this already sufficient to start and execute the function? Let us find it out and start the function via (I used TypeScript):
npm run start
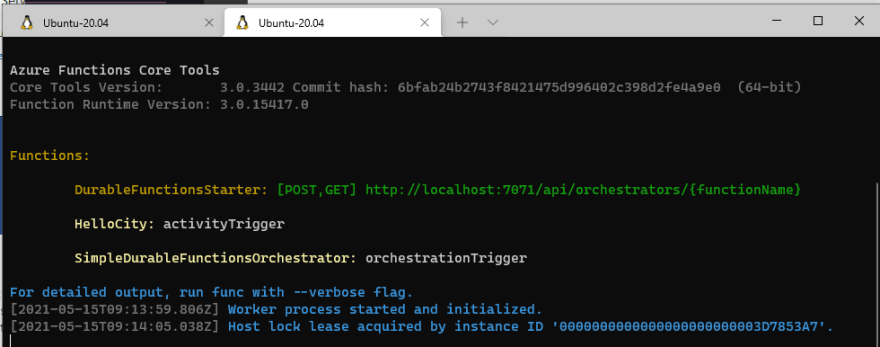
The output should finally look like this:
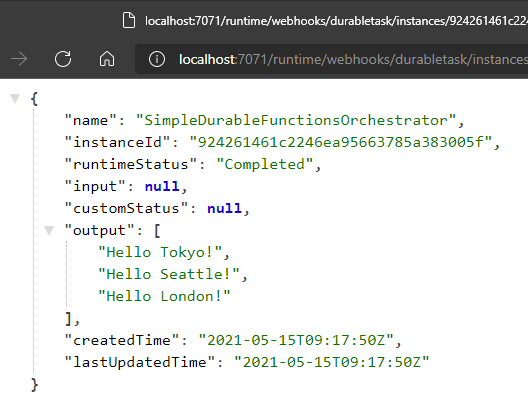
Looks good so far, so let us see if we can call it by opening a browser in Windows and navigating to the URL:
The result is as expected:
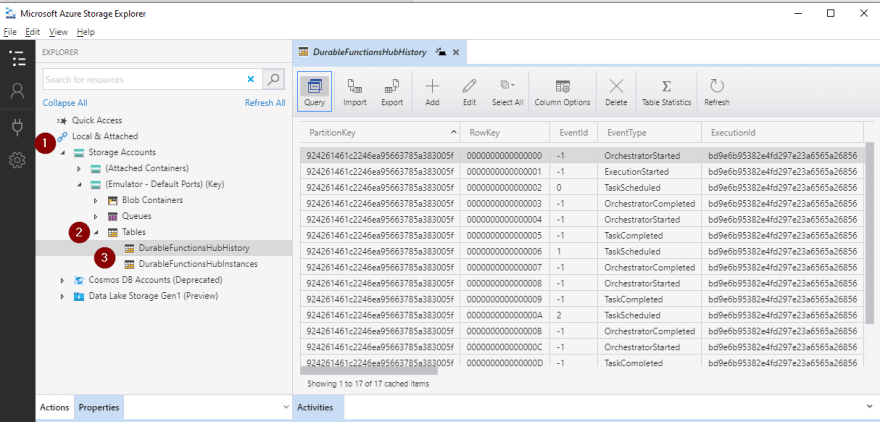
Next let us check what we need to do to access the storage emulator by opening the Azure Storage Explorer in Windows. Without any further setting we navigate to the local and attached storage accounts and find the expected tables and entries:
That was nearly too easy to set up. All works as we are used to in the Windows setup. No tweaking around with ports to be forwarded etc., it all works out of the box.
When using WSL2 we have one further option for our development namely remote containers. Let us see how things work out there.
Local Development in WSL2 with Azurite and Remote Containers
As all prerequisites for remote containers are already in place we can directly jump into the development part. In contrast to the previous section, we start VS Code and re-open the directory in a remote container:
- We tell VS Code to open the directory in a remote container via the command palette:
- We confirm the path to the directory:
- We specify the development container specification:
If you do the last step the very first time, this might take a bit as the container image must be downloaded and a build must be executed.
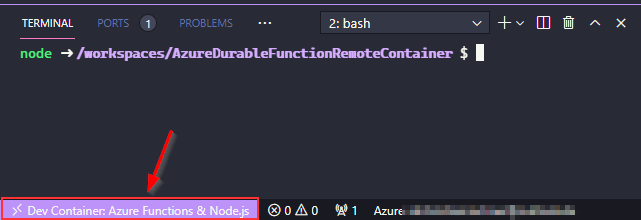
After that you will see that you are working in a container (lower left corner of VS Code):
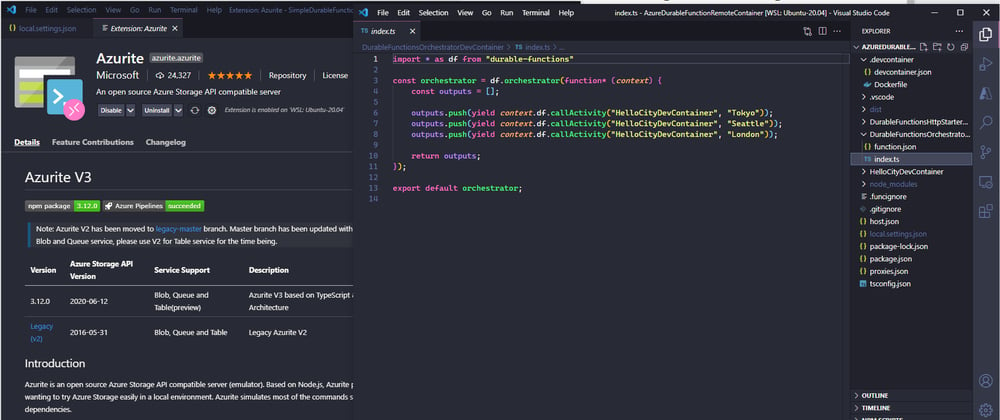
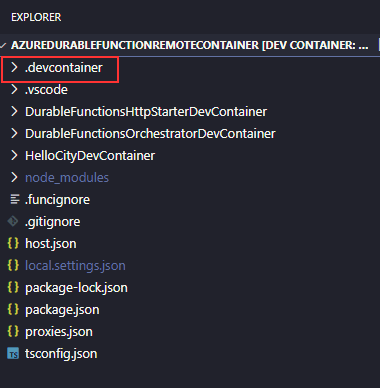
As in the section before we build a sample Durable Function using the Azure Functions extension. The final structure should look similar to this:
The only difference to the setup before is the .devcontainer file that contains the configuration of the remote container.
As before we point the AzureWebJobsStorage to use the storage emulator:
"AzureWebJobsStorage": "UseDevelopmentStorage=true"
Let us start the function and see if things work as before. The result is ... no:
Something went wrong here, but why? The Azurite emulator is up and running and the connection string points to the local emulator, so what is missing?
In contrast to the scenario before, we are now running in a container. The container has no connection to Azurite that is running outside of the container on the localhost.
The fix for this we enhance the connection string in local.settings.json to be able to access the localhost on the host system from within the container (see also Docker for Windows - Networking:
"AzureWebJobsStorage": "UseDevelopmentStorage=true;DevelopmentStorageProxyUri=http://host.docker.internal"
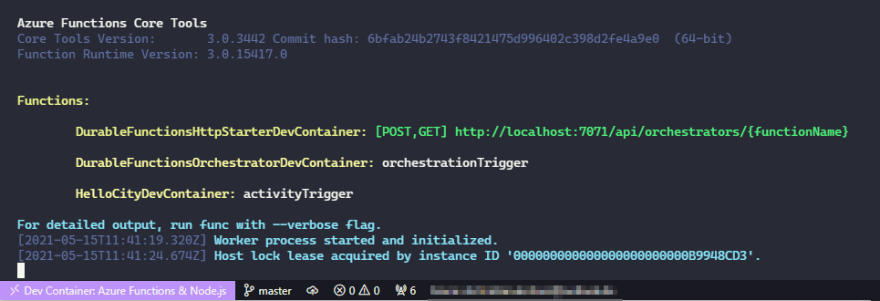
We restart the functions and this time it starts up smoothly:
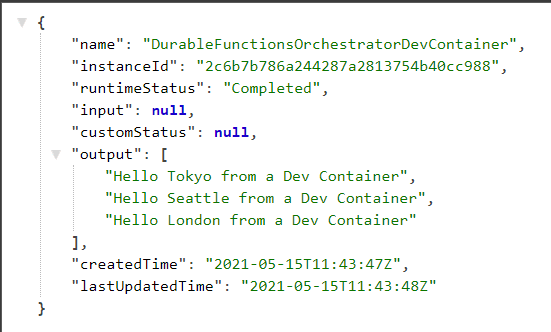
We can call the function from the Windows host running within the container using Azurite running in WSL2:
So just one more configuration to specify and you can do all your development within containers on WSL2. Again a quite smooth experience.
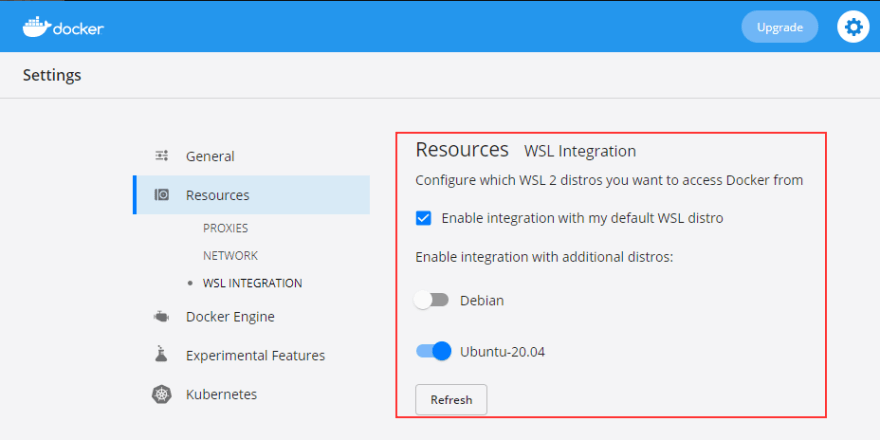
Remark: If you are developing in a WSL2 distro that is not your default distro make sure that it is available as resource in the docker configuration. This setting might be reset after an update of Docker, so in case you run into an error like "Docker Daemon not running" - first check this setting.
Finalizing the setup
Let us do one final step to make the development experience even smoother. When we started Azurite the command to key in was quite lengthy and we do not want to type that in every time. To make things a bit easier we will define an alias for the command and store it in ~/.bashrc:
alias AzuriteUp='azurite -s -l /home/<YOUR USER>/azurite_store -d /home/<YOUR USER>/azurite_store/debug.log'
In addition we might want to clean up the local Azurite storage from time to time. To do so you must delete the content of the directory you pointed Azurite to (see GitHub Azurite - Workspace Structure. Therefore let us define another alias for that:
alias AzuriteClean='rm -r /home/<YOUR USER>/azurite_storage/*'
Finally, source the changes to make them available:
source ~/.bashrc
Remark: There is also a VS Code Extension for Azurite. However, as writing this blog post the support for operations on the table storage is not yet there. If the extension contains that, this would probably be the preferred way to interact with Azurite.
Summary
I hope this blog post helped you with getting your local development of Azure Durable Functions started in WSL2 with Azurite.
Now it is play time to find out what else is possible - Have fun!








Top comments (0)