Introduction
Apps can be executed on a group of virtual machines (VMs) in a scalable manner with Azure Virtual Machine Scale Sets. When deployed, the virtual machines (VMs) inside a scale set may have identical settings and execute identical applications, or they may have distinct configurations and execute distinct applications.
Steps in creating Virtual machine scale set
- Log into your Azure portal
- Click on create a resource

- Search for virtual machine scale set in the market place

- Select create

- Fill in the the project details which include subscription and resource group

- Fill the scale set details

- Leave the orchestration, instance details and scaling sections as default
- Supply the username and password in the administrator account section.

- Select networking bar

- Leave the virtual network configuration and network interface as default

- Change load balancing option to Azure load balancer

- Click create a load balancer

- Choose a name for your load balancer and click create

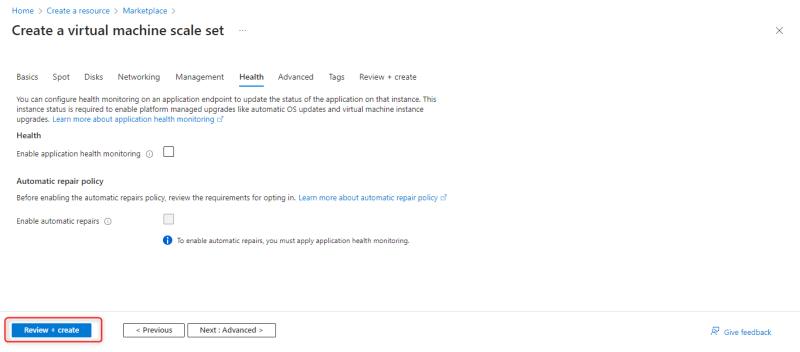
- Select the health bar and tick Enable application health monitoring

- Leave other bars as default and click create + review to validate

- Once validation passed, click create

- Wait for it to deploy

- Click on Go to resource after deployment is complete.

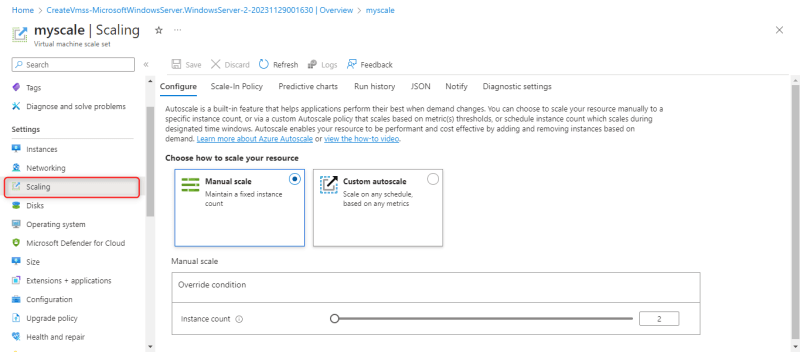
- Click instances to see your created scale sets, 2 instances were created by default


- Select scaling to choose the preferred method of scaling i.e Autoscaling or Manual scaling
 .
.


Top comments (0)