Hello Artisans,
In this blog post, we are going to see how we can create a supercool admin panel using filament's latest version 3.
The filament is a content management framework and a beautiful collection of full-stack components that provide the best starter kit for your next laravel application. It creates a beautiful admin interface in a few steps by providing more flexible ways to do so and generates components that are easy to use and easily scalable.
So let's dive into the installation process and how we can use it in our laravel application. However, before moving forward, ensure we have the following requirements to use filament V3.
PHP 8.1+
Laravel v10.0+
Livewire v3.0+
Step 1: First install laravel in your system, by running the given command to install laravel latest version 10.
composer create-project laravel/laravel filament-tutorial
After the installation process is completed update your .env file with the database name and run migration using the command php artisan migrate
Step 2: Next we need to install filament to generate our brand new admin interface in a few steps without putting much effort into the designing process, to do that run the following command.
composer require filament/filament:"^3.0-stable" -W
Step 3: Now we need to install filament panel builder, which will create and register a new laravel service provider called AdminPanelProvider.
app/Providers/Filament/AdminPanelProvider.php'
The filament panel comes with pre-installed packages that we don't need to install separately (Form Builder, Table Builder, Notifications, Actions, Infolists, and Widgets packages).
php artisan filament:install --panels
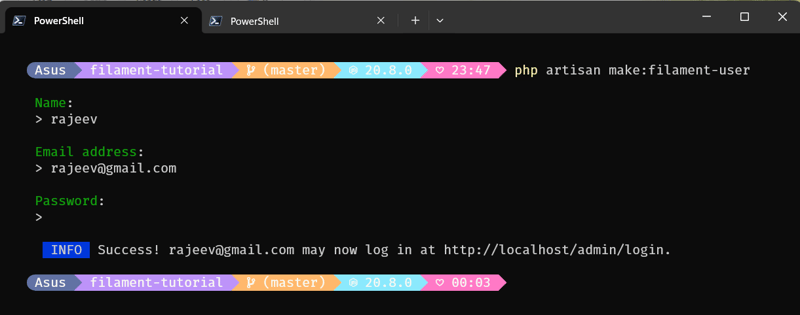
Step 4: Now we will create our very first user using the following command. It will ask you to enter your name, email address, and password as shown below.
php artisan make:filament-user
With the help of this newly created user, you can now log in to the admin interface which we have successfully created and which is now ready to build your application.
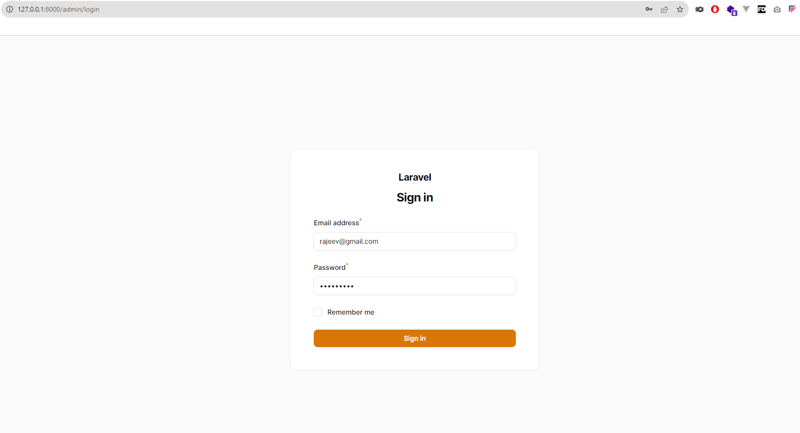
To visit the admin interface run the application php artisan serve open the application in the browser and put /admin after the URL. You can see the admin login section as shown in the image put your credentials of a newly created user.
After successful login, you can see the admin panel something like this.
You are now ready to start building your application.
This post is all about the installation process, and how to use filament V3 in laravel application.
In the upcoming post, we will dig into every package in detail which comes pre-installed with filament panels one by one.
Please like and follow for upcoming blogs on filament packages.
🦄Thank You!!
❤️ 🦄 Happy Reading...😊 ❤️ 🦄


Top comments (1)
Very helpful!
Thank you.