Overview
Dive into the step-by-step process to build your automated task tracking system with webMethods.io Integration. Build a powerful workflow that automatically generates new entries in your chosen platform – be it an Evernote note in a specific notebook, a Pivotal Tracker story, or a Trello card – whenever a new Asana task is created.
Prerequisite:
- webMethods.io Integration tenant – sign up here for a free trial if you’re new (use the advanced form for more options).
- Asana account
- Evernote account/Pivotal tracker account/Trello account
Steps to follow
Login to your webMethods.io Integration tenant and create a new project or choose an existing one.
Go ahead and get started by creating a blank workflow. If you need a refresher on how to get to this point, this guide can be a great introduction.
Set up a trigger action
Click on the small setting icon on the Start step and choose the Asana trigger.


Select New task as a trigger and complete the authorization – connect webMethods.io Integration with your Asana account and chose the workspace and the project. Here, you can also set a polling interval from the dropdown menu - this time interval determines how often you want this trigger to check for new messages.
Click Save. You should see the test trigger window.
To test your trigger, you need to perform the trigger action. Open your Asana project page and add a new to-do task:

Go back to the webMethods.io Integration workflow and click Test. You should see the output data (the task information) from the trigger which webMethods.io Integration will use to configure and test the rest of the workflow. Click Done.
Configure the next step
Choose one of the ways to track your new Asana tasks:
Evernote note
Search for the Evernote connector and add it to the canvas with the drag and drop feature. This automatically connects with the trigger action.

Click on the small settings icon on the Evernote connector, select _ Create Note _ as action, and complete the authorization – connect webMethods.io Integration with your Evernote account.

Click Next.
Now you can proceed with the action configuration – use the Incoming data panel to include task information received from the trigger output – drag and drop the task name in the Title field, choose Notebook ID and type note body, for example
New task in the {{$trigger.projects[0].name}} and with link: {{$trigger.task_link}} was created in Asana. It is due to {{$trigger.due_on}}.

Click Next and then Done. Connect the Evernote connector to the Stop step and save your workflow.
Pivotal tracker story
Search for the Pivotal tracker connector and add it to the canvas with the drag and drop feature. This automatically connects with the trigger action.

Click on the small settings icon on the Pivotal tracker connector, select _ Create story _ as action, and complete the authorization – connect webMethods.io Integration with your Pivotal Tracker account. You need to provide an API Key which you can find in your Pivotal Tracker account under the API Token tab.

Click Next.
Now you can proceed with the action configuration – use the Incoming data panel to include task information received from the trigger output – drag and drop the task name in the Story name field, choose Project name, and fill out the Description field:

Click Next and then Done. Connect the Pivotal Tracker connector to the Stop step and save your workflow.
Trello card
Search for the Trello connector and add it to the canvas with the drag and drop feature. This automatically connects with the trigger action.
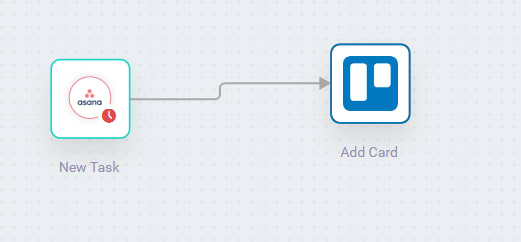
Click on the small settings icon on the Trello connector, select _ Add card _ as action, and complete the authorization – connect webMethods.io Integration with your Trello account.

Click Next.
Now you can proceed with the action configuration – use the Incoming data panel to include task information received from the trigger output – drag and drop the task name in the Card name field, choose Board and List ID and fill out the Description field:

Click Next and then Done. Connect the Trello connector to the Stop step and save your workflow.
Test and monitor workflow execution
Now, we are ready to test the workflow. Read full topic to find more.

Top comments (0)