Python Technical Paper
Lists:
Python lists are mutable(changeable), which means we can change their elements after they've been formed. Lists are one of four built-in python built - in Data structures storing data collections; the other three are Tuple, Set, and Dictionary, all of which have different properties and applications.
## Characteristics of a Python List:
-
Ordered: Lists maintain the order in which the data is inserted.
- Mutable: In list element(s) are changeable.
- Heterogenous: Lists can store elements of various data types.
- Dynamic: List can expand or shrink automatically to accommodate the items accordingly
- Duplicate Elements: Lists allow us to store duplicate data.
Note: Arrays are homogeneous and Lists are hetrogeneous. So Both are Different.
Creating Lists in Python:
A list is created by placing the items/ elements separated by a comma (,) between the square brackets ([ ]). Let’s see how we can create Lists in Python in different ways.
#Creation of a List in Python

# Creating an empty List
empty_List = []

# Creating a List of Integers
integer_List = [26, 12, 97, 8]

# Creating a List of floating point numbers
float_List = [5.8, 12.0, 9.7, 10.8]
# Creating a List of Strings
string_List = ["Interviewbit", "Preparation", "India"]

# Creating a List containing items of different data types
List = [1, "Interviewbit", 9.5, 'D']

# Creating a List containing duplicate items
duplicate_List = [1, 2, 1, 1, 3,3, 5, 8, 8]
List Methods:
Syntax of append() Function in Python
Append function in python has the following syntax:
myList.append(element)
Parameters of append() Function in Python
It accepts a single element which could be any Python object
- integer, floating number, boolean, string, list, user-defined object etc.## Example of append() Function in Python
Here we will add elements like integers, floating numbers, and a string to a list.
list1 = ['programming', 5, 'Hello geeks']

list1.append(10)

list1.append('python')

list1.append(27.5)

# Updated list after adding new elements
print(list1)
Output
['programming', 5, 'Hello geeks', 10, 'python', 27.5]
Syntax of extend() in Python
The syntax of the extend() method in Python is:
list.extend(iterable)
The list extend() method is written with the list to be extended and an iterable is passed to it.
Parameters of extend() in Python
The list extend() method has only one parameter, an iterable. The iterable can be a list, tuple (it is like an immutable list), string, set, or even a dictionary.
Return Values from extend()
The list extend() method doesn't return anything, it just modifies the given list.
list.extend()
list.append()
Extending a list using iterable
list1 = [1, 2, 3]
list2 = [4, 5, 6]
list1.extend(list2)
print(list1)
Output: [1, 2, 3, 4, 5, 6]
Appending element to a list
list1 = [1, 2, 3]
list2 = [4, 5, 6]
list1.append(list2)
print(list1)
Output: [1, 2, 3, [4, 5, 6]]
Syntax of insert() function in Python
insert() function simply takes two parameters index at which the element is to be inserted and the element which is to be inserted.
My_list.insert(index, element)
Parameters of insert() function in Python
Below are the parameters of the insert function:
- index: The index at which the element is inserted. This parameter is of number type.
- element: It is the element that is to be inserted into the list. This parameter can be of any data type(string, number, object).
Return Value of insert() function in Python
insert() method just inserts the element in the list and updates the list and so does not return any value or we can say that insert() method returns None.
Example of insert() function in Python
Let's take a look at a basic example of how insert() function is used:
# original list
lis = ['Welcome', 'Mountblue']

# inserting a string to the list
lis.insert(1, 'to')

# printing the list
print('List:', lis)
Output: We have simply added the string in the list:
List: ['Welcome', 'to', 'Mountblue']
list.remove(x)
Remove the first item from the list whose value is equal to x. It raises a ValueError if there is no such item.
pop():
Overview
The pop() function is a pre-defined, inbuilt function in Python lists. It removes an element from the specified index. If no index is provided, then it removes the last element.
Syntax of Python List pop()
The syntax of pop() is as follows,
list_name.pop(index)
The list_name is the List on which the pop function will operate.
Parameters of Python List pop()
It accepts a single parameter,
- index (optional): The pop() function accepts only one parameter: the item's index to be popped out from the list. If the index is not mentioned, it removes the last item from the list.
Return Value of Python List pop()
The pop() function returns the item, which is present at the specified index and to be removed.
Example of Python List pop()
fruits = ["apple", "orange", "banana", "pineapple"]

print(fruits.pop()) # removes and prints the last element
print(fruits)

print(fruits.pop(0)) # removes and prints the item at 0 index
print(fruits)
Output:
pineapple
['apple', 'orange', 'banana']
apple
['orange', 'banana']
clear():
Overview
The clear() function in Python removes all elements from a list. The function does not take any parameters and does not return anything.
Syntax of clear() function in Python
list.clear()
Parameters of clear() function in Python
The clear method in Python doesn’t take any parameters.
Return Type of clear() function in Python
The clear() function simply clears the given list. It does not return any particular value.
Example of clear() function in Python
Code:
# declaring a list
my_list = [{1, 2}, ('xyz'), ['3.66', '2.2']]

# clearing the list
my_list.clear()

print('The list after using the clear function:', my_list)
Output:
The list after using the clear function: []
Index():
Overview
The index() method in Python searches an element in the list and returns its position/index. If there are duplicate elements, then by default, index() returns the position of the first occurrence of the element we are searching for in the list.
Syntax for index() function in Python
The syntax of the list ndex() method in Python is:
list.index(element, start, end)
Parameters for index() function in Python
The list index() method can take at most three arguments as discussed below:
- element: It specifies the element to be searched in the list. It is a mandatory parameter. Hence it must be provided in the index() method.
- start (optional): It is an optional parameter that specifies the starting index from which the element should be searched. The starting index provided must be present in the range of our list; otherwise, index() will throw a ValueError. By default, the index() method searches for any element from the 0�0t^h^ index.
- end (optional): It is an optional parameter that specifies the position up to which the element should be searched. The end index provided must be in the range of our list. Otherwise, a ValueError will be thrown by the index() method. If "end" is not provided, then by default, the element is searched till the end of the list.
Return Value for index() function in Python
Return Type: int
The index() method in Python returns the index of an element we have specified for it.
Exception of index() function in Python?
If the element is not present in the list, the index() method returns a ValueError Exception. We can handle this error using a try-catch block, as discussed in later examples.
Code:
ls = [1,2,5,7,5,3,2,1,5,6]
result = ls.index(5) #find the position of first occurrence of 5
print(f"First occurence of 5 is at index = {result}")
Output:

count():
Syntax of count() Function in Python
Python Count() function has following syntax:
string.count(substring/character, start=, end=)
Parameters of count() Fucntion in Python
Three parameters are accepted by the count() function of python while using strings:
- substring/character: Which is to be searched in the string.
- start (optional): The value which is stated as the start position. It is inclusive, which means substring/character at this position is also included in the count. If we leave this parameter empty, then start is considered as 0th position by default.
- end (optional): The value stated as the end position. It is exclusive, which means substring/character at this position is excluded from the count. If we leave this parameter empty, then the end is considered the last index of the string by default.
Return Value of count() Fucntion in Python
Return Type: integer
It returns the number of occurrences of substring/character in a string.
Example of count() Fucntion in Python
Let's use count() function on strings to find the occurrence of any character.
string1 = 'Hello There'
occurrenceOfE = string1.count('e')

print('occurrence of e in string: ', occurenceOfE)
Output
occurrence of e in string: 3
Explanation
- We created a string and stored it into a variable.
- Then, we calculated the occurrence of the character 'e' in the string and stored it in the variable.
- Finally, we printed that variable and got the occurrence of 'e' in the string.
sort():
The sort function can be used to sort the list in both ascending and descending order. It can be used to sort lists of integers, floating point numbers, strings, and others. Its time complexity is O(NlogN).
Python sort() Syntax
The syntax of the sort() function in Python is as follows.
Syntax: list_name.sort(key=…, reverse=…)
Parameters:
By default, Python sort() doesn’t require any extra parameters and sorts the list in ascending order. However, it has two optional parameters:
- key: function that serves as a key for the sort comparison
- reverse: If true, the list is sorted in descending order.
Return value: The sort() does not return anything but alters the original list according to the passed parameter.
code:
# List of Integers
numbers = [1, 3, 4, 2]
# Sorting list of Integers
numbers.sort(reverse=True)
print(numbers)
# List of Floating point numbers
decimalnumber = [2.01, 2.00, 3.67, 3.28, 1.68]
# Sorting list of Floating point numbers
decimalnumber.sort(reverse=True)
print(decimalnumber)
# List of strings
words = ["Geeks", "For", "Geeks"]
# Sorting list of strings
words.sort(reverse=True)
print(words)
copy():
Syntax of Copy in Python
The syntax of the copy() method in python is simple. The method is called on objects in the following way:
list.copy()
Parameters of Copy in Python
The copy method in python provided in the standard library does not take any parameter as input.
Return Value of Copy in Python
Blockquote
The python copy method returns a shallow copy of the object it was called on. We will discuss shallow copy soon.
Example
Code:
my_list = [1, 2, 3]  # initializing a list
copy_of_list = my_list.copy()  # using standard library copy() method to create shallow copy of list
print(copy_of_list)
Output:
[1, 2, 3]
Strings:
What is a string in python?
Technically speaking, an immutable data sequence is known as a string in Python. In simple words, as discussed in the case of a crossword, a Python string is nothing but an array of characters, but a computer does not understand characters. It only understands the language of 0’s and 1’s.
So these characters are converted to a number so the computer can understand them clearly. This conversion is known as encoding. ASCII and Unicode are some of the popular encodings used.
To put it simply, Python strings are a sequence of Unicode characters.
Creating a String in Python
A string in Python can be easily created using single, double, or even triple quotes. The characters that form the string are enclosed within any of these quotes.
Note: Triple quotes are generally used when we are working with multiline strings in Python and docstring in Python.
Let’s take a look at an example where we will create strings using the three types of quotes –
Code:
single_string='Hello'
double_string="Hello World"
triple_string="""Welcome to Scaler"""
print(single_string)
print(double_string)
print(triple_string)
Output:
Hello
Hello World
Welcome to Scaler
Different Methods of Python String Module
Python has a plethora of built-in functions of the string module that can be used for string manipulations. Let's take a look at some of the commonly used functions.
capitalize():
Takes the first character of the string and converts it to upper case
casefold():
Converts the entire string into lowercase characters
center():
This function aligns the string in the 'center'
count():
The count() function will return the count of the specified character in the string
encode():
The encoded version of the string is returned
endswith():
As the function name suggests, it tests if a string ends with a specified substring
expandtabs():
This function sets the tab size of the specified string
find():
Looks for a specified string inside another string and returns the index where the substring was found
format():
The function we studied above, formats the specified values in the string
format_map():
Performs the same function as format()
index():
Looks for a specified character inside another string and returns the index where the substring was found
isalnum():
Boolean function that would return true if all the characters in the string are alphanumeric i.e. contain only numbers or alphabets and no special characters
Boolean function that returns True if all the characters in the string are alphabets
isascii():
If all the characters in the string are ASCII characters, then this boolean function returns True
isdecimal():
If all the characters in the string are decimals (numbers) this boolean function returns True
isdigit():
Boolean function that would return true if all the characters in the string are digits
isidentifier():
If the string is an identifier, then this boolean function will return True
islower():
If all the characters in the string are in lowercase, then this boolean function returns True
isnumeric():
If all the characters in the string are numeric, then this boolean function returns True
isspace():
If the character is a space, then this function returns True
isupper():
If all the characters in the string are in uppercase, then this boolean function returns True
join():
This function takes an iterable and converts it into a string
lower():
This function converts the string into lowercase
replace():
Returns a string where a specified value is replaced with a specified value
rfind():
rfind() function in python searches the string for a specified value and returns the last index of where it was found
rindex():
Searches the string for a specified value and returns the last index of where it was found
rstrip():
Returns a right trim version of the string
split():
Splits the string at the specified separator, and returns a list
splitlines():
splitlines() in Python splits the string at line breaks and returns a list
startswith():
The startswith() in python returns true if the string starts with the specified value
strip():
Returns a trimmed version of the string, i.e. without spaces at the start and end of the string
upper():
upper() converts a string into upper case
code :
string1 = "123"
string2 = "abcd"
string3 = "12!cdef"
string4 = "ab cd"

print(string1.isnumeric())
print(string1.isalnum())
print(string2.isalpha())
print(string3.isalnum())
print(string4.isalpha())
Output:
True
True
True
False
False
Syntax of Python String Split
str.split(separator, maxsplit)
str: variable containing the input string. Datatype – string.
Parameters of Split Function in Python
- separator: This is the delimiter. The string splits at this specified delimiter. This is optional, i.e., you may or may not specify a separator. In case no separator has been specified, the default separator is space. In the split() function, we can have one or more characters as delimiters, or we can also have two or more words as delimiters.
- maxsplit: This specifies the maximum number of times the string should be split. This is optional, i.e., you may or may not specify the maxsplit count. In case it has not been specified, the default value is -1, i.e., no limit on the number of splits. In case any negative value is entered, it works the same as in the case when no value is specified.
Example of Python String Split()
Without Specifying Any Maxsplit
Case 1:
str = 'InterviewBit is a great place for learning'
print(str.split())
In the above case, no separator has been specified, and hence the default separator i.e., space is taken to split the string. Also, we see that no maxsplit count is given, so the default value is -1, i.e., no limit on the number of splits. So the string is split wherever a space is found.
Output:
['InterviewBit', 'is', 'a', 'great', 'place', 'for', 'learning']
Case 2
str = 'InterviewBit, is a, great place, for learning'
print(str.split(','))
In the above case, the separator has been specified, i.e., (",") comma. But since there is no maxsplit count, so the default value again is -1, i.e., no limit on the number of splits.
Output:
['InterviewBit', ' is a', ' great place', ' for learning']
join():
Syntax of join() Function in Python
The syntax of join() is as follows:
stringSeperator.join(iterable)
Parameter of join() Function in Python
The join method takes a single parameter,
- iterable: The iterable can be of any type, including List, Tuple, Dictionary, Set, and String.
Return Value of join() Function in Python
Return Type: string
It returns a string after concatenating all elements of iterable.
Example of join() Function in Python
An example to show the working of join is as follows:
elements = ['A', 'B', 'C', 'D']

str1 = ""
str2 = "-"

str1 = str1.join(elements)
str2 = str2.join(elements)

print(str1)
print(str2)
Output:
ABCD
A-B-C-D
Dictionary:
Introduction
Dictionary in Python is one of the most popular data structures. They are used to store data in a key-value pair format. The keys are always unique within a dictionary and are the attribute that helps us locate the data in the memory. The values of the Python dictionary may or may not be unique. The values within a dictionary can be of any data type, but the thing to note is that the keys are immutable. Hence, the key can only be strings, numbers or tuples.

Two more things to keep in mind while working with a dictionary in Python –
- The keys must be only a single element.
- The keys are case-sensitive, i.e. the same name in either uppercase or lowercase will be treated differently.
We will elaborate on this further on in the article.
Creating a Dictionary in Python
Creating a Python dictionary is as simple as placing the required key and value pairs within a curly bracket.
“{}”.
A colon separates the key-value pair.
“:”
When there are multiple key-value pairs, they are separated by a comma.
“,”
The syntax of declaring a dictionary in python is as follows –
my_dict={'Name':'Ravi',"Age":'32'}
Now let’s look at some different ways of creating a Python dictionary –
#creating an empty dictionary
my_dict={}
#creating a dictionary with integer keys
fruits={'1':'apple','2':'banana','3':'cherry'}
#creating a dictionary with mixed keys
random_dict={'1':'red','Name':'Anushka'}
print(my_dict)
print(fruits)
print(random_dict)
Output –
{}
{'1': 'apple', '2': 'banana', '3': 'cherry'}
{'1': 'red', 'Name': 'Anushka'}
Another way we can create a dictionary in Python is using the built-in dict() function!
Let’s see how we can do that –
Dict = dict([(1, 'Scaler'), (2, 'Academy')])
print("\nCreate a Dictionary by using  dict(): ")
print(Dict)
Output –
Create a Dictionary by using  dict():
{1: 'Scaler', 2: 'Academy'}
Updating Dictionary in Python
We can do multiple things when trying to update a dictionary in Python. Some of them are –
- Add a new entry.
- Modify an existing entry.
- Adding multiple values to a single key.
- Adding a nested key.
Now let’s try to implement these through code –
#creating an empty dictionary
my_dict={}
print(my_dict)
#adding elements to the dictionary one at a time
my_dict[1]="James"
my_dict[2]="Jim"
my_dict[3]="Jake"
print(my_dict)
#modifying existing entry
my_dict[2]="Apple"
print(my_dict)
#adding multiple values to a single key
my_dict[4]="Banana,Cherry,Kiwi"
print(my_dict)
#adding nested key values
my_dict[5]={'Nested' :{'1' : 'Scaler', '2' : 'Academy'}}
print(my_dict)
Output –
{}
{1: 'James', 2: 'Jim', 3: 'Jake'}
{1: 'James', 2: 'Apple', 3: 'Jake'}
{1: 'James', 2: 'Apple', 3: 'Jake', 4: 'Banana,Cherry,Kiwi'}
{1: 'James', 2: 'Apple', 3: 'Jake', 4: 'Banana,Cherry,Kiwi', 5: {'Nested': {'1': 'Scaler', '2': 'Academy'}}}
Deleting Dictionary Elements
Now that we have covered how to update Python dictionaries, let’s look at how we can either delete the dictionary entirely or remove individual entries.
To remove an entire dictionary in Python, we use the “del” keyword.
Let’s check out its implementation –
my_dict={1: 'James', 2: 'Apple', 3: 'Jake', 4: 'Banana,Cherry,Kiwi'}
del my_dict[4]
print(my_dict)
Output –
{1: 'James', 2: 'Apple', 3: 'Jake'}
Using
del
We deleted the entries for a specific key in the above example.
Now, if we want to clear an entire dictionary in Python, we will use the
Consider the following code –
my_dict={1: 'James', 2: 'Apple', 3: 'Jake', 4: 'Banana,Cherry,Kiwi'}
my_dict.clear()
print(my_dict)
Output –
{}
As you can see, the entire content of the dictionary “my_dict” was removed.
Use the for loop along with the items() method:
my_dict={1: 'James', 2: 'Apple', 3: 'Jake', 4: 'Banana,Cherry,Kiwi'}
for x in my_dict.items():
    print(x)
Output –
(1, 'James')
(2, 'Apple')
(3, Jake')
(4, 'Banana, Cherry, Kiwi')
4. Use the for loop along with the values() method:
my_dict={1: 'James', 2: 'Apple', 3: 'Jake', 4: 'Banana,Cherry,Kiwi'}
for x in my_dict.values():
    print(x)
Output –
James
Apple
Jake
Banana,Cherry,Kiwi
Properties of Python Dictionary Keys
I am sure by now you have realised that Python dictionary values have no restrictions and can be any Python object. The same is not true for keys.
So there are specific properties of keys we must be aware of to work with Python dictionaries efficiently –
- Duplicate keys are not allowed. When duplicate keys are encountered in Python, the last assignment is the one that wins.
For example –
my_dict={1: 'James', 2: 'Apple', 3: 'Jake', 1: 'Banana,Cherry,Kiwi'}
print(my_dict)
Output –
{1: 'Banana, Cherry, Kiwi', 2: 'Apple', 3: 'Jake'}
- Keys are immutable- they can only be numbers, strings or tuples.
We have seen several examples earlier in this article to see how this works.
Click here to learn more about Python Dictionary Keys() Method.
Built-in Python Dictionary Functions & Methods
Now that we know how to work with Python dictionaries let’s look at some dictionary functions and dictionary methods.
Dictionary Functions
cmp(dict1,dict2):
It compares the items of both the dictionaries and returns true if the value of the first dictionary is greater than the second else returns false.
len(dict):
It gives the total number of items in the dictionary.
str(dict):
It produces a printable string representation of the dictionary.
all(dict):
It returns true if all the keys in the dictionary are true.
any(dict):
It returns true if any key in the dictionary is true.
sorted(dict):
It returns a new sorted list of keys in a dictionary.
Python Dictionary Methods
dict.clear()
It removes all elements of the dictionaries.
dict.copy()
It returns a copy of the dictionary.
dict.pop()
It removes an element from the specified key.
dict.get()
It is used to get the value of the specified key.
dict.fromkeys()
It creates a new dictionary with keys from seq and values set to value.
dict.items()
It returns the list of dictionary tuple pairs.
dict.keys()
It returns the list of keys of the dictionary.
dict.update(dict2)
It adds the dict2’s key-value pairs to dict.
dct.has_key()
It returns true if the specified key is present in the dictionary else false.
Python OOPS:
in Python, we have classes to help us bring all the related objects and functionality together so that it helps us to manage our code easily.
Unlike other programming languages, Python revolves around the concept of objects. Hence, it is an Object-Oriented Programming Language(OOPs).
Classes and objects are two main aspects of OOPs.
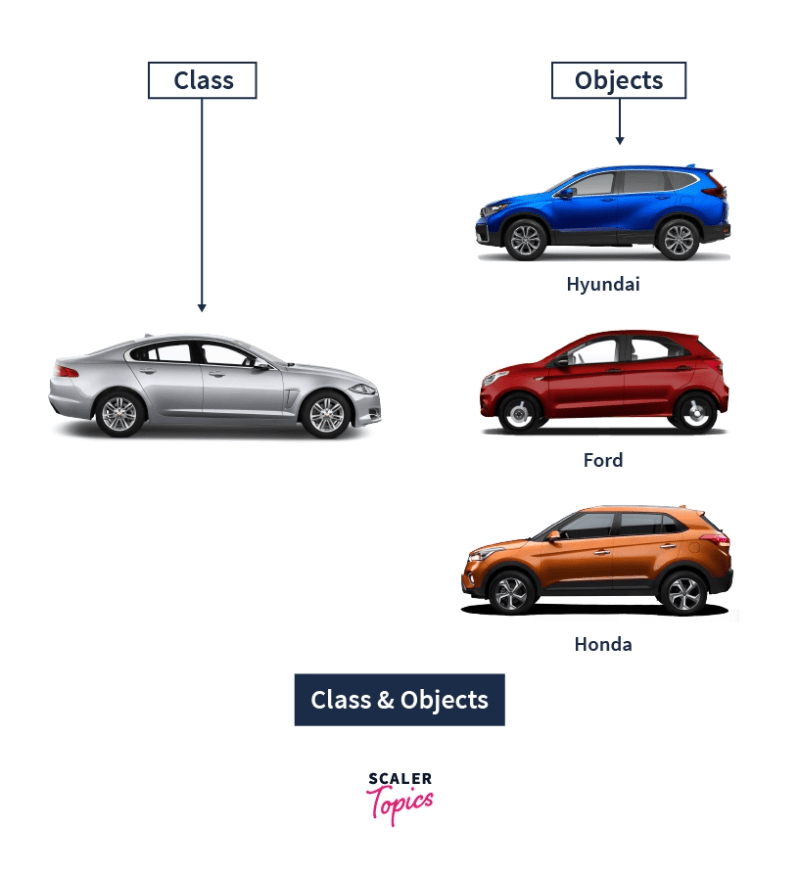
Classes are the user-defined blueprints that help us create an object. Objects are the instances of a particular class. Every other element in Python will be an object of some class, such as the string, dictionary, number(20,30), etc. will be an object of some corresponding built-in class(int, str) in Python.
Let’s take an example to understand this concept better.
Here, we have the blueprint of a car on the left side. This is known as the class while on the right side we have some of the models of the cars based on that blueprint, which are known as the objects of the particular class.
Refer to the following image below:

Creating a Class in Python
Creating a class is as easy as creating a function in Python. In function, we start with the def keyword while class definitions begin with the keyword class.
Following the keyword class, we have the class identifier(i.e. the name of the class we created) and then the : (colon) operator after the class name.
In the next indented lines(statement 1..n) are the members of the class. Also, the variables inside the class are known as attributes. The attributes can be accessed later on in the program using the dot(.) operator.
The syntax for creating a Class in Python is as follows:
class ClassName:
    # Statement 1
    # Statement 2
    .
    .
    # Statement n
Let’s take a simple example of a class named Scaler.
class Scaler:
    pass
Note: The keyword pass denotes an empty class. It is written just to avoid any errors in the console while running the above code.
Python Class Attributes and Methods
To make the most of Python Classes, we also need to add some functionality to the classes. We can make this possible with the help of attributes and methods.
We need to set some attributes which would contain some functions and data. These would add some functionality to our code.
Those functions which we define inside the class are known as methods.
Let’s take a look at these additional functionalities in brief.
Python Class Attributes
These are the variables that are defined inside the particular class and can be used by all the objects. These attributes can, later on, be called by using the class and attribute name with the dot(.) operator.
Let’s take a look at an example for further understanding.
class Scaler:
    Course = 'Python'
Here we have a class named Scaler, with a class attribute named Course with a fixed value (ie ‘Python’).
Note: The value of any attributes will remain the same for all objects until and unless it is changed explicitly later on in the code.
Let’s continue with the above example to define some attributes and access it.
class Scaler:
    Course1 = 'Python'
    Course2 = 'C++'
    Course3 = 'Java'
# Accessing the values of the attributes
print(Scaler.Course1)
print(Scaler.Course3)
# Accessing through object instantiation.
obj= Scaler()
print(obj.Course2)
Output:
Python
Java
C++
Here we have defined several attributes inside the Scaler Class. Also, we have shown two ways of accessing the values of those attributes. One, by directly using the class name and the other by using an object(class instance). Assigning a class to a variable is known as object instantiation.
Note: If we change the value of the attribute using the class name(the first method in the above example), then it would change across all the instances of that class. While if we change the value of an attribute using class instance(object instantiation), it would only change the value of the attribute in that instance only.
Let’s show an example to have clarity on this concept:
class Scaler:
    Course = 'Python'
# Changing value using Class Name
Scaler.Course = 'Machine Learning'
obj= Scaler()
print(obj.Course)
# Changing value using Class Instance
obj.Course = 'AI'
print(obj.Course)   # Value will change in this instance only
print('Using class instance would not reflect the changes to other instances')
print(Scaler.Course) # Value haven't changed
obj2= Scaler()
print(obj2.Course)   # Value haven't changed
Output:
Machine Learning
AI
Using class instance would not reflect the changes to other instances
Machine Learning
Machine Learning
Python Class Methods
Once we have defined the class attributes, we can even define some functions inside the particular class that can access the class attribute and can add more functionality to the existing code.
These defined functions inside a class are known as methods. We can define as many methods as we want inside a single class.
Syntax:
We define a method(function) inside a class using the def keyword, followed by the method name. We then pass some arguments through the method.
Note: When we define a method, it must at least pass a single parameter which is generally named as self. It refers to the current instance of the class.
We can call this parameter by any name, other than self if we want.
Let’s take a look at an example of the same.
class Scaler:
    def CourseDetails(self):
        print('Course Information')
We can also pass other arguments inside the CourseDetails function if we want.
For example, let’s say we have a class Scaler, in which we have an attribute named “name” and a method named CourseDetails. The method would take the argument name along with self. We can also pass multiple arguments as per our requirements in the code.
class Scaler:
    name = 'Python'

    def CourseDetails(self, name):
        self.name = name
Instance Attributes (_init_method) in Python:
We can also provide the values of the attributes during the time of object creation. Instance attributes are attached to the instance of a class. Whenever a new object of the class is created, this method is called.
This is done by defining the attributes under the _init_method. The init method is similar to the constructors as in other programming languages(C++, Java). Such a method contains statements that would be executed during the run time(time of object creation).
Let’s take an example to have more clarity on this particular method. This method begins with a double underscore(__).
class Scaler:
  # init method
  def __init__(self, name):
    self.name = name
  # normal method
  def CourseDetails(self):
    print('The name of this course is', self.name)
study1 = Scaler('Python')
study1.CourseDetails()
study2 = Scaler('Machine Learning')
study2.CourseDetails()
Output:
The name of this course is Python
The name of this course is Machine Learning
Note: We can define separate attribute values for different objects(study1, study2) of a class.
Python Class Properties
In Python, with the property() function inside the class, we can define some additional functionalities.
The property() function, just like Java and other languages, takes the set, get and delete methods as arguments and returns an object. These functionalities can be easily incorporated into the code with property() function.
Let’s look at an example to understand the property() function –
class Scaler:
    def __init__(self):
        self.__name='Python'
    def setCourseName(self, name):
        print('"setCourseName()" is called here')
        self.__name=name
    def getCourseName(self):
        print('"getCourseName()" is called here')
        return self.__name
    name=property(getCourseName, setCourseName)
obj = Scaler()
obj.name = "C++"
print(obj.name)
Output:
"setCourseName()" is called here
"getCourseName()" is called here
C++
Introduction
Python being an “object-oriented programming language”, has the concept of classes and objects to keep related things together.
Let's take the example of a bookshelf. Here we sort the books into different shelves according to their genre. The shelves are the classes, while the different books are the “objects”. Do refer to the article Classes in Python, before going through this blog for better understanding. We can also relate our programming with real-world objects through objects in python. We will discuss such scenarios with some examples later in this article.
Unlike other programming languages, Python revolves around the concept of OOPs. This way, we can keep related objects and functionality together so that it helps us to manage our code in an efficient manner. Classes and objects are two main aspects of OOPs.
Classes are the user-defined blueprints that help us create an “object”. Objects are the instances of a particular class. Every other element in Python will be an object of some class, such as the string, dictionary, number(10,40), etc. will be an object of some corresponding built-in class(int, str) in Python. Objects are different copies of the class with some actual values.
Let's take an example to understand this concept better. Here, we have the blueprint of a car on the left side. This is known as the class, while on the right side, we have some of the models of the cars based on that blueprint, which is known as the objects(instances of the class) of the particular class. Here we would be learning about objects in detail.
Refer to the following image below:
Creating an object in Python
After declaring a class in Python, when we create an instance of that class, it is known as the object of the class. The process of creating an object is called instantiation. The classes are essentially like a template to create the objects. The object is created using the name of the class. The object shares all the behavior and attributes of the class, such as the variables and values present in the class. Also, the object inherits the functions mentioned in the class, along with the class's behavior.
Before creating an object, we should know that it contains such properties to distinguish it from others.
- State - The state of an object is determined by the attributes of the object(i.e., the different items we have in the class, which the object inherits.).
- Behavior - The behavior is represented by the methods of the object. It shows the difference and similarities of the functionality of an object to other objects.
- Identity - Each and every object must be unique on its own. We can make this by giving it a unique name(like obj1, obj3, new_obj, etc.).
The syntax of creating an object of a particular class is as follows:
[object_name] = [class_name](arguments/parameters)
Here in comparison to the above example, the object_name is like the car models, namely, Hyundai, Ford, etc. The class_name is similar to the car blueprint. The arguments are just like the car's features, which can pass to some particular car models(objects).
Accessing Object's variables in Python
Let's take an example. Here we have created an object of the class named Scaler.
# Creating a class named Scaler
class Scaler:
  a = 10
  b = 25
  c = 50

# Creating an object named "obj1", "obj2" & accessing the class properties(attributes).

obj1 = Scaler()
print(obj1.a)
print(obj1.b)

obj2 = Scaler()
print(obj2.c)
Output:
10
25
50
Accessing Object's functions in Python
As we know, inside classes, we can declare functions, which are known as methods. Objects can also contain such methods(functions) and pass the arguments through those methods. Methods of an object are the corresponding function of that particular class.
Let's take an example to understand this concept. We will create a method in the Scaler class and execute it on the object.
# Creating a class named Scaler
class Scaler:
  def __init__(self, name, age, hobby):
    self.name = name
    self.age = age
    self.hobby= hobby

  def new(self):
    print("Heyy my name is " + self.name + ". I Love " + self.hobby)

obj2 = Scaler("Vikram", 24, "coding")
obj2.new()
Output
Heyy my name is Vikram. I Love coding
In the above code snippet, we have created a class named Scaler. In it, we have defined two methods(init & new). We have created an object “obj2”, which is the instance of the class, and it accesses the function new(), while also passing three arguments. This way, the object can access the functions.
Note:.
a. The init method is called each and every time a new object is being created from any class. The init method is similar to the constructors as in other programming languages(C++, Java). Such a method contains statements that would be executed during the run time(time of object creation). This method begins with a double underscore(__).
b. Also, the first argument which is passed in the function of the class must be the object itself. So it’s conventionally called “self”, passed as the first argument, followed by the subsequent arguments (such as age, hobby, etc.). The “self” refers to the current instance of the class. We can call this parameter by any name other than “self” if we want.
Modifying Object's properties in Python
Once we declare objects, we can later modify their properties and values. Let's take an example to understand how this works. Here we would be creating a class named Scaler and would declare an object. We would be trying to change the object property by changing the attribute value.
# Creating a class named Scaler
class Scaler:
  a = 10

# Declaring an object
obj1 = Scaler()
print(obj1.a)

#Modifying value
obj1.a = 200
print("After modifying the object properties")
print(obj1.a)
Output
10
After modifying the object properties
200
Here in the above code snippet, we set the value of the object “obj1”, from 10 to 200. By accessing the value of the attribute(here, it is “a”) through the object (i.e., obj1.a) and assigning a different value to it, we can change any of the properties of each and every object of a class.
Deleting Object's properties in Python
We can even delete the properties(also known as attributes) of an object with the help of the del keyword. Continuing with the previous example of the Scaler class, here we delete the “a” property from the “obj1” object.
del obj1.a
Deleting an Object in Python
You created an object earlier and now want to delete it? We also have a way to delete an object which was created earlier in the code by using the del keyword.
del obj1
Note: After deleting the object of a class, the name of the object which is bound to it gets deleted, but however the object continues to exist in the memory with no name assigned to it. Later it is automatically destroyed by a process known as garbage collection.
What is Inheritance in Python?
Inheritance is the ability to ‘inherit’ features or attributes from already written classes into newer classes we make. These features and attributes are defined data structures and the functions we can perform with them, a.k.a. Methods. It promotes code reusability, which is considered one of the best industrial coding practices as it makes the codebase modular.
In Python inheritance, new class/es inherits from older class/es. The new class/es copies all the older class's functions and attributes without rewriting the syntax in the new class/es. These new classes are called derived classes, and old ones are called base classes.
For example, inheritance is often used in biology to symbolize the transfer of genetic traits from parents to their children. Similarly, we have parent classes (Base classes) and child classes (derived classes). In Inheritance, we derive classes from other already existing classes. The existing classes are the parent/base classes from which the attributes and methods are inherited in the child classes.
Syntax:
class DerivedClass(BaseClass):
    # Class definition
Here, DerivedClass is the class that will inherit from the BaseClass. The BaseClass is the class that will serve as the parent or superclass.
Example:
class Person:
    def __init__(self, name, age):  # Constructor to initialize name and age attributes
        self.name = name
        self.age = age

    def say_hello(self):  # Method to greet and introduce the person
        print(f"Hello, my name is {self.name} and I am {self.age} years old.")

class Student(Person):  # Student class inherits from Person class
    def __init__(self, name, age, grade):  # Constructor to initialize name, age, and grade attributes
        super().__init__(name, age)  # Call the parent class constructor to initialize name and age
        self.grade = grade  # Additional attribute specific to the Student class

    def say_hello(self):  # Override the say_hello method of the parent class
        super().say_hello()  # Call the parent class say_hello method to introduce the student as a person
        print(f"I am a student in grade {self.grade}.")  # Print additional information specific to the Student class

# Creating an instance of the base class
person = Person("John", 30)
person.say_hello()

# Creating an instance of the derived class
student = Student("Mary", 18, 12)
student.say_hello()
Output:
Hello, my name is John and I am 30 years old.
Hello, my name is Mary and I am 18 years old.
I am a student in grade 12.
In the above example, we define a base class called Person with an init method to initialize the name and age attributes, and a say_hello method to introduce the person. We also define a derived class called Student, which inherits from the Person class and adds a new attribute grade and a new implementation of the say_hello method to introduce the student.
We created an instance of the Person class and call its say_hello method, which outputs a message introducing the person. We also created an instance of the Student class and call its say_hello method, which outputs a message introducing the student and their grade.
Types of Inheritance in Python
Now that we are all set with the prerequisites to understand how inheritance in Python is carried out, let’s look at various inheritance types.
Single Inheritance in Python
Single Inheritance is the simplest form of inheritance where a single child class is derived from a single parent class. Due to its candid nature, it is also known as Simple Inheritance.

Example
# python 3 syntax
# single inheritance example

class parent:                  # parent class
    def func1(self):
        print("Hello Parent")

class child(parent):
  # child class
    def func2(self):                 # we include the parent class
        print("Hello Child")   # as an argument in the child
                               # class

# Driver Code
test = child()                 # object created
test.func1()                   # parent method called via child object
test.func2()                   # child method called
Output:
> Hello Parent
> Hello Child
Multiple Inheritance in Python
In multiple inheritance, a single child class is inherited from two or more parent classes. It means the child class has access to all the parent classes' methods and attributes.
However, if two parents have the same “named” methods, the child class performs the method of the first parent in order of reference. To better understand which class’s methods shall be executed first, we can use the Method Resolution Order function (mro). It tells the order in which the child class is interpreted to visit the other classes.

Example:
Basic implementation of multiple inheritance
# python 3 syntax
# multiple inheritance example

class parent1:                     # first parent class
    def func1(self):
        print("Hello Parent1")

class parent2:                     # second parent class
    def func2(self):
        print("Hello Parent2")

class parent3:                     # third parent class
    def func2(self):                     # the function name is same as parent2
        print("Hello Parent3")

class child(parent1, parent2, parent3):     # child class
    def func3(self):                     # we include the parent classes
        print("Hello Child")       # as an argument comma separated

# Driver Code
test = child()        # object created
test.func1()          # parent1 method called via child
test.func2()          # parent2 method called via child instead of parent3
test.func3()          # child method called

# to find the order of classes visited by the child class, we use __mro__ on the child class
print(child.__mro__)
Output:
> Hello Parent1
> Hello Parent2
> Hello Child
>(<class '__main__.child'>, <class '__main__.parent1'>, <class '__main__.parent2'>, <class '__main__.parent3'>, <class 'object'>)
As we can see with the help of mro, the child class first visits itself, then the first parent class, referenced before the second parent class. Similarly, it visits the second parent class before the third parent class, and that’s why it performs the second parent’s function rather than the third parent’s. Finally, it visits any objects that may have been created.
Multilevel Inheritance in Python
In multilevel inheritance, we go beyond just a parent-child relation. We introduce grandchildren, great-grandchildren, grandparents, etc. We have seen only two levels of inheritance with a superior parent class/es and a derived class/es, but here we can have multiple levels where the parent class/es itself is derived from another class/es.

Example:
class grandparent:                 # first level
    def func1(self):
        print("Hello Grandparent")

class parent(grandparent):         # second level
    def func2(self):
        print("Hello Parent")

class child(parent):               # third level
    def func3(self):
        print("Hello Child")


# Driver Code
test = child()                     # object created
test.func1()                       # 3rd level calls 1st level
test.func2()                       # 3rd level calls 2nd level
test.func3()                       # 3rd level calls 3rd level
Output:
> Hello Grandparent
> Hello Parent
> Hello Child
Hierarchical Inheritance in Python
Hierarchical Inheritance is the right opposite of multiple inheritance. It means that there are multiple derived child classes from a single-parent class.

Example:
# python 3 syntax
# hierarchical inheritance example

class parent:                       # parent class
    def func1(self):
        print("Hello Parent")

class child1(parent):               # first child class
    def func2(self):
        print("Hello Child1")


class child2(parent):               # second child class
    def func3(self):
        print("Hello Child2")


# Driver Code
test1 = child1()                     # objects created
test2 = child2()

test1.func1()                       # child1 calling parent method
test1.func2()                       # child1 calling its own method

test2.func1()                       # child2 calling parent method
test2.func3()                       # child2 calling its own method
Output:
> Hello Parent
> Hello Child1
> Hello Parent
> Hello Child2
Hybrid Inheritance in Python
Hybrid Inheritance is the mixture of two or more different types of inheritance. Here we can have many relationships between parent and child classes with multiple levels.

Example:
# python 3 syntax
# hybrid inheritance example

class parent1:                            # first parent class
    def func1(self):
        print("Hello Parent")


class parent2:                            # second parent class
    def func2(self):
        print("Hello Parent")

class child1(parent1):                    # first child class
    def func3(self):
        print("Hello Child1")


class child2(child1, parent2):            # second child class
    def func4(self):
        print("Hello Child2")


# Driver Code
test1 = child1()                          # object created
test2 = child2()

test1.func1()                       # child1 calling parent1 method
test1.func3()                       # child1 calling its own method

test2.func1()                       # child2 calling parent1 method
test2.func2()                       # child2 calling parent2 method
test2.func3()                       # child2 calling child1 method
test2.func4()                       # child2 calling its own method
Output:
> Hello Parent1
> Hello Child1
> Hello Parent1
> Hello Parent2
> Hello Child1
> Hello Child2
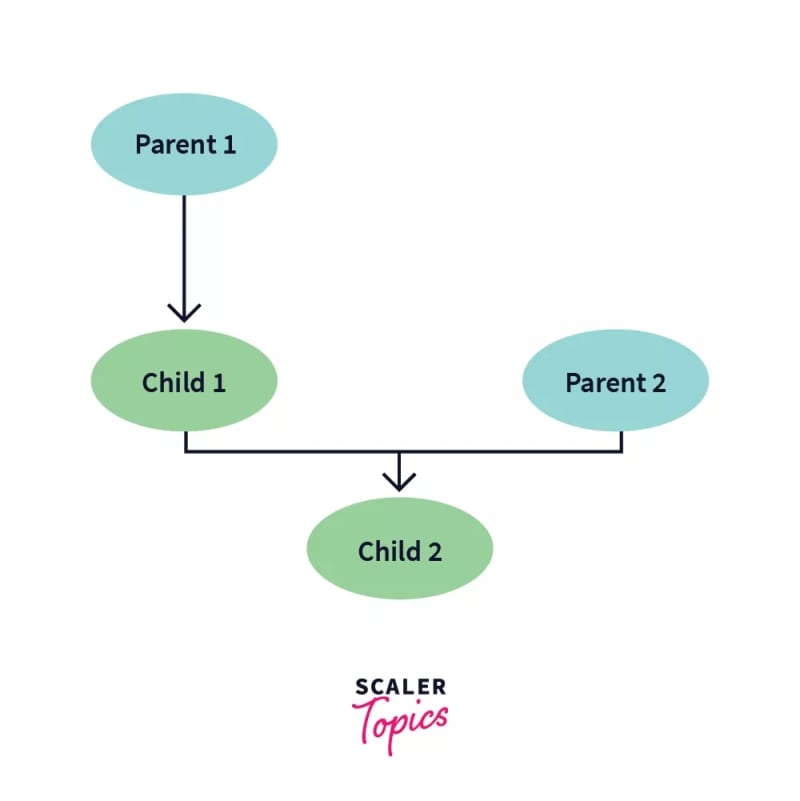
This example shows a combination of three types of python inheritance.
Parent1 -> Child1 : Single Inheritance
Parent1 -> Child1 -> Child2 : Multi – Level Inheritance
Parent1 -> Child2 <- Parent2 : Multiple Inheritance
The diagrammatic explanation of this hybrid inheritance is:
Special Functions in Python Inheritance
Python is a very versatile and user-friendly language. It provides some amazing in-built functions that make our lives easier when understanding inheritance, especially of a complex nature.
super() Function
Method overriding is an ability of any object-oriented programming language that allows a subclass or child class to provide a specific implementation of a method already provided by one of its super-classes or parent classes. This discrepancy is caused due to similar naming convention of the methods. Commonly we can see this situation when the parent’s init() is overridden by the child’s init(), and hence the child class cannot inherit attributes from the parent class.
Similarly, we can face this same problem with methods other than init but having the same naming convention across parent and child classes.
One solution is to call the parent method inside the child method.
# python 3 syntax
# solution to method overriding - 1

class parent:                       # parent class

    def __init__(self):             # __init__() of parent
        self.attr1 = 50
        self.attr2 = 66

class child(parent):                # child class

    def __init__(self):             # __init__() of child
        parent.__init__(self)       # calling parent’s __init__()
        self.attr3 = 45

test = child()                      # object initiated

print (test.attr1)                  # parent attribute called via child
Output:
> 50
Another way to solve this problem without explicitly typing out the parent name is to use super(). It automatically references the parent/base class from which the child class is derived. It is extremely helpful to call overridden methods in classes with many methods.
Example:
# python 3 syntax
# solution to method overriding - 2

class parent:                     # parent class

    def display(self):            # display() of parent
        print("Hello Parent")

class child(parent):              # child class

    def display(self):            # display() of child
        super().display()         # referencing parent via super()
        print("Hello Child")

test = child()                    # object initiated

test.display()                    # display of both activated
Output:
> Hello Parent
> Hello Child
Alternately we can also call super() with the following syntax:
super(child,self).display()
Here, the first parameter references the child class/subclass in the function.
issubclass()
The issubclass() function is a convenient way to check whether a class is the child of the parent class. In other words, it checks if the first class is derived from the second class. If the classes share a parent-child relationship, it returns a boolean value of True. Otherwise, False.
isinstance()
isinstance() is another inbuilt function of Python that allows us to check whether an object is an instance of a particular class or any of the classes it has been derived from. It takes two parameters, i.e. the object and the class we need to check it against. It returns a boolean value of True if the object is an instance and otherwise, False.
Example:
# python 3 syntax
# issubclass() and isinstance() example

class parent:                     # parent class
    def func1():
        print("Hello Parent")

class child(parent):              # child class
    def func2():
        print("Hello Child")


# Driver Code

print(issubclass(child,parent))          # checks if child is subclass of parent

print(issubclass(parent,child))          # checks if parent is subclass of child

A = child()                        # objects initialized
B = parent()

print(isinstance(A,child))                # checks if A is instance of child
print(isinstance(A,parent))               # checks if A is instance of parent
print(isinstance(B,child))                # checks if B is instance of child
print(isinstance(B,parent))            # checks if B is instance of parent
Output:
True
False
True
True
False
True
Advantages of Inheritance in Python
- Modular Codebase: Increases modularity, i.e. breaking down the codebase into modules, making it easier to understand. Here, each class we define becomes a separate module that can be inherited separately by one or many classes.
- Code Reusability: the child class copies all the attributes and methods of the parent class into its class and use. It saves time and coding effort by not rewriting them, thus following modularity paradigms.
-
Less Development and Maintenance Costs: Changes need to be made in the base class, all derived classes will automatically follow.

Disadvantages of Inheritance in Python
- Decreases the Execution Speed: loading multiple classes because they are interdependent
- Tightly Coupled Classes: this means that even though parent classes can be executed independently, child classes cannot be executed without defining their parent classes.
What is Encapsulation in Python?
Encapsulation is one of the cornerstone concepts of OOP. The basic idea of Encapsulation is to wrap up both data and methods into one single unit. The way that data and methods are organized does not matter to the end-user. The user is only concerned about the right way to provide input and expects a correct output on the basis of the inputs provided.

Encapsulation in Python also ensures that objects are self-sufficient functioning pieces and can work independently.
Why do we need Encapsulation in Python?
The advantages of Encapsulation in Python can be summed up as follows –
1. Encapsulation provides well-defined, readable code
The primary advantage of using Encapsulation in Python is that as a user, we do not need to know the architecture of the methods and the data and can just focus on making use of these functional, encapsulated units for our applications. This results in a more organized and clean code. The user experience also improves greatly and makes it easier to understand applications as a whole.
Prevents Accidental Modification or Deletion
Another advantage of encapsulation is that it prevents the accidental modification of the data and methods. Let’s consider the example of NumPy again, if I had access to edit the library, then I might make a mistake in the implementation of the mean function and then because of that mistake, thousands of projects using NumPy would become inaccurate.
3. Encapsulation provides security
Encapsulation in Python is achieved through the access modifiers. These access modifiers ensure that access conditions are not breached and thus provide a great user experience in terms of security.
Access Modifiers in Python encapsulation
Sometimes there might be a need to restrict or limit access to certain variables or functions while programming. That is where access modifiers come into the picture.
Now when we are talking about access, 3 kinds of access specifiers can be used while performing Encapsulation in Python. They are as follows :
- Public Members
- Private Members
- Protected Members

Encapsulation in Python using public members
As the name suggests, the public modifier allows variables and functions to be accessible from anywhere within the class and from any part of the program. All member variables have the access modifier as public by default.
Now let’s check out how we can implement Encapsulation in Python using public methods –
# illustrating public members & public access modifier
class pub_mod:
    # constructor
    def __init__(self, name, age):
        self.name = name;
        self.age = age;

    def Age(self):
        # accessing public data member
        print("Age: ", self.age)
# creating object
obj = pub_mod("Jason", 35);
# accessing public data member
print("Name: ", obj.name)
# calling public member function of the class
obj.Age()
Evidently, from the above code, you can make out that we declared two variables and two methods of the class pub_mod. We were able to access the variables and methods wherever we wanted with ease as the access modifier for them was public, which means they should be accessible everywhere.
This claim is satisfied as we can see in the output –
Name: Jason
Age: 35
Encapsulation in Python using private members
The private access modifier allows member methods and variables to be accessed only within the class. To specify a private access modifier for a member, we make use of the double underscore __.
Let’s check out this example to understand how we can implement Encapsulation using private members –
# illustrating private members & private access modifier
class Rectangle:
  __length = 0 #private variable
  __breadth = 0#private variable
  def __init__(self):
    #constructor
    self.__length = 5
    self.__breadth = 3
    #printing values of the private variable within the class
    print(self.__length)
    print(self.__breadth)

rect = Rectangle() #object created
#printing values of the private variable outside the class
print(rect.length)
print(rect.breadth)
We have accessed len both within and outside the class in the above snippet. Let’s see what kind of output that gives us.
Output –
5
3
Traceback (most recent call last) :
  File "main.py", line 14, in <module>
     print(rect.length)
AttributeError: 'Rectangle' object has no attribute 'length'
We can see that we have received an AttributeError in the output. Can you guess why?
Well, your thoughts should wander towards the private access modifier!
Since len is a private member and we have tried to access it outside the class, that is why we received the above error. We can access private members from outside of a class using the following two approaches
- Public method to access private members
- Name Mangling to access private members
Public method to access private members
# illustrating protected members & protected access modifier
class details:
    _name="Jason"
    _age=35
    _job="Developer"
class pro_mod(details):
    def __init__(self):
        print(self._name)
        print(self._age)
        print(self._job)

# creating object of the class
obj = pro_mod()
Name Mangling to access private members
We can directly access private and protected variables from outside of a class through name mangling. The name mangling is created on an identifier by adding two leading underscores and one trailing underscore, like this classname_dataMember, where classname is the current class, and data member is the private variable name.
class details:
    _name="Jason"
    _age=35
    _job="Developer"
class pro_mod(details):
    def __init__(self):
        print(self._name)
        print(self._age)
        print(self._job)

# creating object of the class
obj = pro_mod()
# direct access of protected member
print("Name:",obj._name)
print("Age:",obj._age)
Encapsulation in Python using protected members
What sets protected members apart from private members is that they allow the members to be accessed within the class and allow them to be accessed by the sub-classes involved. In Python, we demonstrate a protected member by prefixing with an underscore _ before its name.
As we know, if the members have a protected access specifier, it can also be referenced then within the class and the subsequent sub-clas
So now let’s see this concept in action –
# illustrating protected members & protected access modifier
class details:
    _name="Jason"
    _age=35
    _job="Developer"
class pro_mod(details):
    def __init__(self):
        print(self._name)
        print(self._age)
        print(self._job)

# creating object of the class
obj = pro_mod()
# direct access of protected member
print("Name:",obj.name)
print("Age:",obj.age)
Output –
Jason
35
Developer
Traceback (most recent call last):
  File "main.py", line 15, in <module>
    print("Name:",obj.name)
AttributeError: 'pro_mod' object has no attribute 'name'
It is quite clear from the output that the class pro_mod was successfully able to inherit the variables from the class details and print them to the console, although they were protected variables. And when we tried to refer to them outside of their parent class and the sub-class, we got an AttributeError for the same.
Advantages of Encapsulation
Code reusability: Encapsulation in Python allows developers to create reusable code by hiding the implementation details of an object or class and only exposing a public interface for interacting with it.
Data hiding: Encapsulation helps to protect the internal state of an object or class from being accessed or modified by external code, which improves the security of the application.
Improved maintainability: By encapsulating the implementation details of an object or class, developers can make changes to the internal state or behavior of the object without affecting external code that uses it.
Easier to understand: Encapsulation makes the code more organized and easier to understand by clearly separating the public interface from the implementation details.
Better control over class properties: Encapsulation allows developers to have better control over the properties and methods of a class, by making some properties private or protected and only allowing them to be accessed by specific methods.
-
Better class design: Encapsulation encourages developers to design classes that are cohesive and have a single responsibility, which makes the code more modular and easier to maintain.
What is Polymorphism in Python?
The literal meaning of Polymorphism is - having different forms. In programming, Polymorphism refers to a function having the same name but being used in different ways and different scenarios. This makes programming easier and more intuitive.
Polymorphism is one of the fundamental cornerstones of Object Oriented Programming. It is the ability of one function to display multiple functionalities all together. It basically creates a structure that can use many forms of objects.
Polymorphism in Python involves a child class inheriting all the methods from the parent class. This can be implemented in different ways which we will cover in detail in this article.
Polymorphism in Python Example
Let’s try to understand polymorphism and its implementation even better through this simple example -
print(10+256)
print("Scaler"+"Academy")
The above code snippet is the simplest example. Over here, the “+” operator is being overloaded.
You must be wondering what is meant by being “overloaded”. Let me shed some light on that-
Operator overloading is the concept of using an operator beyond its pre-defined purpose.
So in our example, the “+” operator is performing addition in the first line while the second line is an example of string concatenation.
The output would make the difference clear
Here, you can see how the same operator was used in two different ways. Hence, operator overloading can be said to be an implementation of Polymorphism in Python.
266
ScalerAcademy
The best example of Run-time polymorphism is method
Function of Polymorphism in Python
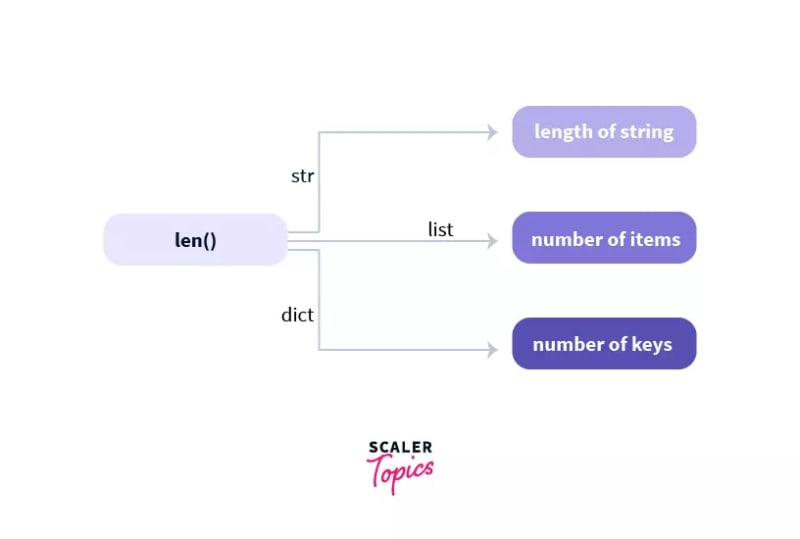
In Python, there are several functions that depict polymorphism by being compatible with multiple data types. The best example of this is the in-built len() function.
Let’s check out a small code snippet to see it in action -
print(len("Scaler Academy"))
print(len(["Python", "PHP", "C++"]))
print(len({"Name": "Rahul", "Address": "Kolkata,India"}))
Output-
14
3
2
From the above code snippet, we can clearly understand the len() function worked for all three data types- strings, lists and dictionaries.
Class Polymorphism in Python
Polymorphism in Python can also be implemented through classes. Python allows classes to have different methods having the same name.
An example would make this concept a lot clearer -
class Cat:
    def __init__(self, name, age):
        self.name = name
        self.age = age

    def info(self):
        print(f"I am a cat. My name is {self.name}. I am {self.age} years old.")

    def make_sound(self):
        print("Meow")


class Cow:
    def __init__(self, name, age):
        self.name = name
        self.age = age

    def info(self):
        print(f"I am a Cow. My name is {self.name}. I am {self.age} years old.")

    def make_sound(self):
        print("Moo")
cat1 = Cat("Kitty", 2.5)
cow1 = Cow("Fluffy", 4)

for animal in (cat1, cow1):
    animal.make_sound()
    animal.info()
    animal.make_sound()
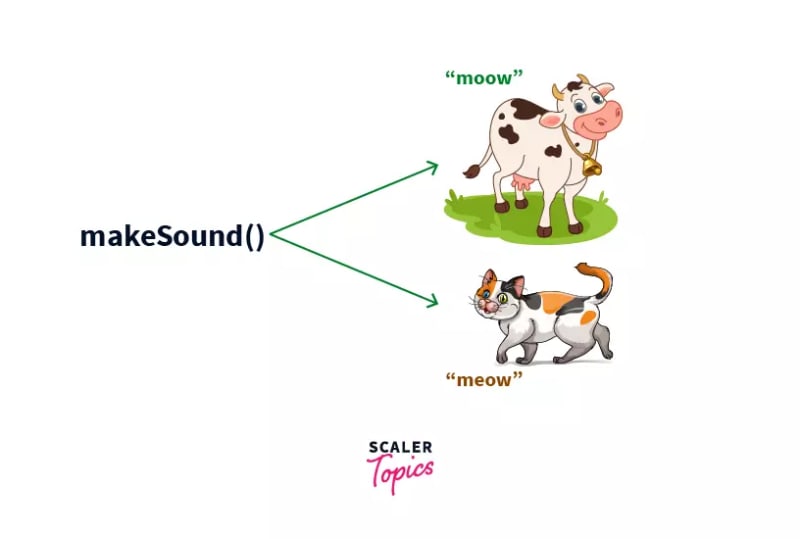
Now in this example, we have created two classes “Cat” and “Cow”. They’re different animals and make different sounds. So, the make_sound() function should produce two different outputs based on the objects we pass through them. In this case, we have created two objects “cat1” and “cow1”.
Now let’s see the final output that we will get -
Meow
I am a cat. My name is Kitty. I am 2.5 years old.
Meow
Moo
I am a Cow. My name is Fluffy. I am 4 years old.
Moo
As discussed, the make-sound() function is indeed producing two different outputs- “Meow” and “Moo”.
Polymorphism in Python with Inheritance
Polymorphism in Python lets us define the child class to have the same name methods as the parent class. On the other hand, inheritance in Python, the child class inherits all methods of the parent class.
Now, we may need to modify or re-define some of these. The process of making these changes specifically to the child class to ensure that they work seamlessly is known as Method Overriding.
Let’s look at a code snippet that implements Polymorphism with Inheritance in Python -
from math import pi
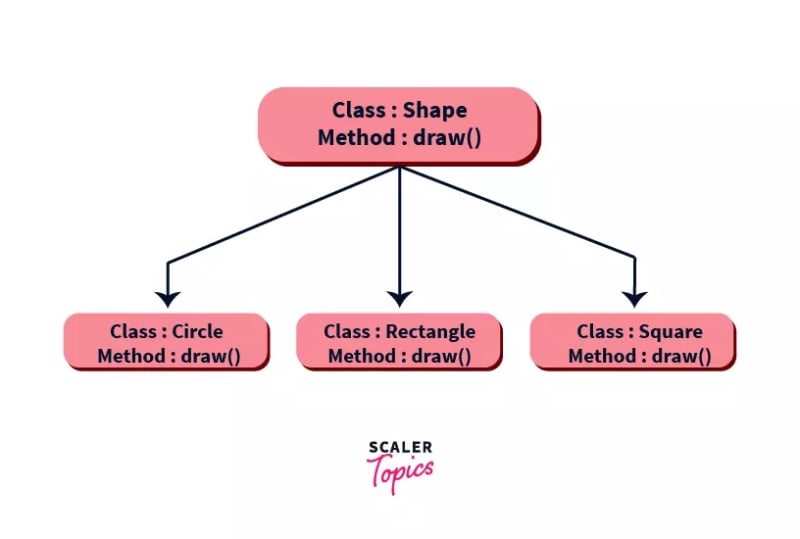
class Shape:
def __init__(self, name):
self.name = name
def area(self):
pass
def fact(self):
return "I am a two-dimensional shape."
def __str__(self):
return self.name
class Circle(Shape):
def __init__(self, radius):
super().__init__("Circle")
self.radius = radius
def area(self):
return pi*self.radius**2
shape_circle = Circle(7)
print(shape_circle)
print(shape_circle.area())
print(shape_circle.fact())
Note- You might have noticed that “pass” has been used within one of the functions.The pass statement in Python is used when you need it syntactically but do not wish for any code to be executed. It basically acts as a placeholder and prevents errors even when no code is written.
Output -

I am sure you can make out from the output that the class “Circle” did not have a fact() method but even then a fact about it was printed to the console. I know what you are thinking!
This is happening, all thanks to Inheritance! Since the parent class “Shape” has a fact() method and the parent class is being inherited by the child class “Circle”, the fact() function is getting called and displayed.
Polymorphism with Class Methods
Python can use two different class types class times in the same way. This can be demonstrated through a simple example where we create two different classes and put them in a tuple.
If we now iterate this tuple of objects, the for loop will execute all the given methods for the first object in the tuple, then the second object in the tuple and so on.
Thus, in this way, we can say that Python would be calling or using these methods without knowing or caring about the class types of the objects. This is nothing but the example of Polymorphism in Python with class methods.
To make this concept even clearer, check out the following example -
class Cat:
    def mood(self):
       print("Grumpy")
    def sound(self):
       print("Meow")

class Dog:
    def mood(self):
       print("Happy")
    def sound(self):
       print("Woof")

hello_kitty = Cat()
hello_puppy = Dog()

for pet in (hello_kitty, hello_puppy):
    pet.mood()
    pet.sound()
Output -

The functions mood() and sound() are same for both the classes yet they produce distinct outputs. Furthermore, we have iterated over the objects of the two classes “Cat” and “Dog” without worrying about the class types. Thus, now you know how to implement Polymorphism in Python with class methods.
Polymorphism with Function and Objects
Polymorphism in Python with functions and objects is a really interesting use-case. By defining a method and passing any object through it, we can implement Polymorphism with functions and objects in Python.
See this simple implementation -
class Beans():
     def type(self):
       print("Vegetable")
     def color(self):
       print("Green")
class Mango():
     def type(self):
       print("Fruit")
     def color(self):
       print("Yellow")
def func(obj):
       obj.type()
       obj.color()
#creating objects
obj_beans = Beans()
obj_mango = Mango()
func(obj_beans)
func(obj_mango)
In this code snippet, we have created two specific classes- Beans and Mango. Along with that, we have created a generic function that tells us the type and color of the object we pass. Mind you, since we have passed only “obj” through it, this obj can be any object. Next, we create two objects of the two above-mentioned classes.
Now let’s see what we get as the output -

From the output, it is clear, we were able to pass the two objects through the function really easily and also received accurate outputs. Hence, in this way we can make use of Polymorphism with classes and objects.
Data Abstraction in OOP
Abstraction is really powerful for making complex tasks and codes simpler when used in Object-Oriented Programming. It reduces the complexity for the user by making the relevant part accessible and usable leaving the unnecessary code hidden. Also, there are times when we do not want to give out sensitive parts of our code implementation and this is where data abstraction can also prove to be very functional.
From a programmer’s perspective, if we think about data abstraction, there is more to it than just hiding unnecessary information. One other way to think of abstraction is as synonymous with generalization. If, for instance, you wanted to create a program to multiply eight times seven, you wouldn't build an application to only multiply those two numbers.
Instead, you'd create a program capable of multiplying any two numbers. To put it another way, abstraction is a way of thinking about a function's specific use as separate from its more generalized purpose. Thinking this way lets you create flexible, scalable, and adaptable functions and programs. You’ll get a better understanding of data abstraction and it’s purposes by the end of this article.
Data Abstraction in Python
Data Abstraction in Python can be achieved through creating abstract classes and inheriting them later. Before discussing what abstract classes are, let us have a brief introduction of inheritance.
Inheritance in OOP is a way through which one class inherits the attributes and methods of another class. The class whose properties and methods are inherited is known as the Parent class. And the class that inherits the properties from the parent class is the Child class/subclass.
The basic syntax to implement inheritance in Python is:
class parent_class:
body of parent class

class child_class( parent_class):
body of child class
Let us now talk about abstract classes in python:
Abstract Classes in Python
Abstract Class: The classes that cannot be instantiated. This means that we cannot create objects of an abstract class and these are only meant to be inherited. Then an object of the derived class is used to access the features of the base class. These are specifically defined to lay a foundation of other classes that exhibit common behavior or characteristics.
The abstract class is an interface. Interfaces in OOP enable a class to inherit data and functions from a base class by extending it. In Python, we use the NotImplementedError to restrict the instantiation of a class. Any class having this error inside method definitions cannot be instantiated.
We can understand that an abstract class just serves as a template for other classes by defining a list of methods that the classes must implement. To use such a class, we must derive them keeping in mind that we would either be using or overriding the features specified in that class.
Consider an example where we create an abstract class Fruit. We derive two classes Mango and Orange from the Fruit class that implement the methods defined in this class. Here the Fruit class is the parent abstract class and the classes Mango and Apple become the sub/child classes. We won’t be able to access the methods of the Fruit class by simply creating an object, we will have to create the objects of the derived classes: Mango and Apple to access the methods.

Why use Abstract Base Class?
Defining an Abstract Base Class lets us create a common Application Programming Interface (API) for multiple subclasses. It is useful while working in large teams and code-bases so that all of the classes need not be remembered and also be provided as library by third parties.
Working of Abstract Class
Unlike other high-level programming languages, Python does not provide the abstract class itself. To achieve that, we use the abc module of Python, which provides the base and necessary tools for defining Abstract Base Classes (ABC). ABCs give the feature of virtual subclasses, which are classes that don’t inherit from a class and can still be recognized by
isinstance()
and
issubclass()
We can create our own ABCs with this module.
from abc import ABC
class MyABC(ABC):
    pass
The abc module provides the metaclass ABCMeta for defining ABCs and a helper class ABC to alternatively define ABCs through inheritance. The abc module also provides the @abstractmethod decorator for indicating abstract methods.
ABC is defined in a way that the abstract methods in the base class are created by decorating with the @abstractmethod keyword and the concrete methods are registered as implementations of the base class.
Concrete Methods in Abstract Base Class in Python
We now know that we use abstract classes as a template for other similarly characterized classes. Using this, we can define a structure, but do not need to provide complete implementation for every method, such as:
from abc import ABC, abstractmethod
class MyClass(ABC):
 @abstractmethod
 def mymethod(self):
  #empty body
  pass
The methods where the implementation may vary for any other subclass are defined as abstract methods and need to be given an implementation in the subclass definition.
On the other hand, there are methods that have the same implementation for all subclasses as well. There are characteristics that exhibit the properties of the abstract class and so, must be implemented in the abstract class itself. Otherwise, it will lead to repetitive code in all the inherited classes. These methods are called concrete methods.
from abc import ABC, abstractmethod

class Parent(ABC):
  #common function
  def common_fn(self):
    print('In the common method of Parent')
 @abstractmethod
  def abs_fn(self): #is supposed to have different implementation in child classes
    pass

class Child1(Parent):
  def abs_fn(self):
    print('In the abstract method of Child1')

class Child2(Parent):
  def abs_fn(self):
    print('In the abstract method of Child2')
An abstract class can have both abstract methods and concrete methods.
We can now access the concrete method of the abstract class by instantiating an object of the child class. We can also access the abstract methods of the child classes with it. Interesting points to keep in mind are:
- We always need to provide an implementation of the abstract method in the child class even when implementation is given in the abstract class.
- A subclass must implement all abstract methods that are defined in the parent class otherwise it results in an error.
Examples of Data Abstraction
Let us take some examples to understand the working of abstract classes in Python. Consider the Animal parent class and other child classes derived from it.

from abc import ABC,abstractmethod

class Animal(ABC):

    #concrete method
    def sleep(self):
        print("I am going to sleep in a while")

    @abstractmethod
    def sound(self):
      print("This function is for defining the sound by any animal")
        pass

class Snake(Animal):
    def sound(self):
        print("I can hiss")

class Dog(Animal):
    def sound(self):
        print("I can bark")

class Lion(Animal):
    def sound(self):
        print("I can roar")

class Cat(Animal):
    def sound(self):
        print("I can meow")
Our abstract base class has a concrete method sleep() that will be the same for all the child classes. So, we do not define it as an abstract method, thus saving us from code repetition. On the other hand, the sounds that animals make are all different. For that purpose, we defined the sound() method as an abstract method. We then implement it in all child classes.
Now, when we instantiate the child class object, we can access both the concrete and the abstract methods.
c = Cat()
c.sleep()
c.sound()

c = Snake()
c.sound()
This will give the output as:
I am going to sleep in a while
I can meow
I can hiss
Now, if we want to access the sound() function of the base class itself, we can use the object of the child class, but we will have to invoke it through super().
class Rabbit(Animal):
    def sound(self):
        super().sound()
        print("I can squeak")

c = Rabbit()
c.sound()
This will produce the following output:
This function is for defining the sound by any animal
I can squeak
If we do not provide any implementation of an abstract method in the derived child class, an error is produced. Notice, even when we have given implementation of the sound() method in the base class, not providing an implementation in the child class will produce an error.
class Deer(Animal):
    def sound(self):
        pass

c = Deer()
c.sound()
c.sleep()
This will produce the following error:
Traceback (most recent call last):
  File "F:/Python/Test/Parent.py", line 38, in <module>
    c = Deer()
TypeError: Can't instantiate abstract class Deer with abstract methods sound
NOTE: Had there been more than one abstract method in the base class, all of them are required to be implemented in the child classes, otherwise, an error is produced.
Why Data Abstraction is Important?
Now that we know what Data Abstraction in Python is, we can also conclude how it is important.
Data Abstraction firstly saves a lot of our time as we do not have to repeat the code that may be the same for all the classes. Moreover, if there are any additional features, they can be easily added, thus improving flexibility. Not to mention, working in large teams becomes easier as one won’t have to remember every function and the basic structure can be inherited without any confusions.

Top comments (0)