
This article was originally published on the Sentry blog here.
Welcome to the second article in this Unity series. You can check out the first article, where I dive into Unity editor basics, here. Over the next few posts we are going to develop a fully functional mini game. In this article, we are going to walk-through adding a new scene, two important components (Rigid 2D and Box Collider 2D), how to destroy a game object, prefab, and how to instantiate a prefab.
The following should be installed on your computer to follow along this tutorial:
- Unity
- Unity Hub
- Visual Studio
In this tutorial, Unity Version “2020.3.23f1” is used.
At the end of this series, a 2D mini game will be created. In this game, players will try to tap on frogs, who will be appearing in random places, before they fall into our lake. When players tap on them there will be a purple smoke effect.
Adding a New Scene
Let’s add a new scene in the project we created last time. This scene will be our new mini game. To add a new scene, simply right click in the Assets/Scenes folder > Create > Scene.

Name the new scene “TapGame”.

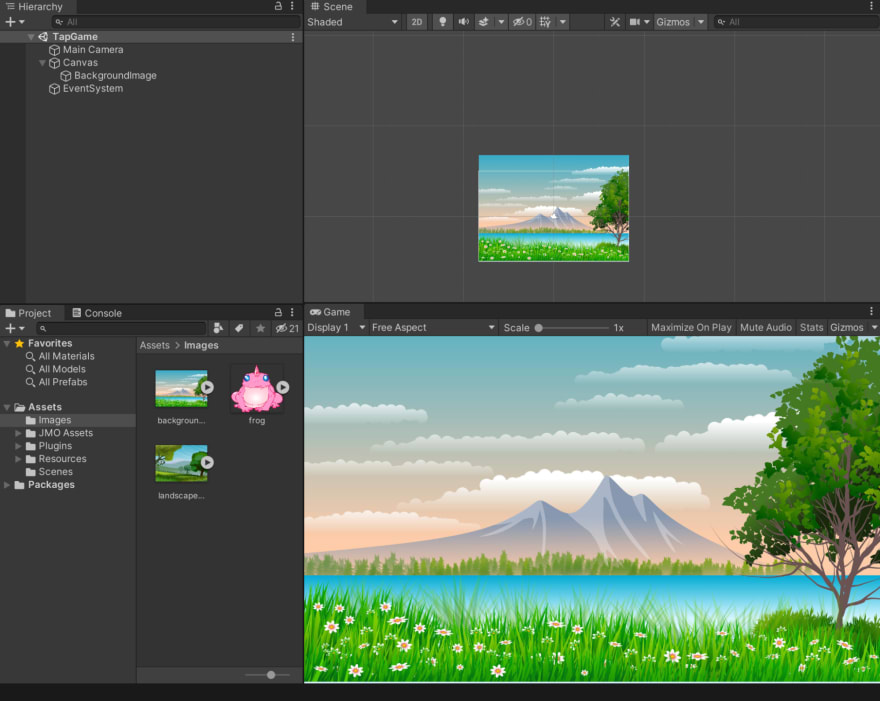
Open the new scene and add a background image. Follow the exact steps that were covered here in my last article. This is how the scene should look (below). In the hierarchy, you should have an event system and a canvas with the background image as a child.
Adding the sprite
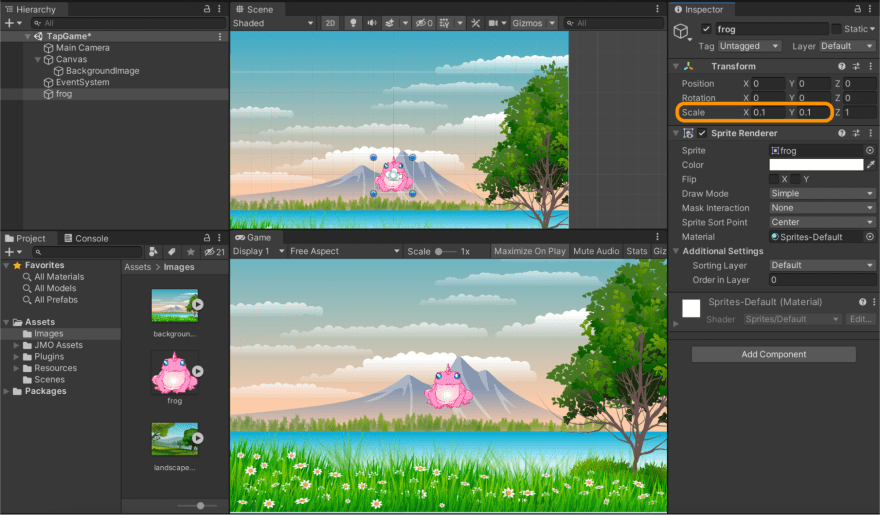
Now we will add the frog sprite. Just drag and drop the frog in the hierarchy, and scale the frog down to 0.1.
Next, we’ll add two important components to the frog sprite.
Box Collider 2D
Since we want to click on the frog, we need a Collider 2D component. Collider 2D components help in defining the physical shape of the game object for collision and trigger purposes. There are several shapes for the Collider 2D aside from the “Box”, which is a rectangle shape, and they are:
- Circle collider 2D for round objects
- Polygon collider 2D for 2D complex shape
- Edge collider for surfaces
The frog’s shape is closer to a rectangle so I chose the Box Collider 2D.
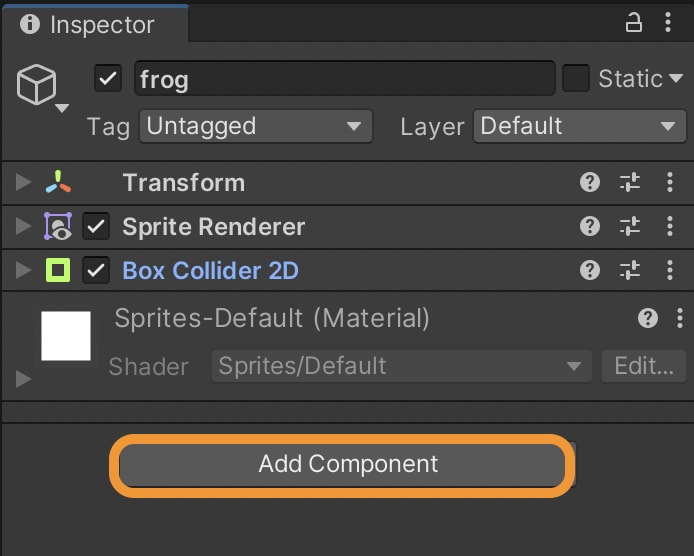
Let’s add this component and check the inspector. Click on “Add Component” and select “Box Collider 2D”.

Let’s check the component’s properties.

- Edit Collider: As the name suggests, we can edit the collider rectangle by clicking on this button. When you click on it, you will see a green rectangle around the frog as shown in the image below. You can move the lines by selecting the small squares.

Material: the physical material that covers your game object that affects its physical properties, such as friction and bounce.
Is Trigger:check this one if you want the Cox collider 2D to be a trigger. A trigger means that if a rigidbody gets in the trigger’s volume it will send these messages: OnTriggerEnter, OnTriggerExit, and OnTriggerStay. If it is checked, a collision with a rigidbody won’t be registered.
Used By Effector: check this if you have an Effector 2D component added to the game object, and you want to direct the forces according to that effector component when game objects collide with each other.
Used By Composite: check this box if you have a Composite Collider 2D component added to the game object. When you check this one, some properties disappear, “Is Trigger”, “Material”, “Used By Effector”, and “Edge Radius”, as they are controlled by the composite 2D component.
Auto Tiling: Check this if the sprite draw mode is Tiled. I will explain tiled draw mode in a later article, but if you’re curious now, you can read more about it here in Unity’s documentation. The shape of the collider will be updated automatically when the sprite’s size changes.
Offset: when you move the collider lines, the offset values change. The values are zero when the lines are exactly on the edges of the sprite.
Size: this one is self explanatory, the size of the collider box.
Edge Radius: this is the corner radius of the collider box and controls whether you want the box edgy, or with round corner radii.
Rigidbody 2D
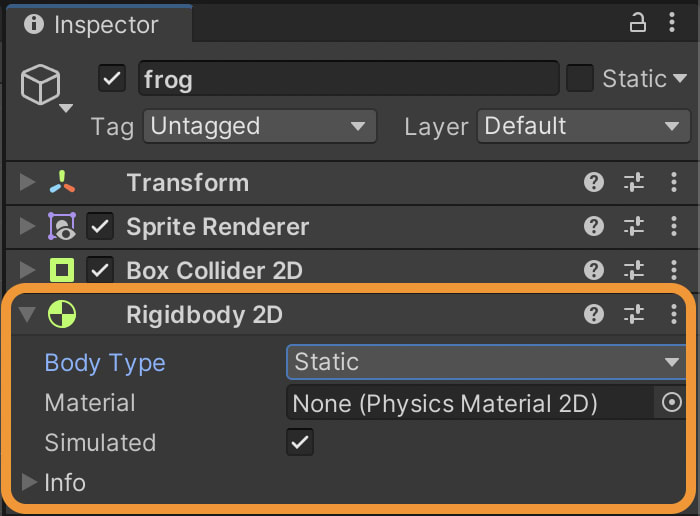
Now let’s add a Rigidbody 2D component to the frog by first clicking “Add Component”. We’ll then search for Rigidbody 2D and add it.

Before doing anything else, let’s click on the play button to see what happens in our mini game so far…

As you can see, the frog just falls down and leaves the screen. This is because the frog has a rigidbody that is affected by gravity as it is under the control of Unity’s physics engine.
Let’s check the Rigidbody 2D component properties.

Depending on the Body Type, the properties of the Rigidbody 2D component change. The body type affects movement and collider interaction.
Body Type: Dynamic
The Dynamic body type is the default type. It has all the properties and is the most interactive.
Material: The physical material is the same as the one I explained in Collider 2D component. If there isn’t one already set in the Collider 2D component, this is the material that will be used. If there is a physical material set in both components, the priority will be the material set in the Collider 2D component.
Simulated: When this one is checked (and it is checked by default) the Rigidbody 2D component and any attached Collider 2D components will interact with the physics simulation. If not checked, they won’t.
Use Auto Mass: Check it if you want to use the mass from the attached Collider 2D component.
Mass: Define the object’s mass
Linear Drag: A coefficient that affects positional movement.
Angular Drag: A coefficient that affects rotational movement.
Gravity Scale: This is self explanatory: how much do you want your object to be affected by gravity? For a lower gravity effect, pick a number less than 1. There is a simple way to make the frog fall down slower. Let’s change the gravity scale into 0.3 to have a slower speed. You can check the frog’s falling speed by running the game.
Collision Detection: This will either be discrete or continuous. If Discrete is selected, game objects can pass through each other after a collision. If Continuous is selected, game objects can not pass through each other.
Sleeping Mode: The three modes for the game object’s sleeping: Never Sleep, Start Awake & Start Asleep.
Interpolate: This defines how the game object’s movement is interpolated. There are three options:
- None - no movement smoothing at all
- Interpolate - smoothed movement based on the game object’s previous frame position
- Extrapolate - smoothed movement based on the game object’s next frame position.
- Constraints: This is used to restrict the game object’s position or rotation.
Body Type: Kinematic
A game object with a kinematic body type is not affected by gravity or forces. So it is faster than a dynamic body type game object. You will need scripts to determine how this game object should move and physics queries to detect collisions. It only collides with a dynamic rigidbody.
As you can see from the image below, some properties we defined above are not available for the Kinematic Rigidbody.

We do see one new property, however.
- Use Full Kinematic Contacts: If you want this kinematic rigidbody to interact with all rigidbody types, check this option, but understand it will act as an immovable game object.
Body Type: Static
This rigidbody type does not move at all under simulation even if another game object collides with it. It only collides with dynamic rigidbody game objects.
For this game, we want the frog to have a dynamic Rigidbody type with a gravity scale of 0.3.
Destroying a Game Object
In order to destroy a frog when a player taps on it, we’ll need to write a C# script.
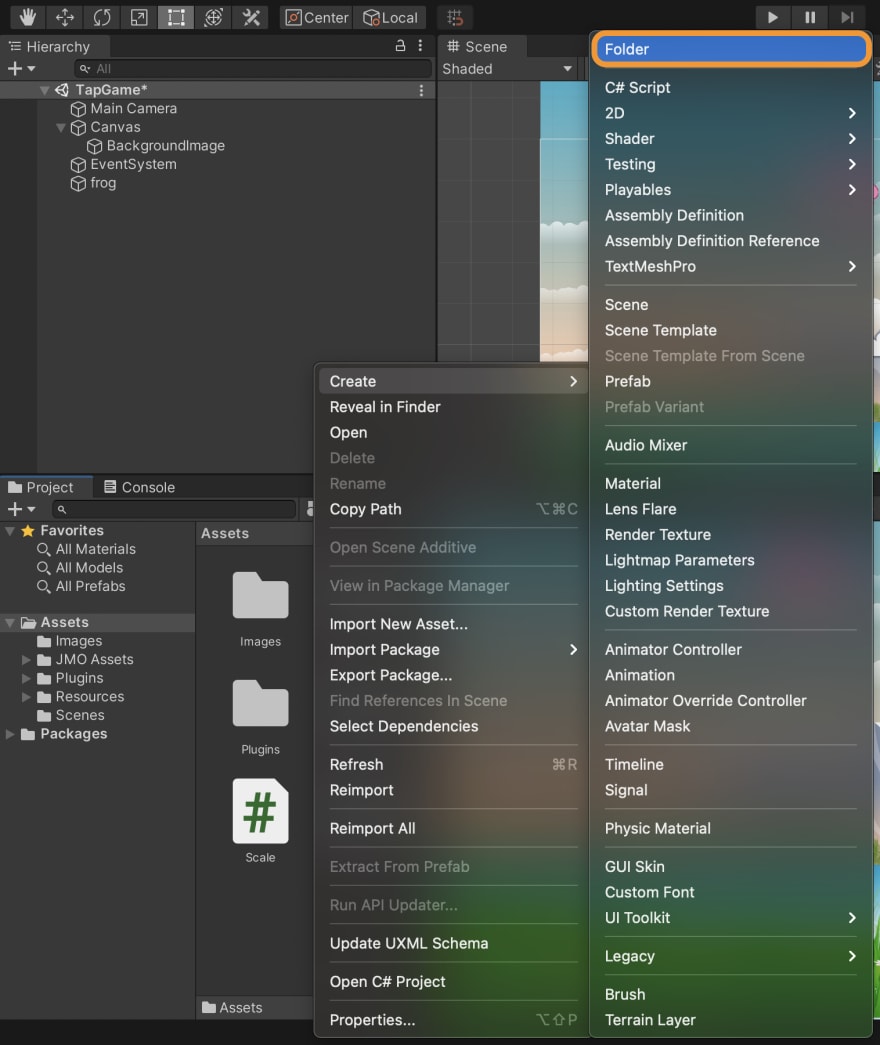
For organizational purposes, let’s create a new folder and name it “Scripts”. Move the “Scale” script we created in my last article to this folder. Right click in the Assets folder > Create > Folder, as shown in the image below.
Now let’s create a new C# script inside the “Scripts” folder. Right click in the Scripts folder > Create > C# script, as shown in the image below.

We’ll name it: KillFrog

Now open the “KillFrog” script and write the following code:
Add a onMouseDown() function and inside it, Destroy(gameObject). This will destroy the game object it is attached to when a player clicks (on PC/laptop) or taps (on a tablet/mobile phone) on it.

Attach this script to the frog by simply dragging the script into the frog’s inspector, or the frog object itself, in the hierarchy.
Now let’s run the game and check if it is working.

It disappears! Clicking on the frog destroy it, but what if we want to add an effect when the frog is destroyed?
Let’s explore two new concepts for this type of effect:
- Prefab
- Game object instantiation
Prefab
A prefab is simply a game object template. You can configure a game object with the needed components and its properties, and then can create an instance from this prefab in the scene. The game object instance will have these components with the configured properties. When you change the components in a prefa, all the instances’ components will change as well so they will be in sync.
When you want a game object to appear in the scene that was not created from the start, you need to instantiate a game object at runtime. To be able to instantiate a sprite, for example, you need a prefab. When you instantiate a game object at runtime, there will be an instance of that game object created in the scene.
To create a prefab simply drag the game object from the Hierarchy into the project Assets folder (after, of course, adding all the components you need.You can edit these components and add more components anytime).
We will create a frog prefab later in the series when we finish all the needed components. But for now we understand what a prefab is.
Time to add an effect for when the frog is killed. Let’s visit the Unity Asset store to browse effects.
Unity Asset Store
Unity has a Unity Asset Store which you can visit directly or through the Unity Engine by selecting Window > Asset Store.

This is an assets store with tons of free and paid assets you can use in your games. Check their licenses before using them commercially, though.
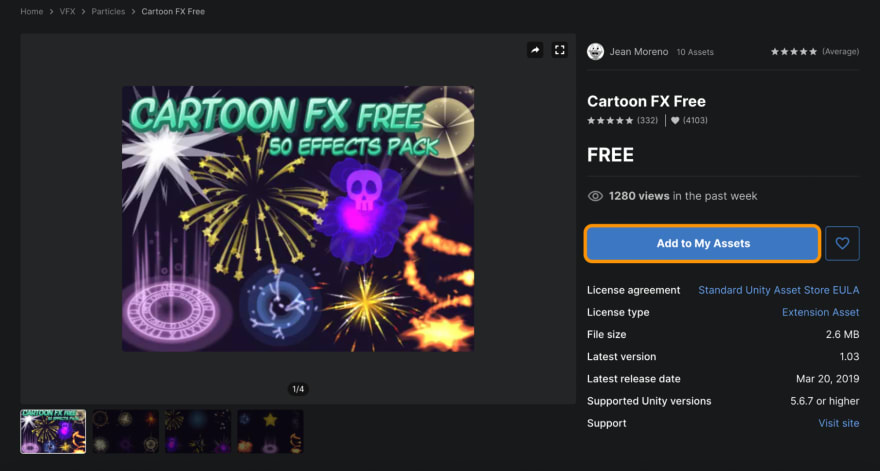
I will use the Cartoon FX Free effect. This asset is available for free and has around 50 cartoon effects.
To import this asset into your project, click on the “Add to My Assets” button in the Asset Store.
Accept the Terms of Service and then click Open in Unity.

The Package manager will open and you’ll be able to download the package.

Import this package into your project. You can leave all the items selected or feel free to select only a few items.

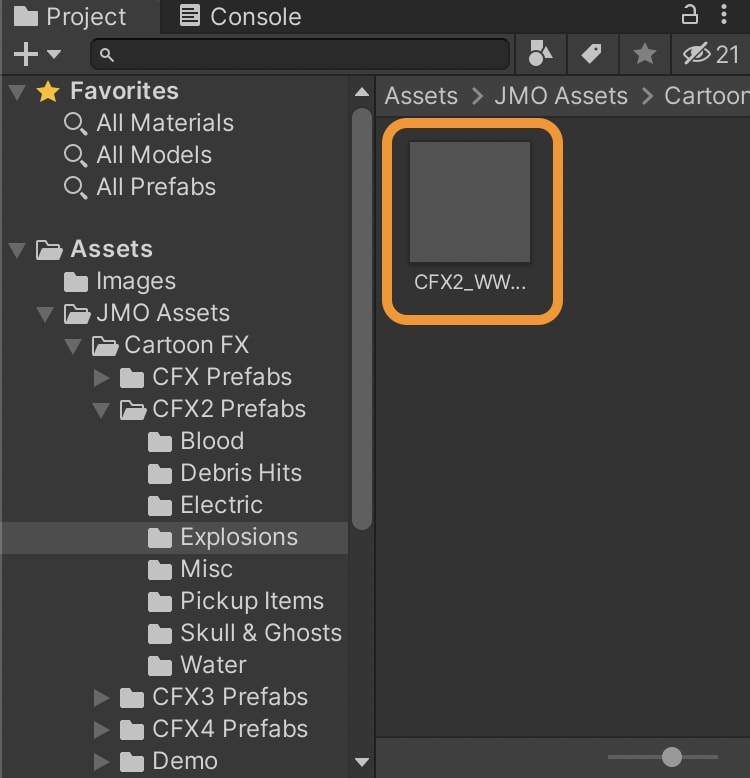
You will find a new folder titled “JMO Assets” in your assets folder, with 3 folders inside.

We need the prefabs inside the first folder, “Cartoon FX”.

These prefabs are for particle system effects. I will elaborate more on this in a later article. For now, we need an explosion effect for when a player kills the frog.
Locate the explosion prefab inside the “Explosions” folder in the “CFX2 Prefabs” folder.
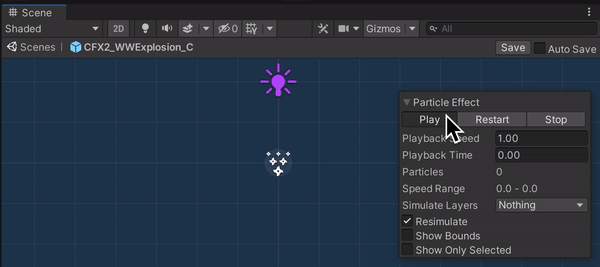
Double click on the explosion prefab to take a look. You can click on play to see it in action.
Now let’s instantiate this prefab when we destroy the frog.
Instantiate a prefab
To instantiate a prefab, you only need one line of code and a reference to that prefab.

Let’s understand this line of code:
Instantiate(SmokeEffect, transform.position, Quaternion.identity);

[SerializeField] makes this a public game object where we can drag the prefab and into the field within the inspector of the game object that the script is attached to.
transform.position: this position is that of the game object the script is attached to, which is the frog in this case – which is exactly what we want.
Quaternion.identity: Quaternion means zero rotation so the explosion will not be rotated.
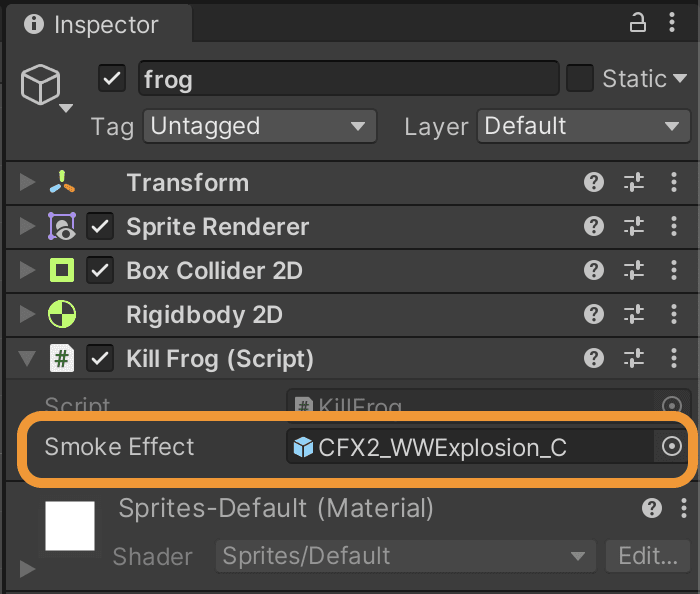
Let’s save the script and go back to Unity to drag the explosion effect into the empty field of the script, as shown in the images below.
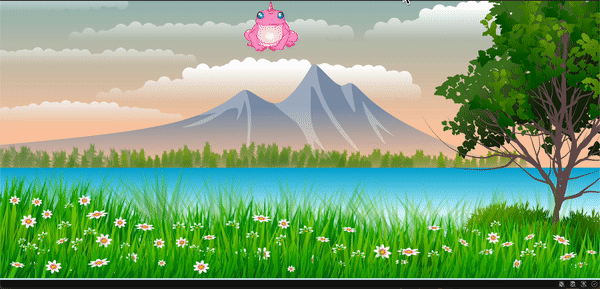
Time to run the game and tap on the frog to see if this worked…

Error Monitoring Using Sentry
In my last article I introduced Sentry and used it to track our game’s errors and monitor our game’s performance. In this article I will focus in more on error monitoring.
Let’s make an intentional error & track it in Sentry.
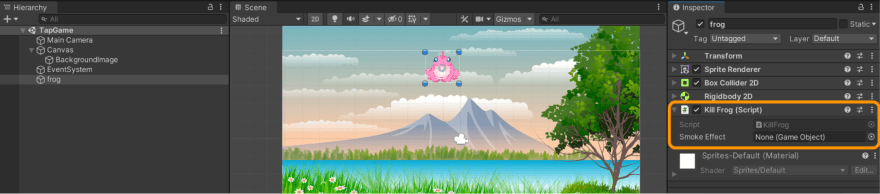
I’m going to remove the explosion game object from the “Smoke Effect” reference field in the script “KillFrog” inspector as shown in the image below.

Run the game, tap on the frog and see what happens.
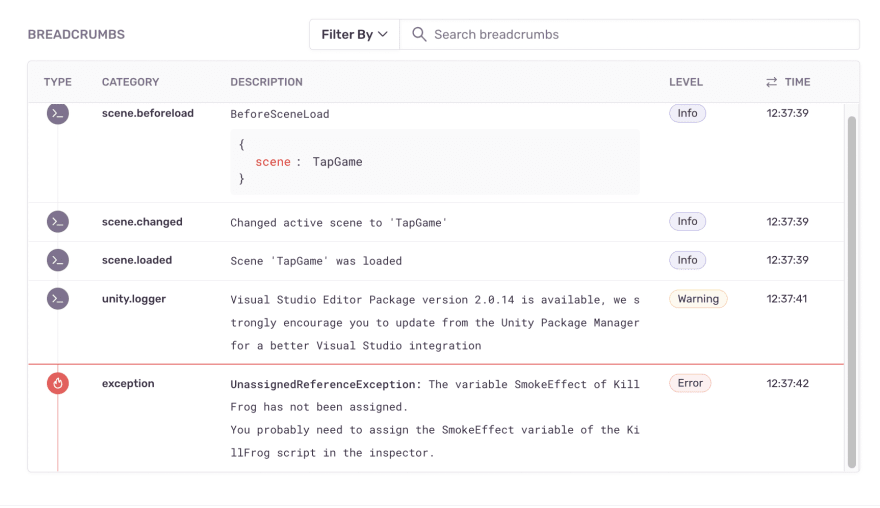
As you can see, the frog is destroyed but there is no explosion effect and we get an error in the console, an Unassigned Reference Exception.

We can open up Sentry to see all the context for this error. Since we don’t sit at our desk all day waiting for errors to occur, we can set up alerts to show errors based on criteria (like how often they’re happening) and notifications to our email or Slackworkspace.
From the issues tab, you will find you have an unresolved issue.

The issue is “Unassigned Reference Exception”. Let’s open the error page and dive in.
When you arrive on the error page, you will find the name of your project, the error type, then a few buttons.
Resolve: closes out the issue when you resolve it
Ignore: If you want to ignore this issue (perhaps we’re already aware of it, or it’s noisy and we need to edit our criteria for when we’re alerted about this particular error)
Mark reviewed: If you’ve already reviewed this issue.
Delete (icon): you can delete this issue without solving it, but of course this error will be created again if the issue happens again.
Share: Get a link to share it with colleagues, or publicly
Open in Discover: You will need a business plan for this feature. You can start a 14 day trial to utilize Discover.

Then you have the exception section where we can see the error type and what went wrong. For example, here, we see exactly why this error occurred and what we need to do to fix it.
- The error: “The variable SmokeEffect of KillFrog has not been assigned.”
- How to fix it: “You probably need to assign the SmokeEffect variable of the KillFrog script in the inspector.”
Then it gives more details on the error: The error happened at line 28 in the KillFrog.OnMouseDown function when we tried to instantiate.

Below that we see the breadcrumbs, which shows us what happened leading up to the error occurring.
Along the right hand side in Sentry, as shown in the image below, we are provided with additional context about this error.

At the top, we see “Ownership Rules”, which are used when you have a team so that issues can be automatically routed to the right person to resolve the issue. Next, you will notice “first seen” and “last seen” times to give you a quick understanding of how long ago, and how recently, this issue has occurred. If you want to connect Sentry to your issue tracking tool, like JIRA, you can do so here (as well as in Settings). Below that are tags related to this issue which provide even more context (what devices or operating systems are experiencing this particular error? Which release(s) is the error showing up in?). And finally, which team members are already participating/working on this issue.
In summary, Sentry is providing us with a lot of context about the issue.
We can fix the issue by assigning the explosion prefab in the inspector and resolving it (clearing it out) in Sentry. Again, as mentioned above, if we want to set up a specific alert for if/when this error occurs again, we can manage our alerts to get notified when certain error criteria that set is met.
Conclusion
Thank you for reading and I hope you learned more about the Unity & Sentry platforms. Stay tuned for the next article where we will continue developing our exploding frog game.

Top comments (0)