Introduction
MySQL Workbench is a unified visual tool for database architects, developers, and DBAs. MySQL Workbench provides data modeling, SQL development, and comprehensive administration tools for server configuration, user administration, backup, and much more.
Today we are going to install it on macOS.
Prerequisites
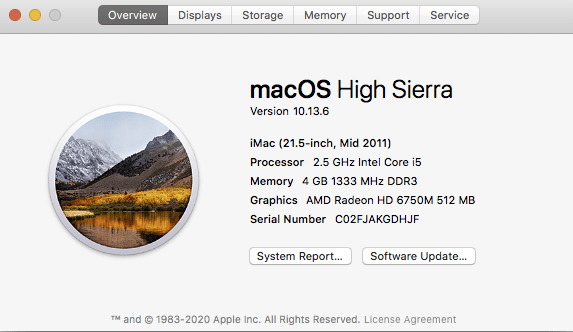
First of all, you have to check your macOS version. From the Apple menu in the corner of your screen, choose About This Mac. You should see the macOS name, such as macOS Mojave, followed by its version number. If you need to know the build number as well, click the version number to see it.
Installation
1. Download
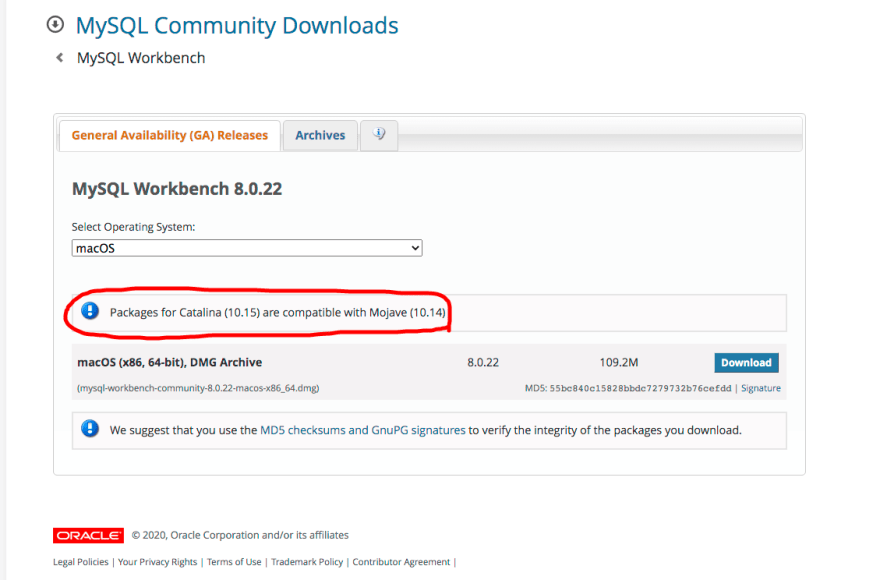
First of all, we have to download it. Click here to download. You will see a page like this.
Please verify that the version of your Workbench is compatible with the version of your system.
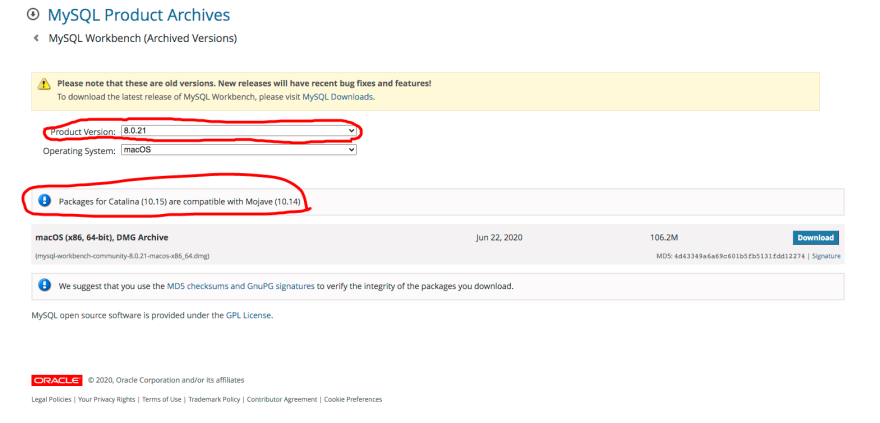
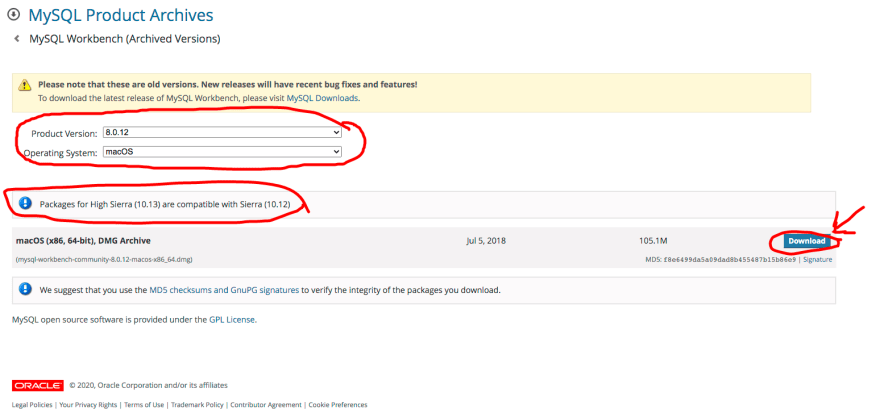
If not, please click on the “Archives” tab. Keep changing the version until the “Product Version” fits with the “version of your system.”
For my own, it’s the version “8.0.12” who is compatible with my macOS version. After click on the “Download” button.
Installation
After downloaded, we need to install it.
First of all, we need to locate our file in the “Downloads” folder.
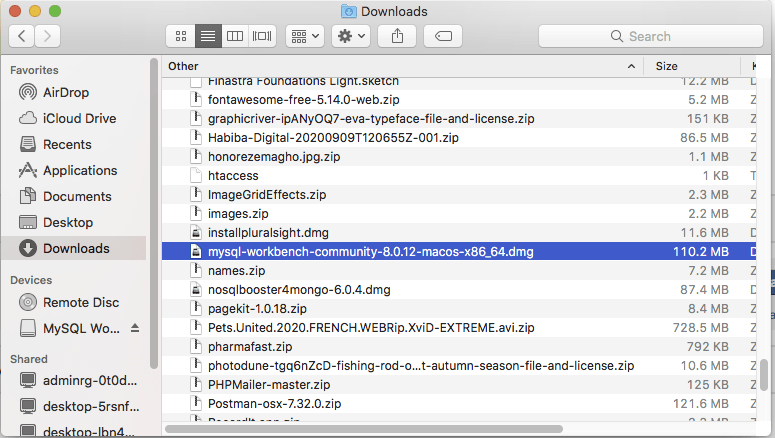
After “double click” on the file, just wait until you see this screen.
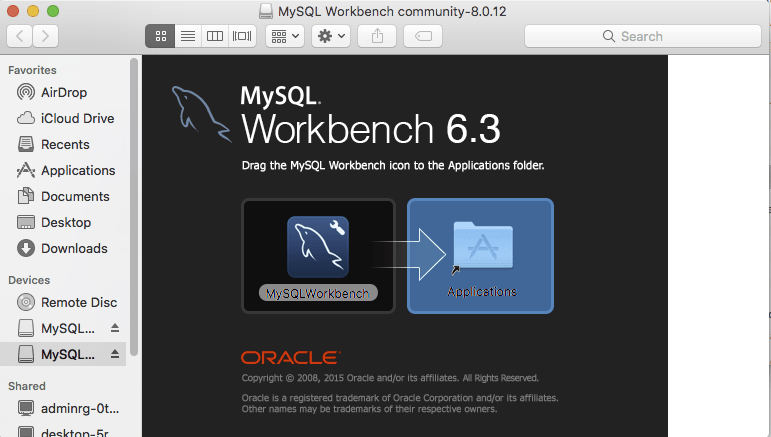
Now, we need to drag the Mysql workbench and drop inside the Applications folder.
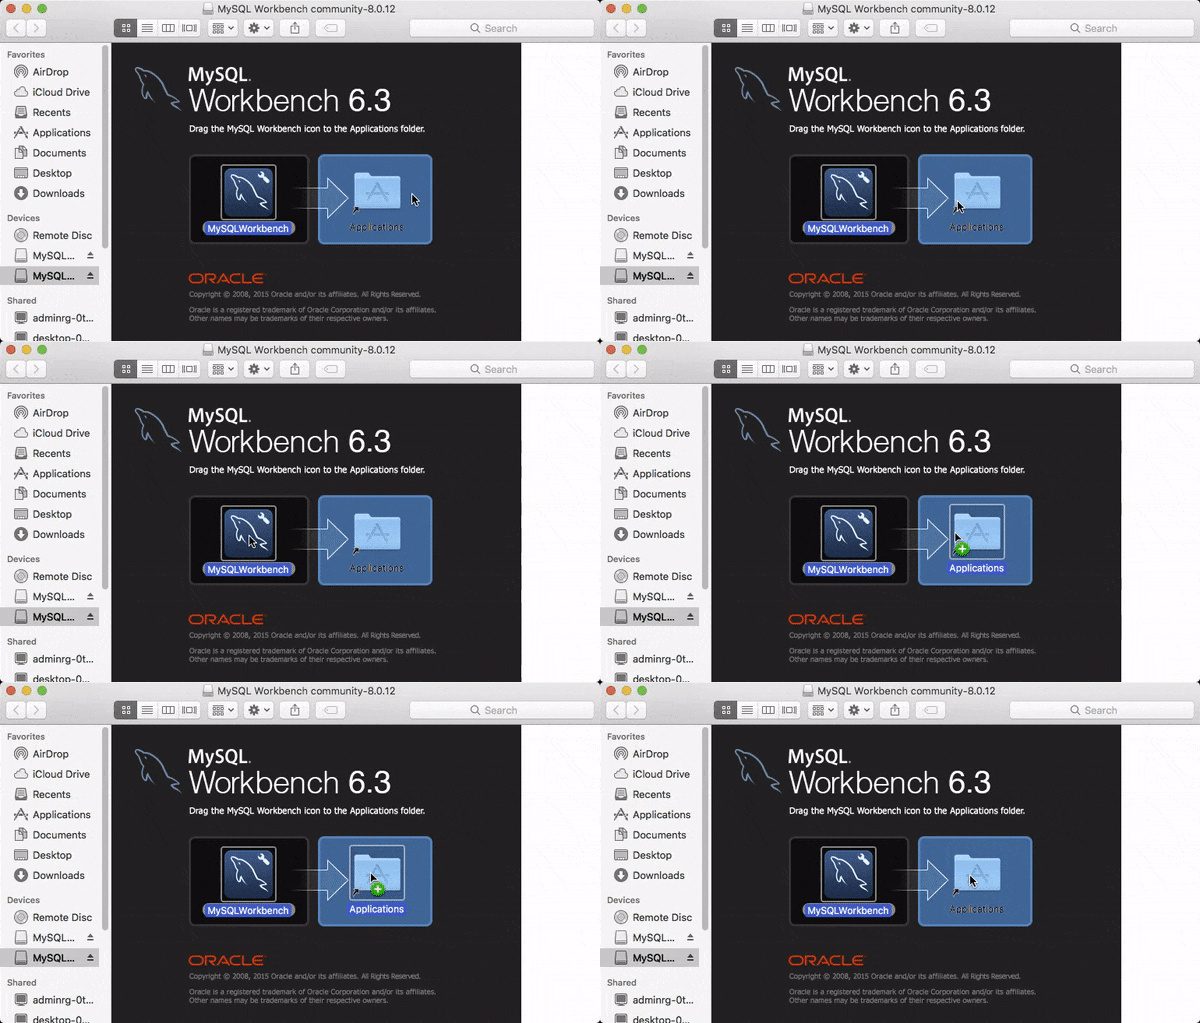
After it will start copying into the Applications folder. Just wait until it finished.

When it's done, you have successfully install “MYSQL Workbench”.
Congratulations.



Latest comments (0)