
Web applications are application program that are stored on a remote server and delivered over the internet through the use of browser interface. it offers great advantages to the developers and the users among them are accessibility which means they can be accessed from any browser provided there is internet availability.
Azure CLI offer great advantage than the normal GUI version of azure in that it is faster to create web applications provided the commands are well understood.
The first step is to login to azure CLI portal provided you have pushed your code from git bash to Git hub.
Open powershell from your window desktop, login to azure cli by using this command az login as shown in the image below

the next step is to create resource group for the web app and you select the location you want use as your resource group, this is done by using the command az group create --name kennolakrg --location uksouth the image below show the command

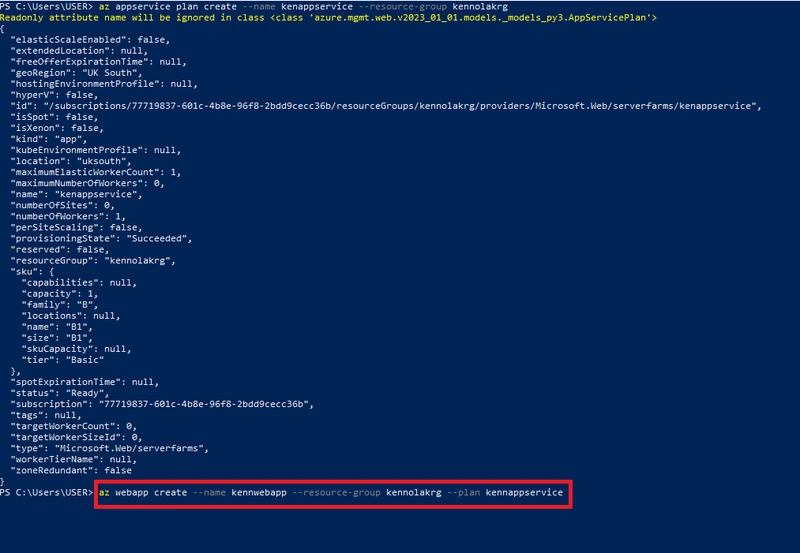
After creating our resource group the next thing is to create a app service plan for the web app we want create by using the command
*az appservice plan create --name kennappservice--resource-group kennolakrg* and press enter after this it will show succeded

After creating an app service plan the next thing is to create the web app by using the following command:
az webapp create --name kennwebapp --resource-group kennolakrg --plan kennappservice this is depicted by the diagram below
The next thing to do is to confirm the creation of the web app on the azure portal, and click app service this is shown by the diagram below

Once this has been confirmed on the azure portal the next action is to go login to your git hub account and copy your url and ensure that your repository is in public this is done on settings aspect of the git hub as shown in the diagram below

After that go to the powershell to paste the url you have copied from the github and deploy the web app by using the following command:
az web deployment source config --name kennwebapp --resource-group kennolakrg --repo-url https://github.com/kennolak/kenapp.git --branch master --manual-integration

Once you have the app running go back to the azure portal and click on your web app after which you click on your default domain
it will display your pushed code

once you have the code go back to azure gui portal and click on deployment centre under
this you see all the attribute you have built also you can click on logs to check the commit message this is shown in the diagram below

After you are done, ensure you tidy up your azure environment to avoid unexpected billing by deleting at the resource group level

Top comments (0)