
Written by Pelumi Akintokun✏️
The CSS :where() function is the newest kid on the pseudo-class block. It takes in a list of selectors as arguments and minifies them, allowing you to write less code and at the same time style them all together.
In this tutorial, we’ll introduce the :where() pseudo-class function and show how it can be used in production. We’ll discuss stacking, specificity, and forgiving in relation to the :where() function, and we’ll also look at some specific use cases.
Let's dive in!
What is CSS :where()?
According to MDN, :where() is a CSS functional pseudo-class selector that takes in a list of selectors as an argument and applies the given styles to any element from that list. :where() is very useful for making a long selector list shorter.
In CSS, when multiple elements have the same style rules applied to them at the same time, we often end up writing a long list of selectors separated by commas.
Here’s an example in which we apply the same style to all <a> tags found inside a header, main element, and footer element:
header a:hover,
main a:hover,
footer a:hover {
  color: green;
  text-decoratíon: underline;
}
There are only three elements that we are selecting in the above code snippet, but with a larger number of elements and selectors, the code will begin to look untidy and may become difficult to read and understand.
This is where the :where() pseudo-class function comes into play.
Here’s how the above example would look using the :where() function:
:where(header, main, footer) a:hover {
  color: red;
  text-decoratíon: underline;
}
Let’s take a closer look at how this code works.
When the browser gets to the code snippet, the code directs the browser to look for header, main, and footer selectors and target all the anchor tags in those selectors. Then, when a user hovers over any of those anchor tags, the browser should apply the specified styles (in this case, red and underline).
This pseudo-class function gives us the luxury of writing a long selector list in such a way that is shorter and more readily understandable.
Combining, dividing, and stacking the :where() function
With the :where() function, we can group elements in several ways and combinations. We can place the :where() function at the beginning, middle, or end of the selector.
Here’s an example with multiple selectors and styles:
/* first list */
header a:hover,
main a:hover,
footer a:hover {
  color: green;
  text-decoratíon: underline;
}

/* second list */
article header > p,
article footer > p{
  color: gray;
}

/* third list */
.dark-theme button,
.dark-theme a,
.dim-theme button,
.dim-theme a{
  color: purple;
}
Here’s the same code, rewritten with the :where() function:
/* first list */
/* at the beginning */
:where(header, main, footer) a:hover {
  color: red;
  text-decoratíon: underline;
}

/* second list */
/* in the middle */
article :where(header, footer) > p {
  color: gray;
}

/* third list */
/* at the end */
.dark-theme :where(button, a) {
  color: purple;
}
In the first list, we specify that the red and underline styles should be applied to the header, main, and footer elements on hover.
In the second list, we specify that the article, header, and footer elements should be styled with gray.
We divided the third list into two :where() functions for better clarity. In this list, we specify that the button and a element should be styled with the .dark-theme, .dim-theme, and purple.
Now, let’s further simplify the functions in the above list:
/* at the end */
.dim-theme :where(button, a) {
  color: purple;
}
Next, we’ll even further reduce these functions, morphing them into one :where() function:
/* stacked */
:where(.dark-theme, .dim-theme) :where(button, a) {
  color: purple;
}
This strategy for reducing a complex selector list is referred to as stacking.
Specificity and the :where() function
Specificity is what browsers look at to determine what CSS property values or styles should applied to a particular element.
The specificity of the CSS :where() function is always zero. Therefore, any element that is targeted with this function automatically gets a specificity of zero, as well. This gives us the power to easily nullify the style of any element we want while reducing its specificity to zero.
Here’s an example with HTML ordered lists:
<div>
  <h2>First list no class</h2>
  <ol>
    <li>List Item 1</li>
    <li>List Item 2</li>
  </ol>
</div>
<div>
  <h2>Second list with class</h2>
  <ol class="second-list">
    <li>List Item 1</li>
    <li>List Item 2</li>
  </ol>
</div>

<div>
  <h2>Third list with class</h2>
  <ol class="third-list">
    <li>List Item 1</li>
    <li>List Item 2</li>
  </ol>
</div>
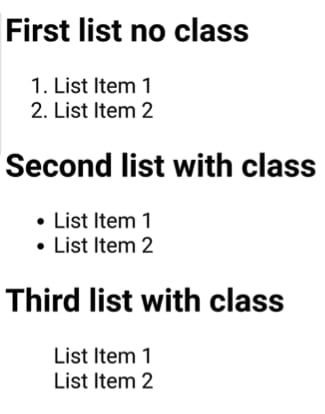
In the above code snippet, there are three ordered lists with two items in each list. The second and third lists have a given class, whereas the first list does not.
Without any styling, we can see that each list is ordered numerically:

Now let's add some styling:
:where(ol[class]) {
  list-style-type: none;
}
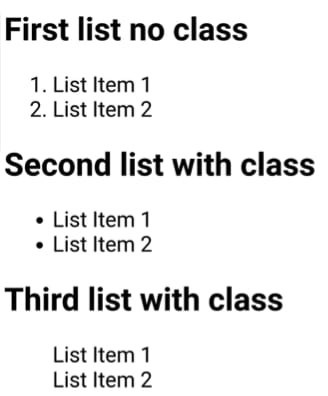
In the above snippet, we use the :where() pseudo-class function to select all <ol> tags that have a class applied.
Below, we see that the second and third lists, which both have a class, were targeted with the :where() function and had their list style type removed:

Now, let's add some additional styling:
:where(ol[class]) {
  list-style-type: none;
}

.second-list {
  list-style-type: disc;
}
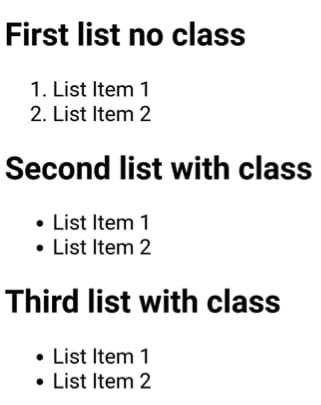
Targeting only the second list using its class name, we can see that it is now displayed with bullet points while the third list still has no list style type:
You might be wondering, “But, isn’t that how it's supposed to be, seeing as the new styling is written below the :where() function styling?" No, it's not, and we’ll see that in a moment.
Let’s see what happens when we move the code we just added to the top of the code block and move the :where() function portion to the bottom:
.second-list {
  list-style-type: disc;
}

:where(ol[class]) {
  list-style-type: none;
}
Notice that the styling still doesn't change:
Remember, the :where() function has zero specificity. Regardless of whether the new code is placed before or after the :where() function snippet, the specificity of the element targeted with :where() will become zero and its stylings will be nullified.
To illustrate this further, let's add the second list’s stylings to the third list, following the :where() function in the code.
.second-list {
  list-style-type: disc;
}

:where(ol[class]) {
  list-style-type: none;
}

.third-list{
  list-style-type: disc;
}
Both the second and third list are displayed with bullet points, irrespective of code placement:
Now let's look at how the CSS :where() function will react if one of the elements is targeted with an invalid selector.
Forgiving and the :where() function
CSS is generally considered to be non-forgiving with regard to selector lists. If a browser does not recognize just one selector in a list, the entire list of selectors will be considered invalid and their styling will not be applied.
But, this is not the case with the :where() pseudo-class function.
If an element in a :where() function is targeted with an invalid selector, that element will not get any styling. The rest of the elements will still get styled. The :where() function will just skip over the invalid selector to the next (valid) selector. This is why :where() is known as a forgiving selector.
In the below example, :unsupported is an invalid selector for many browsers. The below code above will be parsed correctly and will still match the :valid selector, even in browsers that don't support the :unsupported selector:
:where(:valid, :unsupported) {
  ...
}
However, the following code will be ignored in browsers that don't support the :unsupported selector, even if they support the :valid selector:
:valid, :unsupported {
  ...
}
Special use cases for the :where() function
The :where() function can be a useful tool in some special use cases, but there are also some instances in which it should be avoided. Nearly all setbacks that occur when using the :where() pseudo-class function come down to specificity. Because :where() has zero specificity, we need to be very careful about where and when to use this function.
First, let’s look at a few use cases in which :where() can be particularly helpful.
Improving CSS reset
A CSS reset refers to loading a set of style rules prior to any other styles in order to clear the browser’s inbuilt styles. CSS resets are usually placed at the top or start of the CSS stylesheet so that they load first. Developers often use them to remove the default stylings given by the browser to several elements initially, before they start actually styling their elements and websites. CSS resets can also help remove inconsistencies between different browsers.
CSS resets are temporary stylings, that would change later on in the styling process. But, depending on the simplicity or complexity of the selectors of an element or group of elements used in the CSS reset, it may be difficult to override the initial stylings later on in the code.
For example, let’s say we target all anchor tags on the website and style them in green. Then, we later decide to style all footer anchor tags in gray.
The new (gray color) style does not get applied due to the complexity of its selection in the CSS reset. The selector in the reset has a higher order of specificity than the selector used later in the code to target just the footer anchor tags, so the gray color style is not applied.
Now, if we add the :where() pseudo-class function to the CSS reset, this automatically gives all elements in the reset a specificity of zero. This makes it easier for us to change the styles later on without having to worry about specificity conflicts.
Removing styling
The :where() function can be useful if we want to remove or nullify the styles or reduce the specificity of an element or set of elements. The change will occur at the point that we place it in our code, almost like a “mini reset”.
Minifying
Shorter code is easier to read and debug. A good rule of thumb is to examine any code that has more than two commas or three list items to see if it could be minified using the :where() function. This is also a helpful strategy for combinations of two or more selectors (for example, section > header > p > a).
Now, let’s look at a use case in which the :where() function should be avoided.
Maintaining styling
If it is important to ensure that the styling or specificity of an element or set of elements does not change at any point in the future, do not use the :where() pseudo-class. The styling and specificity of any element targeted with this selector will be nullified.
Conclusion
The CSS :where() pseudo-class function is very useful for improving CSS resets, removing styling at any point in our code, and making our code easier to read and debug.
In this article, we demonstrated how the :where() function can be used in production and examined several use cases.
What are your thoughts on this new CSS selector? Can you think of any other instances in which it would be useful?
Is your frontend hogging your users' CPU?
As web frontends get increasingly complex, resource-greedy features demand more and more from the browser. If you’re interested in monitoring and tracking client-side CPU usage, memory usage, and more for all of your users in production, try LogRocket.

LogRocket is like a DVR for web and mobile apps, recording everything that happens in your web app or site. Instead of guessing why problems happen, you can aggregate and report on key frontend performance metrics, replay user sessions along with application state, log network requests, and automatically surface all errors.
Modernize how you debug web apps — Start monitoring for free.

Latest comments (0)