In the first part of this article, we were able to design the UI for our Note App and also implemented the Create and Read operations of our app.
Let's take it a step further by implementing the Update and Delete operations.
Let's get started!
Create a new view controller and name it NoteDetailViewController; Again, make sure not to check “Also create XIB file” option.
This will display the note and also allow us edit it.
Now let’s give our view controller’s main view a colour of .systemBackground as follows.
view.backgroundColor = .systemBackground
Now let’s add the UI Views for our note. The NoteDetailViewController will look a lot like the AddNoteViewController but with some additional components.
Let’s add the title text field as an anonymous closure:
    private var titleField: UITextField = {
        let field = UITextField()
        field.textColor = .label
        field.font = UIFont.systemFont(
                      ofSize: 22, weight: .medium)
        return field
     }()
Also add the body text view as an anonymous closure:
    private var bodyTextView: UITextView = {
        let view = UITextView()
        view.font = UIFont.systemFont(ofSize: 18)
        view.textColor = .label
        view.clipsToBounds = true
        return view
    }()
Now let’s add the views as subviews to the controller's main view and define their frames by overriding the viewWillLayoutSubviews.
    override func viewWillLayoutSubviews() {
        super.viewWillLayoutSubviews()
        view.addSubViews(views: titleField, bodyTextView)

        titleField.frame = CGRect(
                           x: 12,
                           y: 120,
                           width: view.width - 24,
                           height: 44)
        bodyTextView.frame = CGRect(
                           x: 8,
                           y: titleField.bottom + 8,
                           width: view.width - 16,
                           height: view.bottom - 220)
    }
Note let’s create a public note property in our NoteDetailViewController as follows:
var note: Note?
Remember the NoteDetailViewController displays the detail of a selected note in the NotesViewController, that means it expects that a note object will be passed to it when you tap on a note from the list of notes in the NotesViewController.
Now, in our viewDidLoad, let's set value to our titleTextField and bodyTextView as follows:
    if let note = note {
        titleField.text = note.title
        bodyTextView.text = note.body
    }
Because the note property is nullable, we check if it's not null to use it.
Great job!
Now let's go back to our NotesViewController class to handle selecting a note to view it's detail.
Now we’ll implement the collectionView delegate method didSelectItemAt indexPath as follows:
    func collectionView(_ collectionView: UICollectionView,
           didSelectItemAt indexPath: IndexPath) {

        guard let note = self.dataSource.itemIdentifier(for:
               indexPath) else {
            collectionView.deselectItem(
               at: indexPath, animated: true)
            return
        }

        let noteVC = NoteDetailViewController()
        noteVC.note = note

        navigationController?.pushViewController(
               noteVC, animated: true)
    }
Because we’ve implemented our collection view with a diffable datasource, to get the element at indexPath, we call the itemIdentifier of the dataSource and pass it the indexPath.
Now when we build and run, we should see something like the following:
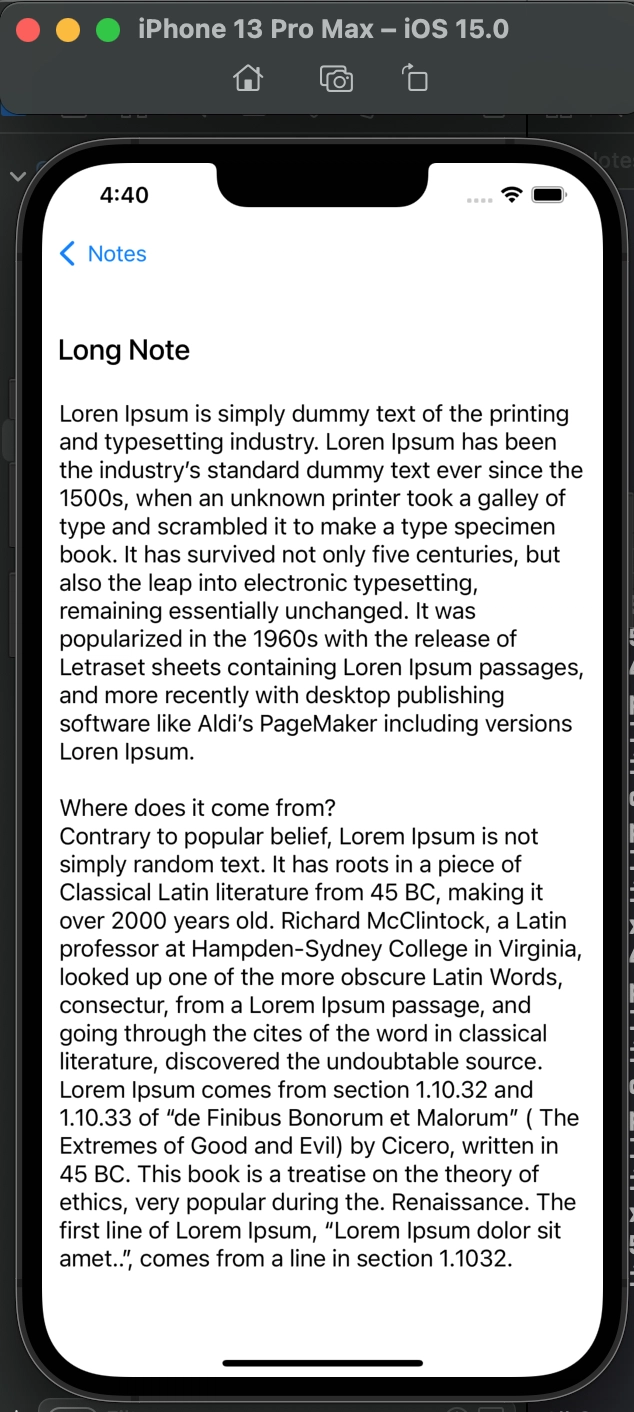
Great Job!
UPDATE MANAGED OBJECT
Not that we’ve been able to create and read from Core data, let’s proceed to update.
Remember that our NoteDetailViewController, like the AddNoteViewController also uses UITextField for Title and UITextView for the body of our notes.
Thus, let’s set the NoteDetailViewController as the delegate for the titleTextField and the bodyTextView. This will allow us to be able to watch for changes.
Add the following snippet to viewDidLoad in the NoteDetailViewController:
    bodyTextView.delegate = self
    titleField.delegate = self
This will immediately tell us to conform to the UITextViewDelegate and the UITextFieldDelegate protocols
Add the following at the bottom outside of the class definition:
extension NoteDetailViewController: UITextViewDelegate,
     UITextFieldDelegate {
}
Remember we created some convenience properties and method as extensions to the UIView, let do the same for String.
Add the following snippet to your Extensions.swift file:
extension String {
   func trim() -> String {
      self.trimmingCharacters(in: .whitespacesAndNewlines)
   }
}
This is a shorthand version of the standard trimmingCharaters(:) String method.
Thanks to Swift, we can leave out the return keyword for a single line statement.
In a note app, we want the app to trigger and update when the title field detects that the title has changed and the body text view to update the body content when the that changes as well.
To help us achieve this, we’re going to be implementing the textFieldDidEndEditing delegate method of the UITextFieldDelegate protocol and the textViewDidEndEditing method of the UITextViewDelegate.
Add the following inside the NoteDetailViewController extension we just added at the bottom:
extension NoteDetailViewController: UITextViewDelegate,
    UITextFieldDelegate {

    func textFieldDidEndEditing(_ textField: UITextField) {

    }

    func textViewDidEndEditing(_ textView: UITextView) {

    }
}
Note let’s add a property name appDelegate to the NoteDetailViewController just below the note declaration as follows:
let appDelegate = UIApplication.shared.delegate as! AppDelegate
Now, inside our textFieldDidEndEditing delegate method, we want core data to update the title when the title text field detect a change and the user has ended editing.
Add the following snippet:
        resignFirstResponder()
        guard let note = self.note else { return }
        if textField == titleField &&
               titleField.text!.trim() != note.title {

            let managedContext =
                 appDelegate.persistentContainer.viewContext
            note.title = titleField.text!.trim()

            do {
                try managedContext.save()
            } catch let error as NSError {
                fatalError("\(error.userInfo)")
            }
        }
Also inside the textViewDidEndEditing delegate method, to update the body, add the following:
        resignFirstResponder()
        guard let note = self.note else { return }
        if textView == bodyTextView &&
                 bodyTextView.text.trim() != note.body {

            let managedContext =
                 appDelegate.persistentContainer.viewContext
            note.body = bodyTextView.text

            do {
                try managedContext.save()
            } catch let error as NSError {
                fatalError("\(error.userInfo)")
            }
        }
Notice that we have to first check if the changes is not the same with the content of the note title or the body before persisting changes.
Note let’s build and run.
We’ve now implemented Update.
DELETING MANAGED OBJECT
Now let’s implement the Delete operation. To do so, let’s go back to our NotesViewController.
Remember that we used UICollectionLayoutListConfiguration (i.e List Layout) which gives us a similar view as a UITableView.
In order to be able to swipe to delete as in the case of UITableView, we need to add Swipe action to our List layout configuration. Now go inside the private method named createLayout and add the following snippet just before the return statement:
config.trailingSwipeActionsConfigurationProvider = {
        indexPath in

    let deleteAction = UIContextualAction(
           style: .destructive, title: "Delete") {
         [weak self] action, view, completion in

       self?.deleteItem(at: indexPath)
       completion(true)

    }
    return UISwipeActionsConfiguration(
                          actions: [deleteAction])
}
You could also create one for the leadingSwipeActionsConfigurationProvider if there’s need for that.
Now we need to create a method called deleteItem(at:). So add the following snippet:
private func deleteItem(at indexPath: IndexPath) {
   guard let appDelegate = UIApplication.shared.delegate
                  as? AppDelegate else { return }

   let managedContext =
             appDelegate.persistentContainer.viewContext

   let note = self.dataSource.itemIdentifier(for: indexPath)
   guard let note = note else { return }

   managedContext.delete(note)

   do {
       try managedContext.save()
       var snapshot = dataSource.snapshot()

       snapshot.deleteAllItems()
       snapshot.appendSections([.main])
       dataSource.apply(snapshot)

       fetchNotes()
       updateCollectionView()

   } catch let error as NSError {
       fatalError("\(error.userInfo)")
   }
}
In the method above, first we get a managedContext from the persistent container in the AppDelegate. Then we find the note at the swiped indexPath.
Then we passed the note to the delete method of the managed context. Finally and importantly, we called the save() method on the managedContext to commit the actual deletion.
Now to update our UI (i.e remove the deleted from snapshot), we had to clear the snapshot, reassigned the main section before fetching and updating the CollectionView.
Now let’s build and run again. If everything is fine, we should be able to swipe a cell and see it deleted when the delete action button is tapped.
We've come to end of the project. The complete source code can be found here.

Latest comments (0)