
Installing RabbitMQ
RabbitMQ can be installed and used in multiple ways:
- Installation on the local machine
- Creating instances of RabbitMQ using Cloud AMQP
- Running a RabbitMQ container using Docker
- The simplest way is to use a Docker container for RabbitMQ.
Start RabbitMQ Server (for Windows Users)
- Start Docker Desktop.
- Open the PowerShell in Windows in administrator mode.
- Start the server by running the Docker container using the command.
docker run -it --rm --name rabbitmq -p 5672:5672 -p 15672:15672 rabbitmq:3.10-management
- Type http://localhost:15672 in the browser to log into the RabbitMQ server.
- Use guest/guest as credentials to log into the server console

Start RabbitMQ Server (for Linux Users)
- Start the server by running the Docker container using the following command:
docker run -it --rm --name rabbitmq -p 5672:5672 -p 15672:15672 e RABBITMQ SERVER ADDITIONAL ERL ARGS=' –

rabbit loopback_users "none"' rabbitmq:3.10-rc-management
- Enter http://localhost:15672 in the browser to log into the RabbitMQ server.
- Use guest/guest as credentials to log into the server console.
Implementing Messaging using RabbitMQ
Pub-Sub Microservices
- The UserMovieService manages all the operations of adding a favorite movie to the user's watch list.
- This will act as the publisher that will send notifications to the user if there are unwatched movies in the user's favourite list.
- The NotificationService will read the messages from the queue and display the notifications to the user.
Publisher Microservice
Steps to configure a microservice to publish messages onto RabbitMQ:
- Add the dependencies to the pom.xml of the parent
- Define configurations of exchange, queue, and binding to connect to RabbitMQ.
- Build the domain object, also called as DTO, which will be sent to the queue.
- Write the data on the queue defined.
Step 1 : Add Dependencies
- Add the dependencies below to the pom.xml of the parent:
<dependency>

<groupId>org.springframework.boot</groupId>

<artifactId>spring-boot-starter-amqp</artifactId>

</dependency>

<dependency>

<groupId>com.googlecode.json-simple</groupId>

<artifactId>json-simple</artifactId>

<version>1.1.1</version>

</dependency>
- The spring-boot-starter-amqp provides all the dependencies required to connect to RabbitMQ and create a queue, send messages to the created queue, and receive messages from the queue.
- The json-simple dependency is used to convert the Java object to JSON so it can be sent to the queue.
Step 2 : Configurations
- Define configurations for exchange, queue, and binding to connect to RabbitMQ.
- The RabbitTemplate provides the classes necessary to declare a queue and send data to the queue.
- All the data will be converted as JSON.
- All the objects are managed by the Spring container, so it is declared with the @bean annotation.
@Configuration

public class MessageConfiguration {

  private String exchangeName = "movie-exchange";

  private String registerQueue = "movie.queue";

  @Bean

  public DirectExchange directExchange() {

    return new DirectExchange(exchangeName);

  }

  @Bean

  public Queue registerQueue() {

    return new Queue(registerQueue, durable: true);

  }

  @Bean

  public Jackson2JsonMessageConverter producerJackson2MessageConverter() {

    return new Jackson2JsonMessageConverter();

  }

  @Bean

  public RabbitTemplate rabbitTemplate(final ConnectionFactory connectionFactory) {

    RabbitTemplate rabbitTemp = new RabbitTemplate(connectionFactory);

    rabbitTemp.setMessageConverter(producerJackson2MessageConverter());

    return rabbitTemp;

  }

  @Bean

  Binding bindingUser(DirectExchange exchange, Queue registerQueue) {

    return BindingBuilder.bind(registerQueue()).to(exchange).with(routingKey: "movie-routing");

  }

}
Step 3 : Domain - DTO Object
Build the domain object (also known as DTO), which will be sent to the queue.
import org.json.simple.JSONObject;

public class MovieDTO {

private JSONObject jsonObject;

public MovieDTO() {}

public JSONObject getJsonObject() {

return jsonObject;

}

public void setJsonObject(JSONObject jsonObject) {

this.jsonObject = jsonObject;

}
The data with multiple fields can be put into the message queue as a JSON object.
Note that we can also send primitive datatypes to the queue as they are, without the need to build them as a JSON object.
Step 4 : Write to the Queue
- Publish the DTO object to the message queue.
- This is done using the RabbitTemplate object defined in the configuration as a bean.
- The convertAndSend method pushes the DTO object into the queue using a routing key.
- This is done in the service layer of the UserMovieService.
public List < Movie > getAllUserMovies(String email) throws UserNotFoundException {

  if (userMovieRepository.findById(email).isEmpty()) {

    throw new UserNotFoundException();

  }

  MovieDTO movieDTO = new MovieDTO();

  List < Movie > movies = userMovieRepository.findById(email).get().getMovieList();

  List < Movie > notWatchedMovies = new ArrayList < > ();

  for (Movie: movies) {

    if (!m.isWatched()) {

      notWatchedMovies.add(m);

    }

  }

  JSONObject jsonObject = new JSONObject();

  jsonObject.put("notWatched Movies", notWatchedMovies);

  movieDTO.setJsonObject(jsonObject);

  rabbitTemplate.convertAndSend(exchange.getName(), "movie-routing", movieDTO);

  return movies;

}
The RabbitMQ Console

The message remains in the queue until it is consumed.
The Subscriber Microservice
Steps to create the subscriber service:
- Define configurations of exchange, queue, and binding to connect to RabbitMQ.
- The subscriber must know which queue to connect to, so we will define them in the configuration class.
@Configuration

public class MessageConfiguration {

  private String exchangeName = "movie-exchange";

  private String registerQueue = "movie.queue";

  @Bean

  public DirectExchange directExchange() {

    return new DirectExchange(exchangeName);

  }

  @Bean

  public Queue registerQueue() {

    return new Queue(registerQueue, durable true);

  }

  @Bean

  public Jackson2JsonMessageConverter producer {

    Jackson2MessageConverter()

    return new Jackson2JsonMessageConverter();

  }

  @Bean

  Binding bindingUser(DirectExchange exchange, Queue registerQueue) {

    return BindingBuilder.bind(registerQueue()).to(exchange).with("movie-routing");

  }

}
Domain - DTO Object
Build the domain object, also known as DTO, which will store the information to be received from the queue.
import org.json.simple.JSONObject;

public class MovieDTO {

  private JSONObject jsonObject;

  public MovieDTO() {}

  public JSONObject getJsonObject() {

    return jsonObject;

  }

  public void setJsonObject(JSONObject jsonObject) {

    this.jsonObject = jsonObject;

  }
Read the Data From the Queue
In the service layer of the Notification service, save the data read from the queue in the database by setting the data to the Notification object.
@RabbitListener(queues = "movie.queue")

@Override

public void saveNotifications(MovieDTO movieDTO) {

  Notification notification = new Notification();

  String email = movieDTO.getJsonObject().get("email").toString();

  if (notificationRepository.findById(email).isEmpty()) {

    notification.setEmail(email);

  }

  notification.setNotificationMessage("The list of not watched movies");

  notification.setMovieNames(movieDTO.getJsonObject());

  notificationRepository.save(notification);

}
Dockerize the Microservices Using Docker Compose
- Write Docker files for each microservice with the necessary configurations.
- Define the docker-compose.yml file with all the services listed.
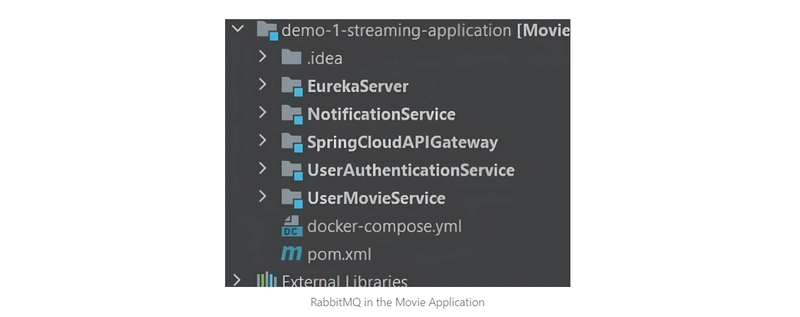
- The Docker configuration for RabbitMQ in the docker-compose.yml is shown in the image.

Output


Top comments (0)