Libraries like React and Vue have made the idea of reactive user interfaces commonplace over the past few years. However, building these types of applications can be quite challenging because you need to essentially develop two apps - the front-end UI and the back-end API... and you need to keep the state in sync.
Now, we can get all of that functionality without needing to worry about state syncing with just a few lines of code using Ruby on Rails 6, CableReady, and StimulusReflex.
Don't believe me?
Let's run through a quick exercise. You'll need a recent version of Ruby, and you'll need Ruby on Rails 6 installed, but that's it. We'll set up a simple CRUD app for managing todos. To make it more interesting, each todo will be a simple state machine that cycles through "not started", "in progress", and "complete".
Once you've got Rails set up, let's create a new app.
$ rails new todo_app
$ cd todo_app
Next, we'll set up a quick Rails scaffold. (Want to know more about scaffolds? Check out this video.)
$ rails g scaffold Todo name:string status:string
$ rails db:migrate
Let's also go ahead and run the Rails server.
$ rails s
If you visit http://localhost:3000/todos, you should see this:
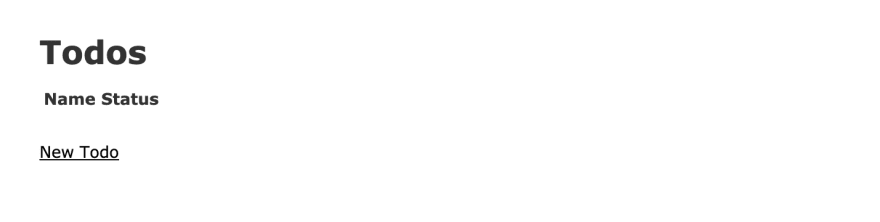
You can click through the interface and see that you can now create, update, and delete todo items.
We're going to make the status attribute into a simple state machine. Let's update our Todo model over in /app/models/todo.rb to look like this:
class Todo < ApplicationRecord

  validates :status, inclusion: {
    in: ['not-started', 'in-progress', 'complete']
  }

  STATUS_OPTIONS = [
    ['Not started', 'not-started'],
    ['In progress', 'in-progress'],
    ['Complete', 'complete']
  ]

  def transition
    update(status: next_status)
  end

  def next_status
    case status
    when 'not-started'
      'in-progress'
    when 'in-progress'
      'complete'
    when 'complete'
      'not-started'
    end
  end

  def display_next_status
    next_status.gsub('-', ' ')
  end

  def display_current_status
    status.gsub('-', ' ').capitalize
  end

end
(If you want to learn more about state machines, check out this short video.)
This code does a few things.
First, it validates that the data saved to the database is either "not-started", "in-progress", or "complete".
Second, it provides a next_status method that cycles through the list of possible statuses. It's not necessarily a great product idea, but it serves as an interesting demo.
Last, this code sets up a few helper methods for formatting some text in our views.
Next, let's make two changes to our views. First, let's update the todo form in /app/views/todos/_form.html.erb to look like this (omitting the error handling code):
<%= form_with(model: todo, local: true) do |form| %>
  <div class="field">
    <%= form.label :name %>
    <%= form.text_field :name %>
  </div>

  <div class="field">
    <%= form.label :status %>
    <%= form.select :status, Todo::STATUS_OPTIONS %>
  </div>

  <div class="actions">
    <%= form.submit %>
  </div>
<% end %>
Finally, let's change our index page in /app/views/todos/index.html.erb to look like this:
<p id="notice"><%= notice %></p>

<h1>Todos</h1>

<table>
  <thead>
    <tr>
      <th>Name</th>
      <th>Status</th>
      <th colspan="4"></th>
    </tr>
  </thead>

  <tbody>
    <% @todos.each do |todo| %>
      <tr>
        <td><%= todo.name %></td>
        <td><%= todo.display_current_status %></td>
        <td><%= link_to 'Show', todo %></td>
        <td>
          <%= link_to "Mark #{todo.display_next_status}", '#' %>
        </td>
        <td><%= link_to 'Edit', edit_todo_path(todo) %></td>
        <td>
          <%= link_to 'Destroy', todo, method: :delete, data: { confirm: 'Are you sure?' } %>
        </td>
      </tr>
    <% end %>
  </tbody>
</table>

<br>

<%= link_to 'New Todo', new_todo_path %>
If we go ahead and set up a couple of todo items, it should look something like this:

As you can see, we've got a couple of todos with statuses of "not started", and each one is prompting us to mark it as "in progress". Pretty cool, but id doesn't do anything yet.
Ready to make this reactive?
We're going to set up a couple of new tools. Back in your terminal, run the following commands (you'll need to stop your server first):
$ bundle add stimulus_reflex
$ bundle exec rails stimulus_reflex:install
With those libraries successfully installed, we should be able to run
$ rails generate stimulus_reflex Todos
This will set up a couple of files for us. The one we will be using is in /app/reflexes/todos_reflex.rb.
Hold that thought for a quick minute.
Let's update the <td> with the link to "Mark #{todo.display_next_status}" to look like this:
 <td>
  <%= link_to "Mark #{todo.display_next_status}", '#', data: {
    reflex: "click->TodosReflex#transition",
    id: todo.id
  } %>
</td>
This code is saying that on click, we should call a method called transition on the TodosReflex class.
So, we need to write that method.
Let's make our TodosReflex class look like this:
class TodosReflex < ApplicationReflex

  def transition
    todo = Todo.find(element.dataset[:id])
    todo.transition
  end

end
Now if you start your server and click on one of the "Mark in progress" links, you should see the page update instantly to look like this:

If you keep clicking, you should cycle through all of the statuses. Awesome!
Conclusion
With very little code, we've created a full-stack, reactive web application. Admittedly it's pretty simplistic.
If you want to get a bit deeper, check out this video. I'm building out a project management app from front-to-back, and it has a number of reactive, real-time components.

Latest comments (0)