In eCommerce, we usually see a product that has a bunch of different variations. For example, a T-shirt may have different colors along with different information such as size and price, then each one will be a variation.
Today, we are going to display them all in a clever way on the single product page. Whenever you click on a color button, all the corresponding information of that variation will be displayed, even in the image gallery.

To do that, we need some particular techniques. In this practice, we’ll use custom fields created by Meta Box. By the way, we do not use any theme, just Gutenberg here.
Before Getting Started
To add all of the extra information for variations, we need custom fields. So, the first tool on the list is Meta Box core plugin. This is the framework to create custom fields & custom post types. It’s free and available on wordpress.org. We also use some advanced features of Meta Box by using the following extensions:
- MB Custom Post Type & Custom Taxonomies: It’s a free extension of Meta Box to create custom post types.
- Meta Box Builder: This premium extension provides a UI in the back end to create custom fields easily.
- Meta Box Conditional Logic: It lets you show fields precisely as any rules you want.
- Meta Box Group: This extension helps you organize custom fields into repeatable and collapsible groups.
- MB Views: It helps you to create templates without touching the theme files as well as get the custom fields’ value and display them.
Video Tutorial
Step 1: Create a New Custom Post Type
Go to Meta Box > Post Types > New Post Type. After creating a new post type, you will see a new menu appears on your dashboard. It’s your new post type.

Step 2: Create Custom Fields
Go to Meta Box > Custom Fields > Add New.

We have a tutorial on how to create custom fields, you can refer to it for more information.
This is the structure of the fields that I’ll create.
| Field | Types of Field | ID |
| Does This Product Have Variations? | Switch | Does_this_product_have_variaitons |
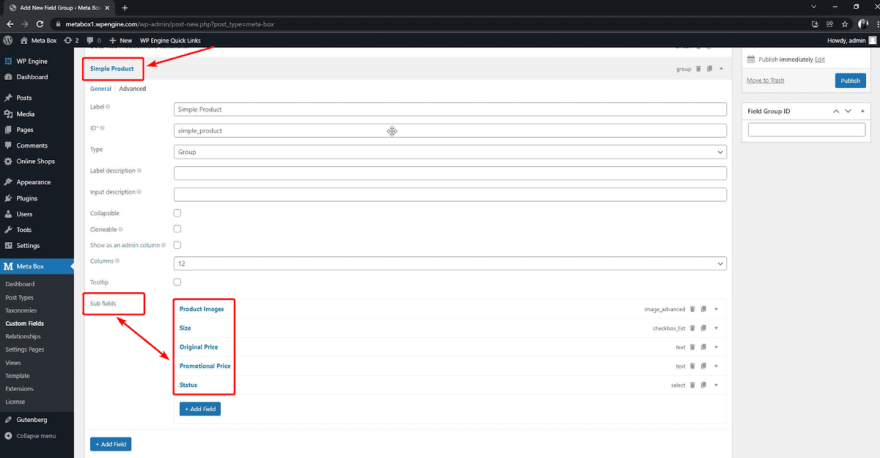
| Simple Product | Group | simple_product |
| Product Image | Image Advanced | product_image |
| Size | Checkbox List | size |
| Original Price | Text | original_price |
| Promotional Price | Text | promotional_price |
| Status | Select | status |
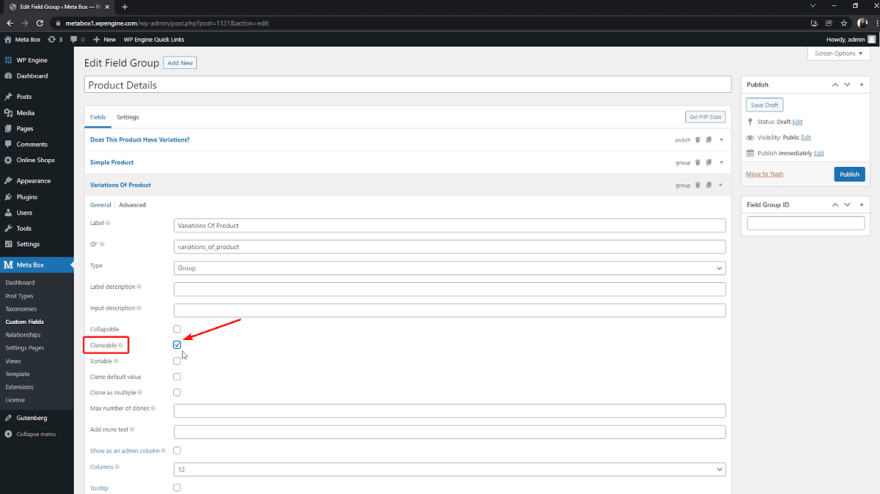
| Variations of Product | Group | variations_of_product |
| Product Image | Image Advanced | product_image |
| Size | Checkbox List | size |
| Original Price | Text | original_price |
| Promotional Price | Text | promotional_price |
| Status | Select | status |
| Color Name | Select | color_name |
As you can see here, I have a Switch field to confirm whether the product has variations or not. If your product doesn’t have any variation, it is a simple product, so the Simple Product group will be displayed for inputting data.
Then, there is some basic information that we put in that group with subfields inside.
If the product has any variations, the Variations of Product group will be displayed. This group also has subfields similar to the Simple Product group. In addition, it has an extra subfield inside to define the name of the variation which is Color Name.
To set the rule about when those groups display, we need to set rules in the Conditional Logic section in their Advanced Settings tab.
Just choose the key as the ID of the Switch field, and the value as 0 or 1. These values correspond to No and Yes options of this field.
 Set the conditional rule for Simple Product
0 is set for the Simple Product group field. So, when the Switch field is set to be No, this group will be displayed.
 Set the conditional rule for Variations of Product
Do likewise, 1 is set to the Variations of Product group field.
One more thing, there is usually more than one variation. Thus, we set the Variations of Product group as cloneable to have more spaces to add variations.
After having all the custom fields, go to the Settings tab of the field group, and choose the Location as the post type of the products that we’ve just created to apply the custom fields to it.

Back to the post editor, you will see all of the created custom fields.
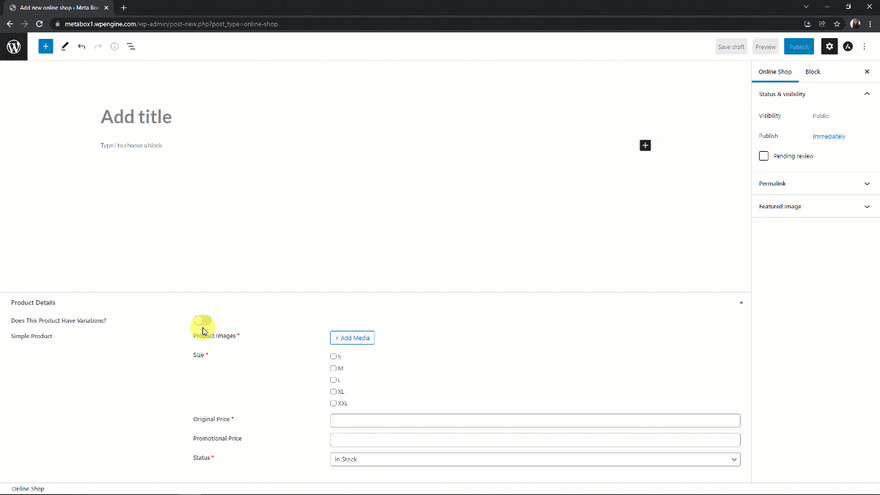
Now, just enter the information into the fields.
Step 3: Display the Product Variations Information on the Product Page
To display the product variations information on the product page, you normally have to go to the theme’s files to add code or use a page builder. But, in Gutenberg, you have another way with Meta Box. It has the MB Views extension to create templates without touching the theme’s files.
So, let’s create a new template using it.
Instead of typing code into the box in the Template tab, you can insert fields to get their data.

Just click the Insert Field button and choose which one you want.

It is necessary to edit the code a little bit when we insert fields. You can refer all code on the original post I put the link.
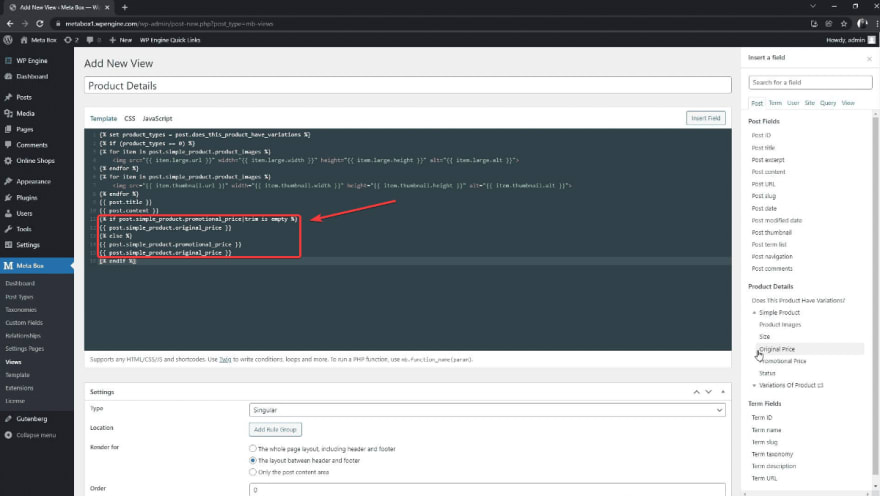
In there, product_types is the variable to admit the value of the Switch field. If it is 0, it means that the product has no variation. So, the next lines of code will get the value of the fields inside the Simple Product group. Otherwise, when the returned value is 1, the value of fields inside the Variations of Product group will be displayed.

Also in the code, I get the value from each Product Image field twice. One displays in the large size, and one in the thumbnail size. All of them will be used to set a slider.

These lines of code are to know when the product or variation has any promotion price and set a rule to display both of the original and promotional prices or just the original one.
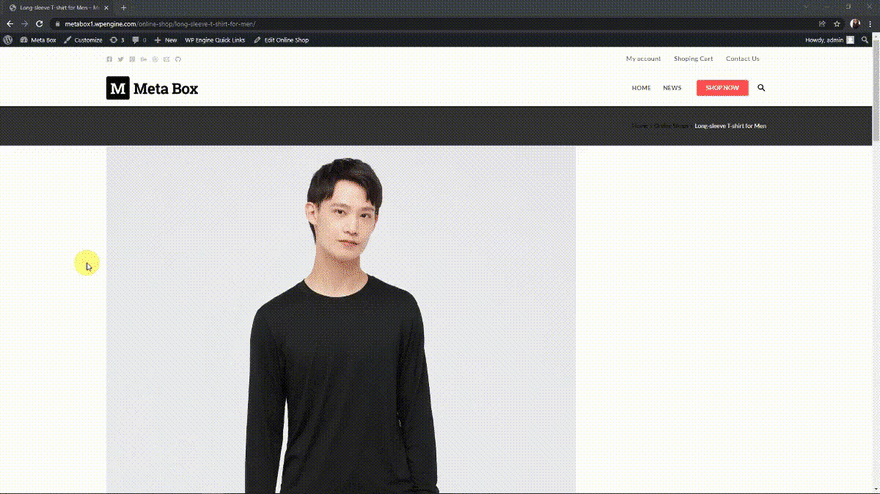
Next, move to the Settings section of the view. Assign this template to the single product page. And now, go to any single product page, see the result.

It is so messy now. So, we’ll need some JS and CSS to make it more beautiful with a better layout.
Before styling, we need to edit this template a little bit more. Back to the view, then add some div tags to divide elements into sections. I put the code on our Github, you can refer to it for more clarity.
There is a notice that I added an A tag in the place where I output the color of variations. I also created a dynamic class there. It will generate different classes using the color name.

I also added an attribute named data-id for price, size, status as well as the image gallery. This attribute will admit the value of the corresponding color name.

Back to the single product page, all the elements have been just reordered.

Let’s move to the next step.
Step 4: Set Rules to Display the Variations’ Information
As you see at the beginning of this video, the images of the product variations are in a slider and the information of each variation displays only when you choose the matching color. To have it, I use some JS and CSS. However, I’m using My Custom Functionality plugin instead of adding them directly to the theme. So, when I change the theme, it won’t be affected. You can download this plugin from GitHub and install it on your website.
Download the JS and CSS Library
For the JS and CSS, I use the Slick library. It’s also available on Github. It includes several files as you can see here. But, we just need three of them.

Go to the folder of the My Custom Functionality plugin. Upload them into the corresponding JS and CSS folders.

Create Custom JS for Slider and Rules
Next, to set a rule that stipulates for displaying the information of each variation as well as the slider, I’ll create a custom.js file in the js folder and add the following code to it.

Declare the JS and CSS Files
Now, add code inside the function custom_enqueue_files() in the plugin.php file.
wp_enqueue_style('slick', plugin_dir_url( __FILE__ ).'/assets/css/slick.css');
wp_enqueue_style('slick-theme', plugin_dir_url( __FILE__ ).'/assets/css/slick-theme.css');

wp_enqueue_script('custom', plugin_dir_url( __FILE__ ).'/assets/js/custom.js', ['jquery']);
wp_enqueue_script('slick-min', plugin_dir_url( __FILE__ ).'/assets/js/slick.min.js', ['jquery']);
wp_enqueue_script('script', plugin_dir_url( __FILE__ ).'/assets/js/script.js', ['jquery']);
Now, the product images have already turned into a slider but we cannot see all the information of each variation in the right place.
Step 5: Style the Product Page
Traditionally, you have to add CSS to the Customizer or the theme’s file. But, with MB Views, you have a CSS tab for it.

There are many classes I used in this code. You can refer to all of it on Github.
Now, back to a single product page, it turned into a new look. When you choose a color, the photo gallery will automatically change according to that color. At the same time, the sizes and prices also change correspondingly.

Last Words
As you see, displaying the product variations on the single product page with Meta Box and custom field is not something difficult. If you use another page builder, keep track of our blogs for more upcoming tutorials. If you are confused or have any ideas, let us know by leaving a comment. See you next blog!

Top comments (0)