I read this brilliant post by Ashley Broadley which explains how to set up a Spark cluster with docker compose. It inspired me to try out something a little bit different, to use different devices in the same LAN as nodes.
This post describes how to set up a cluster in Spark Standalone mode, which is easier in comparison to using other cluster managers.
Following devices were used as nodes:
- Worker 1: A PC running on Windows, with Docker installed.
- Worker 2: A PC running on Ubuntu, with Docker installed.
- Master: A Raspberry Pi 3 model B running on Raspbian.
Steps are pretty simple and straight forward. Here we go…
Setting up Spark in Raspberry Pi and starting the Master
I used SSH to log in to the Raspberry Pi and used it in headless mode just to avoid keeping another monitor and a keyboard. But if you don’t mind that, skip the SSH set up and continue with JDK installation on RPi terminal.
Setting up SSH server and opening up port 22
The SSH server of the RPi is not enabled by default. There are broadly two options for enabling it.
- Placing a ‘ssh’ file in the SD card from another machine.
- Using RPi desktop (Yes, for this you need to plug in a monitor once). RPi documentation explains these two options under 2, and 3.
To test the SSH connection, first find the IP address of the RPi using ifconfig. Then from another machine in the same network enter the command
ssh <username>@<ip address of the RPi>
If the IP address is correct and SSH server is running, you will get a prompt for the password. Type in the login password of the RPi for the user.
However, there are security issues involved with allowing remote login, even if you have set a password. This answer suggests that a key based authentication method should be used.
Installing JDK
Spark runs on Java. So, we need to have Java installed on the RPi. Yet, most RPis used today come with JDK installed on Raspbian. In that case, this step is not necessary. Otherwise, execute following commands from the RPi, to install the Java Runtime Environment.
sudo apt-get update

sudo apt-get install openjdk-8-jre
Installing Spark on the RPi and starting the master
From the Spark documentation:
To install Spark Standalone mode, you simply place a compiled version of Spark on each node on the cluster.
Execute following commands to install Spark.
wget https://downloads.apache.org/spark/spark-2.4.5/spark-2.4.5-bin-hadoop2.7.tgz

tar -xzf spark-2.4.5-bin-hadoop2.7.tgz && \

    mv spark-2.4.5-bin-hadoop2.7 /spark && \

    rm spark-2.4.5-bin-hadoop2.7.tgz
To start the master, use the following command:
/spark/bin/spark-class org.apache.spark.deploy.master.Master --port 7077 --webui-port 8080
This tells Spark to start a master and listen on port 7077, and also use port 8080 for displaying the web User Interface.
If everything goes well, you should see a bunch of logs running on the screen.
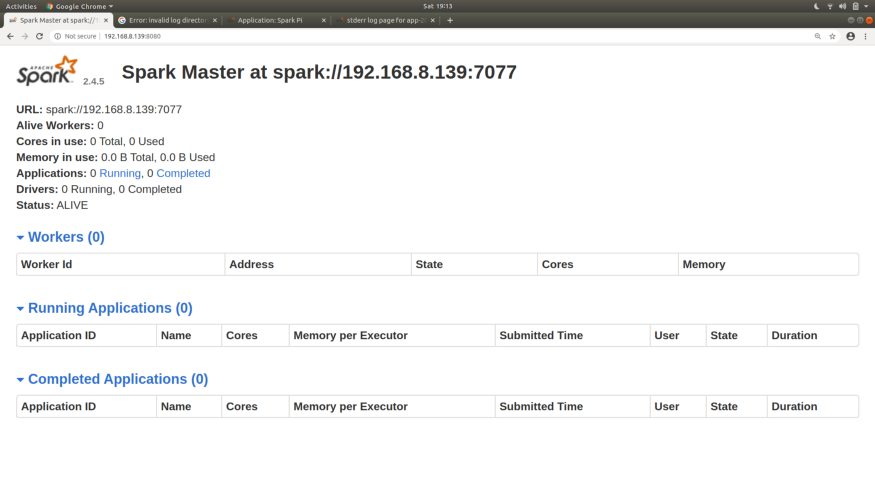
Also, you should be able to see the web UI of the master. If you have a monitor for the RPi, UI can be accessed at localhost:8080, or else point a browser to :8080on any other PC in the LAN.
Seems like the master is running fine. Lets fire up some workers and see what happens.
Starting the worker nodes using Docker
I used the same Dockerfile as in Ashley’s article, and updated the Spark download link. Here it is:
FROM openjdk:8-alpine
RUN apk --update add wget tar bash
RUN wget https://downloads.apache.org/spark/spark-2.4.5/spark-2.4.5-bin-hadoop2.7.tgz
RUN tar -xzf spark-2.4.5-bin-hadoop2.7.tgz && \
    mv spark-2.4.5-bin-hadoop2.7 /spark && \
    rm spark-2.4.5-bin-hadoop2.7.tgz
This will build a docker image with Java and Spark installed. Build the image, start the container, and open its shell using following commands:
Set the environment variable MYNAME by
MYNAME=<your name>
on Ubuntu Terminal or by
set MYNAME=<your name>
on Windows CMD. Also, you may need to execute following with sudo on Ubuntu.
docker build -t $MYNAME/spark:latest .

docker run -it --rm $MYNAME/spark:latest /bin/sh
Then start the worker on docker container with following:
spark/bin/spark-class org.apache.spark.deploy.worker.Worker --webui-port 8080 spark://<ip-of-master>:7077
This tells Spark to start a worker and connect it with the master at the given IP. Lets go back to the UI of the master:

Yes! The master has accepted us.
Since I had another laptop laying around I added that to the cluster as well. — The more the merrier.
Adding another worker is no different from the above.
You can build a docker image on the second machine from the above docker file, or use a copy of the one built on the first machine. Use
sudo docker save -o <some name>.tar $MYNAME/spark:latest
to build a tar with the image, copy it to the second machine, and, use
docker load -i <path to image tar file>
to load the image.
Submitting a job
I used one of the examples come with the Spark installation, which calculates the value of Pi. Execute following from the RPi to submit the job.
/spark/bin/spark-submit --master spark://<master-ip-address>:7077 --class org.apache.spark.examples.SparkPi /spark/examples/jars/spark-examples_2.11–2.4.5.jar 1000
org.apache.spark.examples.SparkPi is the entry point of our application, and /spark/examples/jars/spark-examples_2.11–2.4.5.jar is the path to the jar containing the application and dependencies. Since our application is a one comes shipped with the Spark installation, its available on all nodes of the cluster. 1000 is an application argument which in this case is related to the number of partitions to which the data set is being distributed.
You can check the job status on the UI.
There will also be some log entries in the master and worker terminals. After successful completion of the job, it will show the result in the terminal where the job was submitted.


Latest comments (0)