
Since years I have been working with laptops and small desktop computers, completely preassembled hardware. This year, working with Arduino, Raspberry Pi and Robot Projects, I feel more interested and familiar with electronics and hardware. Also, with the advent of recent next generation game consoles that use NVME technology to accelerate graphics rendering, I became interested and fascinated with PC hardware. To catch up and out of pure educational purpose I decided to build a new PC from scratch.
This article explains the components of my PC, some storyline about graphics card hunting in 2021, and assembly steps with crucial lessons learned.
This article originally appeared at my blog admantium.com.
Hardware Components
The PC hardware market of 2021 offers a huge choice of brands and technological levels to choose from. Getting a complete overview involves reading a lot on forums and magazines, browsing supplier product pages, and reading user comments.
Let’s start with the general goal of the computer: Current gen motherboard and graphics card, recent gen other hardware (CPU, RAM, SSD), prefer power efficient components, micro ATX form factor. These goals drive the hardware selection process, while final choices boil down to a combination of price, user ratings, and specs.
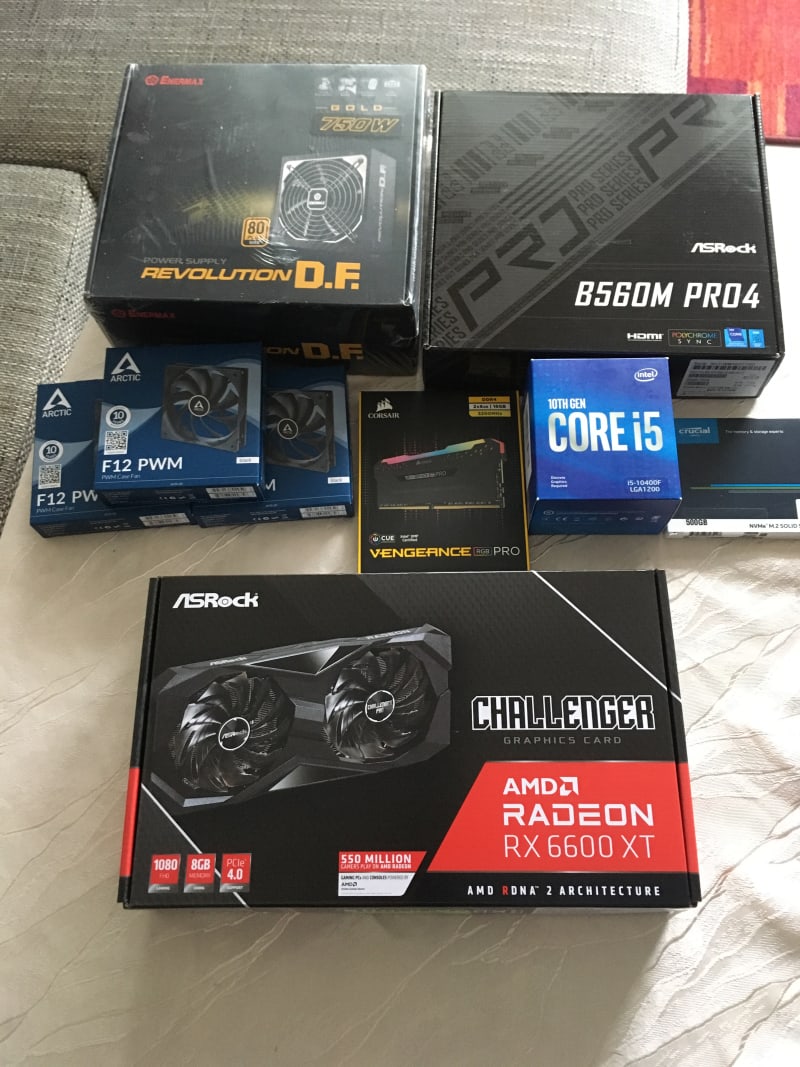
With these general goals, my hardware boils down to these components. (Note: For reference only, I link to the amazon.de product pages)
- Micro-ATX Tower
- B560M Pro Motherboard
- Intel Core I5-10400F
- 16GB DDR4 3200 RAM
- 500GB M2 NVME SSD
- Radeon RX 6600 XT
- 750V Hold 80 Plus PSU
- 120mm PWM Fans
Everything is laid it out:
Assembling
On a cloudy day, I unpacked all components and began the assembly. Following example builds in written or video form, incorporating many beginner's error advices, the individual steps are these:
- Chassis
- Plan position of CPU fans
- Plan position of mainboard and graphics card (PCIe Slot)
- Pry graphics card slot
- Install fans
- Mainboard
- Insert M2 NVME SSD
- Insert RAM
- Install CPU (and cooler since its pre-installed)
- Install mainboard in chassis
- Insert bolts, attach mainboard, fix with nuts
- Connect CPU fan to mainboard pins
- Connect chassis fan to mainboard pins
- Connect front panel wires to mainboard pins (power button, HDD led, audio)
- Insert PSU (Power Supply Unit)
- Remove back panel slot
- Move PSU into chassis
- Connect required power cables to PSU (24pin main, 8pin CPU, 6+2pin GPU)
- Insert bolts, attach PSU, fix with nuts
- Connect main power and CPU power cable
- Graphics Card
- Insert into PCIe slot
- Insert bolts back panel, tighten with nuts
- Connect GPU power cable
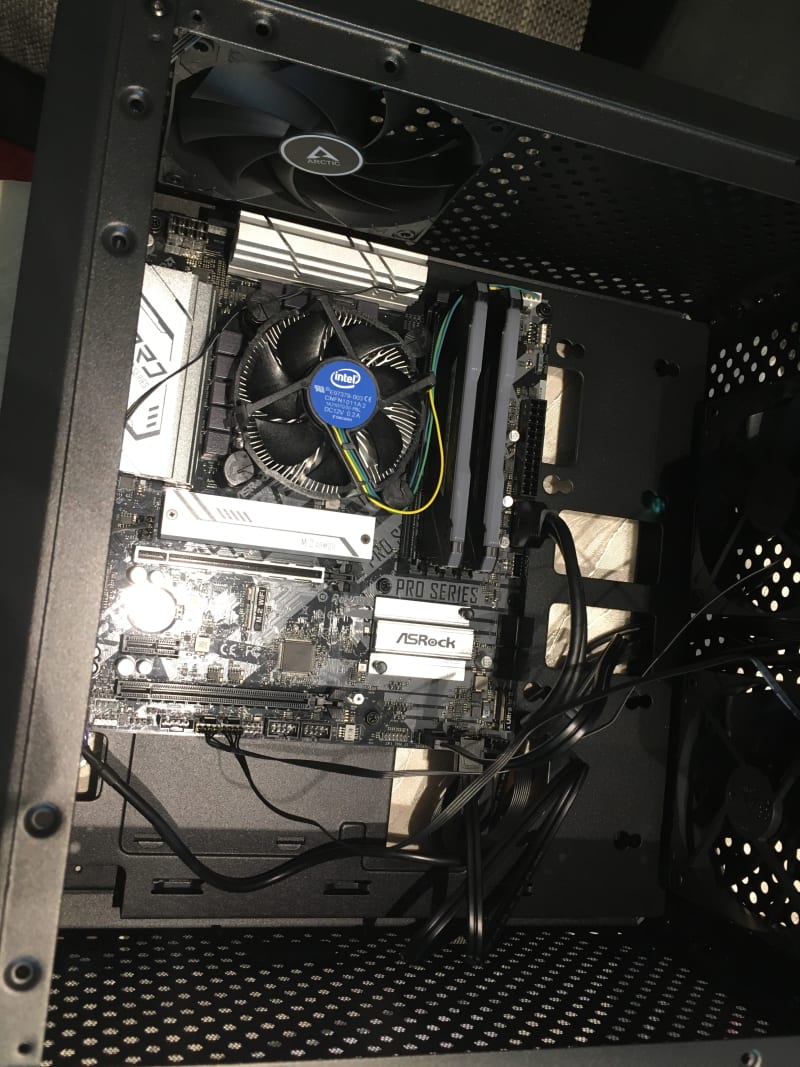
The assembly process was full of pleasant surprises. I was amazed at the overall form factor of the Micro ATX board and marveled at the M2 NVME SSD disk. Inserting the CPU with preassembled cooler was delightful. And then, unpacking the huge graphics card, which I could acquire for the original retails price, and putting it into the computer to finish the build.
First Boot
Time for a first test. I connected the PC to a TV via HDMI, added power, switched it on and ... saw the Bios screen. Hooray! It worked just as it was. Honestly, I did not expect that, but was prepared to see a blank screen or hear frantic beeps from the motherboard.
Continuing from there, i investigated the onboard BIOS. I was amazed about the progress the Bios has made: Its much user friendly, showing easy configurations first and advanced settings in sub menu. It scales to the native connected screens resolution. And it can be even operated with a mouse.

Install Windows 10
Let’s continue with the OS installation. Because I want to use the PC also for gaming, I choose to install Windows 10 first, still leaving the option for Linux. Windows10 can be installed from a USB stick - this is a standard experience for me as a Linux user, but feels very new for Windows.
Anyway, the installation started and only after a short time I see a generic error message: "could not find verified device drivers". At first, I thought that this message is related to Windows not recognizing the attached hardware, and therefore requires additional drivers during installation. Yet, the error came from a very different direction: The connected M2 NVME SSD disk was not recognized! When you take a closer look to the above Bios picture, it clearly shows that no connected disk is recognized. But why?
My first thought was Bios compatibility. Here was a another pleasant surprise: Bios updated can be done via attached USB device, or by inserting an ethernet cable it automatically updates to the newest version. The process was flawless, but after rebooting, the problem remained: No disk recognized.
Studying the mainboard manual about the available M2 slots, I found a note that the M2_1 slot support PCIe4 compatibility only when a 11th gen CPU is installed. My i5-10400F is 10th generation. Therefore, the M2_1 slot can not be used! I needed remove the NVME SSD from slot M2_1 and insert it into M2_2, luckily without removing the graphics card or the motherboard.
Now, the Windows10 installation worked.
Post-Assembly Steps
Windows10 booted without complaints. Additional drivers for Ethernet and soundcard were required. With a WLSN USB stick I could get the drivers from the manufactures website and install them. With this, all connected hardware was fully operational. Mission accomplished - almost!
Before closing the PC completed, some assembly steps had to be done a second time:
- Cable management: The bulky power cables can be hidden between the mainboard interior hook and the outer wall where also additional SSD drives would be installed.
- Fan position and cables: Seeing the concrete position of the graphics card and mainboard, I slight re-arranged the fans and also turned them clockwise so that their wires would lead naturally to the nearest mainboard pins
- Motherboard back panel slot: I forgot to insert the mainboard back panel slot! This required unfortunately to loosen the mother board nuts to get enough room, and then add the slot.
Conclusion
Overall, I had great fun with building my PC. It started with understanding the current technologies for all components: CPU processing power and power consumption, mainboard chipsets and compatibility to other components, M2 NVME SSD and the form factors of builds. Then, I started to draft the component list and made a set of principles how to choose them. In between these steps, the new graphics Card RX 6600 XT was released. Here in Germany, graphic cards prices are still very high, so I was happy to get a new RX 6600 for the vendor price. Once all components arrived, assembly could begin. In total it took me 4 hours for the main assembly, 3 hours for installing Windows 10 and solving the NVME SSD error, and anther 2 hours for the post assembly. The build went flawlessly and worked out of the box - much to my surprise. Now, this machine resides on my desk, and whenever I put it on, colorful RGB lights from the onboard LEDs and the RAM are shown.

Top comments (0)