This guide will help anyone without much C++ experience to get started with ObjectBox on Windows. It will show you how to install all the essential development tools and run a simple example. ObjectBox is a fast NoSQL database that can be used for efficient data persistence in your app.
We will start with setting up a Linux subsystem (WSL2) and installing such tools as:
- CMake — to generate build files from the ObjectBox source code on Linux;
- Git — to download the source code from the ObjectBox repository.
Then, we will compile ObjectBox and run a simple example app in Visual Studio Code.
Windows Subsystem for Linux (WSL2)
1.Install WSL (Note: this requires a reboot; it also configures a limited HyperV that may cause issues with e.g. VirtualBox).
Warning: to paste e.g. a password to the Ubuntu setup console window, right-click the title bar and select Edit → Paste. CTRL + V may not work.
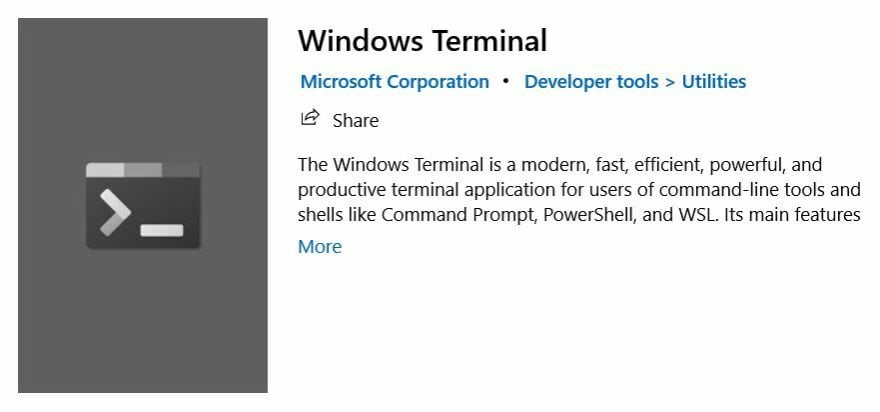
2.(optional, but recommended) install Windows Terminal from Microsoft Store and use Ubuntu from there (does not have the copy/paste issue, also supports terminal apps better).
3.Open Ubuntu in the Windows Terminal by choosing it from the dropdown menu.

4.Get the latest packages and upgrade:
sudo apt update
sudo apt upgrade
5.Install build tools:
sudo apt install build-essential git cmake ccache gdb
# install LLVM / clang
LLVM_VERSION=12
sudo apt install clang-$LLVM_VERSION clang-tools-$LLVM_VERSION clang-format-$LLVM_VERSION lldb-$LLVM_VERSION lld-$LLVM_VERSION clangd-$LLVM_VERSION
# Make clang-LLVM_VERSION the default clang, and clang the default C/C++ compiler
sudo update-alternatives --install /usr/bin/clang++ clang++ /usr/bin/clang++-$LLVM_VERSION 1000
sudo update-alternatives --install /usr/bin/c++ c++ /usr/bin/clang++ 1000
sudo update-alternatives --config c++
sudo update-alternatives --config clang++
sudo update-alternatives --install /usr/bin/clang clang /usr/bin/clang-$LLVM_VERSION 1000
sudo update-alternatives --install /usr/bin/cc cc /usr/bin/clang 1000
sudo update-alternatives --config cc
sudo update-alternatives --config clang
cc --version
c++ --version
# clang tools
sudo update-alternatives --install /usr/bin/clang-format clang-format /usr/bin/clang-format-$LLVM_VERSION 1000
sudo update-alternatives --install /usr/bin/scan-build scan-build /usr/bin/scan-build-$LLVM_VERSION 1000
# lld is faster than the standard ld linker
sudo update-alternatives --install /usr/bin/ld ld /usr/bin/ld.lld-$LLVM_VERSION 50
sudo update-alternatives --install /usr/bin/ld ld /usr/bin/ld.bfd 10
sudo update-alternatives --config ld
ld --version
Install and compile ObjectBox using CMake
Now we can open Visual Studio Code to install the build files and compile them.
1.In Ubuntu, create a new directory called, e.g. objectbox-ex, and open it in Visual Studio Code:
mkdir objectbox-ex
cd objectbox-ex
code .
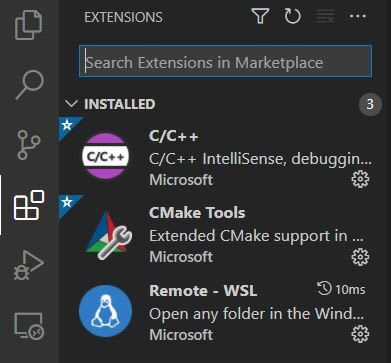
2.Install these extensions:
Remote — WSL
C/C++
CMake Tools
3.Now we need to make a file called CMakeLists.txt. It will tell CMake to get the ObjectBox source code from its Git repository and link the library to your project. Paste the following code there:
include(FetchContent)
FetchContent_Declare(
objectbox
GIT_REPOSITORY https://github.com/objectbox/objectbox-c.git
GIT_TAG v0.14.0
)
FetchContent_MakeAvailable(objectbox)
add_executable(myapp main.cpp)
target_link_libraries(myapp objectbox)
4.Create a simple main.cpp file to verify the setup:
#include "objectbox.hpp"
int main() {
printf("Using ObjectBox version %s\n", obx_version_string());
}
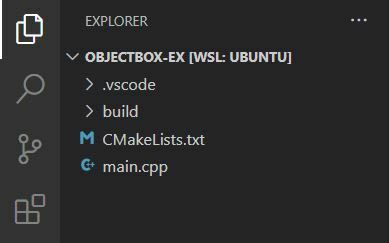
5.Select Clang as the compiler, configure and build ObjectBox by following this guide. As a result, .vscode and build folders will be generated. Your directory should now look like this:
Running the tasks-list app example
Finally, we can check that everything works by running a couple of simple examples.
1.Click “Select target to launch” on the status bar, select myapp from the dropdown menu and then click "launch". You should see our program output the correct ObjectBox version as in the screenshot.

![]()
2.Before proceeding with the example, you need to download the most recent ObjectBox generator for Linux from releases. Then come back to the Windows Terminal and type explorer.exe . to open the current directory in Windows Explorer. Copy the objectbox-generator file in there.
3.Back in VS Code, run the generator for the example code:
./objectbox-generator -cpp build/_deps/objectbox-src/examples/cpp-gen
If you get a “permission denied” error, try this to make the generator file executable for your user:
chmod +x objectbox-generator
4.Now choose objectbox-c-examples-tasks-cpp-gen as the target (same way as we did with myapp in step 1) and run it. It should output the menu of a simple to-do list app as shown in the screenshot. This app stores your tasks, together with their creation time and status. Try playing around with it and exploring the code of this example app to get a feel of how ObjectBox can be used.
Note: if you see a sync error (e.g. Can not modify object of sync-enabled type “Task” because sync has not been activated for this store), please delete the first line from the tasklist.fbs file and run the objectbox generator once again. Or, if you want to try sync, apply for our Early Access Data Sync. There is a separate example (called objectbox-c-examples-tasks-cpp-gen-sync) that you can run after installing the Sync Server.
Now you can start building your own simple examples with Objectbox or incorporating the database into your project. Hope this helps someone! I would love to hear what you think.


Latest comments (0)