🔰 Beginners new to AWS CDK, please do look at my previous articles one by one in this series.
If in case missed my previous article, do find it with the below links.
🔁 Original previous post at 🔗 Dev Post
🔁 Reposted previous post at 🔗 dev to @aravindvcyber
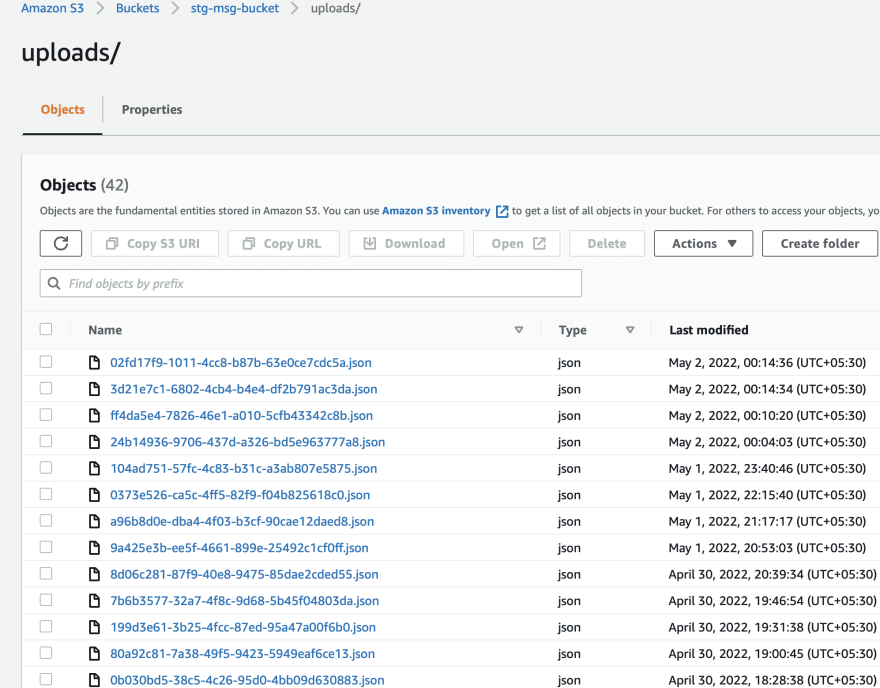
In this article, let us refactor one of our previous lambda functions which creates an event directly with the full message received by adding setup to save the actual message received first into s3 before creating an event by using lambda layers
Benefits of using lambda layers 🚿
These are not the only benefits, it is just only what I just observed in my deployments.
Using lambda layers helps us deploy faster since the same layer can be attached to multiple functions.
Besides that, we can also include our custom modules in the lambda layers and share them across multiple functions.
This also helps to simply patch these modules without redeploying all the functions.
Construction Plan 🏗️
As we mentioned earlier we are trying to save a JSON into s3 as well, which will create inside our stack. To save any object into s3 we need two things as follows.
- A bucket name to save our message
- An object key/identifier to refer it to a specific location.
S3 bucket creation 💊
First let us create an S3 bucket, adding the below lines into our mail stack lib/common-event-stack.ts.
const stgMsgBucket = new s3.Bucket(this, 'stg-msg-bucket',{
      bucketName: 'stg-msg-bucket',
      encryption: s3.BucketEncryption.S3_MANAGED,
      removalPolicy: RemovalPolicy.RETAIN
});
You may find that we have named our unique bucket with the name stg-msg-bucket with S3 managed encryption policy as shown above.
Granting put Object to handler function 🔑
stgMsgBucket.grantWrite(eventCounterBus.handler);
Changes inside our lambda function ✂️
Inside our lambda let us add the below imports as follows.
import { S3 } from "aws-sdk";
import { PutObjectOutput } from "aws-sdk/clients/s3";
const s3 = new S3({ region: "ap-south-1" });
putObject helper function 💉
I have created the below helper function inside the lambda to help us to put an object into S3.
const save = async (uploadParams: S3.PutObjectRequest) => {
  let putResult: PromiseResult<PutObjectOutput, AWSError> | undefined =
    undefined;
  try {
    putResult = await s3.putObject(uploadParams).promise();
  } catch (e) {
    console.log(e);
  } finally {
    console.log(putResult);
    return putResult;
  }
};
Generating the uploadParams object 🔆
Inside our lambda let us add the below statements inside the try statement before posting the msg object into the new event bridge put event.
const uploadParams: S3.PutObjectRequest = {
      Bucket: message.bucket,
      Key: message.key,
      Body: JSON.stringify(message),
      ContentType: "application/json",
};
Invoking save helper function 🔱
const putResult: PromiseResult<PutObjectOutput, AWSError> | undefined =
      await save(uploadParams);
Adding putObject result to our message 👓
message.putStatus = putResult;
const msg: string = JSON.stringify({ message });
Additional properties to input message 🔧
In this above code block we have used the bucket name and bucket key, let us see how we set those properties below.
message.key = `uploads/${message.uuid}.json`;
message.bucket = process.env.BucketName || "";
Uuid generation 🔥
Here you may notice that we have a UUID property attached to the input message. In the below code we will generate the UUID.
message.uuid = getUuid();
This getUuid is coming from the uuid exported module which is available in the /opt/uuid path.
Importing utils function from layer ⚙️
const { getUuid } = require("/opt/utils");
But how do we manage to get the module from the /opt/* folder? The opt folder is the extracted path coming from the lambda layers since it is the only way we could get the third-party modules into the lambda function by importing them.
Create a new lambda layer ☄️
Steps to create a new layer.
- Create a new folder representing your layer name
layers/utils - Inside this folder create a new folder
nodejs - Inside this subfolder, run
npm init -y - Now we will get a package*.json files
- Use
npm install --save uuid, this installs our third-party module. - Then let us create a new file named
utils.jsand add the below lines
const {v4:uuidv4} = require('uuid');
exports.getUuid = ()=> {
    return uuidv4();
}
layer creation statement inside the stack ⚖️
Now we need to add the below statement inside our main stack to create a layer as follows.
const nodejsUtils = new lambda.LayerVersion(this, `nodejsUtils`, {
      removalPolicy: RemovalPolicy.DESTROY,
      code: lambda.Code.fromAsset('layers/utils'),
      compatibleArchitectures: [lambda.Architecture.X86_64],
      compatibleRuntimes: [lambda.Runtime.NODEJS_14_X]
});
You can find that we have specified the runtime and the architectures appropriately
The above code block will create the new layer as shown below.
Adding lambda layer to lambda ❄️
Now let us add the above lambda layer into our lambda function definition as follows.
const eventCounterFn = new lambda.Function(this, 'EventCounterHandler', {
     runtime: lambda.Runtime.NODEJS_14_X,
     handler: 'event-counter-bus.counter',
     code: lambda.Code.fromAsset('lambda'),
     environment: {
       DetailType: downstreamBus.props.DetailType,
       EventBusName: downstreamBus.props.EventBusName,
       Source: downstreamBus.props.Source,
       EVENT_COUNTER_TABLE_NAME: Counters.tableName,
       BucketName: bucketName
     },
     logRetention: logs.RetentionDays.ONE_MONTH,
     layers: [nodejsXray,nodejsUtils]
});
Thus we have added the layer into our lambda function this will help to import them in our functions.
We will be adding more connections to our stack and making it more usable in the upcoming articles by creating new constructs, so do consider following and subscribing to my newsletter.
⏭ We have our next article in serverless, do check out
https://dev.to/aravindvcyber/aws-cdk-101-fetching-json-from-s3-through-stepfunction-15ob
🎉 Thanks for supporting! 🙏
Would be great if you like to ☕ Buy Me a Coffee, to help boost my efforts.
🔁 Original post at 🔗 Dev Post
🔁 Reposted at 🔗 dev to @aravindvcyber
🤡 AWS CDK 101 - 🤾♂ Using layers in Lambda functions and saving JSON to S3
— Aravind V (@Aravind_V7) May 8, 2022
@hashnode
Checkout the full collectionhttps://t.co/CuYxnKr0Ig#TheHashnodeWriteathon
%[https://t.co/wJLxqBh2WJ]#typescript #aws #awscdk #awslambda


Top comments (0)