Azure Static Web Apps is a great place to host Blazor WebAssembly apps. Among Static Web Apps' many features, it has built-in support for authentication using social logins. In this article, we'll look at how we can take advantage of Static Web Apps Authentication in our Blazor WebAssembly apps.
Overview
Azure Static Web Apps takes care of dealing with identity providers like GitHub, Twitter, and Facebook. The frontend application can then access the user's credentials using a built-in API.
Blazor WebAssembly supports custom authentication providers. We'll look at how to set up an auth provider for Static Web Apps and use it in the app. We'll also look at how to properly secure certain functionality in the app so that only authenticated users have access.
Azure Static Web Apps will soon have native support for building and deploying Blazor WebAssembly. For now, take a look at Tim Heuer's article on how to deploy it.
Basic setup
To set up a Blazor WebAssembly app for Static Web Apps Authentication, we need to install the auth provider. Then we need to register it and update the routing to use the logged in user's identity.
Install NuGet package
To simplify setup, I created a NuGet package containing an authentication state provider for Azure Static Web Apps. In a Blazor WebAssembly app, install the package:
dotnet add package AnthonyChu.AzureStaticWebApps.Blazor.Authentication --version 0.0.2-preview
Register services
After the package is installed, use AddStaticWebAppsAuthentication() in the app's Program.cs to register the Static Web Apps AuthenticationStateProvider and other necessary services.
using System;
using System.Net.Http;
using System.Threading.Tasks;
using Microsoft.AspNetCore.Components.WebAssembly.Hosting;
using Microsoft.Extensions.DependencyInjection;
using AzureStaticWebApps.Blazor.Authentication;

namespace BlazorLogin
{
    public class Program
    {
        public static async Task Main(string[] args)
        {
            var builder = WebAssemblyHostBuilder.CreateDefault(args);
            builder.RootComponents.Add<App>("app");

            builder.Services
                .AddTransient(sp => new HttpClient { BaseAddress = new Uri(builder.HostEnvironment.BaseAddress) })
                .AddStaticWebAppsAuthentication();
            await builder.Build().RunAsync();
        }
    }
}
Update App.razor
The out-of-the-box template for Blazor WebAssembly doesn't use authentication. Update App.razor to enable authentication by adding <CascadingAuthenticationState> and changing the <RouteView> component to <AuthorizeRouteView>. This exposes the authentication state as a cascading parameter throughout the app.
<CascadingAuthenticationState>
    <Router AppAssembly="@typeof(Program).Assembly">
        <Found Context="routeData">
            <AuthorizeRouteView RouteData="@routeData" DefaultLayout="@typeof(MainLayout)" />
        </Found>
        <NotFound>
                <LayoutView Layout="@typeof(MainLayout)">
                    <p>Sorry, there's nothing at this address.</p>
                </LayoutView>
        </NotFound>
    </Router>
</CascadingAuthenticationState>
For more information on how to set this up, check out the Blazor security docs.
User authentication
Now the that basic setup is complete, we can add some login links to allow our users to sign in. Then we will look at ways to access the user's identity in our components.
Adding login links
Azure Static Web Apps Authentication provides some links for users to log in and out of services. For instance, to log into GitHub, send the user to /.auth/login/github. And to log out, send them to /.auth/logout.
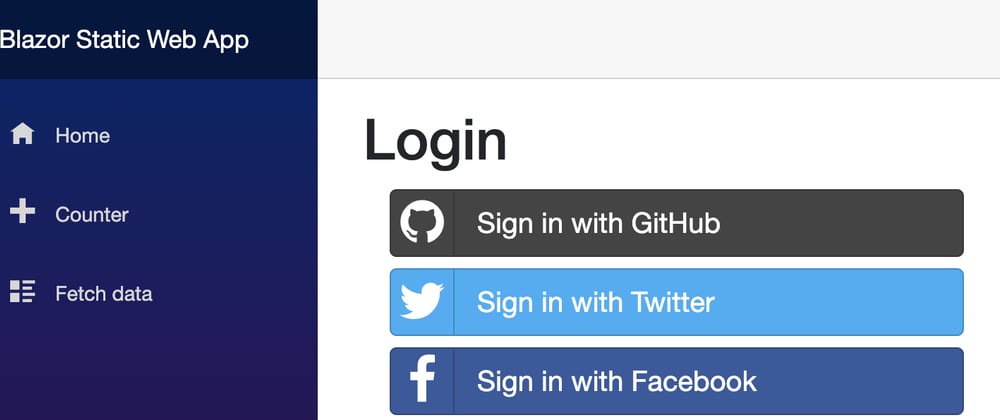
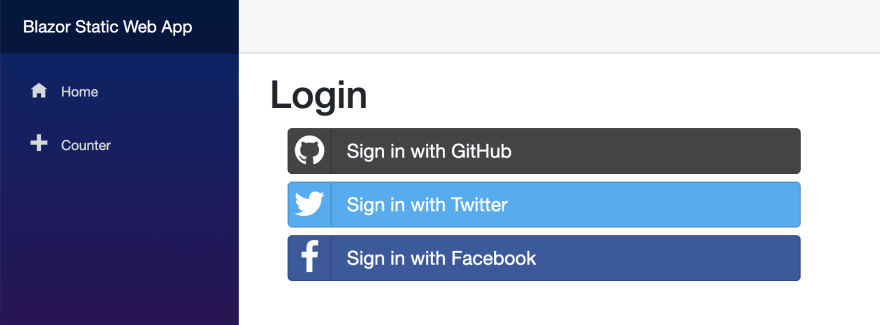
We create a page named LoginProvider.razor that displays the login buttons.
@page "/login-providers"

@{
    var providers = new Dictionary<string, string>
    {
        { "github", "GitHub" },
        { "twitter", "Twitter" },
        { "facebook", "Facebook" }
    };
}

<h1>Login</h1>

<div class="container">
    @foreach(var provider in providers)
    {
        <div class="row">
            <div class="col-sm-12 col-md-9 col-lg-6">
                <a class="btn btn-block btn-lg btn-social btn-@provider.Key" href="/.auth/login/@provider.Key">
                    <span class="fa fa-@provider.Key"></span> Sign in with @provider.Value
                </a>
            </div>
        </div>
    }
</div>
This is what it looks like if we run the app and go to this page:
Accessing user's identity
After the user is logged in, they are redirected back to the app. This time, the authentication state component sees that the user is logged in and it populates a ClaimsPrincipal with the user information and roles. To access this information in a page or component, use context.User. We can also use <AuthorizeView> to decide what to display based on authentication state.
<AuthorizeView>
    <Authorized>
        Hello, @context.User.Identity.Name!
        <a href="/.auth/logout?post_logout_redirect_uri=/">Log out</a>
    </Authorized>
    <NotAuthorized>
        <a href="/login-providers">Log in</a>
    </NotAuthorized>
</AuthorizeView>
Running locally
The authentication state provider uses Azure Static Web Apps' /.auth/me endpoint to retrieve information from the logged in user. If we want to test authentication locally, we can configure StaticWebAppsAuthentication:AuthenticationDataUrl in appsettings.Development.json to use a sample JSON file instead.
{
  "StaticWebAppsAuthentication": {
    "AuthenticationDataUrl": "/sample-data/me.json"
  }
}
For an example of what goes in that JSON file, take a look at the Static Web Apps docs on client principal data.
Because we only configure it in appsettings.Development.json, this only changes the setting when debugging locally. Change the contents of the file to simulate an authenticated or anonymous user.
Access control
We can lock down our application based on the authentication state. Because this is a client application, we must understand that all pages and data in the Blazor WebAssembly app (including protected pages and data in appsettings.json files) are publicly accessible. If we need to secure data, we must protect it in a properly secured backend API.
In this example, we want to protect the "Fetch Data" page. This page returns random weather information. To properly secure it, we must hide navigation link and the page from unauthenticated users. We must also ensure that the API that serves the weather data is only accessible by authenticated users.
Conditionally showing page in navigation
In NavMenu.razor, we only want to display the "Fetch Data" menu item to authenticated users. Like we did before, we can do this using the <AuthorizeView> component.
<AuthorizeView>
    <Authorized>
        <li class="nav-item px-3">
            <NavLink class="nav-link" href="fetchdata">
                <span class="oi oi-list-rich" aria-hidden="true"></span> Fetch data
            </NavLink>
        </li>
    </Authorized>
</AuthorizeView>
Preventing page from displaying to anonymous users
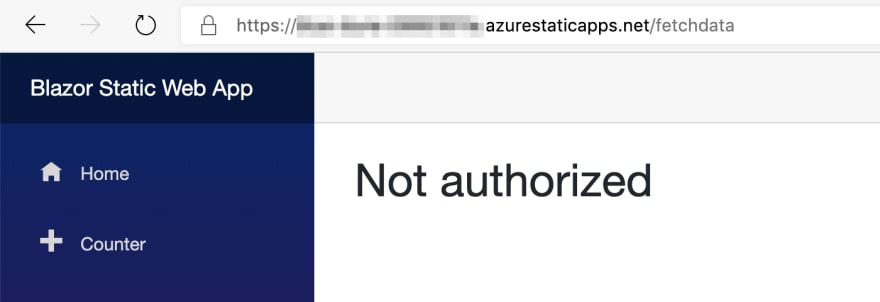
And to protect the FetchData.razor page from being shown to unauthenticated users, we simply need to add an Authorize attribute to it at the top.
@attribute [Authorize()]
Now if we tried to browse to /fetchdata, we'll get this message:
Blocking access to API
But simply locking down links and pages in the client aren't enough. An anonymous user can still retrieve data from our fetch data API directly.
So we need to prevent unauthenticated users from accessing the get weather API. In Azure Static Web Apps, APIs are built using Azure Functions.
Note that only Node.js functions are currently supported. .NET function support is coming soon.
Static Web Apps allows us to define server-side routing rules using a routes.json file.
{
  "routes": [
    {
      "route": "/api/*",
      "allowedRoles": ["authenticated"]
    },
    {
      "route": "/*",
      "serve": "/index.html",
      "statusCode": 200
    }
  ]
}
This file defines two routing rules. The first one restricts access to all backend functions at /api/* to authenticated users only. The second one is a standard single page application fallback route that allows deeplinking to work.
Note that there will be a new configuration file coming soon that supports enhanced route definitions and other settings. routes.json will continue to be supported for the foreseeable future.
For a complete sample app, check out the GitHub repo.
Conclusion
And that's the basics for how to use Azure Static Web Apps Authentication with Blazor WebAssembly. For details on how the AuthenticationStateProvider is built, take a look at the source code.


Oldest comments (0)